Table of Contents
Advertisement
Advertisement
Table of Contents

Related Manuals for Nokia 101


Summary of Contents for Nokia 101
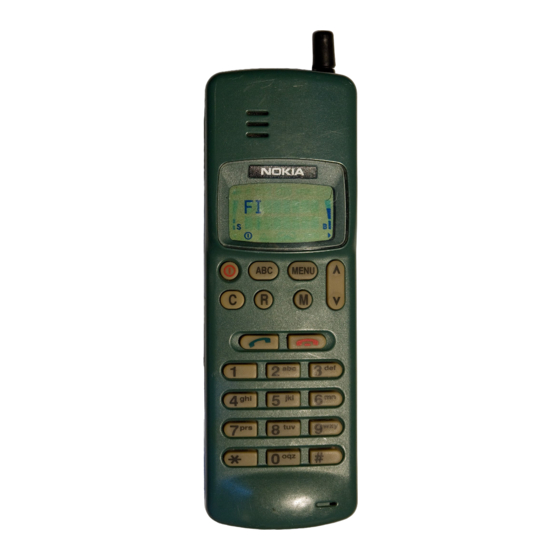
- Page 2 DESCRIPTION OF KEYS (More detailed information on each key is given throughout the manual.) Press and hold to Press to switch to alpha switch on or off. mode and to key in or display letters; press again to switch back to numeric mode.
-
Page 3: Important Safety Information
IMPORTANT SAFETY INFORMATION Traffic Safety Do not use a hand-held telephone while driving a vehicle. If using a hand-held phone park the vehicle before conversing. Always secure the phone in its holder; do not place the phone on the passenger seat or where it can break loose in a collision or sudden stop. - Page 4 Electronic fuel injection systems, electronic anti-skid braking systems, electronic cruise control systems and other electronic systems can malfunction due to the lack of protection from radio signals. Check regularly that all cellular phone equipment in your vehicle is mounted and operating properly.
-
Page 5: Table Of Contents
FUSE REPLACEMENT The cigarette lighter charger (LCH-2) contains a protective fuse. The fuse is located in the charger tip. If the charger does not work, the fuse may be blown. If blown, replace it with a 3.0 amp, 125 volt fuse. Never use a fuse with a higher rating. - Page 6 Keying in Names..............16 Editing Names or Numbers ..........17 Displaying ’Hidden’ Numbers..........17 Deleting Information from Memory Locations ....17 Recalling Information by Memory Location Number..17 Recalling Information by Name ........18 Scanning for a Number............18 Scanning for a Name ............19 The Scratchpad Memory ..........19 Displaying Your Own Number .........20 Additional Features ............20 Locking/Unlocking the Phone..........20...
-
Page 7: Getting Started
The battery pack is a sealed unit with no serviceable parts inside. Do not attempt to open the case. WARNING: Use only Nokia-approved batteries, antennae and chargers. The use of any other types will invalidate any approval or warranty applying to the telephone, and may be dangerous. -
Page 8: The Battery Charge Indicator
THE BATTERY CHARGE INDICATOR The bars on the right hand side of the display screen indicate the battery charge level. The more bars, the higher the battery charge. When IN USE the battery charge falls to less than 10%, the phone displays a warning message: BATTERY LOW, and an audible “beep”... -
Page 9: Display Indicators
Batteries last longer and perform better if allowed to discharge fully at least once a week. You can do this by leaving the phone switched on overnight, or until the message RECHARGE BATTERY is displayed and the phone shuts itself off. NOTE: If the battery is too hot or cold, charging will be interrupted until the battery reaches a normal temperature. -
Page 10: Quick Reference Guide
QUICK REFERENCE GUIDE Switch on/off Press and hold PWR. Place call Key in area code and number, press SEND. End call Press END. Answer call Press SEND. Clear digit Press CLR. Clear display Press and hold CLR. Last number redial Press SEND. Press v or V. - Page 11 List of Menu Functions Menu Function/Description Shortcut LOCK PHONE MENU+0 lock phone, unlock phone SYSTEM SELECT MENU+1 (system feature) select roaming option RECALL LAST MENU+2 recall last number CALL TIMERS MENU+3 displays length of calls; reset timers LIGHTS ON OFF MENU+4 set lights off;...
-
Page 12: Operation Of The Phone
OPERATION OF THE PHONE SWITCHING ON (OR OFF) Extend the antenna fully. As with any other radio transmitting device, avoid prolonged contact with the antenna when the phone is switched on. 1) Press the PWR key and hold it for at least 2 seconds. The phone will carry out a short self-test sequence, then briefly display its programmed name or number. -
Page 13: Receiving A Call
4) The IN USE indicator will appear, and the number will disappear from the display. 5) Lift the phone to your ear, and wait until your call is answered. 6) When you have finished the call, press END. If the message NO SERVICE appears, you are outside the cellular service area. -
Page 14: Volume Keys
VOLUME KEYS The earpiece volume can be controlled by the volume keys v V. Use V key to increase and v key to decrease volume level. The volume level is shown on the display. VOLUME 1 indi- cates the lowest and VOLUME 5 the highest volume level. If you try to increase or decrease the volume level over these values, an error “beep”... -
Page 15: The Menu Facility
THE MENU FACILITY The menu allows you to operate or check the setting of cer- tain features. Although the menu method can take longer than the alternative shortcut, it is often easier to remember. 1) Press MENU. MENU 2) The display will read ‘USE TO VIEW’. -
Page 16: Menu Shortcuts
MENU SHORTCUTS To activate the shortcut function simply press MENU followed by the shortcut number, (e.g. MENU 5 for keypad tones). The menu functions available are: Menu Function/Description Shortcut LOCK PHONE MENU+0 lock phone, unlock phone SYSTEM SELECT MENU+1 (system feature) select roaming option RECALL LAST MENU+2 recall last number... -
Page 17: The Memory
THE MEMORY Your phone has 48 standard memory locations which allow you to store phone numbers of up to 32 digits or names of up to 16 letters together with phone numbers of up to 32 digits. Only numbers or letters can be displayed at any one time. To switch between them press ALPHA. -
Page 18: Keying In Names
If you do not want to delete the existing information, either press CLR or wait until the message STORE NOT DONE appears on the display. The information you tried to store will then reappear on the display, and you can store it in a different memory location as described above. -
Page 19: Editing Names Or Numbers
EDITING NAMES OR NUMBERS If you make a mistake while keying in a name or a number, you can correct it as follows: 1) Press CLR to delete the last number or digit. 2) Press and hold CLR to clear the whole display. Note that this clears both the name and the number entered. -
Page 20: Recalling Information By Name
3) The telephone number stored in that memory location will appear on the display. If the memory location is empty, the message EMPTY will appear. 4) If you want to check the name stored against the number, press ALPHA. (If a name was not stored with the number, the display will be blank). -
Page 21: Scanning For A Name
SCANNING FOR A NAME 1) Press ALPHA. 2) Press RCL and v or V to display the contents of the first memory location, then press ALPHA v or V to display the next or previous, and so on. In alpha mode, the memories are arranged in alphabetical order by the first character. -
Page 22: Displaying Your Own Number
Any number previously stored in the scratchpad memory will be lost. 4) To recall the number, press RCL # #, then to call the number, press SEND. 5) To move a number from scratchpad memory to a permanent memory location, recall it, then store it as described in ‘Storing Information’. -
Page 23: Length Of Your Calls
3) Key in your four-digit code. It will appear on the display as a series of stars. 4) Press STO. If you make a mistake, the phone will display a CODE ERROR message – to retry, start again from the beginning. 5) If you key in the correct code, LOCKED will appear on the display and remain there to... -
Page 24: Resetting The Call Timers
RESETTING THE CALL TIMERS Using the RESET TIMERS option, you can reset the call duration timers to zero. 1) Press MENU 3 to activate the call timers menu. Press MENU, then press v or V keys until CALL TIMERS appears. MENU Press STO. -
Page 25: Setting The Key Tones
SETTING THE KEY TONES These tones sound each time you press a key. You can turn the keypad tones on or off. MENU 1) Press MENU 5. OR Press MENU, then press v or V keys until KEYPAD TONES appears. Press STO. -
Page 26: Using The Phone On Two Networks
USING THE PHONE ON TWO NETWORKS The phone’s two number capability feature lets you subscribe to both cellular services in your area or a cellular service in two different cities. This means that your phone can have two numbers, usually one for each network. -
Page 27: Roaming
If you want to add DTMF numbers to a stored phone number place a wait (W) character in front of the DTMF numbers. Press MENU # #. When you recall the information (telephone number and DTMF numbers) from the memory (RCL), press SEND to call the number stored before the wait character. -
Page 28: Call Forwarding
2) The phone will display its current roaming mode MENU HOME TYPE phone uses only home system MENU NONHOME TYPE phone uses only non home system MENU HOME AREA phone uses only home area and home system MENU BOTH SYSTEMS phone may use either of the systems A or B. -
Page 29: Keyguard
KEYGUARD Note: Keyguard function is only available for version THA-6/B and THA-62/B. Please see type label of the phone. The phone is equipped with a handy keyguard function which, when activated, prevents accidental keypresses for example, when the phone is in your pocket. When the keyguard function is activated, no keybeeps are heard and no keypresses are accepted, except emergency numbers. -
Page 30: Accessories
ACCESSORIES IMPORTANT! Use only accessories approved by the phone manufacturer. The use of any other types will invalidate any approval or warranty applying to the phone, and may be dangerous. When you disconnect the power cord of any accessory, grasp and pull the plug, not the cord. Your cellular phone will be equipped with one of the following battery chargers. - Page 31 DESKTOP CHARGING STAND (DCH-1U) The desktop charging stand makes recharging easier, and allows you to charge both the phone and a spare battery. To use the charging stand, 1) Connect the AC power supply (ACS-3U) or the AC fast travel charger (ACH-4U) to the stand, then plug it into a standard 110V AC outlet.
-
Page 32: Batteries
CHARGING INDICATORS A red indicator on the charger (DCH-1U and LCH-2) and scrolling battery bars on the phone’s display show that charging is in progress. When the phone’s battery is fully charged, the battery indicator on the display will constantly show all three bars and the indicator on the charger will be green. -
Page 33: Vehicle Mounting Bracket
3. Do not short circuit the battery. Accidental short circuit may happen e.g. if you have a spare battery in the pocket or bag where a metallic object (coin, clip or pen) causes di- rect connection of the + and - terminals of the battery (metal strips on the back of the battery). -
Page 34: Appendix
APPENDIX DISPLAY MESSAGES BATTERY LOW Appears when battery charge is down to 10%, then every 5 minutes if the phone is on standby; every minute if it is in use. CALL When flashing indicates that you are receiving a call. If you do not answer the call, the CALL message will remain on the display. - Page 35 CALL ROAMED Displayed when you have “roamed” to a non-home system. PRESS MENU You pressed a key while keyguard was on – press MENU to unlock the keypad. NOT FOUND Indicates that you tried to recall an invalid memory location. Indicates that the name you are trying to recall does not exist.
-
Page 36: Tones
USE < > TO VIEW Indicates that you have entered the menu. Press v or V to scroll the functions. VOLUME Indicates at which volume level the earpiece volume is set. TONES The Ringing Tone • - - - - - - • • - - - - - - • • - - - - - - • The ringing tone sounds when there’s an incoming call. -
Page 37: Troubleshooting
Keep the phone and all its parts and accessories out of small children’s reach. Keep the phone dry. Liquids contain minerals that will corrode electronic circuits. Do not use or store the phone in dusty, dirty areas. Its moving parts can be damaged. Do not store the phone in hot areas. -
Page 38: Technical Information
Korea under license of Nokia of Finland. ©1991, 1994 Nokia Mobile Phones Ltd. All rights reserved. Nokia operates a policy of continuous improvement; therefore we reserve the right to make changes and improvements to any of the products described in this guide without prior notice.