Table of Contents
Advertisement
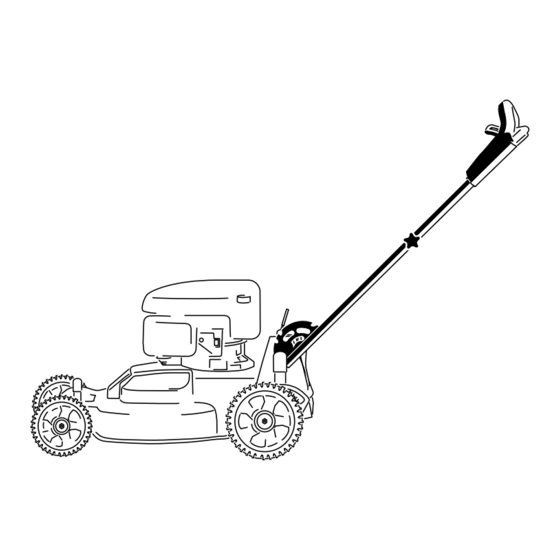
TimeMaster 76cm Lawn Mower
Model No. 20975-Serial No. 315000001 and Up
Model No. 20977-Serial No. 315000001 and Up
Introduction
This rotary-blade, walk-behind lawn mower is intended
to be used by residential homeowners. It is designed
primarily for cutting grass on well-maintained lawns
on residential properties. It is not designed for cutting
brush or for agricultural uses.
Read this information carefully to learn how to operate and
maintain your machine properly and to avoid injury and
equipment damage. You are responsible for operating the
machine properly and safely.
You may contact Toro directly at www.Toro.com for product
and accessory information, help finding a dealer, or to register
your product.
Whenever you need service, genuine Toro parts, or additional
information, contact an Authorized Service Dealer or Toro
Customer Service and have the model and serial numbers of
your machine ready. Figure 1 identifies the location of the
model and serial numbers on the product. Write the numbers
in the space provided.
1
1. Model and serial number plate
Model No.
Serial No.
This manual identifies potential hazards and has safety
messages identified by the safety alert symbol (Figure 2),
which signals a hazard that may cause serious injury or death
if you do not follow the recommended precautions.
© 2014-The Toro® Company
8111 Lyndale Avenue South
Bloomington, MN 55420
G017280
Figure 1
Register at www.Toro.com.
1. Safety alert symbol
This manual uses 2 words to highlight information.
Important calls attention to special mechanical information
and Note emphasizes general information worthy of special
attention.
This product complies with all relevant European directives.
For details, see the separate product-specific Declaration of
Conformity (DOC) sheet.
For models with stated engine horsepower, the gross
horsepower of the engine was laboratory rated by the engine
manufacturer in accordance with SAE J1940. As configured
to meet safety, emission, and operating requirements, the
actual engine horsepower on this class of lawn mower will
be significantly lower.
Do not tamper with the engine controls or alter the governor
speed; doing so may create an unsafe condition resulting in
personal injury.
Contents
Introduction .................................................................. 1
Safety ........................................................................... 2
General Lawn Mower Safety ..................................... 2
Sound Pressure ...................................................... 3
Sound Power .......................................................... 3
Hand/Arm Vibration .............................................. 4
Safety and Instructional Decals ................................. 4
Setup ............................................................................ 6
1 Assembling the Handle.......................................... 6
2 Installing the Blade-Control Bar .............................. 7
3 Filling the Engine with Oil...................................... 7
4 Charging the Battery.............................................. 7
5 Assembling the Grass Bag ...................................... 8
Product Overview .......................................................... 9
Specifications ......................................................... 9
Operation ....................................................................10
Filling the Fuel Tank ...............................................10
Checking the Engine-Oil Level.................................10
Adjusting the Cutting Height....................................11
Adjusting the Handle Height....................................12
Starting the Engine .................................................12
Original Instructions (EN)
All Rights Reserved *3387-816* A
Printed in the USA
Form No. 3387-816 Rev A
Operator's Manual
Figure 2
Advertisement
Table of Contents

Related Manuals for Toro TimeMaster 20975


Summary of Contents for Toro TimeMaster 20975
-
Page 1: Table Of Contents
This product complies with all relevant European directives. machine properly and safely. For details, see the separate product-specific Declaration of You may contact Toro directly at www.Toro.com for product Conformity (DOC) sheet. and accessory information, help finding a dealer, or to register For models with stated engine horsepower, the gross your product. -
Page 2: Safety
• Using the Self-Propel Drive ........12 Never allow children or people unfamiliar with these Stopping the Engine ..........13 instructions to use the machine. Local regulations can Engaging the Blade..........13 restrict the age of the operator. Disengaging the Blade..........13 • Keep in mind that the operator or user is responsible for Checking the Blade-Stop System Operation....14 accidents or hazards occurring to other people or their Recycling the Clippings ...........14... -
Page 3: Sound Pressure
To ensure the best performance and safety, • Stop the blade if the machine must be tilted for purchase only genuine Toro replacement parts and transportation when crossing surfaces other than grass accessories. Do not use will fit parts and accessories;... -
Page 4: Hand/Arm Vibration
Hand/Arm Vibration CAUTION Long-term exposure to vibration while operating Measured vibration level for right hand = 7.5 m/s the machine may cause some numbness in the Measured vibration level for left hand = 5.5 m/s hands and wrists. Uncertainty Value (K) = 3.0 m/s Wear gloves that dampen the vibration whenever you operate the machine for an extended period of Measured values were determined according to the procedures... - Page 5 120-9570 1. Warning—stay away from moving parts, keep all guards and shields in place. 131–4514 1. Warning—read the Operator's Manual. 2. Cutting/dismemberment hazard of hand or foot, mower blade—stay away from moving parts; keep all guards and shields in place. 3.
-
Page 6: Setup
Setup Important: Remove and discard the protective plastic sheet that covers the engine. Assembling the Handle No Parts Required Procedure WARNING G016551 Assembling and unfolding the handle improperly Figure 4 can damage the cables, causing an unsafe operating 1. Handle-lock lever condition. -
Page 7: Installing The Blade-Control Bar
Installing the Blade-Control No Parts Required Procedure Install the blade-control bar into the upper handle (Figure 5). G017514 Figure 6 3. Wipe off the dipstick end with a clean cloth. 4. Insert the dipstick into the oil-fill tube, and screw it in until it stops. -
Page 8: Charging The Battery
Charging the Battery No Parts Required Procedure Electric-start model only Refer to Charging the Battery (page 19). g027216 Assembling the Grass Bag No Parts Required Procedure Figure 9 1. Slip the grass bag over the frame as shown in Figure 8. 3. -
Page 9: Product Overview
Product Overview g017218 Figure 11 Upper handle 1. Traction-assist handle 3. Blade-control bar g027508 2. Blade-control bar lock 4. Ignition switch Figure 10 1. Side-discharge deflector 10. Adjustment knob for the self-propel drive 2. Spark plug 11. Battery (not shown; electric-start model only) 3. -
Page 10: Operation
Operation Filling the Fuel Tank DANGER Gasoline is extremely flammable and explosive. A fire or explosion from gasoline can burn you and others. 6 mm (1/4 inch) • To prevent a static charge from igniting the gasoline, place the container and/or machine directly on the ground before filling, not in a vehicle or on an object. -
Page 11: Adjusting The Cutting Height
Figure 15 1. The oil level is too low; 3. The oil level is correct. add oil to the crankcase. 2. The oil level is too high; remove oil from the crankcase. • If the oil level is too low, add a small amount of oil slowly to the oil-fill tube, and then repeat steps 3 through 5 until the oil level is correct as shown in Figure 7. -
Page 12: Adjusting The Handle Height
Adjusting the Handle Height You can raise or lower the handle to a position more comfortable for you. 1. Pull the handle-lock lever rearward to disengage the handle-lock pins (Figure 18). G017516 Figure 19 • Recoil-start Handle: G016488 Figure 18 1. -
Page 13: Stopping The Engine
Stopping the Engine Engaging the Blade When you start your engine, the blades do not turn. You Standard Model must engage the blades to mow. 1. Pull the blade-control-bar lock back to the blade-control Press the toggle switch (Figure 21) to the Stop position and bar (Figure 23). -
Page 14: Checking The Blade-Stop System Operation
Checking the Blade-Stop Recycling the Clippings System Operation This machine comes from the factory ready to recycle grass and leaf clippings back into the lawn. To prepare the machine Before each use, check that the blades stop within 3 seconds to recycle: of releasing the blade-control bar. -
Page 15: Bagging The Clippings
Check the grass bag frequently. If it is damaged, install a new Toro replacement bag. G016513 Figure 28 If the side-discharge chute is on the mower, remove it before bagging the clippings;... -
Page 16: Operating Tips
• For best performance, install new Toro replacement blades for your model before the cutting season begins. • Replace the blades when necessary with Toro replacement blades. Cutting Grass • Cut only about a third of the grass blade at a time. Do... -
Page 17: Maintenance
• If there are more than 13 cm (5 inches) of leaves on the lawn, set the front cutting height 1 or 2 notches higher than the rear cutting height. • Slow down your mowing speed if the machine does not cut the leaves finely enough. -
Page 18: Servicing The Air Filter
Changing the Engine Oil pump to remove the fuel. Always tip the machine onto its side so that the air filter is up in the air. Service Interval: After the first 5 hours WARNING Every 50 hours Tipping the machine may cause the fuel to Yearly leak. -
Page 19: Charging The Battery
Charging the Battery Service Interval: Every 25 hours Before storage Electric-start model only WARNING Battery posts, terminals, and related accessories contain lead and lead compounds, chemicals known to the State of California to cause cancer and reproductive harm. Wash hands after handling G017514 battery. -
Page 20: Replacing The Fuse
Replacing the Fuse Adjusting the Self-Propel Drive Electric-start model only Whenever you install a new self-propel cable or if the self-propel drive is out of adjustment, adjust the self-propel If the battery does not charge or the engine does not turn drive. -
Page 21: Servicing The Blade-Drive System
Inspecting the Blades (page 22). If the blade edge is dull or nicked, have it sharpened or replace it. If the blade is worn, bent, damaged or cracked, replace it immediately with a genuine Toro replacement blade. DANGER... -
Page 22: Inspecting The Blades
3. Check for bent blades; refer to Checking for Bent when a blade is out of balance or bent. Use only genuine Blades (page 22). Toro replacement blades. 1. Use a block of wood to hold each blade steady and turn Checking for Bent Blades the blade bolt counterclockwise as shown in Figure 43. -
Page 23: Installing The Blades
2. Steady each blade with a board and turn the blade bolt clockwise with a torque wrench as shown in Figure 45; torque the blade bolt to 82 N-m (60 ft-lb). Important: A bolt torqued to 82 N-m (60 ft-lb) is very tight. -
Page 24: Cleaning Under The Machine
WARNING WARNING Incorrectly installing the blades could damage A broken or missing washout fitting could the machine or cause an injury to the operator expose you and others to thrown objects or or to bystanders. blade contact. Contact with a blade or thrown debris can cause injury or death. -
Page 25: Storage
Preparing the Engine Storage 1. While the engine is still warm, change the engine oil; Store the machine in a cool, clean, dry place. refer to Changing the Engine Oil (page 18). 2. Remove the spark plug. General Information 3. Using an oil can, add about 30 ml (1 oz), of motor oil 1. - Page 26 Notes:...
- Page 27 The Way Toro Uses Information Toro may use your personal information to process warranty claims, to contact you in the event of a product recall and for any other purpose which we tell you about. Toro may share your information with Toro's affiliates, dealers or other business partners in connection with any of these activities. We will not sell your personal information to any other company.
-
Page 28: Lyndale Avenue South Bloomington, Mn
Authorized Toro Service Dealer. tractor structure that other components such as the engine are secured to, cracks or breaks in normal use, it will be repaired or replaced, at Toro's option, under warranty at no cost for parts and General Conditions labor.