Table of Contents
Advertisement
Quick Links
Advertisement
Table of Contents

Related Manuals for Epson PowerLite Home Cinema 2045


Summary of Contents for Epson PowerLite Home Cinema 2045
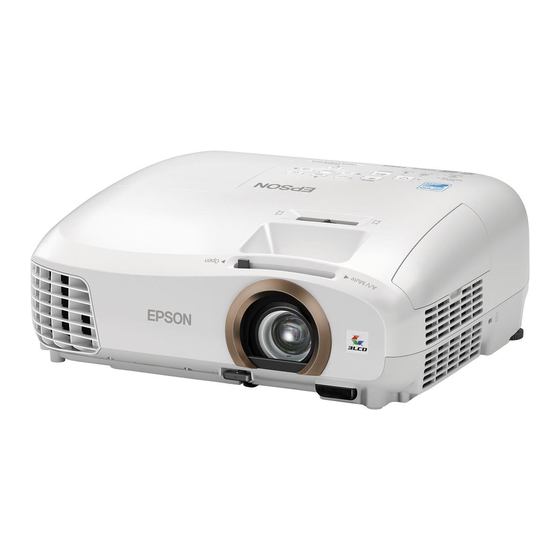
- Page 1 ® PowerLite Home Cinema 2040/2045 User's Guide...
-
Page 3: Table Of Contents
Contents PowerLite Home Cinema 2040/2045 User's Guide..................9 Introduction to Your Projector ......................... 10 Projector Features..........................10 Product Box Contents........................11 Additional Components ........................ 12 Optional Equipment and Replacement Parts................. 12 Warranty and Registration Information ..................13 Notations Used in the Documentation ....................14 Where to Go for Additional Information .................... - Page 4 Connecting to External USB Devices .................... 32 USB Device Projection......................32 Connecting a USB Device or Camera to the Projector.............. 33 Selecting the Connected USB Source ..................34 Disconnecting a USB Device or Camera From the Projector ............ 34 Installing Batteries in the Remote Control ..................34 Opening the Lens Cover ........................
- Page 5 Correcting Image Shape with the Keystone Buttons..............65 Resizing the Image with the Zoom Ring ..................... 67 Focusing the Image Using the Focus Ring..................67 Remote Control Operation ......................... 68 Selecting an Image Source ........................ 69 Projection Modes ..........................71 Changing the Projection Mode Using the Menus................
- Page 6 Projector Network Settings - Network Menu..................102 Projector Information Display - Info Menu ..................104 Event ID Code List........................105 Projector Reset Options - Reset Menu ..................... 107 Maintaining and Transporting the Projector ..................109 Projector Maintenance ........................109 Cleaning the Lens........................109 Cleaning the 3D Glasses ......................
- Page 7 Solving Projector or Remote Control Operation Problems ............... 135 Solutions to Projector Power or Shut-Off Problems ..............135 Solutions to Problems with the Remote Control................136 Solving Network Problems ....................... 136 Solutions When Wireless Authentication Fails ................137 Where to Get Help..........................137 Technical Specifications ........................
-
Page 9: Powerlite Home Cinema 2040/2045 User's Guide
PowerLite Home Cinema 2040/2045 User's Guide Welcome to the PowerLite Home Cinema 2040/2045 User's Guide. -
Page 10: Introduction To Your Projector
• One MHL (Mobile High-definition Link)-compatible HDMI port for high-quality audio and video from tablets and smartphones • WiDi and Miracast screen mirroring for laptops and mobile devices (PowerLite Home Cinema 2045) • Wireless network support (PowerLite Home Cinema 2045) for projection, monitoring, and control via remote network computer •... -
Page 11: Product Box Contents
• Real-time, automatic vertical keystone correction and horizontal keystone correction slider for flexible projector placement • Epson's Instant Off and Direct Power On features for quick setup and shut down • 1.2× optical zoom ratio for improved zooming capability Product Box Contents... -
Page 12: Additional Components
• You can purchase one from Epson or an authorized Epson reseller. • To receive an HDMI signal, you need a compatible HDMI cable. You can purchase one from Epson or an authorized Epson reseller. • To receive an HDMI signal via MHL, you need an MHL-compatible device, an MHL cable, or an HDMI cable and an MHL adapter compatible with your device. -
Page 13: Warranty And Registration Information
In addition, Epson offers free Extra Care Home Service. In the unlikely event of an equipment failure, you won’t have to wait for your unit to be repaired. Instead, Epson will ship you a replacement unit anywhere in the United States, Canada, or Puerto Rico. See the Extra Care Home Service brochure for details. -
Page 14: Notations Used In The Documentation
2045), see the EasyMP Network Projection Operation Guide. • If you still need help after checking this manual and the sources listed above, you can use the Epson PrivateLine Support service to get help fast. For details, see "Where to Get Help". -
Page 15: Projector Parts - Front/Top
Projector Parts - Front/Top Control panel Horizontal keystone slider Zoom ring Focus ring Rear foot Kensington security lock slot Air filter cover Air filter intake vent Remote receiver Lens Front adjustable foot Foot adjust lever... -
Page 16: Projector Parts - Rear
A/V Mute slide (lens cover) Exhaust vent A/V Mute slide lever Lamp cover Parent topic: Projector Part Locations Projector Parts - Rear USB Type A port Service port PC port (VGA) Video port HDMI 1 / MHL port HDMI 2 port Audio ports Audio Out port Remote receiver... -
Page 17: Projector Parts - Base
Parent topic: Projector Part Locations Projector Parts - Base Front adjustable foot Rear feet Security cable attachment point Mounting bracket holes Parent topic: Projector Part Locations... -
Page 18: Projector Parts - Control Panel
Projector Parts - Control Panel WLAN light (PowerLite Home Cinema 2045) Status light Power button/light Home button (displays the Home screen) Menu button (accesses projector menu system) Enter button (selects options) Esc button (cancels/exits functions) Vertical keystone adjustment buttons (adjust screen shape) and arrow buttons... -
Page 19: Projector Parts - Remote Control
Lamp light Screen Mirroring light (PowerLite Home Cinema 2045) Parent topic: Projector Part Locations Projector Parts - Remote Control Power button... - Page 20 Source buttons (select image source) HDMI Link button (displays the settings menu for HDMI Link), Link Menu button (displays the main menu of the connected device), and control buttons (control playback and other features of connected devices that support the HDMI CEC standard) Menu button (accesses projector menu system) Arrow buttons (move through on-screen options) User button (customizable for different functions)
-
Page 21: Setting Up The Projector
Setting Up the Projector Follow the instructions in these sections to set up your projector for use. Projector Placement Projector Connections Installing Batteries in the Remote Control Opening the Lens Cover Projector Placement You can place the projector on almost any flat surface to project an image. You can also install the projector in a ceiling mount if you want to use it in a fixed location. - Page 22 Front Rear Front Ceiling...
-
Page 23: Projection Distance
Rear Ceiling Wherever you set up the projector, make sure to position it squarely in front of the center of the screen, not at an angle, if possible. If you project from the ceiling or from the rear, be sure to select the correct Projection option in the projector's menu system. - Page 24 Use the tables here to determine approximately how far to place the projector from the screen based on the size of the projected image. (Conversion figures may have been rounded up or down.) You can also use the projector Throw Distance Calculator at epson.com/support (U.S.) or epson.ca/support (Canada).
- Page 25 Screen or image size Projection distance Wide to Tele 1 50 inches (126 cm) 65 to 78 inches (165 to 199 cm) 2 80 inches (203 cm) 105 to 126 inches (266 to 320 cm) 3 100 inches (254 cm) 131 to 158 inches (334 to 401 cm) 4 150 inches (381 cm)
-
Page 26: Projector Connections
Projector Connections You can connect the projector to a variety of computer, video, and audio sources to display presentations, movies, or other images, with or without sound. • For video projection, connect devices such as DVD players, gaming consoles, streaming devices, digital cameras, smartphones, and tablets with compatible video output ports. -
Page 27: Connecting To An Hdmi Video Source
Connecting to an HDMI Video Source If your video source has an HDMI port, you can connect it to the projector using an optional HDMI cable. The HDMI connection provides the best image quality. 1. Connect the HDMI cable to your video source's HDMI output port. 2. -
Page 28: Connecting To A Composite Video Source
2. If you are using an MHL adapter, connect it to an MHL-compatible HDMI cable. 3. Connect the other end of the cable to the projector's HDMI 1/MHL port. Note: The projector converts the digital audio signal sent from your video source into a mono analog signal for the internal speaker or a stereo analog signal if you are connecting to external speakers. -
Page 29: Connecting To A Video Source For Sound
commands, set your game console's output format to a progressive signal of 480p, 720p, or higher. See your game console documentation for instructions. Parent topic: Connecting to Video Sources Related tasks Connecting to a Video Source for Sound Connecting to a Video Source for Sound You can play sound through the projector's speaker system if your video source has audio output ports. -
Page 30: Connecting To A Computer For Vga Video
Connecting to a Computer for HDMI Video and Audio Connecting to a Computer for Sound Parent topic: Projector Connections Connecting to a Computer for VGA Video You can connect the projector to your computer using a VGA computer cable. Note: To connect a Mac that includes only a Mini DisplayPort, Thunderbolt port, or Mini-DVI port for video output, you need to obtain an adapter that allows you to connect to the projector's VGA video port. -
Page 31: Connecting To A Computer For Sound
2. Connect the other end to one of the projector's HDMI ports. Note: The projector converts the digital audio signal sent from your computer into a mono analog signal for the internal speaker or a stereo analog signal if you are connecting to external speakers. Parent topic: Connecting to Computer Sources Related tasks... -
Page 32: Connecting To External Usb Devices
You can also connect the projector to an amplifier with speakers. Note: The projector's built-in speaker system is disabled when you connect external speakers. 1. Make sure your computer or video source is connected to the projector with both audio and video cables as necessary. -
Page 33: Connecting A Usb Device Or Camera To The Projector
• Multimedia storage viewer • USB memory card reader Note: Digital cameras or smartphones must be USB-mounted devices, not TWAIN-compliant devices, and must be USB Mass Storage Class-compliant. Note: USB hard drives must meet these requirements: • USB Mass Storage Class-compliant (not all USB Mass Storage Class devices are supported) •... -
Page 34: Selecting The Connected Usb Source
3. Connect the other end of the cable (if applicable) to your device. Parent topic: Connecting to External USB Devices Related topics Projecting a Slide Show Selecting the Connected USB Source You can switch the projector's display to the source you connected to the USB Type A port. 1. - Page 35 1. Remove the battery cover. 2. Insert the batteries with the + and – ends facing as shown.
-
Page 36: Opening The Lens Cover
3. Replace the battery cover and press it down until it clicks into place. Warning: Dispose of used batteries according to local regulations. Do not expose batteries to heat or flame. Keep batteries out of the reach of children; they are choking hazards and are very dangerous if swallowed. - Page 37 Parent topic: Setting Up the Projector...
-
Page 38: Wireless Network Projection
Wireless Network Projection You can send images to your projector through a wireless network (PowerLite Home Cinema 2045). You can connect the projector to your wireless network by configuring the connection manually using the projector's Network menus. After setting up the projector, install the network software. You can download the latest software and documentation from the Epson web site. - Page 39 3. Select the Network menu and press Enter. 4. Make sure the Wireless LAN Power option is set to On. 5. Select Network Configuration and press Enter. 6. Select the Basic menu and press Enter.
- Page 40 • Display LAN Info lets you select how the projector displays network information. You can select an option to display a QR code that lets you quickly connect your iOS or Android devices using the Epson iProjection app. Note: Use the displayed keyboard to enter the name and password. Press the arrow buttons on the remote control to highlight characters and press Enter to select them.
-
Page 41: Wireless Lan Menu Settings
Wireless LAN Menu Settings Parent topic: Wireless Network Projection Wireless LAN Menu Settings Setting Options Description Connection Mode Quick Selects the type of wireless connection: Advanced Quick: lets you quickly connect to one computer, smartphone, or tablet Advanced: lets you connect to a wireless network access point Channel In Quick connection mode,... -
Page 42: Searching For A Wireless Network
Setting Options Description IP Address Display Selects whether to display the IP address on the network standby screen Parent topic: Selecting Wireless Network Settings Manually Searching for a Wireless Network You can use your projector's site survey function to quickly locate and connect to available wireless networks. - Page 43 5. Select the Wireless LAN menu and press Enter. 6. Select Advanced as the Connection Mode setting and press Enter. 7. Select Search Access Point and press Enter. 8. Select the name of the wireless network you want to connect to and press Enter. 9.
-
Page 44: Selecting Wireless Network Settings In Windows
You see a screen like this: 10. Select the settings on the security menu as necessary for your network. 11. When you finish selecting settings, select Complete and follow the on-screen instructions to save your settings and exit the menus. Parent topic: Wireless Network Projection Selecting Wireless Network Settings in Windows... -
Page 45: Setting Up Wireless Network Security
1. Click the AirPort icon on the menu bar at the top of the screen. 2. Make sure AirPort is turned on, then do one of the following: • If your projector is set up on an existing network (Advanced mode), select the network name (SSID). -
Page 46: Wireless Security Menu Settings
You can send images to your projector from mobile devices such as laptops, smartphones, and tablets using Intel WiDi (version 3.5 or later) and Miracast technology (PowerLite Home Cinema 2045). If your device supports Intel WiDi or Miracast, you do not need to install any additional software. -
Page 47: Screen Mirroring Restrictions
Screen Mirroring Restrictions Note the following when using Screen Mirroring features: • You cannot play audio with more than 3 channels. • You cannot project images with a resolution above 1920 × 1080 and a frame rate above 50 fps. •... -
Page 48: Connecting For Screen Mirroring Using Windows 10
4. Select Screen Mirroring Settings and press Enter. 5. Select these Screen Mirroring settings as necessary: • Display Name lets you enter a name up to 32 alphanumeric characters long to identify the projector from a list of available devices. •... -
Page 49: Connecting For Screen Mirroring Using Windows 8.1
You see a list of available devices. 8. Select your projector from the list. 9. If you see the PIN entry screen on your computer or mobile device, enter the PIN code displayed on the Screen Mirroring standby screen or at the bottom right of the projected image and click Next. The projector displays the image from your computer or mobile device. -
Page 50: Connecting For Screen Mirroring Using Windows 7/Windows 8
6. Select Devices. 7. Click Add a device. You see a list of available devices. 8. Select your projector from the list. 9. If you see the PIN entry screen on your computer or mobile device, enter the PIN code displayed on the Screen Mirroring standby screen or at the bottom right of the projected image and click Next. -
Page 51: Connecting For Screen Mirroring With Miracast
3. On your computer or mobile device, open the Intel WiDi software. You see a list of available devices. 4. Select your projector's Display Name from the list. 5. If you see the PIN entry screen on your computer or mobile device, enter the PIN code displayed on the projector's Screen Mirroring standby screen or at the bottom right of the projected image. - Page 52 3. On your mobile device, use the Miracast function to search for the projector. Note: See your mobile device's documentation for information on accessing the Miracast function. You see a list of available devices. 4. Select your projector from the list. 5.
-
Page 53: Using Basic Projector Features
Using Basic Projector Features Follow the instructions in these sections to use your projector's basic features. Turning On the Projector Turning Off the Projector Viewing 3D Images Selecting the Language for the Projector Menus Adjusting the Image Height Image Shape Resizing the Image with the Zoom Ring Focusing the Image Using the Focus Ring Remote Control Operation... - Page 54 1. Slide the projector's lens cover until it clicks into the open position.
- Page 55 2. Connect the power cord to the projector's power inlet. 3. Plug the power cord into an electrical outlet. Note: With Direct Power On turned on, the projector turns on as soon as you plug it in. The projector's power light turns blue. This indicates that the projector is receiving power. 4.
-
Page 56: Turning Off The Projector
2. Press the power button again. (To leave it on, press any other button.) The projector beeps twice, the lamp turns off, and the Status light turns off. Note: With Epson's Instant Off technology, there is no cool-down period so you can pack up the projector for transport right away (if necessary). - Page 57 3. To transport or store the projector, make sure the Status light is off, then unplug the power cord. Caution: To avoid damaging the projector or lamp, never unplug the power cord when the Status light is on or flashing.
-
Page 58: Viewing 3D Images
You can view 3D images using your projector. Viewing 3D images requires a 3D-compatible video device and a pair of Epson RF 3D glasses (not included with your projector). You can also convert 2D images to 3D using the 2D-to-3D Conversion setting in your projector's Signal > 3D Setup menu. - Page 59 4. Press the 2D/3D button on the remote control to activate 3D mode, if necessary. 5. Slide the power switch on the 3D glasses to the On position. 6. Put on the 3D glasses. If you do not see a 3D image, pair the glasses with the projector. Note: If you change the video source or you are not within range of your projector, the glasses enter standby mode and the status light flashes green.
-
Page 60: Pairing The 3D Glasses With The Projector
Related tasks Connecting to an HDMI Video Source Connecting to a Computer for HDMI Video and Audio Pairing the 3D Glasses with the Projector Pair the glasses with the projector to establish communication between them for 3D viewing. 1. Turn on the projector. 2. -
Page 61: Charging The 3D Glasses
Charging the 3D Glasses Charge the glasses when the status light on the glasses flashes red to indicate a low battery. 1. Connect the smaller end of the charging cable to the port on the bridge of the glasses. Note: Make sure you connect the cable in the correct orientation or you may damage the glasses or cable. -
Page 62: 3D Viewing Range
3D Viewing Range When you view 3D images, make sure you are positioned within the viewing range shown here. 32 ft (10 m) 10 ft (3 m) Parent topic: Viewing 3D Images Selecting the Language for the Projector Menus If you want to view the projector's menus and messages in another language, you can change the Language setting. -
Page 63: Adjusting The Image Height
3. Select the Extended menu and press Enter. 4. Select the Language setting and press Enter. 5. Select the language you want to use and press Enter. 6. Press Menu or Esc to exit the menus. Parent topic: Using Basic Projector Features Adjusting the Image Height If you are projecting from a table or other flat surface, and the image is too high or low, you can adjust the image height using the projector's adjustable feet. -
Page 64: Image Shape
2. To adjust the front foot, pull up on the foot release lever and lift the front of the projector. The foot extends from the projector. 3. Release the lever to lock the foot. 4. If the image is tilted, rotate the rear feet to adjust their height. If the projected image is unevenly rectangular, you need to adjust the image shape. -
Page 65: Correcting Image Shape With The Horizontal Keystone Slider
When you turn on automatic keystone correction in your projector's Settings menu, your projector automatically corrects vertical keystone effects when you reposition the projector. Correcting Image Shape with the Horizontal Keystone Slider Correcting Image Shape with the Keystone Buttons Parent topic: Using Basic Projector Features Correcting Image Shape with the Horizontal Keystone Slider You can use the projector's horizontal keystone slider to correct the shape of an image that is unevenly... - Page 66 2. Press one of these keystone buttons on the control panel to display the Keystone adjustment screen. 3. Press a keystone button on the projector's control panel to adjust the image shape. After correction, your image is slightly smaller. Note: If the projector is installed out of reach, you can also correct the image shape with the remote control using the Keystone settings in the projector menus.
-
Page 67: Resizing The Image With The Zoom Ring
Resizing the Image with the Zoom Ring 1. Turn on the projector and display an image. Note: You can display a pattern to aid in adjusting the projected image using the Pattern button on the remote control. 2. To enlarge or reduce the image size, rotate the projector's zoom ring. Parent topic: Using Basic Projector Features Focusing the Image Using the Focus Ring... -
Page 68: Remote Control Operation
2. To sharpen the image focus, rotate the projector’s focus ring. Parent topic: Using Basic Projector Features Remote Control Operation The remote control lets you control the projector from almost anywhere in the room. You can point it at the screen, or the front or back of the projector. Make sure that you aim the remote control at the projector's receivers within the distance and angles listed here. -
Page 69: Selecting An Image Source
19.7 feet (6 m) ± 15° Horizontal 19.7 feet (6 m) ± 30° Note: Avoid using the remote control in conditions with bright fluorescent lights or in direct sunlight, or the projector may not respond to commands. If you will not use the remote control for a long time, remove the batteries. - Page 70 3. Do one of the following: • Press the Source button on the projector until you see the image from the source you want. • Press the button for the source you want on the remote control. If there is more than one port for that source, press the button again to cycle through the sources.
-
Page 71: Projection Modes
Projection Modes Depending on how you positioned the projector, you may need to change the projection mode so your images project correctly. • Front (default setting) lets you project from a table in front of the screen. • Front/Ceiling flips the image over top-to-bottom to project upside-down from a ceiling or wall mount. •... -
Page 72: Image Aspect Ratio
5. Select a projection mode and press Enter. 6. Press Menu or Esc to exit the menus. Parent topic: Projection Modes Related concepts Projector Placement Image Aspect Ratio The projector can display images in different width-to-height ratios called aspect ratios. Normally the input signal from your video source determines the image's aspect ratio. -
Page 73: Available Image Aspect Ratios
3. Select the Signal menu and press Enter. 4. Select Aspect and press Enter. 5. Select the aspect ratio you want to use for your input signal and press Enter. 6. Select Menu or Exit to exit the menus. Parent topic: Image Aspect Ratio Available Image Aspect Ratios You can select the following image aspect ratios, depending on the input signal from your image source. -
Page 74: Color Mode
Aspect ratio setting Description Full Displays images using the full width of the projection area, but does not maintain the aspect ratio. Note: The Auto aspect ratio setting is available only for HDMI image sources. Parent topic: Image Aspect Ratio Color Mode The projector offers different Color Modes to provide optimum brightness, contrast, and color for a variety of viewing environments and image types. -
Page 75: Available Color Modes
3. Press the Color Mode button on the remote control to change the Color Mode. A list of available Color Modes appears. 4. To cycle through all the available Color Modes for your input signal, press the up or down arrow button. -
Page 76: Turning On Auto Iris
Color Mode Description 3D Dynamic Best for projecting in a bright room 3D Cinema Best for movies projected in a dark room Parent topic: Color Mode Turning On Auto Iris In certain color modes, you can turn on the Auto Iris setting to automatically optimize the image based on the brightness of the content you project. -
Page 77: Controlling The Volume With The Volume Buttons
Parent topic: Color Mode Controlling the Volume with the Volume Buttons You can use the Volume buttons on the projector or the remote control to adjust the volume as you project a presentation with audio. The volume buttons control the projector’s internal speaker system or any external speakers you connected to the projector. -
Page 78: Supported Slideshow File Types
Related concepts USB Device Projection Related tasks Connecting a USB Device or Camera to the Projector Supported Slideshow File Types You can project these types of files using the projector's Slideshow feature. Note: For best results, place your files on media that is formatted in FAT16/32. File contents File type Details... - Page 79 1. Press the Slideshow button on the projector remote control. The Slideshow screen appears. 2. Do the following as necessary to locate your files: • If you need to display files inside a subfolder on your device, press the arrow buttons to highlight the folder and press the Enter button.
-
Page 80: Slideshow Display Options
5. To stop the display, follow the on-screen instructions or press the Esc button. Slideshow Display Options Parent topic: Projecting a Slide Show Related tasks Connecting a USB Device or Camera to the Projector Disconnecting a USB Device or Camera From the Projector Slideshow Display Options You can select these display options when using the projector's Slideshow feature. - Page 81 Setting Options Description Screen Switching Does not display the next file automatically Time 1 Second to 60 Seconds Displays files for the selected time and switches to the next file automatically; high resolution images may switch at a slightly slower rate Effect Wipe Transitions between images with a wipe effect...
-
Page 82: Adjusting Projector Features
Adjusting Projector Features Follow the instructions in these sections to use your projector's feature adjustments. Shutting Off the Picture and Sound Temporarily Projecting Two Images Simultaneously Projector Security Features Shutting Off the Picture and Sound Temporarily You can temporarily turn off the projected picture and sound if you want to redirect your audience's attention during a presentation. -
Page 83: Projecting Two Images Simultaneously
Projecting Two Images Simultaneously You can use the split screen feature to simultaneously project two images from different image sources (HDMI1/HDMI2 and Screen Mirroring) next to each other (PowerLite Home Cinema 2045). You can control the split screen feature using the projector menus. -
Page 84: Projector Security Features
You see this screen: 5. To change the size and orientation of the image sent by Screen Mirroring, select the Screen Right Format setting, press Enter, select size and orientation options, press Enter, and press Menu to exit. (The image sent by Screen Mirroring will always be on the right side.) 6. - Page 85 2. Select the Settings menu and press Enter. 3. Select the Lock Setting setting and press Enter. 4. Select one of these lock types and press Enter: • To lock the projector's power button, select Child Lock. To turn the projector on, you must press the power button for longer than three seconds.
-
Page 86: Unlocking The Projector's Buttons
Unlocking the Projector's Buttons If the projector's buttons have been locked, hold the Enter button on the projector's control panel for seven seconds to unlock them. Parent topic: Locking the Projector's Buttons Related references Projector Feature Settings - Settings Menu Installing a Security Cable You can install two types of security cables on the projector to deter theft. -
Page 87: Adjusting The Menu Settings
Adjusting the Menu Settings Follow the instructions in these sections to access the projector menu system and change projector settings. Using the Projector's Menus Image Quality Settings - Image Menu Input Signal Settings - Signal Menu Projector Feature Settings - Settings Menu Projector Setup Settings - Extended Menu Projector Network Settings - Network Menu Projector Information Display - Info Menu... - Page 88 1. Press the Menu button on the control panel or remote control. You see the menu screen displaying the Image menu settings.
- Page 89 2. Press the up or down arrow button to move through the menus listed on the left. The settings for each menu are displayed on the right. Note: The available settings depend on the current input source. 3. To change settings in the displayed menu, press Enter. 4.
-
Page 90: Image Quality Settings - Image Menu
Image Quality Settings - Image Menu Settings on the Image menu let you adjust the quality of your image for the input source you are currently using. The available settings depend on the currently selected input source and resolution. (If a menu is grayed-out, that item is not available for the input source you are currently using.) To change settings for an input source, make sure the source is connected and select that source. - Page 91 Advanced RGBCMY RGBCMY: Adjusts the hue, saturation, and brightness for Epson Super White each color Epson Super White: Reduces over-exposure of whites in your image; is only available when receiving signal input from the HDMI1 or HDMI2 port. Power Consumption...
-
Page 92: Input Signal Settings - Signal Menu
Setting Options Description Auto Iris Adjusts the projected luminance based on the image brightness Normal when certain Color Modes are High Speed selected Note: The Brightness setting does not affect lamp brightness. To change the lamp brightness mode, use the Power Consumption setting. Parent topic: Adjusting the Menu Settings Input Signal Settings - Signal Menu... - Page 93 Setting Options Description 3D Setup 3D Display Selects various 3D options 3D Format 3D Display: enables 3D mode 2D-to-3D Conversion 3D Format: selects the 3D format 3D Depth 2D-to-3D Conversion: converts Diagonal Screen Size 2D images to 3D images 3D Brightness 3D Depth: sets the depth for the Inverse 3D Glasses 3D image...
- Page 94 Fine displays images in higher quality Note: You can select the HDMI Video Range setting only when the Epson Super White setting in the Image menu Advanced setting is turned off. Note: The Reset setting does not reset the Diagonal Screen Size, 3D Viewing Notice, Aspect, and Image Processing settings.
-
Page 95: Projector Feature Settings - Settings Menu
Projector Feature Settings - Settings Menu Options on the Settings menu let you customize various projector features. Setting Options Description Keystone V-Keystone Adjusts image shape to rectangular (horizontally and H-Keystone vertically) Auto V-Keystone V-Keystone: lets you manually H-Keystone Adjuster correct vertical sides H-Keystone: lets you manually correct horizontal sides Auto V-Keystone: enables or... - Page 96 Setting Options Description Split Screen — Splits the screen in two and displays images from the HDMI (PowerLite Home Cinema 2045) source and the Screen Mirroring source simultaneously Volume Varying levels available Adjusts the volume of the projector’s speaker system...
- Page 97 User Button Fine/Fast Assigns a menu option to the User button on the remote 2D-to-3D Conversion control for one-touch access Power Consumption Info Display the QR Code (PowerLite Home Cinema 2045)
- Page 98 Setting Options Description Memory Load Memory Controls memory functions for current projector settings Save Memory Load Memory: lets you load a Erase Memory saved memory Rename Memory Save memory: lets you save current projector settings to memory Erase Memory: lets you delete a saved memory Rename Memory: lets you rename a saved memory using 9...
-
Page 99: Projector Setup Settings - Extended Menu
Projector Setup Settings - Extended Menu Settings on the Extended menu let you customize various projector setup features that control its operation. Setting Options Description Home Screen Home Screen Auto Disp. Selects various options for the projector's Home screen Custom Function 1 Home Screen Auto Disp.: Custom Function 2 controls whether the Home... - Page 100 Messages: controls whether messages are displayed on the Startup Screen screen Display Background: selects the screen color or Epson logo to display when no signal is received Startup Screen: controls whether the Epson logo appears when the projector starts up...
- Page 101 Setting Options Description Operation Direct Power On Selects various operation options Sleep Mode Direct Power On: lets you turn Sleep Mode Timer on the projector without pressing Illumination the power button High Altitude Mode Sleep Mode: automatically places the projector in standby Auto Source Search mode after an interval of inactivity...
-
Page 102: Projector Network Settings - Network Menu
Projector Network Settings - Network Menu Settings on the Network menu let you view network information and set up the projector for monitoring and control over a network (PowerLite Home Cinema 2045). Setting Options Description Screen Mirroring Turns on screen mirroring mode... - Page 103 Region Code Display the QR Code — Displays network information for the projection in a QR code so you can connect to the projector from the Epson iProjection app Network Configuration Accesses additional network Configures your network settings menus Parent topic:...
-
Page 104: Projector Information Display - Info Menu
Lamp Hours Displays the number of hours (H) the lamp has been used in Normal and ECO Power Consumption modes; if the information is displayed in yellow, obtain a genuine Epson replacement lamp soon Source Displays the name of the port to which the current input source is... -
Page 105: Event Id Code List
Information item Description 3D Format Displays the 3D format of the current input source during 3D projection Sync Info Displays information that may be needed by a service technician Deep Color Displays the deep color of the current input source Status Displays information about projector problems that may be needed by a service technician... - Page 106 Event ID code Cause and solution 0022 Unstable network communication. Check the network communication status, wait a few moments, and try connecting to the network again. 0027 0028 0029 0030 0031 0035 0434 0481 0482 0485 0023 Connection failed. If you see the PIN entry screen on your computer, enter the PIN code displayed on the Screen Mirroring standby screen or at the bottom right of the 0024 projected image.
-
Page 107: Projector Reset Options - Reset Menu
If you are not using DHCP, turn off the DHCP setting in the Network menus. 0020 A communication error has occurred. Try restarting the EasyMP Network Projection program and restarting your projector. If that does not solve the problem, contact 0026 Epson for help. 0032 0036 0037 0038... - Page 108 You can reset the projector's lamp usage timer to zero when you replace the lamp using the Reset Lamp Hours option and you can also reset all memory entries using the Reset Memory option. You cannot reset the following settings using the Reset All option: •...
-
Page 109: Maintaining And Transporting The Projector
The only parts you should replace are the lamp, air filter, and remote control batteries. If any other part needs replacing, contact Epson or an authorized Epson servicer. Warning: Before cleaning any part of the projector, turn it off and unplug the power cord. Never open any cover on the projector, except as specifically explained in this manual. -
Page 110: Cleaning The 3D Glasses
• To remove stubborn smudges, moisten a soft, lint-free cloth with lens cleaner and gently wipe the lens. Do not spray any liquid directly on the lens. Warning: Do not use a lens cleaner that contains flammable gas. The high heat generated by the projector lamp may cause a fire. -
Page 111: Air Filter And Vent Maintenance
Filter maintenance intervals will depend on the environment. If regular maintenance is not performed, your Epson projector will notify you when the temperature inside the projector has reached a high level. Do not wait until this warning appears to maintain your projector filter as prolonged exposure to high temperatures may reduce the life of your projector or lamp. -
Page 112: Replacing The Air Filter
2. Gently remove the dust using a small vacuum designed for computers or a very soft brush (such as a paintbrush). Note: You can remove the air filter so you can clean both sides of it. Do not rinse the air filter in water, or use any detergent or solvent to clean it. - Page 113 2. Carefully open the air filter cover. 3. Pull the air filter out of the projector. Note: Air filters contain ABS resin and polyurethane foam. Dispose of used air filters according to local regulations. 4. Place the new air filter in the projector as shown and push gently until it clicks into place.
-
Page 114: Projector Lamp Maintenance
5. Close the air filter cover. Parent topic: Air Filter and Vent Maintenance Projector Lamp Maintenance The projector keeps track of the number of hours the lamp is used and displays this information in the projector's menu system. Replace the lamp as soon as possible when the following occurs: •... - Page 115 3. Use the screwdriver included with the replacement lamp to loosen the screw securing the lamp cover. Warning: If the lamp is broken, glass fragments may be loose inside the lamp chamber. Be careful removing any broken glass to avoid injury. If the projector is installed on the ceiling, stand to the side of the lamp cover and not underneath it;...
- Page 116 5. Loosen the screws securing the lamp to the projector. The screws do not come all the way out. 6. Grasp the raised section of the lamp and gently pull the lamp out of the projector. Note: The lamp(s) in this product contain mercury. Please consult your state and local regulations regarding disposal or recycling.
- Page 117 7. Gently insert the new lamp into the projector. If it does not fit easily, make sure it is facing the right way. Caution: Do not touch any glass on the lamp assembly to avoid premature lamp failure. 8. Push in the lamp firmly and tighten the screws to secure it. Caution: Do not over-tighten the screws.
-
Page 118: Resetting The Lamp Timer
9. Replace the lamp cover and tighten the screw to secure it. Note: Be sure the lamp cover is securely installed or the lamp will not come on. Reset the lamp timer to zero to keep track of the new lamp’s usage. Parent topic: Projector Lamp Maintenance Related tasks... -
Page 119: Replacing The Remote Control Batteries
3. Select the Reset menu and press Enter. 4. Select Reset Lamp Hours and press Enter. You see a prompt asking if you want to reset the lamp hours. 5. Select Yes and press Enter. 6. Press Menu or Esc to exit the menus. Parent topic: Projector Lamp Maintenance Related tasks... - Page 120 1. Remove the battery cover as shown. 2. Remove the old batteries. Warning: If the battery fluid has leaked, wipe it away with a soft cloth and avoid getting the fluid on your hands. If it gets on your hands, wash them immediately to avoid injury. 3.
-
Page 121: Transporting The Projector
• When shipping the projector for repairs, place it in its original packing materials, if possible, or use equivalent materials with cushioning around the projector. Mark the box "Fragile." Note: Epson shall not be liable for any damages incurred during transportation. Parent topic:... -
Page 122: Solving Problems
• The lights on the projector may indicate what the problem is. • The solutions in this manual can help you solve many problems. If none of these solutions help, you can contact Epson for technical support. Parent topic: Solving Problems... -
Page 123: Projector Light Status
The lights on the projector indicate the projector status and let you know when a problem occurs. Check the status and color of the lights and look for a solution in the table here. WLAN (Wireless LAN) light (PowerLite Home Cinema 2045) Status light... - Page 124 Epson for help Flashing blue Flashing Flashing Auto Iris error; turn the projector off, orange orange unplug it, and contact Epson for help Flashing blue Orange Orange Power error; turn the projector off, unplug it, and contact Epson for...
- Page 125 • Clean or replace the air filter • If operating the projector at high altitude, turn on High Altitude Mode • If the problem persists, unplug the projector and contact Epson for help Flashing blue Orange Projector has overheated and turned off;...
- Page 126 Power light Status light Lamp light Temp light Status and solution Wireless LAN light flashes blue slowly; Wireless LAN error, select Off as the Wireless LAN Power setting, then switch the setting back to On Wireless LAN light is off; Wireless LAN is not available, check that the Wireless LAN Power setting is set to On...
-
Page 127: Solving Image Or Sound Problems
Screen Mirroring is not available; make sure the Wireless Mode setting is on Note: If the lights display a pattern not listed in the table above, turn the projector off, unplug it, and contact Epson for help. Parent topic: Solving Problems Solving Image or Sound Problems Check the solutions in these sections if you have any problems with projected images or sound. -
Page 128: Solutions When "No Signal" Message Appears
• Make sure all necessary cables are securely connected and the power is on for the projector and connected video sources. • Press the projector's power button to wake it from standby or sleep mode. Also see if your connected computer is in sleep mode or displaying a blank screen saver. -
Page 129: Displaying From A Pc Laptop
Related concepts Projector Connections Displaying From a PC Laptop If you see the "No Signal" message when you display from a PC laptop, you need to set up the laptop to display on an external monitor. 1. Hold down the laptop's Fn key and press the key labelled with a monitor icon or CRT/LCD. (See your laptop manual for details.) Wait a few seconds for an image to appear. -
Page 130: Solutions When Only A Partial Image Appears
Supported Video Display Formats Solutions When Only a Partial Image Appears If only a partial computer image appears, try the following solutions: • Try adjusting the image position using the Position menu setting. • Select a different image aspect ratio from the Signal menu. •... -
Page 131: Solutions When The Image Contains Noise Or Static
Solutions When the Image Contains Noise or Static If the projected image seems to contain electronic interference (noise) or static, try the following solutions: • Check the cables connecting your computer or video source to the projector. They should be: •... -
Page 132: Solutions When The Image Brightness Or Colors Are Incorrect
• Position the projector close enough to the screen. • Position the projector so the keystone adjustment angle is not so wide that it distorts the image. • Turn on automatic keystone adjustment in the projector's menus. • Adjust the Sharpness setting to improve image quality. •... -
Page 133: Solutions When A 3D Image Does Not Display Correctly
Auto, but in some cases you may need to select a different setting to match the 3D signal from your video device. • Make sure you are using RF 3D active shutter glasses. You can purchase them from Epson. • Make sure your 3D glasses are turned on and fully charged. If the glasses have entered standby mode, slide the power switch on the glasses to the Off position and then back to the On position. -
Page 134: Solutions To Sound Problems
Related references Projector Feature Settings - Settings Menu 3D Viewing Range Optional Equipment and Replacement Parts Related tasks Cleaning the 3D Glasses Charging the 3D Glasses Pairing the 3D Glasses with the Projector Solutions to Sound Problems If there is no sound when you expect it or the volume is too low or high, try the following solutions: •... -
Page 135: Solving Projector Or Remote Control Operation Problems
Remote Receiver setting is turned on in the projector's menu, if available. • Make sure Sleep Mode is not in effect. • The power cord may be defective. Try another power cord. If that doesn't work, disconnect the cord and contact Epson. Parent topic: Solving Projector or Remote Control Operation Problems... -
Page 136: Solutions To Problems With The Remote Control
• If you assigned an ID number to the remote control to operate multiple projectors, you may need to check or change the ID setting (feature not available with all projectors). • If you lose the remote control, you can purchase another from an authorized Epson reseller. Parent topic:... -
Page 137: Solutions When Wireless Authentication Fails
Epson with your questions. Speak to a Support Representative To use the Epson PrivateLine Support service, call (800) 637-7661. This service is available for the duration of your warranty period. You may also speak with a projector support specialist by dialing (562) 276-4394 (U.S.) or (905) 709-3839 (Canada). - Page 138 Purchase Supplies and Accessories You can purchase screens, other optional accessories, and replacement parts from an Epson authorized reseller. To find the nearest reseller, call 800-GO-EPSON (800-463-7766). Or you can purchase online epsonstore.com (U.S. sales) or epson.ca (Canadian sales). To purchase a replacement remote control, call (562) 276-4394 (U.S.) or (905) 709-3839 (for dealer referral in Canada).
-
Page 139: Technical Specifications
Technical Specifications These sections list the technical specifications of your projector. General Projector Specifications Projector Lamp Specifications Remote Control Specifications Projector Dimension Specifications Projector Electrical Specifications Projector Environmental Specifications Projector Safety and Approvals Specifications Supported Video Display Formats General Projector Specifications Type of display Poly-silicon TFT active matrix Resolution... -
Page 140: Projector Lamp Specifications
Image size 34 inches (0.86 m) to 332 inches (8.4 m) (in native aspect ratio) Projection distance 36 inches (0.91 m) to 431 inches (10.9 m) (in native aspect ratio) Projection methods Front, rear, ceiling-mounted Optical aspect ratio 16:9 (width-to-height) Focus adjustment Manual Zoom adjustment... -
Page 141: Remote Control Specifications
Width 11.7 inches (297 mm) Depth 9.6 inches (245 mm) Weight PowerLite Home Cinema 2040: 6.4 lb (2.9 kg) PowerLite Home Cinema 2045: 6.8 lb (3.1 kg) Parent topic: Technical Specifications Projector Electrical Specifications Rated frequency 50/60 Hz Power supply 100 to 240 V AC ±10%... -
Page 142: Projector Environmental Specifications
Power consumption Operating: (100 to 120 V) Normal Power Consumption mode: 307 W ECO Power Consumption mode: 231 W Standby: 0.21 W (Communication Off), 2.1 W (Communication On) Power consumption Operating: (220 to 240 V) Normal Power Consumption mode: 291 W ECO Power Consumption mode: 224 W Standby: 0.28 W (Communication Off), 2.4 W (Communication On) -
Page 143: Supported Video Display Formats
For best results, your computer's monitor port or video card resolution should be set to display in the projector's native resolution. However, your projector includes Epson's SizeWise chip that supports other computer display resolutions, so your image will be resized to fit automatically. - Page 144 Display format Refresh rate (in Hz) Resolution (in pixels) SDTV (480i/480p) 720 × 480 SDTV (576i/576p) 720 × 576 HDTV (720p) 50/60 1280 × 720 HDTV (1080i) 50/60 1920 × 1080 HDTV (1080p) 24/30/50/60 1920 × 1080 MHL input signals 640 ×...
- Page 145 Display format Refresh rate (in Hz) Resolution (in pixels) 3D formats HDTV (720p) 50/60 1280 × 720 Side by Side Top and Bottom HDTV (1080i) 50/60 1920 × 1080 Side by Side HDTV (1080p) 50/60 1920 × 1080 — 1920 × 1080 Side by Side Top and Bottom Parent topic:...
-
Page 146: Notices
FCC Compliance Statement Open Source Software License Trademarks Copyright Notice Recycling Epson offers a recycling program for end of life products. Please go to this site for information on how to return your products for proper disposal. Parent topic: Notices Important Safety Information Warning: The projector and its accessories come packaged in plastic bags. - Page 147 projector to fall from its ceiling mount. This could cause serious injury to anyone under the mount and could damage the projector. • Do not use the projector near water, sources of heat, high-voltage electrical wires, or sources of magnetic fields. •...
- Page 148 • Never open any covers on the projector except as specifically explained in this manual. Never attempt to disassemble or modify the projector. Refer all repairs to qualified service personnel. • Unplug the projector from the wall outlet and refer servicing to qualified service personnel under the following conditions: if it does not operate normally when you follow the operating instructions, or exhibits a distinct change in performance;...
-
Page 149: 3D Safety Instructions
WARNING: The cords included with this product contain chemicals, including lead, known to the State of California to cause birth defects or other reproductive harm. Wash hands after handling. (This notice is provided in accordance with Proposition 65 in Cal. Health & Safety Code § 25249.5 and following.) 3D Safety Instructions Restriction of Use Parent topic:... - Page 150 • When charging the 3D glasses, only use the supplied charging cable and connect the cable to the USB port designated by Epson. Do not charge the 3D glasses using other devices as it may cause the battery to leak, overheat, ignite, or explode.
-
Page 151: Restriction Of Use
Parent topic: Important Safety Instructions Restriction of Use When this product is used for applications requiring high reliability/safety such as transportation devices related to aviation, rail, marine, automotive; disaster prevention devices; various safety devices; or functional/precision devices, you should use this product only after giving consideration to including fail- safes and redundancies into your design to maintain safety and total system reliability. -
Page 152: Open Source Software License
We provide the source code of the GPL Programs until five (5) years after the discontinuation of same model of this projector product. If you desire to receive the source code of the GPL Programs, contact Epson. These GPL Programs are WITHOUT ANY WARRANTY; without even the implied warranty of MERCHANTABILITY AND FITNESS FOR A PARTICULAR PURPOSE. - Page 153 • gdb-6.4 • gawk-3.1.5 • oprofile-0.9.2 • binutils-2.16.1 • diehotplug0.4 • MTD-utils • Yaffs2-slpha1 • pppoe-3.8 • udftools-1.0.0b3 • lrzsz-0.12.20 • wireless-tools.29 • yaffs2-utils • squshfs 4.2 • coreutils 6.9 The GNU General Public License Version 2 is as follows. You also can see the GNU General Public License Version 2 at http://www.gnu.org/licenses/.
- Page 154 this service if you wish), that you receive source code or can get it if you want it, that you can change the software or use pieces of it in new free programs; and that you know you can do these things. To protect your rights, we need to make restrictions that forbid anyone to deny you these rights or to ask you to surrender the rights.
- Page 155 You may charge a fee for the physical act of transferring a copy, and you may at your option offer warranty protection in exchange for a fee. 2. You may modify your copy or copies of the Program or any portion of it, thus forming a work based on the Program, and copy and distribute such modifications or work under the terms of Section 1 above, provided that you also meet all of these conditions: a) You must cause the modified files to carry prominent notices stating that you changed the files and the...
- Page 156 b) Accompany it with a written offer, valid for at least three years, to give any third party, for a charge no more than your cost of physically performing source distribution, a complete machine-readable copy of the corresponding source code, to be distributed under the terms of Sections 1 and 2 above on a medium customarily used for software interchange;...
- Page 157 For example, if a patent license would not permit royalty-free redistribution of the Program by all those who receive copies directly or indirectly through you, then the only way you could satisfy both it and this License would be to refrain entirely from distribution of the Program. If any portion of this section is held invalid or unenforceable under any particular circumstance, the balance of the section is intended to apply and the section as a whole is intended to apply in other circumstances.
- Page 158 PROVIDE THE PROGRAM "AS IS" WITHOUT WARRANTY OF ANY KIND, EITHER EXPRESSED OR IMPLIED, INCLUDING, BUT NOT LIMITED TO, THE IMPLIED WARRANTIES OF MERCHANTABILITY AND FITNESS FOR A PARTICULAR PURPOSE. THE ENTIRE RISK AS TO THE QUALITY AND PERFORMANCE OF THE PROGRAM IS WITH YOU. SHOULD THE PROGRAM PROVE DEFECTIVE, YOU ASSUME THE COST OF ALL NECESSARY SERVICING, REPAIR OR CORRECTION.
- Page 159 We provide the source code of the LGPL Programs until five (5) years after the discontinuation of same model of this projector product. If you desire to receive the source code of the LGPL Programs, please contact Epson. These LGPL Programs are WITHOUT ANY WARRANTY; without even the implied warranty of MERCHANTABILITY AND FITNESS FOR A PARTICULAR PURPOSE.
- Page 160 • grencode-3.4.2 • libnl-3.2.24 • uclibc 0.9.30.3 • ebase 1.2.2 • qdecoder 8.0 • neon-0.28.6 • neon-0.27.2 • libotf-0.9.9 • fribidi-0.10.9 • DirectFB-1.4.2 • libcharguess 1.0b The GNU Lesser General Public License Version 2 is as follows. You also can see the GNU Lesser General Public License Version 2 at http://www.gnu.org/licenses/.
- Page 161 charge for this service if you wish); that you receive source code or can get it if you want it; that you can change the software and use pieces of it in new free programs; and that you are informed that you can do these things.
- Page 162 non-free libraries. In this case, there is little to gain by limiting the free library to free software only, so we use the Lesser General Public License. In other cases, permission to use a particular library in non-free programs enables a greater number of people to use a large body of free software.
- Page 163 copyright notice and disclaimer of warranty; keep intact all the notices that refer to this License and to the absence of any warranty; and distribute a copy of this License along with the Library. You may charge a fee for the physical act of transferring a copy, and you may at your option offer warranty protection in exchange for a fee.
- Page 164 version than version 2 of the ordinary GNU General Public License has appeared, then you can specify that version instead if you wish.) Do not make any other change in these notices. Once this change is made in a given copy, it is irreversible for that copy, so the ordinary GNU General Public License applies to all subsequent copies and derivative works made from that copy.
- Page 165 You must give prominent notice with each copy of the work that the Library is used in it and that the Library and its use are covered by this License. You must supply a copy of this License. If the work during execution displays copyright notices, you must include the copyright notice for the Library among them, as well as a reference directing the user to the copy of this License.
- Page 166 a) Accompany the combined library with a copy of the same work based on the Library, uncombined with any other library facilities. This must be distributed under the terms of the Sections above. b) Give prominent notice with the combined library of the fact that part of it is a work based on the Library, and explaining where to find the accompanying uncombined form of the same work.
- Page 167 This section is intended to make thoroughly clear what is believed to be a consequence of the rest of this License. 12. If the distribution and/or use of the Library is restricted in certain countries either by patents or by copyrighted interfaces, the original copyright holder who places the Library under this License may add an explicit geographical distribution limitation excluding those countries, so that distribution is permitted only in or among countries not thus excluded.
- Page 168 END OF TERMS AND CONDITIONS How to Apply These Terms to Your New Libraries If you develop a new library, and you want it to be of the greatest possible use to the public, we recommend making it free software that everyone can redistribute and change. You can do so by permitting redistribution under these terms (or, alternatively, under the terms of the ordinary General Public License).
- Page 169 The "BSD License" are WITHOUT ANY WARRANTY; without even the implied warranty of MERCHANTABILITY AND FITNESS FOR A PARTICULAR PURPOSE. List of BSD License programs • tcpdump-3.9.7 • pppd-2.4.4 License terms of conditions of each program which are provided by owner of the copyright to the "BSD License"...
- Page 170 List of libjpeg programs • libjpeg-6b License terms of conditions of each program which are provided by owner of the copyright to the "libjpeg" are as follows. Copyright (C) 1994-1997, Thomas G. Lane. This file is part of the Independent JPEG Group's software. For conditions of distribution and use, see the accompanying README file.
- Page 171 These conditions apply to any software derived from or based on the IJG code, not just to the unmodified library. If you use our work, you ought to acknowledge us. Permission is NOT granted for the use of any IJG author's name or company name in advertising or publicity relating to this software or products derived from it.
- Page 172 List of libpng programs • libpng-1.2.49 • libpng-1.2.18 License terms of conditions of each program which are provided by owner of the copyright to the "libpng" are as follows. This copy of the libpng notices is provided for your convenience. In case of any discrepancy between this copy and the notices in the file png.h that is included in the libpng distribution, the latter shall prevail.
- Page 173 libpng versions 0.89, June 1996, through 0.96, May 1997, are Copyright (c) 1996, 1997 Andreas Dilger Distributed according to the same disclaimer and license as libpng-0.88, with the following individuals added to the list of Contributing Authors: John Bowler Kevin Bracey Sam Bushell Magnus Holmgren Greg Roelofs...
- Page 174 A "png_get_copyright" function is available, for convenient use in "about" boxes and the like: printf("%s",png_get_copyright(NULL)); Also, the PNG logo (in PNG format, of course) is supplied in the files "pngbar.png" and "pngbar.jpg (88x31) and "pngnow.png" (98x31). Libpng is OSI Certified Open Source Software. OSI Certified Open Source is a certification mark of the Open Source Initiative.
- Page 175 Jean-loup Gailly jloup@gzip.org Mark Adler madler@alumni.caltech.edu If you use the zlib library in a product, we would appreciate *not* receiving lengthy legal documents to sign. The sources are provided for free but without warranty of any kind. The library has been entirely written by Jean-loup Gailly and Mark Adler;...
- Page 176 otherwise, or (ii) ownership of fifty percent (50%) or more of the outstanding shares, or (iii) beneficial ownership of such entity. "You" (or "Your") shall mean an individual or Legal Entity exercising permissions granted by this License. "Source" form shall mean the preferred form for making modifications, including but not limited to software source code, documentation source, and configuration files.
- Page 177 (including a cross-claim or counterclaim in a lawsuit) alleging that the Work or a Contribution incorporated within the Work constitutes direct or contributory patent infringement, then any patent licenses granted to You under this License for that Work shall terminate as of the date such litigation is filed.
- Page 178 WARRANTIES OR CONDITIONS OF ANY KIND, either express or implied, including, without limitation, any warranties or conditions of TITLE, NON-INFRINGEMENT, MERCHANTABILITY, or FITNESS FOR A PARTICULAR PURPOSE. You are solely responsible for determining the appropriateness of using or redistributing the Work and assume any risks associated with Your exercise of permissions under this License.
- Page 179 aes-src-29-04-09 This projector product includes the open source software program "aes-src-29-04-09" which applies the terms and conditions provided by owner of the copyright to the "aes-src-29-04-09". The "aes-src-29-04-09" are WITHOUT ANY WARRANTY; without even the implied warranty of MERCHANTABILITY AND FITNESS FOR A PARTICULAR PURPOSE. List of aes-src-29-04-09 programs •...
- Page 180 The newlib subdirectory is a collection of software from several sources. Each file may have its own copyright/license that is embedded in the source file. Unless otherwise noted in the body of the source file(s), the following copyright notices will apply to the contents of the newlib subdirectory: (1) Red Hat Incorporated Copyright (c) 1994-2007 Red Hat, Inc.
- Page 181 The author of this software is David M. Gay. Copyright (c) 1991 by AT&T. Permission to use, copy, modify, and distribute this software for any purpose without fee is hereby granted, provided that this entire notice is included in all copies of any software which is or includes a copy or modification of this software and in all copies of the supporting documentation for such software.
- Page 182 So that all may benefit from your experience, please report any problems or suggestions about this software to the 29K Technical Support Center at 800-29-29-AMD (800-292-9263) in the USA, or 0800- 89-1131 in the UK, or 0031-11-1129 in Japan, toll free. The direct dial number is 512-462-4118. Advanced Micro Devices, Inc.
- Page 183 Permission to use, copy, modify, and distribute this software is freely granted, provided that the above copyright notice, this notice and the following disclaimer are preserved with no changes. THIS SOFTWARE IS PROVIDED "AS IS" AND WITHOUT ANY EXPRESS OR IMPLIED WARRANTIES, INCLUDING, WITHOUT LIMITATION, THE IMPLIED WARRANTIES OF MERCHANTABILITY AND FITNESS FOR A PARTICULAR PURPOSE.
- Page 184 So that all may benefit from your experience, please report any problems or suggestions about this software to the SuperH Support Center via e-mail at softwaresupport@superh.com. SuperH, Inc. 405 River Oaks Parkway San Jose CA 95134 (13) Royal Institute of Technology Copyright (c) 1999 Kungliga Tekniska Högskolan (Royal Institute of Technology, Stockholm, Sweden).
- Page 185 1. Redistributions of source code must retain the above copyright notice, this list of conditions and the following disclaimer. 2. Redistributions in binary form must reproduce the above copyright notice, this list of conditions and the following disclaimer in the documentation and/or other materials provided with the distribution. THIS SOFTWARE IS PROVIDED BY THE AUTHOR AND CONTRIBUTORS "AS IS"...
- Page 186 All rights reserved. Redistribution and use in source and binary forms, with or without modification, are permitted provided that the following conditions are met: 1. Redistributions of source code must retain the above copyright notice, this list of conditions and the following disclaimer.
- Page 187 2. Redistributions in binary form must reproduce the above copyright notice, this list of conditions and the following disclaimer in the documentation and/or other materials provided with the distribution. THIS SOFTWARE IS PROVIDED BY THE AUTHOR AND CONTRIBUTORS "AS IS" AND ANY EXPRESS OR IMPLIED WARRANTIES, INCLUDING, BUT NOT LIMITED TO, THE IMPLIED WARRANTIES OF MERCHANTABILITY AND FITNESS FOR A PARTICULAR PURPOSE ARE DISCLAIMED.
- Page 188 All rights reserved. Redistribution and use in source and binary forms is permitted provided that the above copyright notice and following paragraph are duplicated in all such forms. This file is distributed WITHOUT ANY WARRANTY; without even the implied warranty of MERCHANTABILITY or FITNESS FOR A PARTICULAR PURPOSE.
- Page 189 THIS SOFTWARE IS PROVIDED BY THE AUTHOR AND CONTRIBUTORS "AS IS" AND ANY EXPRESS OR IMPLIED WARRANTIES, INCLUDING, BUT NOT LIMITED TO, THE IMPLIED WARRANTIES OF MERCHANTABILITY AND FITNESS FOR A PARTICULAR PURPOSE ARE DISCLAIMED. IN NO EVENT SHALL THE AUTHOR OR CONTRIBUTORS BE LIABLE FOR ANY DIRECT, INDIRECT, INCIDENTAL, SPECIAL, EXEMPLARY, OR CONSEQUENTIAL DAMAGES (INCLUDING, BUT NOT LIMITED TO, PROCUREMENT OF SUBSTITUTE GOODS OR SERVICES;...
- Page 190 1. Redistributions of source code must retain the above copyright notice, this list of conditions and the following disclaimer. 2. Redistributions in binary form must reproduce the above copyright notice, this list of conditions and the following disclaimer in the documentation and/or other materials provided with the distribution. THIS SOFTWARE IS PROVIDED BY THE AUTHOR AND CONTRIBUTORS "AS IS"...
- Page 191 Copyright (c) 1998, M. Warner Losh <imp@freebsd.org> All rights reserved. Redistribution and use in source and binary forms, with or without modification, are permitted provided that the following conditions are met: 1. Redistributions of source code must retain the above copyright notice, this list of conditions and the following disclaimer.
- Page 192 OTHERWISE) ARISING IN ANY WAY OUT OF THE USE OF THIS SOFTWARE, EVEN IF ADVISED OF THE POSSIBILITY OF SUCH DAMAGE. (33) - Daniel Eischen (targets using libc/posix) Copyright (c) 2001 Daniel Eischen <deischen@FreeBSD.org>. All rights reserved. Redistribution and use in source and binary forms, with or without modification, are permitted provided that the following conditions are met: 1.
- Page 193 MERCHANTABILITY AND FITNESS FOR A PARTICULAR PURPOSE ARE DISCLAIMED. IN NO EVENT SHALL ARM LTD BE LIABLE FOR ANY DIRECT, INDIRECT, INCIDENTAL, SPECIAL, EXEMPLARY, OR CONSEQUENTIAL DAMAGES (INCLUDING, BUT NOT LIMITED TO, PROCUREMENT OF SUBSTITUTE GOODS OR SERVICES; LOSS OF USE, DATA, OR PROFITS; OR BUSINESS INTERRUPTION) HOWEVER CAUSED AND ON ANY THEORY OF LIABILITY, WHETHER IN CONTRACT, STRICT LIABILITY, OR TORT (INCLUDING NEGLIGENCE OR OTHERWISE) ARISING IN ANY WAY OUT OF THE USE OF THIS SOFTWARE, EVEN IF ADVISED...
- Page 194 * * Redistributions of source code must retain the above copyright notice, this list of conditions and the following disclaimer. * * Redistributions in binary form must reproduce the above copyright notice, this list of conditions and the following disclaimer in the documentation and/or other materials provided with the distribution. * * Neither the name of MIPS Technologies Inc.
- Page 195 The above copyright notice and this permission notice shall be included in all copies or substantial portions of the Software. THE SOFTWARE IS PROVIDED "AS IS", WITHOUT WARRANTY OF ANY KIND, EXPRESS OR IMPLIED, INCLUDING BUT NOT LIMITED TO THE WARRANTIES OF MERCHANTABILITY, FITNESS FOR A PARTICULAR PURPOSE AND NONINFRINGEMENT.
- Page 196 (3) When this software is redistributed in a form in which it cannot be used in the development of other software, embedded in devices, etc., one of the following conditions shall be satisfied. (a) The above copyright display, these terms of utilization, and the following stipulation of no guarantee shall be inserted in documentation accompanying redistribution (user's manual, etc.).
- Page 197 2. Redistributions in binary form must reproduce the above copyright notice, this list of conditions and the following disclaimer in the documentation and/or other materials provided with the distribution. 3. All advertising materials mentioning features or use of this software must display the following acknowledgement: This product includes software developed by the University of California, Berkeley and its contributors.
- Page 198 (a) The above copyright display, these terms of utilization, and the following stipulation of no guarantee shall be inserted in documentation accompanying redistribution (user's manual, etc.). (4) The above copyright holder and the TOPPERS Project shall be exempt from responsibility for whatever damages occur either directly or indirectly through the utilization of this software.
- Page 199 3. Neither the name(s) of the above-listed copyright holder(s) nor the names of its contributors may be used to endorse or promote products derived from this software without specific prior written permission. THIS SOFTWARE IS PROVIDED BY THE COPYRIGHT HOLDERS AND CONTRIBUTORS "AS IS" AND ANY EXPRESS OR IMPLIED WARRANTIES, INCLUDING, BUT NOT LIMITED TO, THE IMPLIED WARRANTIES OF MERCHANTABILITY AND FITNESS FOR A PARTICULAR PURPOSE ARE DISCLAIMED.
- Page 200 DISCLAIMED. IN NO EVENT SHALL THE COPYRIGHT OWNER OR CONTRIBUTORS BE LIABLE FOR ANY DIRECT, INDIRECT, INCIDENTAL, SPECIAL, EXEMPLARY, OR CONSEQUENTIAL DAMAGES (INCLUDING, BUT NOT LIMITED TO, PROCUREMENT OF SUBSTITUTE GOODS OR SERVICES; LOSS OF USE, DATA, OR PROFITS; OR BUSINESS INTERRUPTION) HOWEVER CAUSED AND ON ANY THEORY OF LIABILITY, WHETHER IN CONTRACT, STRICT LIABILITY, OR TORT (INCLUDING NEGLIGENCE OR OTHERWISE) ARISING IN ANY WAY OUT OF THE USE OF THIS SOFTWARE, EVEN IF ADVISED OF THE POSSIBILITY OF SUCH DAMAGE...
- Page 201 Copyright (c) 1997-2012 University of Cambridge All rights reserved. PCRE JUST-IN-TIME COMPILATION SUPPORT ----------- Written by: Zoltan Herczeg Email local part: hzmester Emain domain: freemail.hu Copyright(c) 2010-2012 Zoltan Herczeg All rights reserved. STACK-LESS JUST-IN-TIME COMPILER ----------- Written by: Zoltan Herczeg Email local part: hzmester Emain domain: freemail.hu Copyright(c) 2009-2012 Zoltan Herczeg...
- Page 202 * Redistributions in binary form must reproduce the above copyright notice, this list of conditions and the following disclaimer in the documentation and/or other materials provided with the distribution. * Neither the name of the University of Cambridge nor the name of Google Inc. nor the names of their contributors may be used to endorse or promote products derived from this software without specific prior written permission.
- Page 203 OPEN MARKET MAKES NO EXPRESS OR IMPLIED WARRANTY WITH RESPECT TO THE SOFTWARE OR THE DOCUMENTATION, INCLUDING WITHOUT LIMITATION ANY WARRANTY OF MERCHANTABILITY OR FITNESS FOR A PARTICULAR PURPOSE. IN NO EVENT SHALL OPEN MARKET BE LIABLE TO YOU OR ANY THIRD PARTY FOR ANY DAMAGES ARISING FROM OR RELATING TO THIS SOFTWARE OR THE DOCUMENTATION, INCLUDING, WITHOUT LIMITATION, ANY INDIRECT, SPECIAL OR CONSEQUENTIAL DAMAGES OR SIMILAR DAMAGES, INCLUDING LOST PROFITS OR LOST DATA, EVEN IF OPEN MARKET HAS BEEN ADVISED OF THE...
- Page 204 3. All advertising materials mentioning features or use of this software must display the following acknowledgment: This product includes software developed by the OpenSSL Project for use in the OpenSSL Toolkit. (http://www.openssl.org) 4. The names "OpenSSL Toolkit" and "OpenSSL Project" must not be used to endorse or promote products derived from this software without prior written permission.
-
Page 205: Trademarks
Notices Trademarks ® ® ® EPSON , Instant Off , and PowerLite are registered trademarks, and EPSON Exceed Your Vision is a registered logomark of Seiko Epson Corporation. ® ® Accolade and PrivateLine are registered trademarks; Duet , and SizeWise are trademarks;... -
Page 206: Copyright Notice
Seiko Epson Corporation. The information contained herein is designed only for use with this Epson product. Epson is not responsible for any use of this information as applied to other products. -
Page 207: Copyright Attribution
Copyright Attribution © 2015 Epson America, Inc. 8/15 CPD-43312 Parent topic: Copyright Notice...