Table of Contents
Advertisement
Advertisement
Table of Contents

Related Manuals for Asus C100PA


Summary of Contents for Asus C100PA
- Page 1 E10177 First Edition April 2015 Notebook PC E-Manual for Chromebook...
- Page 2 Warranty Statement, up to the listed contract price of each product. ASUS will only be responsible for or indemnify you for loss, damages or claims based in contract, tort or infringement under this Warranty Statement.
-
Page 3: Table Of Contents
Table of Contents About this manual .....................6 Conventions used in this manual ................7 Typography ........................7 Safety precautions .....................8 Using your Notebook PC ....................8 Caring for your Notebook PC ..................9 Proper disposal ........................ 10 Chapter 1: Hardware Setup Getting to know your Notebook PC ..............12 Top View .......................... - Page 4 Chapter 3: Working with Chrome™ OS Starting for the first time ..................34 Sign-in area ........................35 Browse as Guest ......................35 User account ........................36 Using your desktop ....................37 Apps list ..........................37 Status area ......................... 39 Connecting to the Internet ..................42 Enabling your Wi-Fi connection ................
- Page 5 CTR 21 Approval (for Notebook PC with built-in Modem) ......86 ENERGY STAR complied product ................88 Global Environmental Regulation Compliance and Declaration ....88 ASUS Recycling/Takeback Services ................89 Rechargeable Battery Recycling Service in North America......89 Regional notice for California ..................89 Regional notice for Singapore ...................
-
Page 6: About This Manual
About this manual This manual provides information about the hardware and software features of your Notebook PC, organized through the following chapters: Chapter 1: Hardware Setup This chapter details the hardware components of your Notebook Chapter 2: Using your Notebook PC This chapter shows you how to use the different parts of your Notebook PC. -
Page 7: Conventions Used In This Manual
Conventions used in this manual To highlight key information in this manual, some text are presented as follows: IMPORTANT! This message contains vital information that must be followed to complete a task. NOTE: This message contains additional information and tips that can help complete tasks. -
Page 8: Safety Precautions
Safety precautions Using your Notebook PC This Notebook PC should only be used in environments with ambient temperatures between 5°C (41°F) and 35°C (95°F). Refer to the rating label on the bottom of your Notebook PC and ensure that your power adapter complies with this rating. -
Page 9: Caring For Your Notebook Pc
Caring for your Notebook PC Disconnect the AC power and remove the battery pack (if applicable) before cleaning your Notebook PC. Use a clean cellulose sponge or chamois cloth dampened with a solution of nonabrasive detergent and a few drops of warm water. Remove any extra moisture from your Notebook PC using a dry cloth. -
Page 10: Proper Disposal
Proper disposal Do not throw your Notebook PC in municipal waste. This product has been designed to enable proper reuse of parts and recycling. The symbol of the crossed out wheeled bin indicates that the product (electrical, electronic equipment, and mercury- containing button cell battery) should not be placed in municipal waste. -
Page 11: Chapter 1: Hardware Setup
Chapter 1: Hardware Setup Notebook PC E-Manual... -
Page 12: Getting To Know Your Notebook Pc
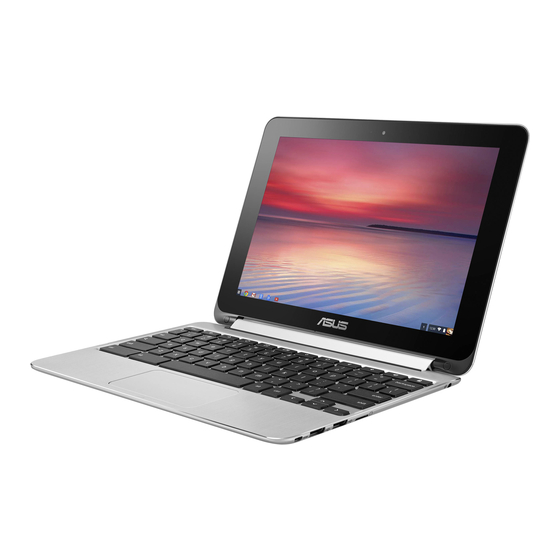
Getting to know your Notebook PC Top View NOTE: The keyboard's layout may vary per region or country. The Notebook may also vary in appearance depending on the Notebook PC model. Notebook PC E-Manual... - Page 13 Camera indicator The camera indicator lights up when the built-in camera is in use. Camera The built-in camera allows you to take pictures or record videos using your Notebook PC. 360º-adjustable touch screen panel Your Notebook PC’s touch screen panel can be adjusted all the way into a 360º...
- Page 14 Keyboard The keyboard provides QWERTY keys with a comfortable travel depth for typing. It also enables you to use the function keys, allows quick access to Chrome™ OS, and controls other multimedia functions. NOTE: The keyboard layout differs by model or region. Touchpad The touchpad allows the use of multi-gestures to navigate onscreen, providing an intuitive user experience.
-
Page 15: Bottom
Bottom NOTE: The bottom side may vary in appearance depending on model. WARNING! The bottom of the Notebook PC can get warm to hot while in use or while charging the battery pack. When working on your Notebook PC, DO NOT place it on surfaces that can block the vents. IMPORTANT! Battery time varies by usage and by the specifications for this Notebook PC. -
Page 16: Right Side
Right Side Micro HDMI port This port is for a micro HDMI (High-Definition Multimedia Interface) connector and is HDCP compliant for HD DVD, Blu- ray, and other protected content playback. USB 2.0 ports These USB (Universal Serial Bus) ports are compatible with USB 2.0 or USB 1.1 devices such as keyboards, pointing devices, flash disk drives, external HDDs, speakers, cameras, and printers. -
Page 17: Left Side
Left Side Power (DC) input port Insert the bundled power adapter into this port to charge the battery pack and supply power to your Notebook PC. WARNING! The adapter may become warm to hot while in use. Do not cover the adapter and keep it away from your body while it is connected to a power source. -
Page 18: Two-Color Battery Charge Indicator
Two-color battery charge indicator The two-color LED provides a visual indication of the battery’s charge status. Refer to the following table for details. Color Status Solid Green The Notebook PC is plugged to a power source and the battery power is between 95% and 100%. - Page 19 Volume button This button turns the volume up or down on your Notebook PC. Power button Press the power button to turn your Notebook PC on or off. You can also use the power button to put your Notebook PC to sleep or hibernate mode and wake it up from sleep or hibernate mode.
- Page 20 Notebook PC E-Manual...
-
Page 21: Chapter 2: Using Your Notebook Pc
Chapter 2: Using your Notebook PC Notebook PC E-Manual... -
Page 22: Getting Started
Getting started Charge your Notebook PC Plug the AC power adapter into a 100V~240V power source. Connect the DC power connector into your Notebook PC’s power (DC) input. Charge the Notebook PC for eight (8) hours before using it in battery mode for the first time. NOTE: The power adapter may vary in appearance, depending on your model and region. - Page 23 • The socket outlet must be easily accessible and near your Notebook • To disconnect your Notebook PC from its main power supply, unplug your Notebook PC from the power socket. WARNING! Read the following precautions for your Notebook PC’s battery. • Only ASUS-authorized technicians should remove the battery inside the device. • The battery used in this device may present a risk of fire or chemical burn if removed or disassembled. • Follow the warning labels for your personal safety. • Risk of explosion if battery is replaced by an incorrect type. •...
-
Page 24: Lift To Open The Display Panel
Lift to open the display panel Press the power button Notebook PC E-Manual... -
Page 25: Gestures For The Touch Screen Panel And Touchpad
Gestures for the touch screen panel and touchpad Gestures allow you to launch programs and access the settings of your Notebook PC. Refer to the following illustrations when using hand gestures on your touch screen panel and touchpad. NOTE: The following screenshots are for reference only. The touch screen panel’s appearance may vary depending on model. - Page 26 Tap and hold Slide to the right or left Tap and hold an item until Slide to the right or left to a menu appears (if available), go backward or forward and you may tap to select an through your web browsing action from the menu.
-
Page 27: Gestures For The Touchpad
Gestures for the touchpad Gestures allow you to launch programs and access the settings of your Notebook PC. Refer to the following illustrations when using hand gestures on your touchpad. Moving the pointer You can tap or click anywhere on the touchpad to activate its pointer, then slide your finger on the touchpad to move the pointer onscreen. -
Page 28: One-Finger Gestures
One-finger gestures Click/Tap Double tap/Double click Click/Tap on the touchpad to Double-tap/Double-click on launch and activate apps and an active screen to minimize or programs. maximize it on your display panel. Drag and drop Click/Tap on an active screen then slide the same finger without lifting it off the touchpad. -
Page 29: Two-Finger Gestures
Two-finger gestures Two-finger scroll (up/down) Two-finger scroll (left/right) Slide two fingers to scroll up or • Slide two fingers to scroll left down. or right. • While browing a web page, slide two fingers to the left or right to go back or move to the next web page visited. Drag and drop Two-finger click/tap Select an item then press and hold... -
Page 30: Three-Finger Gesture
Three-finger gesture Swipe left/Swipe right If you opened multiple tabs on your web browser, swipe three fingers left or right to switch between these tabs. Swipe down Swipe down to see an overview of all the screens currently opened on Chrome™. -
Page 31: Using The Keyboard
Using the keyboard The following shortcut keys on your Notebook PC’s keyboard can be used to launch programs and functions while using your Chrome™ OSoperating system. Goes back to the previous page Moves to the next page Reloads your current web page Activates full-screen mode for the currently opened screen. -
Page 32: Using The Touch Screen Panel As A Tablet
Using the touch screen panel as a tablet To use your Notebook PC’s touch screen panel as a tablet device, you may adjust it all the way into a 360º angle as shown below. Notebook PC mode adjust to a 360º angle tablet mode Notebook PC E-Manual... -
Page 33: Chapter 3: Working With Chrome™ Os
Chapter 3: Working with Chrome™ OS Notebook PC E-Manual... -
Page 34: Starting For The First Time
Starting for the first time When you start your Notebook PC for the first time, a series of screens appear to guide you in configuring your Chrome™ operating system. To start your Notebook PC: Press the power button on your Notebook PC. Wait for a few minutes until the setup screen appears. -
Page 35: Sign-In Area
Sign-in area After turning on your Notebook PC, the sign-in screen appears so you can choose to work on Chrome™ OS using either of the following options. IMPORTANT! Ensure you have Internet connection before choosing any of the following sign-in options. Browse as Guest This option is recommended if you simply want to browse online or let others use your Notebook PC. -
Page 36: User Account
User account Use this option to access apps and other programs offered in Chrome™ OS and save downloaded files, apps, and browser histories right into your user account. Signing in to your user account Select the user account you want to use then type your password on the enter password field. -
Page 37: Using Your Desktop
Using your desktop Apps list Start working on your Notebook PC by launching apps that can be accessed after signing in to your user account. These apps enable a variety of functions that can help you maximize the features of your Notebook PC. - Page 38 Adding apps on the shelf To add more apps on the shelf: Click Right-click on the app you want to add on the shelf then select Pin to shelf. Deleting apps from the shelf To delete any of the apps you currently have on the shelf: Right-click on the app you want to delete.
-
Page 39: Status Area
Status area At a glance, the status area displays an overview of your Google user account information. It also allows you to change the settings of your Notebook PC and your current user account. Status area Click to launch the status area Launching the status area To launch the status area, click anywhere on the status area box on the lower right corner of your desktop screen. - Page 40 Inside the status area User account This shows the Google user account currently used. Settings Click this option to access your Chrome™ OS settings. Sign out Click this option to sign out from the current user account. Network Click this option to view your current network connection, available network connections, and the network settings.
- Page 41 Volume Drag the volume slider to the right or to the left to turn the volume up or down on your Notebook PC. Battery status This shows the current battery life percentage of your Notebook PC. It also calculates the remaining time before your battery becomes discharged or fully-charged again.
-
Page 42: Connecting To The Internet
Connecting to the Internet Internet connection is a must for you to work on Chrome™ OS via your Notebook PC. Connect to the Internet wirelessly using a Wi-Fi connection. Enabling your Wi-Fi connection To enable your Wi-Fi connection: Launch the status area. Select No Network >... -
Page 43: Adding A Network Connection
Adding a network connection To add a new network connection to your list of networks: Launch the status area. Click Settings. Under Internet connection, select Add connection. Notebook PC E-Manual... - Page 44 Choose Add Wi-Fi... or Add private network... then input the necessary details to setup your new network connection. Click Connect to start connecting to the Internet using this new network connection. Notebook PC E-Manual...
-
Page 45: Chrome Browser
Chrome browser The Chrome browser is your main tool to go online. Aside from the Internet, this browser also displays most of the applications launched in the Chrome™ OS. To launch the Chrome browser, click on the shelf. Inside the Chrome browser Previous and next web page icons Press these icons to go back to the previous page or go to the next web page. - Page 46 The tab allows you to launch multiple sites or applications on your Chrome browser. Close Click this option to close the current tab. New tab Click this option to launch a new tab on your Chrome browser. Address bar The address bar displays the current file path or website address of the tab you are viewing.
-
Page 47: Printing Documents
Printing documents Using the print feature of your Notebook PC’s Chrome™ OS, you can save files in PDF format or create hard copies via Google Cloud Print. Saving PDF files To save your file in PDF format: Open the file you want to print then press On the left side of your screen, select the settings you want to modify such as the Pages, Layout, Margins, and Options. - Page 48 In the next screen that appears, select which location you want to save your file as a PDF then type in your preferred file name in the File name box. Click Save to create the pdf file into the location and exit. Notebook PC E-Manual...
-
Page 49: Google Cloud Print
Google Cloud Print If you need to create file printouts from your Notebook PC, you may do so using the Google Cloud Print feature. Google Cloud Print allows you to create hard copies using these key ingredients: cloud-based technology, an active Internet connection, and a cloud print enabled printer. - Page 50 Connecting a classic printer to Google Cloud Print Classic printers are printers that do not automatically support Google Cloud Print and needs to be manually setup for use with Google To use a classic printer with your Notebook PC, you need to connect the said printer to Google Cloud Print via a compatible Windows®...
- Page 51 To connect classic printers to Google Cloud print: Connect your preferred printer to your computer then turn on both devices. IMPORTANT! Ensure that your printer is already installed to your computer before proceeding with the next steps. Connect your computer to the Internet then open your Google Chrome browser.
- Page 52 Under Classic Printers click Add printers. Sign in using your Google account. In the next screen, click the printer that you want to connect to Google Cloud Print then click Add printers. The following screen appears when you have successfully set up your printer with Google Cloud Print.
- Page 53 Using Google Cloud Print to create printouts After successfully connecting your printer with Google Cloud Print, you can start printing files from your Notebook PC using the following procedures: Open the file you want to print then press Under the Destination option, click Change... From the list of registered printers, click the printer you want to use.
-
Page 54: Managing Your Files
Managing your files Manage and store files on your Notebook PC using the Files app and Google Drive app on the Chrome™ OS. Using these apps, you can store and edit various files such as documents, images, audios, and videos while working on your Notebook PC. - Page 55 File locations This column shows you the currently available file locations. This also shows all the external storage devices that are currently connected to your Notebook PC. Search Click on the search button to enable the search box. To use the search box, type the file name you want to locate then press Settings Click this button to customize the settings of your currently...
- Page 56 Accessing files stored on your Notebook PC The Downloads folder inside the Files app is where your Notebook PC stores all types of files downloaded online or saved on your Notebook To access these files, simply launch the Files app then select the Downloads folder and click the file you want to open.
-
Page 57: Creating A New Folder
Unmounting devices To ensure that your devices are safely disconnected from your Notebook PC, unmount them first via Files app using the following steps: Click > Select the device you want to unmount then click Once the unmounted device no longer appears on the file locations column, you may remove the device from your Notebook PC. -
Page 58: Google Drive
Google Drive Google Drive is a 15 GB cloud storage system you can access on your Notebook PC via your Google account. It allows you to sync and access your files across other devices such as mobile phones, tablet PCs, and other Notebook PCs. - Page 59 Moving your downloads to Google Drive By default, all the files downloaded on your Notebook PC are stored inside the Download app. You can move these files to your Google Drive using the following procedures: Click > Click Downloads then select the Google docs, files, or folders that you want to move then drag and drop these selected items into Google Drive.
- Page 60 Inside the Google Drive app Create Click this option to create a new file that is automatically saved in your Google Drive. Upload Click this option to upload files or folders from another location into your Google Drive. File locations This column shows you the currently available file locations inside your Google Drive.
- Page 61 Search box Type the name of the file, folder, or Google document that you want to find you want to locate inside Google Drive then press or click Search Click this button to start searching for the indicated file name. Details and activity Click this option to show the activity log of your Google Drive account and the details of your My Drive file location.
-
Page 62: Resetting Your Notebook Pc
Resetting your Notebook PC In case you need to reset your Chrome™ OS to its default settings, you may do so using Powerwash. Using Powerwash WARNING! • Backup all your data before performing this option. • All data stored locally in your Notebook PC are deleted when using Powerwash. However, your Google Drive accounts and other data synchronized with these accounts are not going to be affected. Launch the status area then select Settings. - Page 63 Click Powerwash. When prompted, click Restart. In the Powerwash your Chrome device window, click Reset to proceed. Notebook PC E-Manual...
-
Page 64: Turning Your Notebook Pc Off
Turning your Notebook PC off You can turn off your Notebook PC by doing either of the following procedures: Using Chrome™ OS Launch the status area. Click Using the power button on your Notebook PC You can also use this option to turn off your Notebook PC in case it becomes unresponsive. -
Page 65: Tips And Faqs
Tips and FAQs Notebook PC E-Manual... -
Page 66: Useful Tips For Your Notebook Pc
Useful tips for your Notebook PC To help you maximize the use of your Notebook PC, maintain its system performance, and ensure all your data are kept secured, here are some useful tips that you can follow: • Unless absolutely necessary, refrain from using force shutdown to turn off your Notebook PC. •... -
Page 67: Hardware Faqs
I turn on the Notebook PC. What should I do? Although these dots normally appear onscreen, they will not affect your system. If the incident continues and subsequently affects system performance, consult an authorized ASUS service center. My display panel has an uneven color and brightness. How... - Page 68 What should I do if my Notebook PC’s power adapter gets lost or my battery stops working? Contact your local ASUS service center for assistance. My Notebook PC cannot do keystrokes correctly because my cursor keeps on moving. What should I do? Make sure that nothing accidentally touches or presses on your touchpad while you type on the keyboard.
-
Page 69: Software Faqs
• Remove all connected USB devices then restart your Notebook PC. • If the problem still exists, your Notebook PC might have a memory storage problem. Contact your local ASUS service center for assistance. My Notebook PC boots slower than usual and my operating system lags. How can I fix this? Delete the applications you recently installed or were not included with your operating system package then restart your system. - Page 70 My Notebook PC does not boot up. How can I fix this? You can try doing any of the following suggestions: • Remove all connected devices to your Notebook PC then restart your system. • If the problem still exists, contact your local ASUS service center for assistance. Why can’t my Notebook PC wake up from sleep mode? • You need to press the power button to resume your last working state. • Your system might have completely used up its battery power. Connect the power adapter to your Notebook PC and connect to a power outlet then press the power button.
-
Page 71: Appendices
Appendices Notebook PC E-Manual... -
Page 72: Internal Modem Compliancy
Internal Modem Compliancy The Notebook PC with internal modem model complies with JATE (Japan), FCC (US, Canada, Korea, Taiwan), and CTR21. The internal modem has been approved in accordance with Council Decision 98/482/EC for pan-European single terminal connection to the public switched telephone network (PSTN). However due to differences between the individual PSTNs provided in different countries, the approval does not, of itself, give an unconditional assurance of successful operation on every PSTN network termination point. -
Page 73: Network Compatibility Declaration
Network Compatibility Declaration Statement to be made by the manufacturer to the Notified Body and the vendor: “This declaration will indicate the networks with which the equipment is designed to work and any notified networks with which the equipment may have inter- working difficulties. - Page 74 This table shows the countries currently under the CTR21 standard. Country Applied More Testing Austria Belgium Czech Republic Not Applicable Denmark Finland France Germany Greece Hungary Not Applicable Iceland Ireland Italy Still Pending Still Pending Israel Lichtenstein Luxemburg The Netherlands Norway Poland Not Applicable...
-
Page 75: Federal Communications Commission Interference Statement
This information was copied from CETECOM and is supplied without liability. For updates to this table, you may visit http://www.cetecom.de/technologies/ctr_21. html 1 National requirements will apply only if the equipment may use pulse dialling (manufacturers may state in the user guide that the equipment is only intended to support DTMF signalling, which would make any additional testing superfluous). -
Page 76: Fcc Radio Frequency (Rf) Exposure Caution Statement
• Connect the equipment into an outlet on a circuit different from that to which the receiver is connected. • Consult the dealer or an experienced radio/TV technician for help. WARNING! The use of a shielded-type power cord is required in order to meet FCC emission limits and to prevent interference to the nearby radio and television reception. It is essential that only the supplied power cord be used. Use only shielded cables to connect I/O devices to this equipment. -
Page 77: Declaration Of Conformity (R&Tte Directive 1999/5/Ec)
Declaration of Conformity (R&TTE directive 1999/5/EC) The following items were completed and are considered relevant and sufficient: • Essential requirements as in [Article 3] • Protection requirements for health and safety as in [Article 3.1a] • Testing for electric safety according to [EN 60950] • Protection requirements for electromagnetic compatibility in [Article 3.1b] • Testing for electromagnetic compatibility in [EN 301 489-1] & [EN 301 489-17] • Effective use of the radio spectrum as in [Article 3.2] • Radio test suites according to [EN 300 328-2] CE Marking CE marking for devices without wireless LAN/Bluetooth The shipped version of this device complies with the requirements of the EEC directives 2004/108/EC “Electromagnetic compatibility”... -
Page 78: Ic Radiation Exposure Statement For Canada
IC Radiation Exposure Statement for Canada This equipment complies with IC radiation exposure limits set forth for an uncontrolled environment. To maintain compliance with IC RF exposure compliance requirements, please avoid direct contact to the transmitting antenna during transmitting. End users must follow the specific operating instructions for satisfying RF exposure compliance. -
Page 79: Déclaration D'industrie Canada Relative À L'exposition Aux Ondes Radio
Déclaration d’Industrie Canada relative à l’ exposition aux ondes radio Cet appareil est conforme aux limites d’exposition aux radiations d’Industrie Canada définies pour un environnement non-contrôlé. Pour maintenir la conformité avec les exigences d’exposition RF d’IC, veuillez éviter tout contact direct avec l’antenne pendant l’émission. Les utilisateurs finaux doivent suivre les instructions de fonctionnement spécifiques pour satisfaire la conformité... -
Page 80: Ic Warning Statement
IC Warning Statement The device could automatically discontinue transmission in case of absence of information to transmit, or operational failure. Note that this is not intended to prohibit transmission of control or signaling information or the use of repetitive codes where required by the technology. The device for the band 5150-5250 MHz is only for indoor usage to reduce potential for harmful interference to co-channel mobile satellite systems;... -
Page 81: Wireless Operation Channel For Different Domains
Wireless Operation Channel for Different Domains N. America 2.412-2.462 GHz Ch01 through CH11 Japan 2.412-2.484 GHz Ch01 through Ch14 Europe ETSI 2.412-2.472 GHz Ch01 through Ch13 France Restricted Wireless Frequency Bands Some areas of France have a restricted frequency band. The worst case maximum authorized power indoors are: •... - Page 82 Departments in which the use of the 2400–2483.5 MHz band is permitted with an EIRP of less than 100mW indoors and less than 10mW outdoors: 01 Ain 02 Aisne 03 Allier 05 Hautes Alpes 08 Ardennes 09 Ariège 11 Aude 12 Aveyron 16 Charente 24 Dordogne 25 Doubs 26 Drôme 32 Gers 36 Indre 37 Indre et Loire 41 Loir et Cher 45 Loiret...
-
Page 83: Ul Safety Notices
UL Safety Notices Required for UL 1459 covering telecommunications (telephone) equipment intended to be electrically connected to a telecommunication network that has an operating voltage to ground that does not exceed 200V peak, 300V peak-to-peak, and 105V rms, and installed or used in accordance with the National Electrical Code (NFPA 70). -
Page 84: Tv Notices
REACH Complying with the REACH (Registration, Evaluation, Authorization, and Restriction of Chemicals) regulatory framework, we publish the chemical substances in our products at ASUS REACH website at http://csr.asus.com/english/ REACH.htm. Macrovision Corporation Product Notice This product incorporates copyright protection technology that is protected by method claims of certain U.S.A. -
Page 85: Nordic Lithium Cautions (For Lithium-Ion Batteries)
Nordic Lithium Cautions (for lithium-ion batteries) CAUTION! Danger of explosion if battery is incorrectly replaced. Replace only with the same or equivalent type recommended by the manufacturer. Dispose of used batteries according to the manufacturer’s instructions. (English) ATTENZIONE! Rischio di esplosione della batteria se sostituita in modo errato. Sostituire la batteria con un una di tipo uguale o equivalente consigliata dalla fabbrica. -
Page 86: Ctr 21 Approval (For Notebook Pc With Built-In Modem)
CTR 21 Approval (for Notebook PC with built-in Modem) Danish Dutch English Finnish French Notebook PC E-Manual... - Page 87 German Greek Italian Portuguese Spanish Swedish Notebook PC E-Manual...
-
Page 88: Energy Star Complied Product
Declaration ASUS follows the green design concept to design and manufacture our products, and makes sure that each stage of the product life cycle of ASUS product is in line with global environmental regulations. In addition, ASUS disclose the relevant information based on regulation requirements. -
Page 89: Asus Recycling/Takeback Services
ASUS Recycling/Takeback Services ASUS recycling and takeback programs come from our commitment to the highest standards for protecting our environment. We believe in providing solutions for you to be able to responsibly recycle our products, batteries, other components as well as the packaging materials. Please go to http://csr.asus.com/ english/Takeback.htm for detailed recycling information in different regions. - Page 90 EC Declaration of Conformity We, the undersigned, Manufacturer: ASUSTeK COMPUTER INC. Address: 4F, No. 150, LI-TE Rd., PEITOU, TAIPEI 112, TAIWAN Authorized representative in Europe: ASUS COMPUTER GmbH Address, City: HARKORT STR. 21-23, 40880 RATINGEN Country: GERMANY declare the following apparatus: Notebook PC...