Sign In
Upload
Manuals
Brands
Cisco Manuals
Wireless Access Point
Aironet 1100 Series
Cisco Aironet 1100 Series Manuals
Manuals and User Guides for Cisco Aironet 1100 Series. We have
3
Cisco Aironet 1100 Series manuals available for free PDF download: Installation And Configuration Manual, Hardware Installation Manual
Cisco Aironet 1100 Series Installation And Configuration Manual (320 pages)
Brand:
Cisco
| Category:
Wireless Access Point
| Size: 4.81 MB
Table of Contents
Table of Contents
3
Preface
15
Audience
15
Purpose
15
Organization
15
Conventions
17
Related Publications
19
Obtaining Documentation
19
World Wide Web
19
Documentation CD-ROM
19
Ordering Documentation
20
Documentation Feedback
20
Obtaining Technical Assistance
20
Cisco.com
20
Technical Assistance Center
21
Cisco TAC Web Site
21
Cisco TAC Escalation Center
22
Chapter 1 Overview
23
Features
24
Hardware Features
24
Ethernet Port
24
Single Radio Operation
24
Power Sources
25
Status Indicators
25
Anti-Theft Features
26
UL 2043 Certification
26
Software Features
26
Management Options
27
Roaming Client Devices
27
Network Configuration Examples
28
Root Unit on a Wired LAN
28
Repeater Unit that Extends Wireless Range
29
Central Unit in an All-Wireless Network
30
Installing the Access Point
31
Chapter 2 Installing the Access Point
32
Safety Information
32
FCC Safety Compliance Statement
32
General Safety Guidelines
32
Warnings
32
Unpacking the Access Point
33
Package Contents
33
Basic Installation Guidelines
33
Before Beginning the Installation
34
Installation Summary
34
Connecting the Ethernet and Power Cables
35
Connecting to an Ethernet Network with an Inline Power Source
36
Connecting to an Ethernet Network with Local Power
36
Powering up the Access Point
37
Chapter 3 Configuring the Access Point for the First Time
37
Before You Start
40
Resetting the Access Point to Default Settings
40
Obtaining and Assigning an IP Address
41
Connecting to the Access Point Locally
41
Assigning Basic Settings
42
Default Settings on the Express Setup Page
45
Protecting Your Wireless LAN
46
Using the IP Setup Utility
46
Obtaining and Installing IPSU
46
Using IPSU to Find the Access Point's IP Address
47
Using IPSU to Set the Access Point's IP Address and SSID
48
Assigning an IP Address Using the CLI
49
Using a Telnet Session to Access the CLI
49
Chapter 4 Using the Web-Browser Interface
51
Using the Web-Browser Interface for the First Time
52
Using the Management Pages in the Web-Browser Interface
52
Using Action Buttons
53
Character Restrictions in Entry Fields
55
Using Online Help
55
CHAPTER 5 Using the Command-Line Interface
57
IOS Command Modes
58
C H a P T E R 5 Using the Command-Line Interface
59
Getting Help
59
Abbreviating Commands
59
Using no and Default Forms of Commands
59
Understanding CLI Messages
60
Using Command History
60
Changing the Command History Buffer Size
60
Recalling Commands
61
Disabling the Command History Feature
61
Using Editing Features
61
Enabling and Disabling Editing Features
61
Editing Commands through Keystrokes
62
Editing Command Lines that Wrap
63
Searching and Filtering Output of Show and more Commands
64
Accessing the CLI
64
Opening the CLI with Telnet
64
Opening the CLI with Secure Shell
65
Administering the Access Point
67
Chapter 6 Administering the Access Point
68
Preventing Unauthorized Access to Your Access Point
68
Protecting Access to Privileged EXEC Commands
68
Setting or Changing a Static Enable Password
69
Protecting Enable and Enable Secret Passwords with Encryption
70
Protecting Access to Privileged EXEC Commands
70
Configuring Username and Password Pairs
71
Configuring Multiple Privilege Levels
72
Setting the Privilege Level for a Command
72
Logging into and Exiting a Privilege Level
73
Controlling Access Point Access with RADIUS
73
Default RADIUS Configuration
74
Configuring RADIUS Login Authentication
74
Defining AAA Server Groups
75
Configuring RADIUS Authorization for User Privileged Access and Network Services
77
Displaying the RADIUS Configuration
78
Configuring the Access Point for Local Authentication and Authorization
78
Configuring the Access Point for Secure Shell
79
Understanding SSH
79
Configuring SSH
80
Managing the System Time and Date
80
Understanding the System Clock
80
Understanding Network Time Protocol
81
Configuring NTP
82
Configuring NTP Authentication
83
Default NTP Configuration
83
Configuring NTP Associations
85
Configuring NTP Broadcast Service
86
Configuring NTP Access Restrictions
87
Configuring the Source IP Address for NTP Packets
89
Displaying the NTP Configuration
90
Configuring Time and Date Manually
90
Displaying the Time and Date Configuration
91
Setting the System Clock
91
Configuring the Time Zone
92
Configuring Summer Time (Daylight Saving Time)
93
Configuring a System Name and Prompt
95
Configuring a System Name
95
Default System Name and Prompt Configuration
95
Default DNS Configuration
96
Setting up DNS
96
Understanding DNS
96
Displaying the DNS Configuration
97
Creating a Banner
97
Configuring a Message-Of-The-Day Login Banner
98
Default Banner Configuration
98
Configuring a Login Banner
99
CHAPTER 7 Configuring Radio Settings
101
Disabling and Enabling the Radio Interface
102
Configuring the Role in Radio Network
102
Configuring Radio Data Rates
103
Configuring Radio Transmit Power
105
Limiting the Power Level for Associated Client Devices
105
Configuring Radio Channel Settings
106
Enabling and Disabling World-Mode
107
Disabling and Enabling Short Radio Preambles
107
Configuring Transmit and Receive Antennas
108
Disabling and Enabling Aironet Extensions
109
Configuring the Ethernet Encapsulation Transformation Method
110
Enabling and Disabling Reliable Multicast to Workgroup Bridges
110
Enabling and Disabling Public Secure Packet Forwarding
111
Configuring the Beacon Period and the DTIM
112
Configure RTS Threshold and Retries
112
Configuring the Maximum Data Retries
113
Configuring the Fragmentation Threshold
113
Chapter 8 Configuring Multiple Ssids
115
Understanding Multiple Ssids
116
Configuring Multiple Ssids
116
Default SSID Configuration
117
Creating an SSID
117
Using a RADIUS Server to Restrict Ssids
118
Chapter 9 Configuring WEP and WEP Features
121
Understanding WEP
122
Configuring WEP and WEP Features
122
Creating WEP Keys
122
Creating WEP Keys
123
Enabling and Disabling WEP and Enabling TKIP and MIC
123
Enabling and Disabling Broadcast Key Rotation
124
Chapter 10 Configuring Authentication Types
125
Understanding Authentication Types
126
Open Authentication to the Access Point
126
Shared Key Authentication to the Access Point
126
EAP Authentication to the Network
127
MAC Address Authentication to the Network
129
Combining MAC-Based, EAP, and Open Authentication
129
Configuring Authentication Types
130
Default Authentication Settings
130
Assigning Authentication Types to an SSID
130
Configuring Authentication Holdoffs, Timeouts, and Intervals
132
Matching Access Point and Client Device Authentication Types
133
Chapter 11 Configuring RADIUS Servers
137
Understanding RADIUS
138
RADIUS Operation
138
Configuring RADIUS
140
Default RADIUS Configuration
140
Identifying the RADIUS Server Host
140
Configuring RADIUS Login Authentication
143
Defining AAA Server Groups
145
Configuring RADIUS Authorization for User Privileged Access and Network Services
147
Starting RADIUS Accounting
148
Configuring Settings for All RADIUS Servers
149
Configuring the Access Point to Use Vendor-Specific RADIUS Attributes
149
Configuring the Access Point for Vendor-Proprietary RADIUS Server Communication
150
Displaying the RADIUS Configuration
151
Chapter 12 Configuring Vlans
153
Understanding Vlans
154
Related Documents
155
Incorporating Wireless Devices into Vlans
156
Configuring Vlans
156
Configuring a VLAN
156
Using a RADIUS Server to Assign Users to Vlans
158
Viewing Vlans Configured on the Access Point
158
VLAN Configuration Example
159
Chapter 13 Configuring Qos
163
Understanding Qos for Wireless Lans
164
Qos for Wireless Lans Versus Qos on Wired Lans
164
Impact of Qos on a Wireless LAN
164
Precedence of Qos Settings
165
Configuring Qos
165
Configuration Guidelines
166
Configuring Qos Using the Web-Browser Interface
166
Adjusting Radio Traffic Class Definitions
170
Qos Configuration Examples
172
Prioritizing for Voice Traffic
172
Prioritizing for Video Traffic
174
Chapter 14 Configuring Proxy Mobile IP
175
Understanding Proxy Mobile IP
176
Overview
176
Components of a Proxy Mobile IP Network
176
How Proxy Mobile IP Works
177
Agent Discovery
177
Subnet Map Exchange
178
Registration
179
Tunneling
179
Proxy Mobile IP Security
180
Configuring Proxy Mobile IP
180
Configuration Guidelines
180
Configuring Proxy Mobile IP on Your Wired LAN
181
Configuring Proxy Mobile IP on Your Access Point
181
Chapter 15 Configuring Filters
183
Understanding Filters
184
Configuring Filters Using the CLI
184
Configuring Filters Using the Web-Browser Interface
184
Configuring and Enabling MAC Address Filters
184
Creating a MAC Address Filter
185
Configuring and Enabling IP Filters
187
Creating an IP Filter
188
Configuring and Enabling Ethertype Filters
190
Creating an Ethertype Filter
191
Chapter 16 Configuring CDP
193
Understanding CDP
194
Configuring CDP
194
Default CDP Configuration
194
Configuring the CDP Characteristics
194
Disabling and Enabling CDP
195
Disabling and Enabling CDP on an Interface
196
Monitoring and Maintaining CDP
196
Chapter 17 Configuring SNMP
201
Understanding SNMP
202
SNMP Versions
202
SNMP Manager Functions
203
SNMP Agent Functions
203
SNMP Community Strings
203
Configuring SNMP
203
Default SNMP Configuration
204
Configuring Community Strings
205
Default SNMP Configuration
205
Disabling the SNMP Agent
205
Configuring Trap Managers and Enabling Traps
207
Setting the Agent Contact and Location Information
209
SNMP Examples
209
Using the Snmp-Server View Command
209
Displaying SNMP Status
210
CHAPTER 18 Configuring Repeater and Standby Access Points
211
Understanding Repeater Access Points
212
Configuring a Repeater Access Point
213
Default Configuration
214
Guidelines for Repeaters
214
Setting up a Repeater
214
Verifying Repeater Operation
215
Setting up a Repeater as a LEAP Client
216
Understanding Hot Standby
217
Configuring a Hot Standby Access Point
217
Chapter 19 Managing Firmware and Configurations
219
Working with the Flash File System
220
Displaying Available File Systems
220
Setting the Default File System
221
Displaying Information about Files on a File System
221
Changing Directories and Displaying the Working Directory
222
Creating and Removing Directories
222
Copying Files
223
Deleting Files
223
Creating, Displaying, and Extracting Tar Files
224
Creating a Tar File
224
Displaying the Contents of a Tar File
224
Extracting a Tar File
225
Displaying the Contents of a File
226
Working with Configuration Files
226
Guidelines for Creating and Using Configuration Files
227
Configuration File Types and Location
227
Creating a Configuration File by Using a Text Editor
228
Copying Configuration Files by Using TFTP
228
Downloading the Configuration File by Using TFTP
228
Preparing to Download or Upload a Configuration File by Using TFTP
228
Uploading the Configuration File by Using TFTP
228
Copying Configuration Files by Using FTP
230
Downloading a Configuration File by Using FTP
230
Preparing to Download or Upload a Configuration File by Using FTP
230
Uploading a Configuration File by Using FTP
232
Copying Configuration Files by Using RCP
233
Ap# Configure Terminal
233
Ap(Config)# End
233
Ap(Config)# Ip Ftp Password Mypass
233
Downloading a Configuration File by Using RCP
233
Preparing to Download or Upload a Configuration File by Using RCP
233
Uploading a Configuration File by Using RCP
233
Configure Using Host2-Confg from 172.16.101.101?[Confirm]
235
Loading 1112 Byte File Host2-Confg:![Ok] [OK] Ap
235
Name of Configuration File[Rtr2-Confg]? Host2-Confg
235
Clearing Configuration Information
236
Deleting a Stored Configuration File
236
Working with Software Images
236
Image Location on the Access Point
237
Tar File Format of Images on a Server or Cisco.com
237
Copying Image Files by Using TFTP
238
Downloading an Image File by Using TFTP
238
Preparing to Download or Upload an Image File by Using TFTP
238
Uploading an Image File by Using TFTP
238
Copying Image Files by Using FTP
241
Downloading an Image File by Using FTP
241
Preparing to Download or Upload an Image File by Using FTP
241
Uploading an Image File by Using FTP
241
Copying Image Files by Using RCP
245
Downloading an Image File by Using RCP
245
Preparing to Download or Upload an Image File by Using RCP
245
Uploading an Image File by Using RCP
245
Reloading the Image Using the Web Browser Interface
250
Browser HTTP Interface
250
Browser TFTP Interface
251
Command
239
Step 3 Configure Terminal
242
Step 6 End
242
Ftp:[[//Username[:Password]@Location]/Directory]
243
Verify that the FTP Server Is Properly Configured by Referring to the "Preparing to Download or Upload a Configuration File by Using FTP" Section on Page
244
Log into the Access Point through a Telnet Session
244
Enter Global Configuration Mode
244
(Optional) Change the Default Remote Username
244
(Optional) Change the Default Password
244
Return to Privileged EXEC Mode
245
Chapter 20 Configuring System Message Logging
253
Configuring System Message Logging
254
System Log Message Format
254
Default System Message Logging Configuration
255
Disabling and Enabling Message Logging
256
Setting the Message Display Destination Device
257
Enabling and Disabling Timestamps on Log Messages
258
Enabling and Disabling Sequence Numbers in Log Messages
258
Defining the Message Severity Level
259
Limiting Syslog Messages Sent to the History Table and to SNMP
260
Setting a Logging Rate Limit
261
Configuring UNIX Syslog Servers
261
Configuring the UNIX System Logging Facility
262
Logging Messages to a UNIX Syslog Daemon
262
Displaying the Logging Configuration
263
Chapter 21 Troubleshooting
265
Checking the Top Panel Indicators
266
Checking Basic Settings
268
Ssid
268
Resetting to the Default Configuration
268
Using the MODE Button
269
Using the Web Browser Interface
269
Security Settings
268
WEP Keys
268
Reloading the Access Point Image
270
Using the MODE Button
270
Browser HTTP Interface
271
Browser TFTP Interface
271
Web Browser Interface
271
Obtaining the Access Point Image File
272
Obtaining the TFTP Server Software
272
Translated Safety Warnings
273
Dipole Antenna Installation Warning
274
Explosive Device Proximity Warning
275
Lightning Activity Warning
276
Installation Warning
277
Circuit Breaker (15A) Warning
277
Appendix
279
Declarations of Conformity and Regulatory Information
279
Manufacturers Federal Communication Commission Declaration of Conformity Statement
280
Department of Communications-Canada
280
Canadian Compliance Statement
280
European Community, Switzerland, Norway, Iceland, and Liechtenstein
281
Declaration of Conformity with Regard to the R&TTE Directive 1999/5/EC
281
Declaration of Conformity for RF Exposure
282
Guidelines for Operating Cisco Aironet Access Points and Bridges in Japan
283
Japanese Translation
283
English Translation
283
Appendix
285
Channels and Antenna Settings
285
Channels
286
Maximum Power Levels
287
Appendix
289
Mounting Instructions
289
Overview
290
Mounting on a Horizontal or Vertical Surface
291
Mounting on a Suspended Ceiling
292
Using the Security Hasp Adapter
294
Mounting on a Cubical Wall Partition
295
Using the Desktop Holster
296
Using the Cable Lock Feature
297
Appendix
299
Protocol Filters
299
Appendix
305
Supported Mibs
305
MIB List
305
Using FTP to Access the MIB Files
306
Appendix
307
Access Point Specifications
307
Appendix
309
Error and Event Messages
309
I N D E X
313
Advertisement
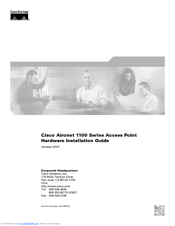
Cisco Aironet 1100 Series Hardware Installation Manual (122 pages)
Hardware Installation Guide
Brand:
Cisco
| Category:
Wireless Access Point
| Size: 2.68 MB
Table of Contents
Chapter 1 Overview
17
Hardware Features
18
Ethernet Port
18
Table of Contents
3
Audience
9
Organization
9
Purpose
9
Conventions
10
Obtaining Documentation
12
Cisco.com
12
Documentation CD-ROM
13
Ordering Documentation
13
Documentation Feedback
13
Related Publications
12
Obtaining Technical Assistance
13
Cisco TAC Website
14
Opening a TAC Case
14
TAC Case Priority Definitions
14
Obtaining Additional Publications and Information
15
Leds
19
Power Sources
19
Anti-Theft Features
20
UL 2043 Certification
20
Network Configuration Examples
21
Root Unit on a Wired LAN
21
Repeater Unit that Extends Wireless Range
22
Central Unit in an All-Wireless Network
23
Installing the Access Point
26
Safety Information
26
FCC Safety Compliance Statement
26
General Safety Guidelines
26
Warnings
26
Unpacking the Access Point
27
Package Contents
27
Basic Installation Guidelines
27
Before Beginning the Installation
28
Installation Summary
28
Connecting the Ethernet and Power Cables
29
Connecting to an Ethernet Network with an Inline Power Source
30
Connecting to an Ethernet Network with Local Power
30
Powering up the Access Point
31
Chapter 3 Configuring the Access Point for the First Time
31
Before You Start
34
Resetting the Access Point to Default Settings
34
Obtaining and Assigning an IP Address
35
Connecting to the Access Point Locally
35
Assigning Basic Settings
36
Default Settings on the Express Setup Page
39
Protecting Your Wireless LAN
40
Using the IP Setup Utility
40
Obtaining and Installing IPSU
40
Using IPSU to Find the Access Point's IP Address
41
Using IPSU to Set the Access Point's IP Address and SSID
42
Assigning an IP Address Using the CLI
43
Using a Telnet Session to Access the CLI
43
Chapter 4 Using the Web-Browser Interface
45
Using the Web-Browser Interface for the First Time
46
Using the Management Pages in the Web-Browser Interface
46
Using Action Buttons
47
Character Restrictions in Entry Fields
49
Using Online Help
49
CHAPTER 5 Using the Command-Line Interface
52
IOS Command Modes
52
Getting Help
53
Abbreviating Commands
53
Using no and Default Forms of Commands
53
Understanding CLI Messages
54
Using Command History
54
Changing the Command History Buffer Size
55
Recalling Commands
55
Disabling the Command History Feature
55
Using Editing Features
56
Enabling and Disabling Editing Features
56
Editing Commands through Keystrokes
56
Editing Command Lines that Wrap
57
Searching and Filtering Output of Show and more Commands
58
Accessing the CLI
59
Opening the CLI with Telnet
59
Opening the CLI with Secure Shell
59
Overview
62
Mounting Instructions
63
Mounting on a Horizontal or Vertical Surface
63
Mounting on a Suspended Ceiling
64
Mounting above a Suspended Ceiling
66
Using the Security Hasp Adapter
67
Mounting on a Cubical Wall Partition
68
Using the Desktop Holster
69
Using the Cable Lock Feature
71
Unpacking the Radio
73
Chapter 7 2.4-Ghz Radio Upgrade
74
Upgrade Overview
74
Unpacking the Radio
74
Removing the Back Cover
75
Removing a 2.4-Ghz Radio
76
Installing a 2.4-Ghz Radio
77
Replacing the Back Cover
79
Replacing the Back Cover
80
Finding the Software Version
81
Troubleshooting
84
Checking the Top Panel Leds
84
Checking Basic Settings
86
Ssid
86
WEP Keys
86
Security Settings
86
Resetting to the Default Configuration
86
Using the MODE Button
87
Using the Web Browser Interface
87
Reloading the Access Point Image
88
Using the MODE Button
88
Web Browser Interface
89
Browser HTTP Interface
89
Browser TFTP Interface
89
Obtaining the Access Point Image File
90
Obtaining the TFTP Server Software
90
Appendix
91
Translated Safety Warnings
91
Dipole Antenna Installation Warning
92
Explosive Device Proximity Warning
93
Lightning Activity Warning
94
Installation Warning
95
Circuit Breaker (15A) Warning
95
Appendix
97
Declarations of Conformity and Regulatory Information
97
Manufacturers Federal Communication Commission Declaration of Conformity Statement
98
Department of Communications-Canada
99
Canadian Compliance Statement
99
European Community, Switzerland, Norway, Iceland, and Liechtenstein
99
Declaration of Conformity with Regard to the R&TTE Directive 1999/5/EC
99
Declaration of Conformity for RF Exposure
101
Guidelines for Operating Cisco Aironet Access Points and Bridges in Japan
101
Japanese Translation
101
English Translation
101
Administrative Rules for Cisco Aironet Access Points in Taiwan
102
All Access Points
102
Chinese Translation
102
English Translation
102
Appendix
105
Access Point Specifications
105
Appendix
109
Channels and Antenna Settings
109
Channels
109
Maximum Power Levels
109
IEEE 802.11B (2.4-Ghz Band
110
IEEE 802.11G (2.4-Ghz Band
111
G L O S S a R y
113
I N D E X
119
Cisco Aironet 1100 Series Hardware Installation Manual (116 pages)
Hardware Installation Guide
Brand:
Cisco
| Category:
Wireless Access Point
| Size: 5.33 MB
Table of Contents
Table of Contents
3
Audience
7
Organization
7
Preface
7
Purpose
7
Conventions
8
Obtaining Documentation
10
Cisco.com
11
Product Documentation DVD
11
Ordering Documentation
11
Related Publications
10
Cisco Product Security Overview
11
Reporting Security Problems in Cisco Products
12
Documentation Feedback
11
Product Alerts and Field Notices
12
Obtaining Technical Assistance
13
Cisco Support Website
13
Locating the Product Serial Number
14
Submitting a Service Request
15
Definitions of Service Request Severity
15
Obtaining Additional Publications and Information
15
Chapter 1 Overview
17
Product Terminology
17
Autonomous Access Points
17
Lightweight Access Points
17
Hardware Features
19
Single Radio Operation
19
Ethernet Port
19
Leds
20
Power Sources
20
Anti-Theft Features
21
Network Examples with Autonomous Access Points
21
Root Unit on a Wired LAN
22
Repeater Unit that Extends Wireless Range
23
Central Unit in an All-Wireless Network
24
Workgroup Bridge Configuration
24
Network Example with Lightweight Access Points
25
UL 2043 Certification
21
CHAPTER 2 Installing the Access Point
27
Safety Information
28
FCC Safety Compliance Statement
28
General Safety Guidelines
28
Warnings
28
Unpacking the Access Point
29
Package Contents
29
Basic Installation Guidelines
29
Access Point Layout and Connectors
30
Leds
30
Controller Discovery Process for Lightweight Access Points
31
Deploying the Access Points on the Wireless Network
31
Connecting the Ethernet and Power Cables
33
Connecting to an Ethernet Network with an Inline Power Source
34
Connecting to an Ethernet Network with Local Power
34
Powering up the Access Point
35
CHAPTER 3 Mounting Instructions
37
Overview
38
Mounting on a Horizontal or Vertical Surface
39
Mounting on a Suspended Ceiling
40
Mounting above a Suspended Ceiling
42
Using the Security Hasp Adapter
43
Mounting on a Cubical Wall Partition
44
Using the Desktop Holster
45
Using the Cable Lock Feature
47
Upgrade Overview
49
Unpacking the Radio
49
Chapter 4 2.4-Ghz Radio Upgrade for Autonomous Access Points
50
Upgrade Overview
50
Unpacking the Radio
50
Removing the Back Cover
51
Removing a 2.4-Ghz Radio
52
Installing a 2.4-Ghz Radio
53
Replacing the Back Cover
55
Replacing the Back Cover
56
Finding the Software Version
57
CHAPTER 5 Troubleshooting Autonomous Access Points
60
Checking the Autonomous Access Point Leds
60
Checking Basic Settings
62
Default IP Address Behavior
62
Default SSID and Radio Behavior
62
Enabling the Radio Interfaces
63
Ssid
63
Security Settings
63
WEP Keys
63
Running the Carrier Busy Test
64
Resetting to the Default Configuration
65
Using the MODE Button
66
Using the Web Browser Interface
66
Running the Ping or Link Test
65
Reloading the Access Point Image
67
Using the MODE Button
67
Browser HTTP Interface
68
Browser TFTP Interface
68
Web Browser Interface
68
Obtaining the Access Point Image File
69
Obtaining the TFTP Server Software
69
CHAPTER 6 Troubleshooting Lightweight Access Points
72
Guidelines for Using 1100 Series Lightweight Access Points
72
Using DHCP Option 43
72
Checking the Lightweight Access Point Leds
73
Returning the Access Point to Autonomous Mode
75
Using a Controller to Return the Access Point to Autonomous Mode
75
Using the MODE Button to Return the Access Point to Autonomous Mode
75
MODE Button Setting
76
Obtaining the Autonomous Access Point Image File
76
Obtaining the TFTP Server Software
77
Appendix
79
Translated Safety Warnings
79
Appendix
81
Declarations of Conformity and Regulatory Information
81
Manufacturers Federal Communication Commission Declaration of Conformity Statement
82
Industry-Canada
83
VCCI Statement for Japan
83
Canadian Compliance Statement
83
European Community, Switzerland, Norway, Iceland, and Liechtenstein
84
Declaration of Conformity with Regard to the R&TTE Directive 1999/5/EC
84
Declaration of Conformity for RF Exposure
86
Guidelines for Operating Cisco Aironet Access Points and Bridges in Japan
86
Japanese Translation
86
English Translation
87
Administrative Rules for Cisco Aironet Access Points in Taiwan
87
All Access Points
87
Chinese Translation
87
English Translation
88
Operation of Cisco Aironet Access Points in Brazil
88
Access Point Models
88
Regulatory Information
88
English Translation
89
Portuguese Translation
89
Declaration of Conformity Statements
89
Declaration of Conformity Statements for European Union Countries
89
Appendix
95
Access Point Specifications
95
Appendix
99
Channels and Maximum Power Levels
99
Appendix
101
Priming Lightweight Access Points Prior to Deployment
101
Appendix
104
Configuring DHCP Option 43 for Lightweight Access Points
104
Overview
105
Configuring Option 43 for 1000 Series Access Points
106
Configuring Option 43 for 1100, 1130, 1200, 1240, and 1300 Series Access Points
107
G L O S S a R y
109
I N D E X
115
Advertisement
Advertisement
Related Products
Cisco Aironet 1550 Series
Cisco Aironet 1700
Cisco Aironet 1700 Series
Cisco Aironet 1530 Series, 1532
Cisco Aironet 1130 Series
Cisco Aironet 1240 Series
Cisco Aironet 1530 Series
Cisco Aironet 1830 Series
Cisco Aironet 1540 Series
Cisco aironet 3800 series
Cisco Categories
Switch
IP Phone
Network Router
Wireless Access Point
Conference System
More Cisco Manuals
Login
Sign In
OR
Sign in with Facebook
Sign in with Google
Upload manual
Upload from disk
Upload from URL