Sign In
Upload
Manuals
Brands
Sony Manuals
VCR
SL-HF950
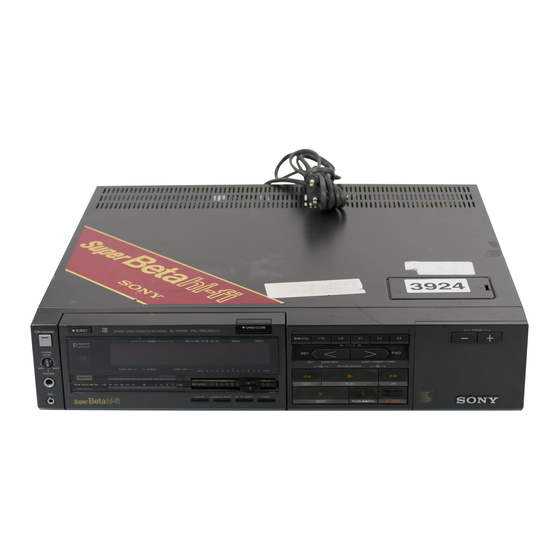
Sony SL-HF950 Manuals
Manuals and User Guides for Sony SL-HF950. We have
2
Sony SL-HF950 manuals available for free PDF download: Service Manual, Operating Instructions Manual
Sony SL-HF950 Service Manual (458 pages)
super Beta hi-fi
Brand:
Sony
| Category:
VCR
| Size: 19.04 MB
Table of Contents
Safety Check-Out
3
Adaptation to the Local TV System
3
Before Connecting the Unit to the Mains
3
Difference List
4
TA-37(Ub)(Tuner, Audio) Printed Wiring Board
5
TA-37(Ub)(Tuner, Audio) Schematic Diagram
8
Electrical Parts List
12
Specifications
17
Table of Contents
20
General
21
Precautions
21
Removal of the Transit Screws
22
Technical Information
22
What Is Beta Hi-Fi PAL Recording?
22
Super Beta Standard Mode
23
Super Beta PRO Mode
23
Frequency Response
23
Chrominance Signal-To-Noise Ratio
23
Location and Function of Controls
24
Inside the Front Panel
26
Rear
28
On-Screen Display
29
When a TV Programme Is Selected
29
When the Tape Is in Operation
29
Display for Timer
30
When the Quick Timer Is Activated
30
Basic Operations
31
Cassette Insertion
31
To Eject the Cassette
31
To Open/Close the Cassette Compartment
31
TV Programme Recording (Beta Hi-Fi Recording)
32
To Record
32
Check before Recording
32
Super Beta Selector
32
To Keep a Recorded Programme from Being Accidentally Erased
33
Recording a Stereo or Bilingual TV Programme
33
Playback
34
Selection of Playback/Recording Monitor Sound
34
Various Playback Modes
35
Picture and Sound Adjustment
35
Picture Search
35
Skip Scan
35
Auto Play
36
Variable Speed Playback
36
Frame-By-Frame Playback
36
Picture Adjustment for Variable Speed Playback
36
Use of the Time Counter
37
To Index the Tape Contents
37
"GO to ZERO" Function
37
Index Function
38
To Mark Index Signals
38
Index Scan
39
Index Search
39
To Erase Index Signals
40
Timer-Activated Recording
41
To Set the Timer
41
Week and Day Indicators
41
While Setting the Timer
42
Before or During Timer Recording
42
To Change the Settings
42
To Erase the Timer Setting of an Event
42
Quick Timer Recording
43
After Timer Recording
43
Tape Editing
44
Connections
44
Operation
44
Edit Switch
44
Audio and Video Insert
45
Audio and Video Source Connection
45
TV Station Programming
47
Automatic Programming
47
Manual Programming
47
Monitoring the Sound Being Inserted
47
Clock Setting
48
Fine Tuning of a Weak Station
48
Eliminating Noise on Unused Programme Positions
48
Zero Second Adjustment
49
To Change the Actual Clock Setting
49
Disassembly of Cabinet
51
Removal of the TA-36/37 Board
52
Removal of the SS-50 Board
52
Removal of the YC-40 Board
53
Removal of the FR-20 Board
53
Removal of the FL-8, FL-9 Board
54
Removal of the RP-31 Board
54
Removal of the Power Block
55
Removal of the Reel Block Assembly
55
Removal of the LS Block Assembly
56
Internal Views
57
Diagrams
58
Circuit Boards Location
58
SS-50 (Servo, System Control), OC-1 (Skip Switch), US-1 (Skip Switch), LS-11 (Skate Motor) Schematic Diagrams
59
System Control
63
Servo Block Diagram
65
Audio Level Diagram
87
RED, EE Mode
87
PB Mode
87
Normal Audio Level Diagram
88
Timer Block Diagram
89
Tuner Block Diagram
92
Power Block Diagram
98
Frame Schematic Diagram
101
Exploded Views
153
Cabinet Assembly
153
Front Panel Assembly
154
Main Board Assembly
155
Frame Assembly
156
Power Assembly
157
LS Assembly
158
Chassis Assembly
159
Reel Table Assembly
160
Drum Assembly
163
Hardware List
164
Remote Control Operation
206
Battery Insertion
206
Battery Life
206
Schematic Diagram
208
Printed Wiring Board
209
Exploded View
210
Periodic Check and Maintenance
219
Port-Repair Maintenance
219
Cleaning of Rotating Head Disk Assembly
219
Cleaning of the Tape Movement System
219
Periodic Check Items
220
Check, Adjustment and Replacement Procedures
221
State of Wear of Video Heads Check
221
Replacing Rotary Head Disk Assembly
222
Removing Rotary Head Disk Assembly
222
Refitting Rotary Head Disk Assembly
223
Replacing Upper Drum
224
Adjusting AFM Rotary Transformer Gap
224
How to Remove Upper Drum
224
Caution When Changing Rotary Coupler Assy and Guide Arm Assy
225
How to Refit Upper Drum
225
Centering Adjustment
225
Video Head Dihedral Check and Adjustment
226
Replacement and Adjustment of the Drum Assembly
227
Replacement of the Capstan Motor
228
Adjustment of the Motor Gap When Replacing the Drum Assembly
228
Capstan Shaft Vericality Adjustment
229
Removal of the No.2 and No.3 Guides
230
Replacement and Adjustment of the S Threading Ring
231
Removal of Miscellaneous Parts
232
Removal of the S Threading Ring
233
S Threading Ring Mounting and Position Adjustment
234
Removal and Adjustment of the Reel Block Assembly
235
Removal and Refitting of the Tension Regulating Lever
235
S Coil Sensor, Harness Treatment and Operation Check
236
Adjustment of the Position of Tension Regulating Lever
236
Removal and Installation of LS Gear
237
Refitting of the U/D Arm Assembly
238
Adjustment of the Position of the LS Gear Assembly
238
Installation of LS Gear Assembly
239
Adjustment of the Forward Back Tension
240
Tape Path Adjustment
241
Tracking Adjustment
241
Cassette Holder Remodeling
241
Preparation
242
Waveform Confirmation
242
Entrance Side Adjustment
243
Exit Side Adjustment
245
Adjustment after Replacement of the Ace Assembly
246
Audio Head (ACE Assembly) Azimuth Adjustment
246
CTL Head (ACE Assembly), Position Adjustment
247
Audio Head (ACE Assembly) Height Adjustment
247
Adjustment after Replacement of the Capstan Motor
248
Thin Tape Movement Check Method During Tape Path Adjustment
249
Beta Hi-Fi RF Output Waveform Check
249
Electrical Adjustments
250
Power Supply Check
252
System Control Check
252
Clock Frequency Check
252
Character Generator Clock Frequency Check
252
Servo System Adjustment
253
Drum Servo System Adjustment
253
Capstan Servo System Adjustment
254
PAL Video System Adjustment
256
Record System Adjustment
257
Playback System Adjustment
261
Secam Video System Adjustment
264
Audio System Adjustment
266
Normal Audio System Adjustment
266
Beta Hi-Fi Audio System Adjustment
267
RF Input Level Adjustment
268
Tracking Meter Adjustment
268
Demodulator F0 Adjustment
268
Demodulator DC Offset Preset Adjustment
268
Level and Level Balance Adjustment
269
Overall Frequency Characteristic Check
269
Overall Distortion Check
269
Overall S/N Check
269
Tuner System Adjustment
270
Tuner AGC Adjustment
270
Stereo Separation Adjustment
270
Semiconductors
458
Advertisement
Sony SL-HF950 Operating Instructions Manual (41 pages)
Video TV Recorder
Brand:
Sony
| Category:
DVR
| Size: 2.68 MB
Advertisement
Related Products
Sony SL-HF950ES
Sony SL-HF950EE
Sony SL-HFR70
Sony SL-HF300
Sony Super Beta Hi-Fi SL-HF870D
Sony SL-HF750
Sony SLHF2000
Sony SL-HF600
Sony SL-HF360
Sony SL-HF550
Sony Categories
Laptop
TV
Camcorder
CD Player
Digital Camera
More Sony Manuals
Login
Sign In
OR
Sign in with Facebook
Sign in with Google
Upload manual
Upload from disk
Upload from URL