Table of Contents
Advertisement
Quick Links
Download this manual
See also:
Network Manual
Advertisement
Table of Contents

Related Manuals for NEC SuperScript 4600N


Summary of Contents for NEC SuperScript 4600N
- Page 1 U P E R C R I P T 4 6 0 0 N USER’S GUIDE October, 1999 703-A0364-001...
- Page 2 The NEC Technologies product(s) discussed in this document are warranted in accordance with the terms of the Limited Warranty Statement accompanying each product. However, actual performance of each such product is dependent upon factors such as system configuration, customer data and...
-
Page 3: This User's Guide
Shows how to diagnose and respond to operating difficulties, including paper jams, printer errors, and print quality problems. Chapter 9, “Technical Support” Tells how to contact NEC for service, support, and supplies for your printer. Also provides information about the SuperScript 4600N Limited Warranty and obtaining service contracts. - Page 4 SuperScript 4600N — User’s Guide...
-
Page 5: Table Of Contents
Loading the Paper Tray Printing a Startup Page Connecting the Printer Connecting the 4600N Printer Locally Connecting the 4600N to a Network Printing with the 4600N Printer Local Setup for Windows 95/98 and Windows NT 4.0 PostScript Driver Setup for Windows 3.1x... - Page 6 Installing the Printer Driver Software Printing a Document Accessing the Printer Driver Changing Settings in the Printer Driver Setting Another Printer Driver as Default SuperScript 4600N — User’s Guide Mac OS Installing Printing Software Choosing the Printer Configuring the PPD...
- Page 7 Replacing the Belt Cartridge Inside the Back Cover Replacing the Fuser Unit Cleaning the Laser Lens Replacing the Ozone Filter Replacing the Toner Collector Cleaning the Outside of the Printer CHAPTER 8: TROUBLESHOOTING Overview Print Quality Maintenance Simple Troubleshooting Printer Messages...
- Page 8 NEC Technical Support How to Contact NEC Ordering Supplies NEC Warranty and Service NEC Service Contracts SuperScript 4600N Printer Limited Warranty Warranty Period Warranty Coverage Warranty Support Obtaining Warranty Service Limitation of Damages PRINTER SPECIFICATIONS Operating Specifications Paper Handling MEDIA SPECIFICATIONS...
-
Page 9: Chapter 1: Features
200MZ processor speeds up the rendering of complex graphic documents • Year-2000 compliant SuperScript 4600N Enhancements With the SuperScript 4600N, you can take advantage of the latest printing technology. • Advanced PostScript spooling features enabled by the built in hard disk. Features include collation, send one—... -
Page 10: System Requirements
Microsoft’s Internet Explorer 4.01 SP1 or above web browser. Other requirements are described in the SuperScript Color Laser Network Guide. Supported Printing Environments The SuperScript 4600N comes with software for using the printer on several operating systems and networks. ® ®... -
Page 11: Superscript 4600N Cd
Network Client/Custom Setup If you are a network client with access to a SuperScript 4600N printer, you can use this setup to access web-based printing tools and network utilities. Using this option, you can install •... -
Page 12: 4600N Printer Web Pages
4600N P RINTER Every SuperScript 4600N network printer has a built-in web server and Printer Home page you can use for a variety of tasks, including • Pull Printing from your desktop • Installing the NEC PrintAgent Remote Printing driver •... -
Page 13: Paper Handling And Special Media
APER ANDLING AND PECIAL EDIA You can use the 4600N to print on a wide variety of media and sizes. SuperScript 4600N paper handling features let you manage print jobs and office tasks efficiently. Supported Media Use any light or medium weight copier paper to print out draft copies of your documents. -
Page 14: Superscript 4600N Settings
4600N S UPER CRIPT Printer Settings SuperScript 4600N printer settings give you many ways to customize your print job. There is often more than one place to change the same printer setting. These include • The SuperScript PostScript 3 and PCL5e printer drivers •... -
Page 15: Advanced Features
Advanced Features Advanced features allow you to have more control over your print jobs. They can be accessed from the NEC features tab of the PostScript driver or from the Advanced features button on your printer’s home page. For more details about these unique features see Chapter 6 of this user’s guide. -
Page 16: Postscript Options
Job Timeout: This is the maximum number of seconds the printer can take to print a single job. If the print job takes more time to print than the timeout value, the printer may stop printing and prepare to receive a new document. -
Page 17: Pcl5E Features
Printer Memory This feature appears on the driver, but does not apply to the SuperScript 4600N printer and does not need to be adjusted. Cartridges This feature appears on the driver, but does not apply to the SuperScript 4600N printer and does not need to be adjusted. -
Page 18: Working With Fonts In Windows 10
The Windows printer drivers have settings for specifying how TrueType fonts in your document are matched to PostScript fonts in the printer. You may want to adjust these if your documents take a long time to print or the quality of the font is not satisfactory. -
Page 19: Chapter 2: Getting Started
CHAPTER 2 GETTING STARTED VERVIEW This chapter tells you how to safely set up your printer and begin printing right away. Included are instructions for: • Selecting a location and unpacking • Checking printer contents and identifying printer parts •... -
Page 20: Unpacking
Appendix D to safeguard internal components. SuperScript 4600N — User’s Guide 4. Using your thumb and finger, remove the plastic screw sleeves from the box (C). Lift off the outer box (D). -
Page 21: Checking Printer Contents
HECKING RINTER ONTENTS Take a moment to verify that the following items were included in your printer box: • SuperScript 4600N printer with 250-sheet Paper Tray 1 • QuickStart Poster • Starter Kit (see contents below) • Accessory Kit (see contents below) •... -
Page 22: Identifying Printer Parts
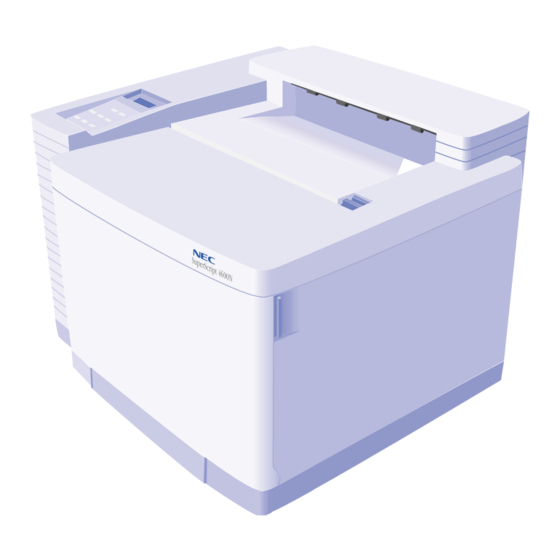
DENTIFYING RINTER Use the illustrations on the facing page to identify standard parts for the SuperScript 4600N. Front View • Operator Panel—for displaying messages and configuring the printer • Power Button—for turning on and off the printer • Top Cover—provides access to the Fuser Unit and inside of the printer (also serves as the Output Tray) •... - Page 23 Important Printer Parts FRONT VIEW Operator Panel Power Button Front Cover Paper Tray 1 BACK INTERNAL VIEW Transfer Unit consists of: BACK VIEW Back Vent Serial Number Filter Cover Back Cover Latch Power Cord Connector FRONT INTERNAL VIEW Toner Module...
-
Page 24: Installing The Belt Cartridge
Open the Front Cover of the printer with the Front Cover Release Latch (A). 3. Open the Top Cover of the printer by sliding the Top Cover Release button forward (B) 4. Flip up the Belt Cartridge Locking Levers inside the top of the printer (C). -
Page 25: Installing The Fuser Components
Remove the Fuser Oil Bottle from its plastic bag and set into place with the shunt valve down and the labeled side facing the front of the printer (D). The tab on the bottle should face right when viewed from the printer’s front. -
Page 26: Installing The Toner Modules
Y=Yellow, and K=Black). Begin with Cyan. Remove the Toner Module from its plastic bag and rock it gently three or four times (C). SuperScript 4600N — User’s Guide 4. Remove the protective tape from the module. ODULES 5. Remove (and save) the orange protective cover. -
Page 27: Loading The Paper Tray
Media button on the Operator Panel to switch between these paper types. The printer does not have to be reconfigured for overhead transparencies; it will automatically recognize when this type of media is loaded. -
Page 28: Printing A Startup Page
For sales information, call (800) NEC-INFO or visit our website at http://www.nectech.com. For supplies, call (800) 632-2326 ©1999 NEC Technologies, Inc. All rights reserved. NEC and the NEC logo are registered trademarks and SuperScript is a trademark of NEC Corporation. Adobe, PostScript and the PostScript logo are trademarks of Adobe Systems Incorporated or its subsidiaries... -
Page 29: Connecting The Printer
ONNECTING THE RINTER This section tells you how to connect your SuperScript 4600N Series printer to your computer or network. note: You can be connected to and receive data at the parallel port and Ethernet port at the same time. -
Page 30: Printing With The 4600N Printer
After you have successfully printed a Startup Page and connected your printer, you can install a printer driver from the SuperScript 4600N CD and begin printing. There are three available setups for SuperScript 4600N Series printer software: Easy/Local, Network Client/Custom, and Network Server/Administrator. These were described earlier on page 3 of this user’s guide. -
Page 31: Quick Web Printing With The 4600N
Easy Remote Printing Setup Once the IP address is assigned to the printer, you can go to the printer’s home page to download and install the NEC PrintAgent software and driver. note: Printing, see the “SuperScript Color Laser Network... -
Page 32: Printing Envelopes
Printing on such envelopes can damage the printer. Put Paper Tray 1 or the Legal Paper Tray back in the printer. SuperScript 4600N — User’s Guide note: You can load envelopes in Paper Tray 1 or the optional Legal Tray as long as the tray is inserted in the Paper Tray 1 Feeder. -
Page 33: Printing Transparencies
If the manufacturer put a removable strip at the edge of the transparencies, load the transparencies with the strip toward the front of the printer (even if they recommend that the striped edge faces the back of the printer). •... - Page 34 SuperScript 4600N — User’s Guide...
-
Page 35: Chapter 3: Printer Options
CHAPTER 3 PRINTER OPTIONS VERVIEW The SuperScript 4600N has several easily installed options available. You can add an extra paper tray and feeder unit or a handy legal size paper tray. You can also increase the printer’s random-access memory (RAM). -
Page 36: Adding The Paper Tray 2 Unit
Screw Hole SuperScript 4600N— User’s Guide WARNING! assure that it is level. If the printer is tipped more than 1.5 degrees, oil will spill inside and cause damage. 5. Locate the metal tab with screw hole on each side of the Paper Tray 2 unit (A). - Page 37 Paper Tray 2 unit. Remove the Cable Connector Door at the rear of the printer (D) and plug the cable in to the printer socket (E). 10. Place the Cable Connector Door that you removed from the printer over the opening on the Paper Tray 2 unit.
-
Page 38: Installing The Legal Paper Tray
Remove the packing from the Legal Paper Tray and make any needed adjustments inside the tray (B). 3. Fill the tray (C). Install the tray in the feeder unit. SuperScript 4600N— User’s Guide note: APER long as the tray is inserted in the Paper Tray 1 feeder. -
Page 39: Adding Memory (Simm)
For sales information, call (800) NEC-INFO or visit our website at http://www.nectech.com. For supplies, call (800) 632-2326 ©1999 NEC Technologies, Inc. All rights reserved. NEC and the NEC logo are registered trademarks and SuperScript is a trademark of NEC Corporation. Adobe, PostScript and the PostScript logo are trademarks of Adobe Systems Incorporated or its subsidiaries and may be registered in certain jurisdictions. -
Page 40: Installing Simm
Turn the printer off and disconnect it. Using a small phillips-head screw driver remove the two screws from the expansion slot on the rear of the printer (A), and pull out the Controller Board part way (B). To remove any un-needed SIMMs start from the bottom: Open the metal release brackets on each side of the memory socket at the same time (C). -
Page 41: Chapter 4: Printer Drivers
Easy/Local setup. This setup quickly installs the basic printing tools for your operating system. This is appropriate if you are connected to a SuperScript 4600N from the parallel port. All setup options are described in more detail on page 3. -
Page 42: Windows 95/98
NEC’s color matching method is the default and recommended driver. The ICM based driver calibrates the colors with those actually seen on the print client’s monitor. The NEC based driver calibrates the colors with those described by the NEC Color Table located inside the printer. -
Page 43: Setting Another Printer Driver As Default
Configuring the PostScript printer driver for sharing can be done during the installation of the driver from the SuperScript 4600N CD to the Windows NT computer, or after the driver has been installed on the Windows NT computer. To configure sharing during driver installation: Insert the SuperScript 4600N CD into the Windows NT computer to automatically launch the Install Wizard. -
Page 44: Using The Windows 95/98 Printer Drivers
Windows 95/98 Printer Driver - System Tabs The General, Details, and Sharing tabs provide access to Windows features for setting up your printer. A brief description is provided here. For more information about settings on these tabs, see the Windows manual. - Page 45 Windows 95/98 Printer Driver - PostScript 3 Tabs (I) PostScript Tab Use these settings to configure options for the PostScript printing language. Watermarks Tab A watermark is text that appears on pages in your print job, such as DRAFT or CONFIDENTIAL.
- Page 46 Graphics Tab Use the Graphics tab settings to define print quality. SuperScript 4600N — User’s Guide Click the Help button to view the complete Help file. Click the ? Help icon and click a setting on the driver to view more information about it.
- Page 47 Click the ? Help icon and click a setting on the driver to view more information about it. Click any tab to view more printer settings. Click the Restore Defaults button to replace current settings on the tab with factory defaults.
-
Page 48: Windows Nt
Installing Printer Driver Software Follow these steps to use the SuperScript Installer in Windows NT 4.0. Insert the SuperScript 4600N CD into the CD-ROM drive. The Installer will launch automatically. When prompted, select the Easy/Local installation option and click Next. -
Page 49: Using The Windows Nt 4.0 Printer Driver
Installed for Tray 2. The Device Settings tab lets you change printer properties specific to the SuperScript 4600N. (More settings are available when you select Print or Print Setup from your application’s File menu or Document Default from Printer Properties menu.) The Device Settings tabs are different for the PostScript 3 and PCL5e printer drivers, and are shown below. - Page 50 Windows NT 4.0 Document Properties - PostScript 3 You can change document settings using the Document Properties pages. To access these, select Print or Print Setup from your application’s File menu or Document Defaults from the Printer Properties menu. Page Setup Tab Use this tab for general page setup options.
- Page 51 Windows NT 4.0 Document Properties - PCL5e You can change document settings using the Document Properties pages. To access these, select Print or Print Setup from your application’s File menu or Document Defaults from Printer Properties menu. Page Setup Tab Use this tab for general page setup options.
-
Page 52: Windows 3.1X
Installing the Printer Driver Software Installation for Windows 3.1x (PostScript) Boot your system and start Windows. Insert the SuperScript 4600N CD into the appropriate drive (in this example we use drive E:). In the Windows Program Manager, select Run from the File menu. -
Page 53: Setting Another Printer Driver As Default
Setting Another Printer Driver as Default You can change printer drivers using the Windows Control Panel. In the Windows Control Panel double-click the Printers icon. The Windows 3.1x PostScript 3 Printer Driver Properties Paper Tab Use the Paper tab to customize paper handling for the print job. - Page 54 Use these settings to configure options for the PostScript printing language. Click the Help button to view the complete Help file. SuperScript 4600N — User’s Guide Job Control Use these settings to configure more options for PostScript printing. Click Cancel to discard changes and close the driver.
- Page 55 Windows 3.1x - PCL5e Printer Driver Properties The PCL5e printer driver window has general document settings. Press the Options button to display more settings for adjusting graphic output. Click the Help button to view the complete Help file. Click Cancel to discard changes and close the driver.
-
Page 56: Mac Os
800-SOS-APPL. Then perform a custom install of the Apple Printer Utility. 1. Launch the Apple Printer Utility. 2. Select the zone in which your SuperScript 4600N printer resides. 3. Select the printer you wish to rename and click Open Printer. - Page 57 Mac OS -Print Dialog Box Pull down the Settings menu to view more categories in the center panel. For more details about the spooler features see Ch. 6 Mac OS...
- Page 58 SuperScript 4600N — User’s Guide...
-
Page 59: Chapter 5 Operator Panel
OPERATOR PANEL VERVIEW The printer’s Operator Panel allows you to read printer messages and change printer settings directly at the printer. The Operator Panel on the SuperScript 4600N consists of eight buttons and six indicator lights. This chapter describes •... -
Page 60: The Message Display
Indicates that the printer settings are being restored to their factory defaults. WARMING UP Printer is not yet ready to operate. It is performing an initial power up check or the fuser unit is warming up to operating temperature. READY Printer is online and ready to print under Auto Emulation Switching mode. -
Page 61: Operator Panel Buttons
Press once to change media to Thick stock (use for envelopes and labels too) Green LED light turns on. Press again to return to plain paper. When the printer detects overhead transparencies in the paper tray, the button is not active, and the green OHT indicator light goes on. When the transparencies are removed from the paper tray, the setting returns to the previous value. -
Page 62: Using The Menu Tree
Press Menu to exit menu mode. If you changed any network settings, you must restart the printer to validate the new settings. SuperScript 4600N — User’s Guide MENU CONTROL For an example of how to use the menu tree, see the next page. -
Page 63: An Example Of Using The Menu Tree
MENU - CONTROL Using the Operator Panel Menu Tree Press Next next item in a menu Press the Online button to take the CONTROL Printer Offline SETUP READY POSTSCRIPT OFFLINE Press Menu COMMUNICATIONS to enter menu mode... -
Page 64: Operator Panel Menus
NO / YES* JAM RECOVERY MEMORY 32MB, 40MB, 48MB, 64MB, 72MB, 80MB, 96MB, 128MB RESTORE DEFAULTS SuperScript 4600N — User’s Guide PostScript Menu Use this menu to configure the printer’s settings for the PostScript interpreter. POSTSCRIPT STARTUP PAGE PRINT PS ERRORS... - Page 65 ID number. Communications Menu This menu has settings that enable the printer to receive print jobs from the Parallel port or NIC, and to configure emulations and networking protocols. See page 60 for instructions on configuring TCP/IP parameters such as the network IP address.
- Page 66 Use the Advanced Features menu to access advanced features that include scanner, Zip disk, and spooler functions. For a full description of these see Chapter 6 of this user’s guide. ADVANCED FEATURES SCANNER/COPY ZIP DISK MENU SPOOLER SuperScript 4600N — User’s Guide...
-
Page 67: Operator Panel Tasks
It must be online (indicator light on) to print. While the printer is offline, it continues to receive data until its input buffer is full. If you press the Online button while the printer is printing, it finishes the current page, and then waits for you to bring it online again. -
Page 68: Printing 4600N Information Pages
SUBNET MASK select ENABLE To validate any changes to network settings, you must turn the printer off, and then on again. For more information about networking the 4600N printer, see the SuperScript Color Laser Network Guide. CONTROL COMMUNICATIONS appears on the... -
Page 69: Chapter 6: Advanced Features
VERVIEW This chapter provides information on the new advanced features of the SuperScript 4600N. If your printer has an IP address and you are connected to the Internet, you can access most of these features from the printer’s home page. Most features can also be accessed through the Operator Panel. -
Page 70: Spooling Options
“front of the line.” Each sent document is assigned a default priority number of five (5). Set up Job Priority on the NEC Features tab of the printer driver. If you want a job to print ahead of the others, choose a number between 1 and 4 in the scrolling Priority box on the NEC Features tab. -
Page 71: Banner Pages
SuperScript 4600N Banner Page creator, job size, number of copies, job hold, and job reprint information. You can choose to print a Banner page from the PostScript driver’s NEC Features tab or from the Job RePrint web page, shown below. note:... -
Page 72: Job Hold
Operator Panel and physically select JOB HOLD PRINT Menu. Set up the Job Hold feature from the NEC Features tab in the printer’s PostScript driver. You can also use the Job RePrint web page. -
Page 73: Job Preview
1-2-3-1-2-3 order. This sorts each document for you so it does not have to be sorted by hand. You only have to go to the printer once and not to the copy machine at all. By default this option is not selected. If Collate is not selected the pages will be printed in 1-1-2-2-3-3 order. -
Page 74: External Zip Drive Feature
100MB or Zip ® ® connected to the SCSI port of the SuperScript 4600N. The drive must be connected and the Zip cartridge must contain files when the printer is turned on. You can then set up your print job either through the Web or the printer’s Operator Panel. -
Page 75: To Print From The Web
Click on the file you want printed. note: You cannot specify the number of copies from the Web. To Print From the Operator Panel You can also access Zip disk settings from the printer’s Operator Panel. Follow these steps. Press Online. appears on the display. OFFLINE Press Menu. -
Page 76: To Eject Zip Disk
EJECT DISK Select. Press Menu, then press Online. ONLINE display. EJECT DISK Power Warning Online Menu OnLine Data Label Feed Item Media Previous Next Select SuperScript 4600N — User’s Guide appears appears on the Eject Zip disk at the Operator Panel... -
Page 77: Scanner Copy Feature
The printer works with the Umax Astra 1220S scanner. Setting Up the Scanner Before you can print, you must set up the printer to work with the scanner. Make sure the scanner is not plugged into the power and the printer is turned OFF. -
Page 78: Accessing The Scanner
Resolution: You can scan images in 75, 150, or 300 dpi. The default setting is 150 dpi. SCALE COLOR , and Previewing a Scanned Image To see a preview of the printer’s last scanned image, click the Image icon on the 4600N Advanced Features web page (B). appears on the... -
Page 79: Chapter 7: Maintaining Your Printer
This chapter explains basic maintenance and cleaning procedures you must follow to maintain the high print quality and efficient operation of your NEC SuperScript 4600N printer. Included are instructions for the following maintenance tasks: • Replacing the Toner Modules •... -
Page 80: Maintenance Schedule
Service Visit Schedule Certain printer parts must be maintained or replaced by an authorized NEC field service engineer. When this is necessary call NEC Technical Support at 800-632-4650. They will put you in touch with an engineer in your area who can service your printer. -
Page 81: Replacing The Toner Modules
The Operator Panel will display the TONER EMPTY message when the toner level is getting low. To order an NEC SuperScript 4600N Toner Module contact your NEC printer dealer or see below. The black replacement modules print approximately 10,000 pages. The yellow, magenta, and cyan replacement modules print approximately 6,000 pages each. -
Page 82: Replacing The Fuser Oil Bottle
Hold a piece of paper under the used Fuser Oil Bottle while removing it to avoid drips in the printer. SuperScript 4600N — User’s Guide 5. Insert the new Fuser Oil Bottle, cap side down. Make OTTLE sure the tab of the bottle is on the right (E). The label will face the front of the printer. -
Page 83: Replacing The Fuser Cleaning Roller
3. Open the Lock Tabs (C). Remove the used Fuser Cleaning Roller (D). 5. Install the replacement Fuser Cleaning Roller (E). 6. Close the Lock Tabs and the Top Cover of the printer (F). Reset the Operator Panel to make sure the consumables LEANING usage information is current (G). -
Page 84: Cleaning The Belt Cartridge
Belt Cartridge. Cleaning Blade Do not touch edge! SuperScript 4600N — User’s Guide 6. Turn the Belt Cartridge so that the handle is facing away ARTRIDGE from you. 7. Use the brush to gently clean the wire inside the end of the Belt Cartridge. -
Page 85: Replacing The Belt Cartridge
EPLACING THE Order Number 20-205 Turn off the printer (A). Open the Front and Top Covers (B). Flip up the Lock Levers to release the Belt Cartridge (C). Pull the old Belt Cartridge straight up and discard it (D). 5. Remove the black wrapper from the new Belt Cartridge and pull out the two tension release pins as shown (E). -
Page 86: Inside The
NSIDE THE OVER Allow several minute for the printer to cool down and use only dry, lint-free cotton cloths or swabs for this procedure. The Transfer Unit consists of the Transfer Drum, Registration Rollers, Transfer Roller, and Paper Discharger. Turn off and unplug the printer. -
Page 87: Replacing The Fuser Unit
Tension Release Pins on each side. 11. Carefully lower the new Fuser Unit into the slot (G). 12. Tighten the thumb screws inside the back of the printer. 13. Gently lift up on the Fuser Unit’s handles to make sure that it is secured. -
Page 88: Cleaning The Laser Lens
4. Remove the Belt Cartridge (D) and loosely wrap it in a soft dark cloth or paper (E). SuperScript 4600N — User’s Guide Use both hands to remove the Laser Lens. Pinch the Laser Lens tabs located on the bottom of the Toner Module area and lift it out (F). -
Page 89: Replacing The Ozone Filter
ZONE Order Number 126164 The Ozone Filter needs to be replaced about every 12 months. Slide open the Filter Cover located in back of the printer. Take the used Ozone Filter from inside the Filter Cover and discard it. Fit the new Ozone Filter inside the Filter Cover and slide it shut. -
Page 90: Cleaning The Outside Of The Printer
To clean the Paper Exit Rollers follow the instructions below: Turn off and unplug the printer Open the Top Cover slightly. Using a dry cotton cloth, clean the Paper Exit Rollers. Manually rotate each roller. Close the Top Cover. Paper Exit Rollers SuperScript 4600N — User’s Guide... -
Page 91: Chapter 8 Troubleshooting
Recovery is set to On, the printer will automatically reprint lost pages of a PostScript print job after a jam is cleared, as long as you do not turn off the printer. Jam Recovery can only be set in the Operator Panel menu tree (see page 56). - Page 92 <Y, M, or C> TONER LOW 120K SERVICE CASSETTE OUT <TRAY 1 or 2> MEDIA MISMATCH LOAD <MEDIA> TRAY SuperScript 4600N — User’s Guide Explanation First message to appear when the printer is powered up. One of the paper trays is empty Paper Tray 2 contains paper size that is not supported by the engine.
-
Page 93: Preventing Paper Jams
Paper Tray 1 (or 2) and passed under the Transfer Drum. It then passes through the Fuser Unit and is delivered to the Output Tray on the top of the printer. Paper jams occur in the following three areas. -
Page 94: Removing Paper Jams
• Try to remove jammed paper without tearing it. Any pieces of media left in the printer, whether large or small, can obstruct the paper path and cause further jams. If, after clearing the paper jam, the jam message on the Operator Panel persists, open and close the Top Cover. -
Page 95: Inner Jams
Pressure Release Tabs. Remove the jammed paper by pulling it from the bottom of the fuser, through the printer’s Back Cover, not from the top of the Fuser area. This prevents any unfused toner from dirtying the Fuser Rollers (located under the Fuser Cleaning Roller). -
Page 96: Outer Jams
Drum Jams Drum jams occur when the paper gets wound around the Transfer Drum. 1. Turn off the printer and let it cool. Open the Back Cover. 2. Carefully remove the paper from the Transfer Drum. note: Do not touch the Transfer Drum! -
Page 97: Print Quality
This may be caused by a tilt in the surface supporting the printer, or by too little toner. Solutions • Check the table the printer is on. It should not be tilted more than 1.5%. • Check the Toner Modules. Replace any that are too low. -
Page 98: Black Line
• Call a service representative to check the printer, if you cannot identify a cause. SuperScript 4600N — User’s Guide Horizontal Banding Horizontal banding in the image may indicate a transfer failure. Solutions •... -
Page 99: Color Misregistration
• Replace the Belt Cartridge if it is worn or damaged. • Call a service representative to check the printer to replace the Cleaning Brush if necessary. Toner Streak When toner is streaked or brushed across the page, it may indicate problems with the Toner Module. -
Page 100: Parallel Printing Problems
(with a parallel cable) to the printer. Only Windows and UNIX computers can be locally connected. Nothing Printed The printer does not indicate that a print job was received and nothing was printed. Solution Assure the bidirectional parallel cable is attached securely. -
Page 101: Chapter 9 Technical Support
How to Contact NEC There are a number of ways to contact NEC or receive information about technical issues, products, and services. Contacting NEC Technical Support or Customer Service... - Page 102 Sending a Facsimile Transmission You can fax questions or comments to NEC at 1-978-742-7049 Be sure to indicate the number where NEC can telephone or fax a response. Using FastFacts—NEC’s Information Retrieval System NEC’s technical support staff have created technical notes and tips for using NEC products.
-
Page 103: Nec Warranty And Service
NEC W ARRANTY AND Your SuperScript 4600N printer comes with a one-year onsite warranty. The complete warranty is provided below. Packing and shipping instructions are provided in Appendix D. All repair requests must be prequalified by calling NEC Customer Service at 1-800-632-4650. -
Page 104: Warranty Support
Consumers are cautioned that Product performance is affected by system configuration, software, the application, customer data, and operator control of the system, among other factors. While NEC TECHNOLOGIES, INC. Products are considered to be compatible with many systems, the specific functional implementation by the customers of the Product may vary. -
Page 105: Printer Specifications
To work witha Umax Astra 1200S and Astra ® To work with an SCSI Iomega Zip 100MB or Zip ® drive Printer Language Emulations • PostScript Level 3 • PCL 5e Automatic Jam Recovery Automatically reprints jammed pages Color Support ®... -
Page 106: Paper Handling
Envelopes Recommended Media Use NEC Premium papers (listed below) to ensure the best quality printed output. If you do not have the NEC Premium papers, try to match them as closely as possible for the best printing results. Premium Color Laser Paper 24 lb. Bond: A bright paper with a super smooth finish for brilliant color... -
Page 107: Media Specifications
APPENDIX B MEDIA SPECIFICATIONS This appendix has general guidelines for purchasing and storing paper and other media for your NEC SuperScript 4600N printer. Your printer supports a wide variety of print media, including • Plain paper • Transparencies • Glossy papers •... - Page 108 It is the most effective measure you can take to achieve consistently good results from your printer. Using the NEC Premium papers described above will ensure good results. Generally, paper manufactured for photocopying has good print quality and paper handling characteristics.
-
Page 109: Safety Information
APPENDIX C SAFETY INFORMATION This chapter provides safety information and product specifications for the SuperScript 4600N printer. As you operate your printer, please be aware of the following safety considerations. Ozone Emission The corona assemblies found in laser printers and... -
Page 110: Fcc Statement
Use a shielded and properly grounded I/O cable to ensure compliance of this unit to the specified limits of the rules. Since your SuperScript 4600N comes with a network interface card (NIC) installed, it meets the requirements of FCC Class A when connected to an Ethernet cable. -
Page 111: Moving Your Printer
Failure to do so may result in damage to the printer. OVING RINTER To move the printer locally means that it can either be carried by two people or moved on a cart to its new location. Follow these steps: Turn the printer off and allow it to cool for 15 minutes. - Page 112 SuperScript 4600N — User’s Guide 15. Reinstall the Fuser Oil Bottle (J).Close the Lock Tabs (K) and Top Cover. 16. Plug the printer in and turn the power on. Check to make sure no error messages are showing on the Operator Panel.
-
Page 113: Moving Your Printer Locally
HIPPING THE RINTER To ship your printer long distance, follow steps 1 —9 under “Moving Your Printer Locally” on page 103. Then proceed with the following instructions. note: If you are returning the printer for service, you do not need to return the Power Cord, Toner Modules, Belt Cartridge, Fuser Oil Bottle, or Fuser Cleaning Roller. - Page 114 Toner Collector. 11. Close the Front and Top Covers (I). SuperScript 4600N — User’s Guide 12. Pack any accessories in the styrofoam box. See next page. 13. With another person’s help, put the printer into a plastic bag.
- Page 115 15. Pack the printer for shipment as shown (K). 16. Do not forget the Power Cord and User’s Guide (unless you are shipping the printer for service). Slide the box cover all the way down (L). 17. Attach the shipping box to its base tray. Insert the screw holders first (M), then the box screws themselves (N).
- Page 116 SuperScript 4600N — User’s Guide...
-
Page 117: Index
NDEX Numerics 10 Mbps 10/100Base-T 100 Mbps Ethernet 4600N driver CD 4600N printer accessory kit Adobe Acrobat Reader ADSC advanced features advanced features menu alert messages Apple Printer Utility back cover cleaning inside back cover latch banding banner page belt cartridge... - Page 118 SuperScript 4600N — User’s Guide envelopes labels paper tray 1 transparencies lock levers lock tabs locking levers Macintosh maintenance schedule media recommended...
- Page 119 – Mac OS Windows 3.1x Windows 95/98 Windows NT printer fonts printer memory tracking printer messages printer options printer supplies printer’s home page printing envelopes from an application graphics in color...
- Page 120 IP address setup from Windows 95/98 Windows NT 4.0 setup menu Sharp Edge Technology shipping SIMM software PrintAgent Windows NT SuperScript 4600N — User’s Guide specifications spooling options starter kit startup page status messages streaks subnet mask SuperScript 4600N software supplies...
- Page 121 fonts Windows 95/98 driver Windows NT shared driver configure for sharing description installing Windows NT driver printing Windows NT 4.0 Windows Program Manager Zip drive...