Table of Contents
Advertisement
User Manual
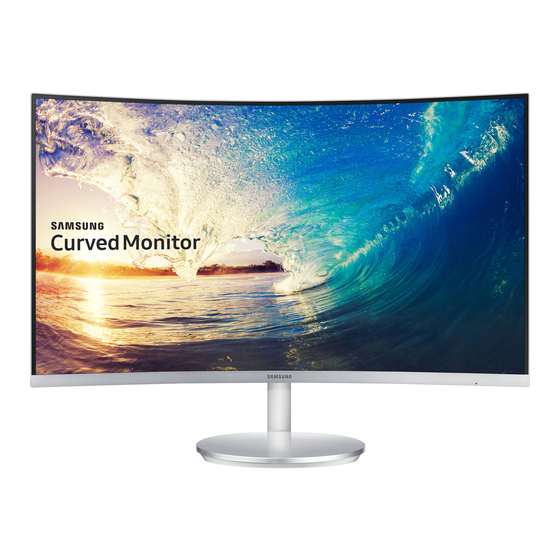
C27F591FD
The colour and the appearance may differ depending on the product, and the specifications are subject to change without prior notice
to improve the performance.
The contents of this manual are subject to change without notice to improve quality.
ⓒ Samsung Electronics
Samsung Electronics owns the copyright for this manual.
Use or reproduction of this manual in parts or entirety without the authorization of Samsung Electronics is prohibited.
Trademarks other than that of Samsung Electronics are owned by their respective owners.
• An administration fee may be charged if either
- (a) an engineer is called out at your request and there is no defect in the product
(i.e. where you have failed to read this user manual).
- (b) you bring the unit to a repair centre and there is no defect in the product
(i.e. where you have failed to read this user manual).
• The amount of such administration charge will be advised to you before any work or home visit is carried out.
Advertisement
Table of Contents

Related Manuals for Samsung C27F591FD


Summary of Contents for Samsung C27F591FD
- Page 1 ⓒ Samsung Electronics Samsung Electronics owns the copyright for this manual. Use or reproduction of this manual in parts or entirety without the authorization of Samsung Electronics is prohibited. Trademarks other than that of Samsung Electronics are owned by their respective owners.
-
Page 2: Table Of Contents
Before Using the Product Connecting and Using a Source Device Screen Setup Securing the Installation Space Pre-connection Checkpoints SAMSUNG MAGIC Bright Precautions for storage Connecting and Using a PC Brightness Safety Precautions Connection Using the D-SUB Cable (Analogue Type) 18... - Page 3 Table of contents Setup and Reset Troubleshooting Guide Sound Requirements Before Contacting Samsung Customer Service Centre Volume Testing the Product Sound Mode Checking the Resolution and Frequency Select Sound Check the following. FreeSync Q & A Eco Saving Plus Off Timer...
-
Page 4: Before Using The Product
High-glossy models can develop white stains on the surface if an ultrasonic wave humidifier is used nearby. ― Contact your nearest Samsung Customer Service Centre if you want to clean the inside of the product (Service fee will be charged.) -
Page 5: Cleaning
Caution • Do not disconnect the power cord while the product is being used. • Only use the power cord provided with your product by Samsung. Do not use the power cord with other products. • Keep the power socket where the power cord is connected unobstructed. -
Page 6: Installation
• Do not expose the product to direct sunlight, heat, or a hot object such as a stove. - Be sure to consult Samsung Customer Service Centre if you want to install the product at such a place. - The product lifespan may be reduced or a fire may result. -
Page 7: Operation
- Be sure to power off the product and disconnect the power cord when water or other foreign substances - Contact Samsung Customer Service Centre for repairs. have entered the product. Then contact Samsung Customer Service Centre. • To move the product, first disconnect all the cables from it, including the power cable. - Page 8 Caution • Leaving the screen fixed on a stationary image for an extended period of time may cause afterimage burn-in or • Do not touch the screen when the product has been turned on for an extended period of time as it will become defective pixels.
-
Page 9: Preparations
Chapter 02 Preparations Parts Icons Description Multi directional button that helps navigate. JOG Button ― The JOG button is located on the rear left side of the product. The button can be used to move up, down, left or right, or as Enter. Control Panel This LED is power status indicator and works as ―... -
Page 10: Direct Key Guide
Direct Key guide ― The shortcut button screen (OSD menu) shown below is displayed only when the monitor screen is turned on, the computer resolution changes, or the input source changes. ― The function buttons page shows if Eye Saver Mode is enabled. -
Page 11: Function Key Guide
Eye Saver Mode. Press to enable or disable The items below are not available if the Eye Saver Mode function is enable. Picture Game Mode, SAMSUNG Bright, Brightness, Color • MAGIC System Eco Saving Plus • Selects to turn the Monitor off by moving the JOG button in the function key guide screen. - Page 12 When the monitor displays nothing (i.e. Power saving mode or Non-signal mode), 2 direct keys for control source and power could be used as below. JOG Button Power saving/Non-signal mode Source Change Down PRESS(ENTER) for 2 seconds Power Off When the monitor displays the Main menu the JOG Button could be used as below. JOG Button Action UP/DOWN...
-
Page 13: Changing Brightness, Contrast And Sharpness Settings
Set the input volume for the input device to at least 20% and control the volume using the volume control (JOG button LEFT/RIGHT) on the product. Brightness ― What is Auto Mute? ― This menu is not available when SAMSUNG Bright is set to Dynamic Contrast mode. -
Page 14: Reverse Side
Reverse Side Adjusting the Product Tilt ― The colour and shape of parts may differ from what is shown. Specifications are subject to change without notice to ― The colour and shape of parts may differ from what is shown. Specifications are subject to change without notice to improve quality. -
Page 15: Anti-Theft Lock
Anti-theft Lock Precautions for moving the monitor ― An anti-theft lock allows you to use the product securely even in public places. ― The locking device shape and locking method depend on the manufacturer. Refer to the user guide provided with your anti-theft locking device for details. -
Page 16: Installation
Installation Attaching the Stand ― Before assembling the product, place the product down on a flat and stable surface so that the screen is facing downwards. : The product is curved. Placing pressure on the product when on a flat surface may damage the product. When the product is on the ground facing up or down, do not put pressure on it. Place the protective Styrofoam (cushion) included in the Attach the stand base to the stand neck, and then fasten the package on the floor and place the product facing down on... -
Page 17: Removing The Stand
Removing the Stand ― Before assembling the product, place the product down on a flat and stable surface so that the screen is facing downwards. : The product is curved. Placing pressure on the product when on a flat surface may damage the product. When the product is on the ground facing up or down, do not put pressure on it. Place the protective Styrofoam (cushion) included in the While holding the monitor, pull and remove the stand neck in package on the floor and place the product facing down on... -
Page 18: Connecting And Using A Source Device
Chapter 03 Connecting and Using a Source Device Pre-connection Checkpoints Connecting and Using a PC ― Before connecting a source device, read the user manual provided with it. Select a connection method suitable for your PC. The number and locations of ports on source devices may differ from device to device. ―... -
Page 19: Connection Using The Hdmi Cable
Connection Using the HDMI Cable Connection Using an DP Cable DP IN HDMI IN ― A DP cable shorter under 1.5 m in length is recommended. Using a cable longer than 1.5 m can affect the picture quality. Connection Using an HDMI-DVI Cable Connecting to Headphones HDMI IN AUDIO IN... -
Page 20: Connecting The Power
Correct posture to use the product Connecting the Power Use the product in the correct posture as follows: • Straighten your back. • Adjust the angle so light does not reflect on the screen. • Keep your forearms perpendicular to your upper arms and level with the back of your hands. Connect the power cable to the DC power adapter. -
Page 21: Driver Installation
Driver Installation ― You can set the optimum resolution and frequency for this product by installing the corresponding drivers. ― To install the latest version of the product driver, download it from the Samsung Electronics website at http://www.samsung.com. Setting Optimum Resolution An information message about setting optimum resolution will appear if you power on the product for the first time after purchase. -
Page 22: Screen Setup
Screen Setup Configure the screen settings such as brightness. A detailed description of each function is provided. Refer to your product for details. SAMSUNG MAGIC Bright In PC mode • Custom: Customize the contrast and brightness as required. • Standard: Obtain a picture quality suitable for editing documents or using Internet. -
Page 23: Brightness
You can adjust the general brightness of the picture. (Range: 0~100) Adjust the tint of the screen. ― This menu is not available when A higher value will make the picture appear brighter. SAMSUNG Bright Cinema Dynamic Contrast is set to mode. -
Page 24: Samsung Magic Upscale
SAMSUNG MAGIC Upscale Eye Saver Mode SAMSUNG Upscale function can enhance the layers of the picture details and the vividness of the picture. Set to an optimum picture quality suitable for eye relaxation. MAGIC The function has more obvious effects on low-resolution pictures. -
Page 25: Picture Size
Picture Size Screen Adjustment ― This menu is only available when Change the picture size. Picture Size is set to Screen Fit Mode. When a 480P or 576P or 720P or 1080P signal is input in mode and the monitor can display normally, select Screen Fit In PC mode to adjust horizontal position in 0-6 levels. -
Page 26: Adjusting Osd (On Screen Display) Settings
Chapter 05 Adjusting OSD (On Screen Display) settings A detailed description of each function is provided. Refer to your product for details. Transparency Position Set the transparency for the menu windows. Adjust the menu position. OnScreen Display Configure the transparency of the Language 한국어... -
Page 27: Setup And Reset
Chapter 06 Setup and Reset A detailed description of each function is provided. Refer to your product for details. Sound Volume Adjust the Volume controlling the JOG button LEFT/RIGHT. System Sound Mode Sound FreeSync • Standard: Selects the normal sound mode. Eco Saving Plus •... -
Page 28: Freesync
• The response rate during the game may fluctuate depending on the resolution. A higher resolution generally decreases the response rate. • The sound quality of the monitor may be degraded. ― If you encounter any issues when using the function, contact the Samsung Service Centre. -
Page 29: Eco Saving Plus
Eco Saving Plus Eco Saving Plus function reduces power consumption by controlling the electric current used by the monitor panel. ― This option is not available when SAMSUNG Bright Dynamic Contrast is in mode. MAGIC ― This menu is not available when Game Mode is enabled. -
Page 30: Pc/Av Mode
PC/AV Mode Power LED On PC/AV Mode to AV. The picture size will be enlarged. Configure the settings to enable or disable the power LED located at the lower part of the product. • Working: The power LED is on when the product is turned on. This option is useful when you view a movie. -
Page 31: Installing The Software
Easy Setting Box enables users to use the monitor by partitioning multiple sections. • Windows 10 32Bit/64Bit To install the latest version of Easy Setting Box, download it from the Samsung Electronics website at http://www.samsung.com. ― The software may not work properly if you do not restart the computer after the installation. -
Page 32: Troubleshooting Guide
Check the following. Customer Service Centre Installation issue (PC mode) ― Before calling Samsung Customer Service Centre, test your product as follows. If the problem persists, contact Samsung Customer Service Centre. The screen keeps switching on and off. Check the cable connection between the product and PC, and ensure the connectors are locked. - Page 33 Not Optimum Mode is displayed. Video playback is choppy. This message appears when the signal from the graphics card exceeds the maximum resolution or frequency for Playback of high-definition large video files can be choppy. This may be because the video player is not optimized the product.
-
Page 34: Q & A
Q & A ― Refer to the user manual for your PC or graphics card for further instructions on adjustment. How can I change the frequency? Set the frequency on your graphics card. • Windows 7: Go to Control Panel Appearance and Personalization Display Screen Resolution... -
Page 35: Specifications
Specifications General ― Plug-and-Play Model Name C27F591FD This monitor can be installed and used with any Plug-and-Play compatible systems. Two-way data exchange between the Size 27 Class (27.0 Inches / 68.6 cm) monitor and PC system optimizes the monitor settings. Monitor installation takes place automatically. However, you can Display area 597.888 mm (H) x 336.312 mm (V) -
Page 36: Standard Signal Mode Table
Standard Signal Mode Table Synchronization Horizontal Frequency 30 – 81 kHz Vertical Frequency 48 – 72 Hz Resolution Optimum resolution 1920 x 1080 @ 60 Hz Maximum resolution 1920 x 1080 @ 60 Hz If a signal that belongs to the following standard signal modes is transmitted from your PC, the screen will automatically be adjusted. If the signal transmitted from the PC does not belong to the standard signal modes, the screen may be blank even though the power LED turns on. - Page 37 Resolution Horizontal Frequency (kHz) Vertical Frequency (Hz) Pixel Clock (MHz) Sync Polarity (H/V) VESA, 1920 x 1080 67.500 60.000 148.500 ― Horizontal Frequency The time required to scan a single line from the left to the right side of the screen is called a horizontal cycle. The reciprocal number of a horizontal cycle is called horizontal frequency. Horizontal frequency is measured in kHz. ―...
-
Page 38: Appendix
― When the service is requested, in spite of in warranty, we may charge you for a visit from a service technician in the • Use of supplies or separatly sold product unspecified by Samsung. following cases. • Repair from a person besides an engineer of outsourcing service company or partner of Samsung Electronics Co., Ltd. Not a product defect •...