Table of Contents
Advertisement
Advertisement
Table of Contents

Related Manuals for Epson DS-40


Summary of Contents for Epson DS-40
- Page 1 DS-40 User's Guide...
-
Page 3: Table Of Contents
Scanner Basics............................8 Scanner Parts Locations ........................8 Scanner Parts..........................8 Scanner Buttons and Lights......................11 Optional and User Replaceable Epson Scanner Parts ..............13 Powering Your Scanner ........................13 Installing Batteries ......................... 13 Using the Optional AC Adapter...................... 15 Changing the Power Off Setting ...................... - Page 4 Scanner Does Not Turn On or Turns Off Unexpectedly..............61 Scanner Button Does Not Work as Expected ................62 Scanning Software Does Not Operate Correctly ................63 Cannot Start Epson Scan ......................63 Original Feeds Incorrectly in Scanner.................... 64 Original Jams in Scanner....................... 64 Scanning is Slow ...........................
- Page 5 Notices ............................... 80 Important Safety Instructions......................80 Battery Safety Instructions ......................... 81 Restrictions on Copying ........................82 Default Delay Times for Power Management for Epson Products............83 Trademarks ............................83 Copyright Notice..........................83 Open Source Software License ..................... 84 Info-ZIP Copyright and License ..................... 87 A Note Concerning Responsible Use of Copyrighted Materials.............
-
Page 7: Ds-40 User's Guide
DS-40 User's Guide Welcome to the DS-40 User's Guide. For a printable PDF copy of this guide, click here. -
Page 8: Scanner Basics
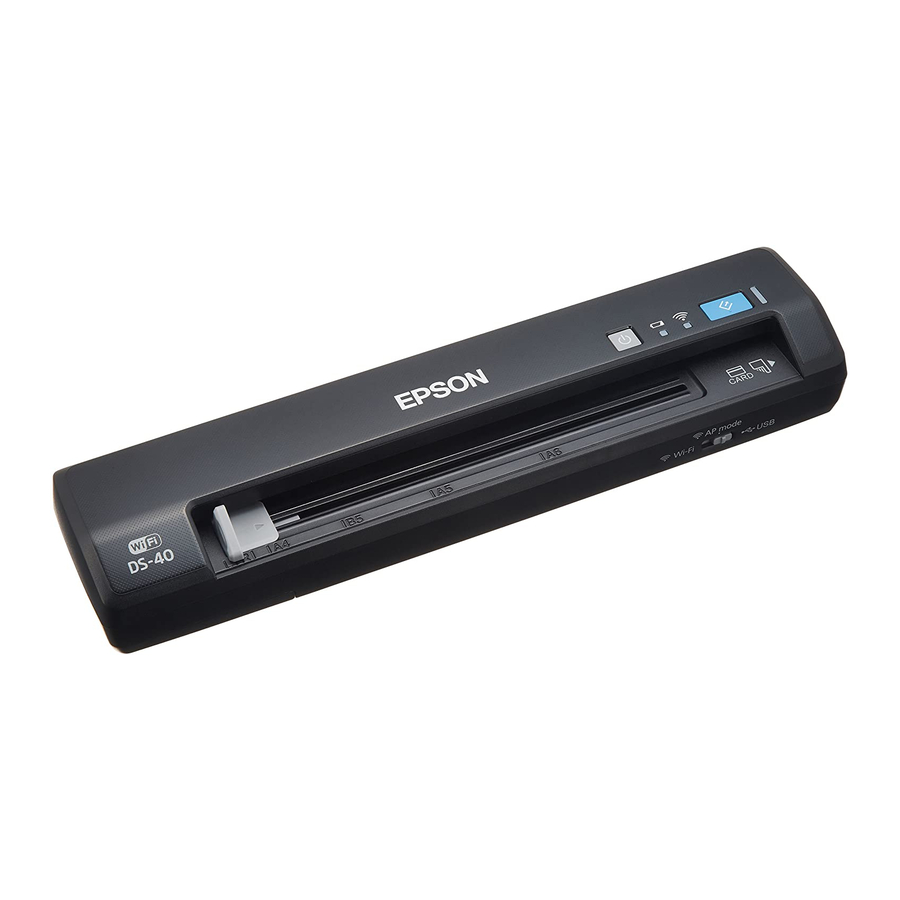
Changing the Power Off Setting Scanner Parts Locations See these sections to identify the parts on your scanner. Scanner Parts Scanner Buttons and Lights Optional and User Replaceable Epson Scanner Parts Parent topic: Scanner Basics Scanner Parts Front Edge guide... - Page 9 Input slot Connection mode switch Back USB interface connector DC inlet The Connect button Output slot...
- Page 10 Accessories USB cable Accessory kit Carrying bag 4 AA batteries Parent topic: Scanner Parts Locations...
-
Page 11: Scanner Buttons And Lights
Scanner Buttons and Lights Buttons power button start button... - Page 12 Lights low battery light Wi-Fi light The ready light Parent topic: Scanner Parts Locations Related references Scanner Light Status...
-
Page 13: Optional And User Replaceable Epson Scanner Parts
Optional and User Replaceable Epson Scanner Parts You can purchase genuine Epson accessories at epson.com (U.S. sales) or epson.ca (Canadian sales). You can also purchase accessories from an Epson authorized reseller. To find the nearest one, call 800- GO-EPSON (800-463-7766). Part Part number AC adapter B12B867201... - Page 14 1. Slide off the battery cover. 2. Insert the batteries with the + and – ends facing as shown.
-
Page 15: Using The Optional Ac Adapter
3. Slide the battery cover back on. Parent topic: Powering Your Scanner Related references Battery Safety Instructions Using the Optional AC Adapter When scanning a large number of documents over a wireless connection, use the optional AC adapter (part number B12B867201) to avoid draining the batteries. Note: The AC adapter does not recharge the batteries installed in the scanner. -
Page 16: Changing The Power Off Setting
Powering Your Scanner Changing the Power Off Setting You can use the Epson Scan Settings utility to change the time period of inactivity before the scanner turns off automatically. 1. Do one of the following to access the Epson Scan Settings utility: •... - Page 17 2. Click Energy Saving. 3. Enter the time period of inactivity before the scanner turns off automatically as the Power Off Timer setting. If you enter a value of 0, the scanner will not turn off automatically. 4. Click OK. Parent topic: Scanner Basics...
-
Page 18: Loading Originals
Loading Originals Follow the instructions here to load your originals into the scanner. Loading Originals in the Input Slot Original Document Loading Capacity Plastic Card Loading Capacity Loading Originals in the Input Slot You can load an original that meets the document specifications in the input slot. 1. - Page 19 2. Slide your original into the input slot against the right side as shown until it meets resistance. Make sure the printed side is face down and top edge first. 3. Slide the edge guide against the edge of the original. Parent topic: Loading Originals...
-
Page 20: Original Document Loading Capacity
Related references Original Document Loading Capacity Plastic Card Loading Capacity Original Document Loading Capacity You can load an original document that meets the specifications in your scanner. Paper type Paper size Paper weight or Loading capacity thickness Plain paper, fine paper, Letter (8.5 ×... -
Page 21: Plastic Card Loading Capacity
• Originals with uneven surfaces, such as embossed documents • Photos • Originals with wet ink • Ripped, curled, or wrinkled originals • Originals containing stapes or paper clips • Originals with holes, other than standard hole-punched originals • Originals that are bound •... - Page 22 Parent topic: Loading Originals...
-
Page 23: Wi-Fi Networking
Connecting to an Existing Wi-Fi Network Direct Wi-Fi Mode Setup Wi-Fi Protected Setup (WPS) Epson DocumentScan App for iOS/Android Connection Mode Switch The position of the connection mode switch determines which method you can use to connect the scanner to a wireless network or device, or to a computer. -
Page 24: Manual Network Connection Setup
Manual Network Connection Setup If the software installation process did not result in a Wi-Fi connection between your scanner and a router or access point, do the following to manually connect to a network: 1. Connect your scanner to your computer using a direct Wi-Fi connection. 2. -
Page 25: Connecting To An Existing Wi-Fi Network
You can set up your scanner to communicate with your computer using a wireless router or access point. The wireless router or access point can be connected to your computer over a wireless or wired network. Epson scanner Wireless router or access point... -
Page 26: Manually Connecting To A Wi-Fi Router Using Epsonnet Config
Start, and select All Programs or Programs. Select EpsonNet > EpsonNet Config > EpsonNet Config. • OS X: Open the Applications folder, select Epson Software > EpsonNet > EpsonNet Config > EpsonNet Config. 5. Select your scanner from the list and click Configuration. -
Page 27: Setting Up Network Scanning
Setting Up Network Scanning After manually configuring your scanner to connect to your network, you must set up the computer to connect to the scanner using the Epson Scan Settings utility. Your scanner must be turned on and connected to the network. - Page 28 • OS X: Open the Applications folder, click Epson Software, and click EPSON Scan Settings. 2. Select your scanner from the Select Scanner list. 3. Select the Network setting and click Add. You see a screen like this: 4. Do one of the following:...
-
Page 29: Determining The Scanner's Ip Address
Start, and select All Programs or Programs. Select EpsonNet > EpsonNet Config > EpsonNet Config. • OS X: Open the Applications folder and select EPSON Software > EpsonNet > EpsonNet Config > EpsonNet Config. 2. Find your scanner in the list and write down the IP address. -
Page 30: Enabling A Direct Wi-Fi Connection
4 devices. Epson scanner Computer with a wireless interface Other wireless device Enabling a Direct Wi-Fi Connection Using WPS to Set Up a Direct Wi-Fi Connection... -
Page 31: Using Wps To Set Up A Direct Wi-Fi Connection
2. Turn on the scanner. 3. Wait for the ready and Wi-Fi lights to stop blinking. 4. From your computer or device, search for and select the SSID shown on the label on the bottom of the scanner. 5. Enter the password shown on the label on the bottom of the scanner. When the ready and Wi-Fi lights on the scanner stay on, the connection is established. -
Page 32: Wi-Fi Protected Setup (Wps)
The scanner enters standby mode for WPS connection for two minutes. 4. Press the WPS button on your computer or device, or enable the WPS feature, within two minutes. When the ready and Wi-Fi lights on the scanner stay on, the connection is established. Parent topic: Direct Wi-Fi Mode Setup Wi-Fi Protected Setup (WPS) -
Page 33: Using Wps Pin Mode To Connect To A Network
3. Press and hold the Connect button on the scanner for at least 3 seconds, then release it when the ready and Wi-Fi lights flash alternately. The scanner enters standby mode for WPS connection for two minutes. 4. Press the WPS button on your router or access point. The ready and Wi-Fi lights on the scanner stay on, indicating that the scanner is connected to the network. - Page 34 2. Press and hold the Connect button and press the power button to turn on the scanner. 3. Hold the Connect button until the ready and Wi-Fi lights flash alternately. The scanner enters standby mode for WPS connection for two minutes. 4.
-
Page 35: Epson Documentscan App For Ios/Android
Wi-Fi Protected Setup (WPS) Epson DocumentScan App for iOS/Android You can use the Epson DocumentScan app to scan from a network scanner to an iOS or Android device over a direct Wi-Fi connection. You can find more information about Epson DocumentScan by searching for the app on the App Store (iOS) or Google Play (Android). -
Page 36: Scanning
Note: Document Capture Pro (Windows) and Document Capture (OS X) do not support scanning from the scanner button over a wireless network. Launch Epson Scan before scanning from the scanner button. 1. Make sure you installed the scanner software and connected the scanner to your computer or network. -
Page 37: Assigning Start Button Settings Or Scan Jobs
• Windows 8.x: Navigate to the Apps screen and select Document Capture Pro. • Windows (other versions): Click or Start, and select All Programs or Programs. Select EPSON Software, then select Document Capture Pro. • OS X: Open the Applications folder, select the Epson Software folder, and select Document Capture. - Page 38 You see a window like this: 2. Click the Scan icon.
- Page 39 • Windows: Click Detailed Settings. Select any displayed scan settings you want to use and click • OS X: Close the Scan window. Open the Scan menu at the top of the screen and select Displays the EPSON Scan Setup Screen. Click the Scan icon. Select any displayed scan settings you...
-
Page 40: Scanning With Epson Scan
Scanning to a SharePoint Server or Cloud Service Scanning with Epson Scan Epson Scan automatically saves your scanned file on your computer in the format and folder you specify. You can select settings, preview, and change the scanned file settings as necessary. - Page 41 2. Select options for each of the scan settings on the screen. 3. If necessary, click the Preview button. Epson Scan previews your original, and displays the result in a separate Preview window. The scanner also ejects the page. 4. Reload the page in the scanner.
-
Page 42: Available Image Adjustments
7. Change any of the necessary file save settings and click OK. Epson Scan scans your original, and saves the file in the selected folder or opens it in your scanning program. If the file was saved directly to your computer, you see the file in the Windows Explorer or OS X Finder, where you can view and print the image, if desired. -
Page 43: Starting A Scan From A Scanning Program
Scanning with Epson Scan Starting a Scan from a Scanning Program You can start Epson Scan from a TWAIN-compliant scanning program to select scan settings, scan, and open the scanned image in the program. 1. Open your scanning program and select its scanning option. (See your scanning program help for... - Page 44 Note: In certain programs, you may need to select your product as the "source" first. If you see a Select Source option, choose it and select your product. With Windows, do not select a WIA option for your product; it will not work correctly. You see an Epson Scan window like this:...
-
Page 45: Scanning Special Projects
Note: In certain programs, you may see the program's scan window instead of the Epson Scan window. Select scanning options as necessary. Parent topic: Scanning Scanning Special Projects Your product's scanning software offers various options to help you quickly complete special scan projects. - Page 46 You see a window like this: 3. Select the language used in the document you are going to scan as the Document Language setting. 4. Click the icon that corresponds with the program or format you want to scan to. 5.
-
Page 47: Scanning Using Ocr - Os X
Parent topic: Convert Scanned Documents to Editable Text (OCR) Related tasks Scanning with Epson Scan Scanning Using OCR - OS X You can use the ABBYY FineReader OCR program to convert scanned documents to editable text. 1. Load your original in the scanner. - Page 48 5. Select the type of document you are going to scan. Epson Scan starts in the last scan mode you used. 6. Select your scan settings and click Scan. Your document is scanned and you see the Epson Scan window while your document is converted to editable text.
-
Page 49: Scanning To A Sharepoint Server Or Cloud Service
• Windows 8.x: Navigate to the Apps screen and select Document Capture Pro. • Windows (other versions): Click or Start, and select All Programs or Programs. Select EPSON Software, then select Document Capture Pro. • OS X: Open the Applications folder, select the Epson Software folder, and select Document Capture. - Page 50 You see a window like this: 2. Click the Scan icon. 3. Select any displayed scan settings you want to use. Note: See the Help information in Document Capture Pro or Document Capture for details. 4. Click Scan. You see a preview of your scan in the Document Capture Pro or Document Capture window. 5.
- Page 51 • Microsoft OneNote • Google Drive • SugarSync You see the Transfer Settings window. 6. Enter any required information to set up the destination. If you have previously created a saved setting for the destination, select it from the drop-down list. 7.
-
Page 52: Cleaning And Transporting Your Scanner
Cleaning and Transporting Your Scanner See these sections if you need to clean or transport your scanner. Cleaning Your Scanner Cleaning Inside Your Scanner Replacing Batteries Calibrating Your Scanner Transporting Your Scanner Cleaning Your Scanner To keep your product working at its best, you should clean it several times a year. Caution: Do not use a hard brush, alcohol, or paint thinner to clean the product or you may damage it. - Page 53 (U.S. sales) or epson.ca (Canadian sales). You can also purchase accessories from an Epson authorized reseller. To find the nearest one, call 800- GO-EPSON (800-463-7766). 1. Turn on the scanner and make sure it is connected to the computer. 2. Load the dry cleaning sheet into the scanner.
-
Page 54: Replacing Batteries
Parent topic: Cleaning and Transporting Your Scanner Related references Optional and User Replaceable Epson Scanner Parts Replacing Batteries When the low battery light is on, you need to replace the batteries. You can use 4 AA batteries (Ni- MH, alkaline, or lithium) to power your scanner. - Page 55 2. Remove the old batteries and recycle them appropriately. 3. Insert the batteries with the + and – ends facing as shown.
-
Page 56: Calibrating Your Scanner
• Scanned images contain vertical lines. Note: You can use the calibration sheet multiple times. If calibrating the scanner does not improve the image quality, contact Epson for support. Make sure the scanner batteries are not low or calibration will not start. -
Page 57: Transporting Your Scanner
• Windows (other versions): Click or Start > All Programs or Programs > EPSON > EPSON Scan > EPSON Scan Settings. • OS X: Open the Applications folder, click Epson Software, and click EPSON Scan Settings. 4. Click Maintenance. 5. Click Calibration. - Page 58 3. Place the scanner and USB cable in the provided pouch. Parent topic: Cleaning and Transporting Your Scanner...
-
Page 59: Solving Problems
Solving Problems Check these sections for solutions to problems you may have using your product. Scanner Light Status Solving Scanning Problems Solving Network Scanning Problems Solving Scanned Image Quality Problems When to Uninstall Your Scanner Software Where to Get Help Scanner Light Status You can often diagnose problems with your scanner by checking its lights. - Page 60 A paper is jammed. Reload the original. If the lights continue to flash, a Wi-Fi light are flashing at scanner error may have occurred. Turn the scanner off and then back the same time on again. If the error continues, contact Epson for support. Wireless connection Light status Condition/solution The ready light is on The scanner is turned on and ready to scan.
-
Page 61: Solving Scanning Problems
Wi-Fi light are flashing at scanner error may have occurred. Turn the scanner off and then back the same time on again. If the error continues, contact Epson for support. An AOSS error has occurred. Retry the connection. Wi-Fi light is flashing low battery light is The batteries are running low. -
Page 62: Scanner Button Does Not Work As Expected
• Check the status of the lights and make sure the scanner is ready to scan. • Make sure the connection mode switch is set correctly. • When using a wireless connection, start Epson Scan on your computer before scanning from the product. -
Page 63: Scanning Software Does Not Operate Correctly
• If you upgraded your operating system but did not reinstall your scanning software, try reinstalling it. • If you are scanning using OS X, make sure no other Epson scanner drivers are installed. If other drivers are installed, uninstall them, then reinstall this scanner's software. -
Page 64: Original Feeds Incorrectly In Scanner
• OS X: Open the Applications folder, click Epson Software, and click EPSON Scan Settings. Make sure the correct Connection setting is selected, then click the Test button. • Make sure you do not have multiple versions of Epson Scan installed. If you do, uninstall both versions and install one version. -
Page 65: Scanning Is Slow
2. Gently pull out the jammed original in the direction that offers the least resistance. Note: If a piece of paper gets stuck in the roller and remains inside the scanner, remove it carefully with a pair of tweezers in the direction of the output slot. If you cannot remove it, contact Epson support. -
Page 66: Solving Network Scanning Problems
• Document Capture Pro (Windows) and Document Capture (OS X) do not support starting a scan from the scanner button over a wireless network. Launch Epson Scan before scanning from the scanner button. • If you are scanning a large original at a high resolution, a network communication error may occur. Try... -
Page 67: Scanner Cannot Connect To A Wireless Router Or Access Point
• Epson Scan does not support networks that use only IPv6. Use Epson Scan on a network that supports IPv4. • If the Firewall function is active on Windows XP or later, the scanner may not be discovered by Epson Scan Settings. Open Epson Scan Settings, click Add, and enter the IP address for your scanner. -
Page 68: Solving Scanned Image Quality Problems
Note: If you are using a 5 GHz wireless router, set the router to operate in dual band (2.4 GHz and 5 GHz) mode. See your router documentation for instructions. • Verify that your router or access point is operating correctly by connecting to it from your computer or another device. -
Page 69: Back Of Original Image Appears In Scanned Image
Back of Original Image Appears in Scanned Image If an image from the back of a thin original appears in your scanned image, make sure you selected the correct Image Type setting for your original and select the Text Enhancement setting in Epson Scan. Parent topic:... -
Page 70: Ripple Patterns Appear In An Image
You may see a ripple pattern (called a moiré) in scanned images of printed documents. This is caused by interference from differing pitches in the scanner's screen and your original's halftone screen. To reduce this effect, adjust these Epson Scan settings (if available) and try scanning again: • Select the Descreening setting. -
Page 71: Scanned Image Edges Are Cropped
• Select Auto Detect as the Size setting (Epson Scan) or the Document Size setting (Document Capture Pro or Document Capture). • Adjust the cropping area shown in the Crop Margins for Size "Auto" setting in Epson Scan. • Document Capture Pro (Windows): Select Detailed Settings from the Scan window. Click Configuration and select the Document tab. -
Page 72: Uninstalling Scanner Software - Os X
Select the scanner software program and click Change/Remove. 4. Restart your computer, then see the Start Here sheet to re-install your software. Note: If you find that re-installing your scanner software does not solve a problem, contact Epson. Parent topic:... - Page 73 Purchase Supplies and Accessories You can purchase genuine Epson accessories at epson.com (U.S. sales) or epson.ca (Canadian sales). You can also purchase accessories from an Epson authorized reseller. To find the nearest one, call 800- GO-EPSON (800-463-7766). Parent topic: Solving Problems...
-
Page 74: Technical Specifications
Technical Specifications These sections list the technical specifications for your scanner. Note: Epson offers a recycling program for end of life products. Please go to this site for information on how to return your products for proper disposal. Windows System Requirements... -
Page 75: General Specifications
Color monitor with 800 × 600 resolution or higher and millions of colors Note: Epson Scan does not support the UNIX File System (UFS) for OS X. Install Epson Scan on a disk or in a partition that does not use UFS. -
Page 76: Dimension Specifications
Image data 16 bits per pixel per color internal 1 to 8 bits per pixel per color external Interface One Hi-Speed USB port Light source RGB LED Parent topic: Technical Specifications Dimension Specifications Height 1.7 inches (43 mm) Width 11.7 inches (296 mm) Depth 2.7 inches (69 mm) Weight... -
Page 77: Environmental Specifications
Power consumption USB connection: Operating: 2.5 W Ready mode: 1.3 W Sleep mode: 1.3 W Power off mode: 0.0125 W Wireless network connection: Operating: 5.5 W Ready mode: 3.5 W Sleep mode: 3.0 W Power off mode: 0.4 W Parent topic: Technical Specifications Environmental Specifications Temperature... -
Page 78: Network Interface Specifications
• Manufacturer: Askey Computer Corporation. • Type: WLU6117-D69 (RoHS) This product conforms to Part 15 of FCC Rules and RSS-210 of the IC Rules. Epson cannot accept responsibility for any failure to satisfy the protection requirements resulting from a non-recommended modification of the product. - Page 79 To prevent radio interference to the licensed service, this device is intended to be operated indoors and away from windows to provide maximum shielding. Equipment (or its transmit antenna) that is installed outdoors is subject to licensing. Parent topic: Technical Specifications...
-
Page 80: Notices
Notices Check these sections for important notices about your scanner. Note: Epson offers a recycling program for end of life products. Please go to this site for information on how to return your products for proper disposal. Important Safety Instructions... -
Page 81: Battery Safety Instructions
• Do not place or store the scanner outdoors, in a car, near excessive dirt or dust, water, heat sources, or in locations subject to shocks, vibrations, condensation, high temperature or humidity, direct sunlight, strong light sources, or rapid changes in temperature or humidity. •... -
Page 82: Restrictions On Copying
• Do not use new and old batteries together or mix different types of batteries. • Insert batteries so that the polarities (+ and –) are correct. • Remove dead batteries promptly. • Do not heat batteries or throw them in fire or water. •... -
Page 83: Default Delay Times For Power Management For Epson Products
Seiko Epson Corporation. The information contained herein is designed only for use with this Epson product. Epson is not responsible for any use of this information as applied to other products. -
Page 84: Open Source Software License
Seiko Epson Corporation shall not be liable for any damages or problems arising from the use of any options or any consumable products other than those designated as Original Epson Products or Epson Approved Products by Seiko Epson Corporation. Seiko Epson Corporation shall not be held liable for any damage resulting from electromagnetic interference that occurs from the use of any interface cables other than those designated as Epson approved Products by Seiko Epson Corporation. - Page 85 This product includes the open source software programs which apply the GNU General Public License Version 2 or later version ("GPL Programs"). The list of GPL Programs: base-passwd-3.5.7 busybox-1.2.2.1 ifupdown-0.6.8 kernel-2.6.18 lsp-arm-versatile926ejs-2.6.18_pro500 module-init-tools-3.2pre1 mount-2.12 net-tools-1.60 netbase-4.29 psmisc-21.5 readline-libs-5.0 sysvinit-2.86 udev-0.093 udhcp 0.9.8cvs20050124-5 util-linux-2.12 usb8786...
- Page 86 This product includes the open source software program "Bonjour" which apply the Apache License Version2.0 ("Apache License Program"). Bonjour License This product includes the open source software program "Bonjour" which applies the terms and conditions provided by owner of the copyright to the "Bonjour". Net-SNMP license This product includes the open source software program "Net-SNMP"...
-
Page 87: Info-Zip Copyright And License
This product includes the open source software program "libwrap-libs-7.6" which applies the terms and conditions provided by owner of the copyright to the "TCP Wrappers". libncurses license This product includes the open source software program "libncurses-5.4" which applies the terms and conditions provided by owner of the copyright to the "libncurses". - Page 88 Copyright (c) 1990-2007 Info-ZIP. All rights reserved. For the purposes of this copyright and license, "Info-ZIP" is defined as the following set of individuals: Mark Adler, John Bush, Karl Davis, Harald Denker, Jean-Michel Dubois, Jean-loup Gailly, Hunter Goatley, Ed Gordon, Ian Gorman, Chris Herborth, Dirk Haase, Greg Hartwig, Robert Heath, Jonathan Hudson, Paul Kienitz, David Kirschbaum, Johnny Lee, Onno van der Linden, Igor Mandrichenko, Steve P.
-
Page 89: A Note Concerning Responsible Use Of Copyrighted Materials
A Note Concerning Responsible Use of Copyrighted Materials Epson encourages each user to be responsible and respectful of the copyright laws when using any Epson product. While some countries' laws permit limited copying or reuse of copyrighted material in certain circumstances, those circumstances may not be as broad as some people assume. Contact your legal advisor for any questions regarding copyright law.