Table of Contents
Advertisement
Advertisement
Table of Contents

Related Manuals for Panasonic KX-FT901BX


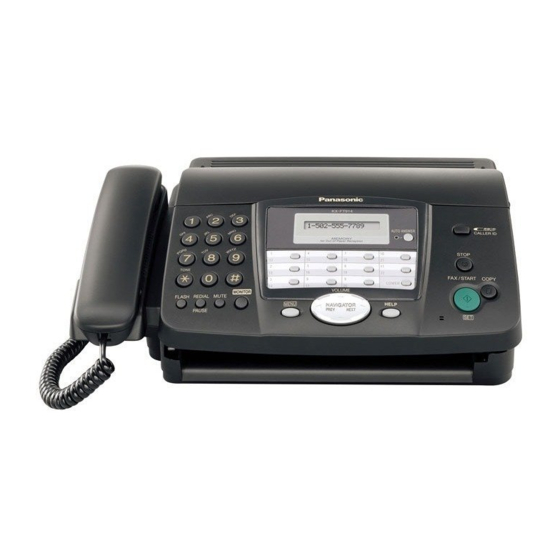
Summary of Contents for Panasonic KX-FT901BX
-
Page 1: Operating Instructions
Thank you for purchasing a Panasonic fax machine. Please read these operating instructions before using the unit and save for future reference. Operating Instructions KX-FT901BX Model No. KX-FT903BX Model No. with Digital Answering System KX-FT907BX Model No. KX-FT907 Personal Facsimile... -
Page 2: Table Of Contents
Receiving a fax manually – Auto answer OFF ... 34 Receiving a fax automatically – Auto answer ON... 35 Receive polling (retrieving a fax placed on another fax machine)... 37 5.10 Pager call...37 6. Distinctive Ring Distinctive Ring Distinctive Ring service from your phone company ...38... - Page 3 10.Help Error Messages 10.1 Error messages – Reports ... 51 10.2 Error messages – Display ... 51 Troubleshooting 10.3 When a function does not work, check here ... 53 Jams 10.4 Recording paper jams ...55 10.5 Document jams – sending... 56 Cleaning 10.6 Document feeder / scanner glass cleaning ...57...
-
Page 4: Installation And Quick Start
1. Installation and Quick Start 1.1 Included accessories 1 Installation and Quick Start Item Power cord Telephone line cord Handset Handset cord Recording paper (10 metres long) Paper stacker (KX-FT903/KX-FT907 only) Operating instructions Note: L If any items are missing or damaged, contact the place of purchase. L Save the original carton and packing materials for future shipping and transportation of the unit. -
Page 5: Connections
1.3 Connections 1 Handset cord L The longer, uncoiled end should be connected to the unit. 2 Telephone line cord L Connect to the single telephone line jack. 3 Power cord L Connect to the power outlet (220 V – 240 V, 50/60 Hz). 4 Paper stacker (KX-FT903/KX-FT907 only) L The paper stacker may not be shown in all illustrations in these operating instructions. -
Page 6: Recording Paper
1. Installation and Quick Start 1.4 Recording paper Open the cover by pressing the cover open button (1). Install the recording paper. Correct Incorrect Insert the leading edge of the paper into the opening above the thermal head (1). Pull the paper out of the unit. L Make sure that there is no slack in the paper roll. -
Page 7: Fax Sending / Copying
1.5 Fax sending / Copying Quick Start Open the document feeder tray. Adjust the document guides (1), and insert the document FACE DOWN. To send a fax: Dial the fax number and press {FAX/START}. To make a copy: Press {COPY}. {FAX/START} L For further details to send a fax, see page 27. -
Page 8: Answering Device (Kx-Ft907 Only)
1. Installation and Quick Start 1.7 Answering device (KX- FT907 only) 1.7.1 Recording your own greeting message {RECORD} {MIC} {STOP} {FAX/START} Press {RECORD} 2 times. Press {FAX/START}. Speak clearly about 20 cm away from {MIC}, for up to 16 seconds. To stop recording, press {STOP}. -
Page 9: Help Function
1.8 Help function The unit contains helpful information which can be printed for quick reference. How to set up: How to program your unit. Directory: How to use the one-touch dial feature and navigator directory. Auto answer: Explanation of the auto answer setting. Caller ID: How to use the Caller ID features. -
Page 10: Important Information
2. Important Information Important Instructions 2 Important Information 2.1 Important safety instructions When using this unit, basic safety precautions should always be followed to reduce the risk of fire, electric shock, or personal injury. 1. Read and understand all instructions. 2. -
Page 11: For Best Performance
2.2 For best performance Environment L Keep the unit away from electrical noise generating devices, such as fluorescent lamps and motors. L The unit should be kept free from dust, high temperature and vibration. L The unit should not be exposed to direct sunlight. -
Page 12: Preparation
3. Preparation 3 Preparation 3.1 Location of controls KX-FT901 KX-FT903 * The pictured model is KX-FT903. KX-FT907 E F G H... -
Page 13: Overview
{TONE} L To change from pulse to tone temporarily during dialling when your line has rotary pulse services. {SLOW} (KX-FT907 only) L To slow down message playback (page 42). {QUICK} (KX-FT907 only) L To speed up message playback (page 42). {PLAY MESSAGES} (KX-FT907 only) L To play messages (page 41). -
Page 14: Adjusting Volume
3. Preparation Volume 3.3 Adjusting volume {A}{B} Ringer volume 4 levels (high/medium/low/off) are available. While the unit is idle, press {A} or {B}. L If any documents are in the document entrance, you cannot adjust the volume. Confirm that there are no documents in the entrance. -
Page 15: Your Logo
Note: L The other party’s fax machine will print the date and time on each page you send according to your unit’s date and time setting. L The accuracy of the clock is approximately ±60 seconds a month. To correct a mistake Press {<} or {>} to move the cursor to the... - Page 16 3. Preparation Keys Characters G H I M N O m n P Q R S p U V t W X Y Z w x < > % & ¥ To enter a hyphen. {FLASH} To insert a space. {MUTE} To delete a digit.
-
Page 17: Your Fax Number
3.6 Your fax number {FLASH} {MENU} {<}{>} Press {MENU}. SYSTEM SET UP Press {SET}. PRESS[()]&[SET] Press {<} or {>} repeatedly to display the following. YOUR FAX NO. Press {SET}. L The underbar shows the position of the cursor. NO.= Enter your fax number, up to 20 digits. NO.=1234567 Example: Press {SET}. -
Page 18: Telephone
4. Telephone 4 Telephone Automatic Dialling 4.1 Storing names and telephone numbers for the one-touch dial feature and navigator directory For rapid access to frequently dialled numbers, the unit provides the one-touch dial feature (22 items) and navigator directory (100 items). L You can also send faxes using the one-touch dial feature and navigator directory (page 28). -
Page 19: Editing A Stored Item
To correct a mistake Press {<} or {>} to move the cursor to the incorrect character/number, and then make the correction. To delete a character/number Press {<} or {>} to move the cursor to the character/number you want to delete, and press {STOP}. -
Page 20: Making Phone Calls Using The One-Touch Dial Feature And Navigator Directory
4. Telephone 4.2 Making phone calls using the one-touch dial feature and navigator directory Before using this feature, store the desired names and telephone numbers for the one-touch dial feature and navigator directory (page 18). Station keys {STOP} {HELP} {>}{A}{B} {LOWER} {MONITOR} (KX-FT901/KX-FT903) {DIGITAL SP-PHONE} (KX-FT907) 4.2.1 Using the one-touch dial... -
Page 21: Recording A Telephone Conversation (Kx-Ft907 Only)
Recording 4.3 Recording a telephone conversation (KX-FT907 only) You can record a telephone conversation. This conversation can be played back later, either directly (page 41) or remotely (page 43). {RECORD} {STOP} During a telephone conversation, press {RECORD}. L “2WAY RECORDING” will be displayed. To stop recording, press {STOP} or replace the handset. -
Page 22: Viewing And Calling Back Using Caller Information
4. Telephone “PRIVATE CALLER”: The caller requested not to send caller information. “LONG DISTANCE”: The caller made a long distance call. To confirm caller information using the Caller ID list – To print manually, see page 59. – To print automatically after every 20 new calls, activate feature #26 (page 48). - Page 23 L The time of the call cannot be displayed. To confirm the time of the call, print the Caller ID list (page 59). Display while viewing L When the unit could not receive a name, the display will show “NO NAME RCVD”. L When no calls have been received, the display will show “NO CALLER DATA”.
-
Page 24: Storing Caller Information For The One- Touch Dial Feature And Navigator Directory
4. Telephone 4.6 Storing caller information for the one- touch dial feature and navigator directory Important: L This feature is not available in the following cases. – The telephone number includes data other than numbers (i.e., * or #). – The caller information does not include a telephone number. -
Page 25: Dial Lock
Press {SET}. CODE= Enter a 2–4 digit PIN using the dial keys 0–9. L Please note your PIN. If you forget your PIN, consult your nearest Panasonic service centre. Press {SET}. E01= Enter an emergency telephone number, up to 30 digits. -
Page 26: Voice Contact
Important: L This feature can be used only if the other party’s fax machine is equipped with a voice contact feature. {MONITOR} (KX-FT901/KX-FT903) {DIGITAL SP-PHONE} (KX-FT907) 4.8.1 Initiating voice contact... -
Page 27: Fax
5 Fax Sending Faxes 5.1 Sending a fax manually {REDIAL} {A}{B} {STOP} {FAX/START} {MONITOR} (KX-FT901/KX-FT903) {DIGITAL SP-PHONE} (KX-FT907) Open the document feeder tray (1). Adjust the width of the document guides (2) to fit the actual size of the document. Insert the document (up to 10 pages) FACE DOWN until the unit grasps the document and a single beep is heard. -
Page 28: Sending Faxes Using The One-Touch Dial Feature And Navigator Directory
5. Fax Maximum document size 216 mm Effective scanning area L Shaded area will be scanned. 4 mm 4 mm 208 mm 216 mm Document weight L Single sheet: 45 g/m to 90 g/m L Multiple sheets: 60 g/m to 80 g/m Note: L Remove clips, staples or other fasteners. -
Page 29: Broadcast Transmission (Kx-Ft903/ Kx-Ft907 Only)
L Confirm that you have entered the number correctly, and that the number is a fax number. L Confirm that the other party’s fax machine is answering by turning ON the connecting tone feature (feature #76, page 50). 5.4 Broadcast... - Page 30 5. Fax Program items. Using stations 2–11: Press the desired station key. Using stations 12–22: Press {LOWER}, then press the desired station key. Using navigator directory: Press {A} or {B} repeatedly to display the desired item and press {SET}. L To program other items, repeat this step (up to 10 items).
-
Page 31: Transmit Polling (Letting Another Machine Retrieve A Fax On Your Unit)
5.5 Transmit polling (letting another machine retrieve a fax on your unit) This feature allows another person to call your unit to retrieve a document fed into your unit. This allows you to send a fax without paying for the phone call. This feature can be used when the unit is set to TAD/FAX (KX-FT907 only), FAX ONLY or TEL/FAX mode. -
Page 32: Selecting The Way To Use Your Fax Machine
{AUTO ANSWER} repeatedly. How phone calls and faxes are received If the call is a phone call, the fax machine will record the caller’s message automatically. If a fax calling tone is detected, the fax machine will receive the fax automatically. -
Page 33: Tel Mode
L Make sure feature #05 is set to “TEL/FAX” beforehand (page 47). How phone calls and faxes are received If the call is a phone call, the fax machine will ring. If a fax calling tone is detected, the fax machine will receive the fax automatically without ringing. -
Page 34: Receiving A Fax Manually - Auto Answer Off
5. Fax 5.7 Receiving a fax manually – Auto answer 5.7.1 Activating TEL mode Set the fax machine to TEL mode by pressing {AUTO ANSWER} repeatedly to display the following. TEL MODE L The {AUTO ANSWER} indicator turns OFF. AUTO ANSWER... -
Page 35: Receiving A Fax Automatically - Auto Answer On
5.8 Receiving a fax automatically – Auto answer ON 5.8.1 Activating TAD/FAX mode (KX-FT907 only) Make sure feature #05 is set to “TAD/FAX” beforehand (page 47). Press {AUTO ANSWER} repeatedly to display the following. TAD/FAX MODE L The {AUTO ANSWER} indicator turns L The unit will play the pre-recorded greeting message. -
Page 36: Activating Tel/Fax Mode
5. Fax 5.8.2 Activating FAX ONLY mode Make sure feature #05 is set to “FAX ONLY” beforehand (page 47). Press {AUTO ANSWER} repeatedly to display the following. FAX ONLY MODE L The {AUTO ANSWER} indicator turns AUTO ANSWER How faxes are received When receiving calls, the unit will automatically answer all calls and only receive fax documents. -
Page 37: Receive Polling (Retrieving A Fax Placed On Another Fax Machine)
Press {STOP} on the fax machine to talk with the calling party. 5.9 Receive polling (retrieving a fax placed on... -
Page 38: Distinctive Ring Service From Your Phone Company
This service is convenient if you wish to have a different number for your fax machine and telephone, even when you use them on a single telephone line. Distinctive Ring is a service offered by your local... -
Page 39: Copy
7 Copy Copying 7.1 Making a copy {A}{B} {STOP} {COPY} Open the document feeder tray (1). Adjust the width of the document guides (2) to fit the actual size of the document. Insert the document (up to 10 pages) FACE DOWN until the unit grasps the document and a single beep is heard. -
Page 40: Answering Device
8. Answering Device (KX-FT907 only) 8 Answering Device (KX-FT907 only) Greeting 8.1 Recording your greeting messages You can record your own greeting message. The maximum greeting message length is; – in TAD/FAX mode: 16 seconds (default) or 60 seconds – in TEL/FAX mode: 16 seconds We recommend you record a message of less than 12 seconds to make it easier to receive faxes. -
Page 41: Leaving A Message For Others Or Yourself
Memo Message 8.2 Leaving a message for others or yourself To leave a private message for yourself or someone else, you can record a voice memo. This memo can be played back later, either directly or remotely. {RECORD} {MIC} {STOP} {FAX/START} Press {RECORD}. -
Page 42: Erasing Recorded Messages
8. Answering Device (KX-FT907 only) environments, the actual recording time may be less. To repeat a message Press {<} while listening to the message. L If you press {<} within 5 seconds of the beginning of the message, the previous message will be played. -
Page 43: Remote Operation
Remote Operation 8.4 Operating from a remote location You can call your unit from a remote location and access the answering device. Important: L Program the remote operation ID beforehand (feature #11, page 47). L Set the unit to TAD/FAX mode before going out (page 35). L Use a touch tone telephone for remote operations. - Page 44 8. Answering Device (KX-FT907 only) To monitor the room Press {6} to activate the unit’s microphone and listen to the room where the unit is located for about 30 seconds. L After 30 seconds, a beep will sound. To continue monitoring, press {6} again within 10 seconds.
-
Page 45: Message Transfer
Message transfer 8.5 Transferring recorded messages to another telephone This feature allows your unit to call a designated telephone number each time a caller leaves a message. You can then listen to the transferred message via remote operation. Important: L To use this feature, program the transfer telephone number first (feature #60, page 50) and set the unit to TAD/FAX mode. -
Page 46: Programmable Features
9. Programmable Features 9 Programmable Features Features 9.1 Programming {MENU} {<}{>}{A}{B} 9.1.1 Programming basic features Press {MENU}. Press {SET}. Select the feature you wish to program. Press {<} or {>} repeatedly to display the desired feature. Press {SET}. L The current setting of the feature will be displayed. -
Page 47: Basic Features
9.2 Basic features Code #01: Setting the date and time SET DATE & TIME See page 14 for details. Code #02: Setting your logo YOUR LOGO See page 15 for details. Code #03: Setting your fax number YOUR FAX NO. See page 17 for details. -
Page 48: Advanced Features
9. Programmable Features 9.3 Advanced features Code #22: Setting the journal report to print automatically AUTO JOURNAL “ON” (default): The unit will print a journal report automatically after every 35 new fax transmissions and receptions (page 27). “OFF”: The unit will not print a journal report, but will keep a record of the last 35 fax transmissions and receptions. - Page 49 Code #41: Changing the fax activation code FAX ACTIVATION If you wish to use an extension telephone to receive faxes, activate this feature and program the activation code. 1. Press {MENU}. 2. Press {#}, then {4}{1}. 3. Press {SET}. 4. Press {A} or {B} repeatedly to select “ON”. 5.
- Page 50 9. Programmable Features “DARKER”: Darker contrast. Code #60 (KX-FT907 only): Setting the message transfer MESSAGE TRANS. To transfer new voice messages to another telephone (page 45), activate this feature and program the transfer telephone number. 1. Press {MENU}. 2. Press {#}, then {6}{0}. 3.
-
Page 51: Help
L The document was not fed into the unit properly. Re-insert it and try again. OTHER FAX NOT RESPONDING L The other party’s fax machine is busy or has run out of recording paper. Try again. L The other party’s fax machine rings too many times. - Page 52 (page 42). ————————————————————— NO RESPONSE L The other party’s fax machine is busy or has run out of recording paper. Try again. ————————————————————— NO TAD GREETING L Your TAD/FAX greeting message is not recorded.
-
Page 53: When A Function Does Not Work, Check Here
[EXT] jack on the unit. Connect to the [LINE] jack (page 5) (KX-FT901/KX-FT903 only). L The other party’s fax machine is busy or has run out of recording paper. Try again. L The other party’s machine is not a fax machine. -
Page 54: Fax – Receiving
Make sure that the shiny side of the paper is facing down and re-install the paper (page 6). L The other party placed the document in their fax machine the wrong way. Check with the other party. The printing quality is poor. -
Page 55: Recording Paper Jams
The printing quality is poor. L The thermal head is dirty. Clean it (page 58). L Adjust the print contrast using feature #59 (page 49). The copied image is distorted. L Adjust the width of the document guides to fit the actual size of the document. -
Page 56: Document Jams - Sending
10. Help Install the recording paper and close the cover securely by pushing down on both sides (see page 6 for details). 10.5 Document jams – sending Open the cover by pressing the cover open button (1) and remove the jammed document carefully (2). -
Page 57: Document Feeder / Scanner Glass Cleaning
Cleaning 10.6 Document feeder / scanner glass cleaning Clean the document feeder when: – Documents frequently misfeed. – Smudges or black/white lines appear on the original document when sending or copying. Disconnect the power cord and the telephone line cord. Open the cover by pressing the cover open button (1). -
Page 58: Thermal Head / Head Cover Cleaning
10. Help 10.7 Thermal head / head cover cleaning If smudges or black/white lines appear on a copied/received document, check whether there is dust on the thermal head and head cover. Clean them to remove the dust. Disconnect the power cord and the telephone line cord. -
Page 59: General Information
11 General Information Printed Reports 11.1 Reference lists and reports You can print out the following lists and reports for your reference. Basic feature list: provides you with the current settings of the basic programming features (page 47). Advanced feature list: provides you with the current settings of the advanced programming features (page 48). -
Page 60: Specifications
11. General Information Specifications 11.2 Specifications Applicable lines: Public Switched Telephone Network Document size: Max. 216 mm in width, Max. 600 mm in length Effective scanning width: 208 mm Recording paper size: 216 mm × max. 30 m roll Effective printing width: 208 mm Transmission time Approx. -
Page 61: User Record
User record 11.3 User record For your future reference Date of purchase Serial number (found on the rear of the unit) Dealer’s name and address Dealer’s telephone number Attach your sales receipt here. 11. General Information... -
Page 62: Index
12. Index 12. Index 12.1 Index # #01 Date and time: 14 #02 Your logo: 15 #03 Your fax number: 17 #04 Sending report: 27, 47 #05 Auto answer: 47 #06 TAD ring setting: 35, 47 #07 FAX ring setting: 47 #09 TEL/FAX ring setting: 36, 47 #10 Recording time for an incoming message: 47... - Page 63 Original mode (Feature #58): 49 Overseas mode (Feature #23): 48 P Pager call (Feature #70): 37 Polling Receiving: 37 Transmitting: 31 Power failure: 55 Print contrast (Feature #59): 49 Programming: 46 R Receiving faxes Automatically: 35 Manually: 34 Recording Greeting message: 40, 45 Memo message: 41 Telephone conversation: 21 Recording paper: 4, 6...
- Page 64 Copyright: L This manual is copyrighted by Panasonic Communications Co., Ltd. (PCC) and its licensee. Under the copyright laws, this manual may not be reproduced in any form, in whole or part, without the prior written consent of PCC and its licensee.