Panasonic SC-HT65 Operating Instructions Manual
Home theater audio system
Hide thumbs
Also See for SC-HT65:
- Operating instructions manual (57 pages) ,
- Operating instructions manual (56 pages) ,
- Operating instructions manual (56 pages)

Related Manuals for Panasonic SC-HT65


Summary of Contents for Panasonic SC-HT65
- Page 1 Operating Instructions Home Theater Audio System SC-HT65 Model No. RQTV0225-B SC-HT65 GN-En.indb 1 8/17/2007 4:19:29 PM...
-
Page 2: Table Of Contents
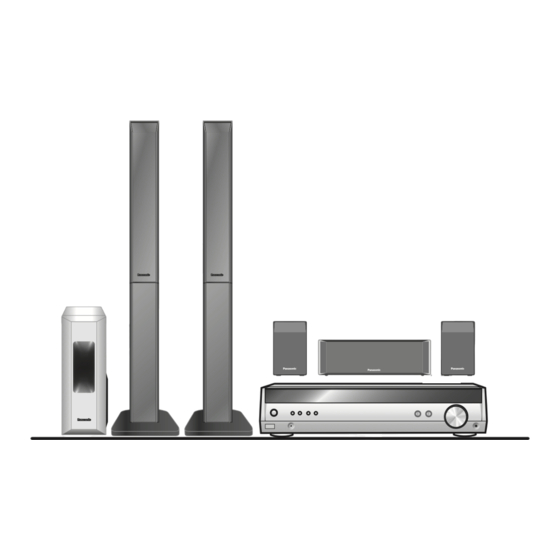
Operating the DVD recorder/DVD player ...21 Operating the TV ...21 Changing the remote control code ...22 Reference Specifications ...22 Troubleshooting guide ...23 Maintenance ...23 Safety precautions ... Back cover SC-HT65 GN-En.indb 2 System AV Control Receiver Front speakers Surround speakers Center speaker Subwoofer Supplied accessories Please check and identify the supplied accessories. -
Page 3: The Remote Control
Use when adjusting speaker level. Press and hold to start the speaker test signal. SC-HT65 GN-En.indb 3 Aim at the sensor, avoiding obstacles, at a maximum range of 7 m directly in front of the unit. Remote control signal sensor... -
Page 4: Main Unit/Display
PCM: Lights when the PCMFIX mode is set C.FOCUS: Appears when you are using Center Focus [DIGITAL INPUT] Lights when input is digital. SC-HT65 GN-En.indb 4 AUTO SPEAKER SETUP Flashes during Auto Speaker Setup. Lights when the setup finishes. [INPUT SELECTOR, <, >] For selecting input. -
Page 5: Step 1 Speaker Setup
There is no difference between the right and left speakers and stands. • For optional wall mount ( page 7). ➡ SC-HT65 GN-En.indb 5 Screws Stand bases (x 8) (x 2) Place the front, center, and surround speakers at approximately the same distance from the seating position. -
Page 6: Connect The Speakers To The Receiver
Connect the speakers to the receiver Attach the speaker-cable stickers to make connection Do not insert the wires beyond the wire insulation. WOOFER SUBWOOFER SC-HT65 GN-En.indb 6 Insert the wire fully. +: White −: Blue Push! Press into the groove. Tighten securely. -
Page 7: Other Speaker Setup Options
■ Leave about 80 mm Wireless system connection Set your sound free with Panasonic’s wireless receiver and speaker systems Attach the SH-FX65 digital transceiver for wireless surround sound. You can also connect your portable audio equipment to the wireless system. -
Page 8: Step 2 Home Theater Connections
VIERA Link “HDAVI Control” This convenient feature links control of your receiver and your other Panasonic home theater equipment. VIERA televisions and DIGA DVD recorders connected with an HDMI cable can be controlled in this way. For details, refer to the operating instructions of your other equipment. -
Page 9: Tv, Bd Player/Dvd Recorder And Dvd Player
BD/DVR OPT 2 BD/DVR DVD-P FRONT (L, R) AUDIO OUT VIDEO OUT SC-HT65 GN-En.indb 9 • Turn off all components before making any connections. • Peripheral equipment and cables sold separately unless otherwise indicated. • To connect equipment, refer to the appropriate operating instructions. -
Page 10: Step 3 Antenna And Ac Mains Supply Connections
However there is no problem using the unit. SC-HT65 GN-En.indb 10 FM indoor antenna (x 1) (x 1) For best reception FM outdoor antenna •... -
Page 11: Step 4 Auto Speaker Setup
Connect the calibration microphone to the [SETUP MIC] jack on the front panel. Placing of calibration microphone. SC-HT65 GN-En.indb 11 • Turn off all components before making any connections. • Peripheral equipment and cables sold separately unless otherwise indicated. •... -
Page 12: Troubleshooting For Auto Speaker Setup
Auto speaker setup will not start if you have plugged in headphone. Unplug any headphone. • VIERA Link “HDAVI Control ” (➡ page 8) is disabled during auto speaker setup. SC-HT65 GN-En.indb 12 AUTO SETUP a) Press and hold •... -
Page 13: Settings
Note When a FIX mode is on, the unit cannot process other signals. This may cause noise to be output. If this occurs, select an input mode other than PCMFIX, or cancel the DTSFIX mode. SC-HT65 GN-En.indb 13 MENU TUNE SETUP Switch on. -
Page 14: Adjusting Speaker Output Level
Output the signal. Adjust the main volume. -LEVEL TEST VOLUME Press and hold. TEST L C R SR SL SUBW SC-HT65 GN-En.indb 14 MENU TUNE SETUP Switch on. RETURN VIERA Link “HDAVI Control” OFF: VIERA Link “HDAVI Control” is OFF ON: VIERA Link “HDAVI Control”... -
Page 15: Basic Operations
96 kHz or 88.2 kHz, you cannot add surround effects with Dolby Pro Logic ΙΙ or SFC. • When input is Dolby Digital or DTS, you cannot use SFC. SC-HT65 GN-En.indb 15 AUTO SPEAKER SETUP INPUT SELECTOR Start play of the source. -
Page 16: Menu Operation
Dim the display for better viewing in a darkened room ➡ page 20 SLEEP OFF The SLEEP timer can turn the unit off after a set time ➡ page 20 SC-HT65 GN-En.indb 16 MENU TUNE SETUP RETURN Sub menu 1 Sub menu 2... -
Page 17: The Radio
If you cannot tune to the correct AM frequency, change the frequency step to suit your area. Main unit 1. Press [-MENU] to select “TUNER” ➡ “AM STEP”. 2. Press [TUNE - or +] to select “AM STEP 9 kHz” or “AM STEP 10 kHz” ➡ [ENTER]. SC-HT65 GN-En.indb 17 MENU TUNE SETUP... -
Page 18: Rds Broadcasts
You can improve FM reception by switching reception to monaural. Main unit 1. Press [-MENU] to select “TUNER” 2. Press [TUNE - or +] to select “MONO” Select “AUTO” to cancel. SC-HT65 GN-En.indb 18 “RDS DISP”. ➡ FINANCE CHILDREN SOCIAL A... -
Page 19: Sound Field
7 (center sound is spread out). The factory setting is 3. Remote control 1. Press [-EFFECT, ―C.FOCUS] to select “C-WDTH”. 2. Press [-] or [+] to adjust the effect. SC-HT65 GN-En.indb 19 SUBWOOFER SKIP STOP DIRECT NAVIGATOR ENTER... -
Page 20: Other Functions
1. Press and hold [―SETUP] to enter the setup menu. 2. Press [TUNE - or +] to select “RESET” ➡ [ENTER]. 3. Press [TUNE - or +] to select “RESET YES” ➡ [ENTER]. To cancel, select “RESET NO”. SC-HT65 GN-En.indb 20 AUTO SPEAKER SETUP INPUT SELECTOR... -
Page 21: Remote Control Operation Guide
Remote control operation guide This remote control can operate Panasonic DVD recorders, DVD players, and televisions. Note that this remote control cannot operate some equipment and that it may not be able to perform some operations. Before using a Panasonic DVD recorder or player DVD recorder Change the remote control code to match the remote control mode of the DVD recorder. -
Page 22: Changing The Remote Control Code
Remote control operation guide Changing the remote control code Change the code if you find the remote control unintentionally also controls other Panasonic equipment. Do the following to set the remote control code and this unit’s remote control mode to the same one. -
Page 23: Troubleshooting Guide
To clean this unit, wipe with a soft, dry cloth. • Never use alcohol, paint thinner or benzine to clean this unit. • Before using chemically treated cloth, carefully read the instructions that came with the cloth. SC-HT65 GN-En.indb 23 Page 5-10 – –... -
Page 24: Safety Precautions
Industrial Co., Ltd. Matsushita Electric Industrial Co., Ltd. Web Site: http://panasonic.net SC-HT65 GN-En.indb 24 This product may receive radio interference caused by mobile telephones during use. If such interference is apparent, please increase separation between the product and the mobile telephone.