Dell PowerEdge FX2 User Manual
Chassis management controller
Hide thumbs
Also See for PowerEdge FX2:
- Deployment manual (107 pages) ,
- Owner's manual (98 pages) ,
- Configuration manual (24 pages)

Related Manuals for Dell PowerEdge FX2


Summary of Contents for Dell PowerEdge FX2
- Page 1 Dell Chassis Management Controller Version 1.4 for PowerEdge FX2/FX2s User's Guide...
- Page 2 WARNING: A WARNING indicates a potential for property damage, personal injury, or death. © 2016 Dell Inc. All rights reserved. This product is protected by U.S. and international copyright and intellectual property laws. Dell and the Dell logo are trademarks of Dell Inc. in the United States and/or other jurisdictions. All other marks and names mentioned herein may be trademarks of their respective companies.
-
Page 3: Table Of Contents
............................20 How to use this User's Guide ............................20 Other documents you may need ........................21 Accessing documents from Dell support site 2 Installing and setting up CMC..................22 ..............................22 Installing CMC hardware ............................22 Checklist to set up chassis ........................ - Page 4 ......................31 Configuring chassis management at server mode ................31 Configuring chassis management at server using CMC web interface ................31 Configuring chassis management at server mode using RACADM 3 Logging into CMC......................33 ......................... 33 Configure public key authentication over SSH ....................33 Generating public keys for systems running Windows ......................
- Page 5 ..............................53 Viewing chassis summary ......................53 Viewing chassis controller information and status ......................53 Viewing information and health status of all servers ....................53 Viewing information and health status of storage sleds ......................54 Viewing information and health status of the IOMs ........................54 Viewing information and health status of fans .................................55 Configuring fans...
- Page 6 ........................67 Applying Chassis Configuration Profiles ........................67 Exporting Chassis Configuration Profiles ........................68 Editing Chassis Configuration Profiles ........................68 Deleting Chassis Configuration Profiles ............68 Configuring Multiple CMCs through RACADM Using Chassis Configuration Profiles ........................68 Exporting Chassis Configuration profiles ........................69 Importing Chassis Configuration profiles ................................
- Page 7 ............................ 87 Clearing Boot Identity Profiles ......................... 87 Viewing Stored Boot Identity Profiles ..........................87 Importing Boot Identity Profiles ..........................87 Exporting Boot Identity Profiles ............................88 Deleting Boot Identity Profiles ..........................88 Managing Virtual MAC Address Pool ..............................88 Creating MAC Pool ..............................88 Adding MAC Addresses ............................89...
- Page 8 ............................118 Deactivating FlexAddress ..............................118 Configuring FlexAddress ..................118 Configuring FlexAddress for chassis-level fabric and slots ...............118 Viewing World Wide Name/Media Access Control (WWN/MAC) IDs ............................... 119 Command messages ....................120 FlexAddress DELL SOFTWARE LICENSE AGREEMENT ........................121 Viewing WWN/MAC address information...
- Page 9 ................122 Viewing basic WWN/MAC address information using web interface ...............122 Viewing advanced WWN/MAC address information using web interface ..................... 123 Viewing WWN/MAC address information using RACADM 14 Managing Fabrics....................... 125 ..............................125 Monitoring IOM health ..........................125 Configuring network settings for IOM ................
- Page 10 ........................137 Executing Power Control Operations ..........137 Executing Power Control Operations for Multiple Servers Using CMC Web Interface .....................138 Executing Power Control Operations on the IOM 17 Configuring PCIe slots....................139 ....................140 Viewing PCIe slot properties using CMC web interface ........................140 Viewing PCIe slot properties using RACADM ..............................140 PCIe reassignment 18 Troubleshooting and recovery..................
-
Page 11: Overview
The Dell Chassis Management Controller (CMC) for PowerEdge FX2/FX2s is a Systems Management hardware and software solution for managing the PowerEdge FX2/FX2s chassis. The CMC has its own microprocessor and memory and is powered by the modular chassis into which it is plugged. -
Page 12: What Is New In This Release
Firmware update of server components such as BIOS and network controllers across multiple servers in the chassis using Lifecycle Controller. • Dell OpenManage software integration — Enables you to launch the CMC web interface from Dell OpenManage Server Administrator or OpenManage Essentials (OME) 1.2. •... -
Page 13: Security Features
• iDRAC IO Identity feature support for enhanced WWN/MAC Address Inventory. • FlexAddress feature — Replaces the factory-assigned World Wide Name/Media Access Control (WWN/MAC) IDs with chassis-assigned WWN/MAC IDs for a particular slot, an optional upgrade. • Graphical display of chassis component status and health. •... -
Page 14: Supported Remote Access Connections
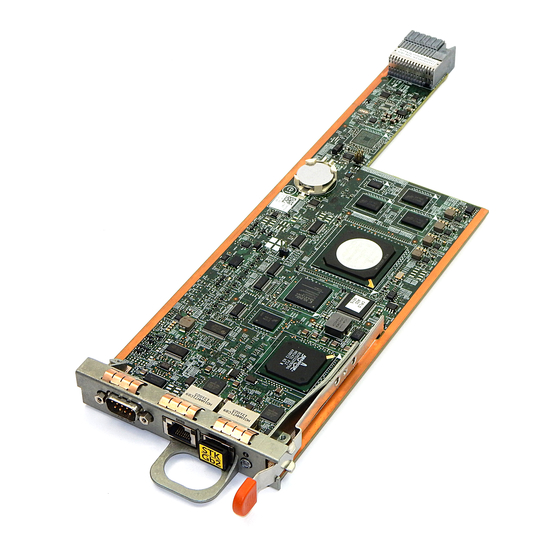
Item Indicator, Button, or Connector Ethernet connector STK/Gb2 (stack) System identification button Low-profile PCIe expansion slots Power supply (PSU1) Power supply (PSU2) I/O module (2) I/O module ports I/O module indicators A Front Panel view of the chassis is given here with a table that lists the parts and devices available in the CMC. Figure 2. -
Page 15: Supported Platforms
The CMC supports the PowerEdge FX2 and FX2s chassis models. The supported platforms are PowerEdge FC630, PowerEdge FM120x4, and PowerEdge FC830. For information about compatibility with CMC, see the documentation for your device. For the latest supported platforms, see the Dell Chassis Management Controller (CMC) Version 1.4 for Dell PowerEdge FX2/FX2s Release Notes available at dell.com/support/manuals. -
Page 16: Supported Firmware Versions
Supported Firmware Versions for Server Component Update The following table lists the supported firmware versions for server components when CMC PowerEdge FX2/FX2s firmware is updated from 1.3 to 1.4 version but the server components are not updated to the next version. -
Page 17: Managing Licenses
Table 4. Supported network adapters PowerEdge FX2/FX2s Platforms Model FC420 FC620 FC430 FC630 FC830 5718 DP 1G 57810S 10G SFP+ 57810S 10G BASE-T 5719 QP 1G LightPulse LPE12002 FC8 HBA LightPulse LPe15002B-M8–D DP 8G Gen LPe16002 Dual Port FC 16 HBA LighPulse LPE12000 FC 8 HBA LightPulse LPe 15000B-M8–D SP 8G... -
Page 18: Types Of Licenses
The master copies of storage sled licenses are stored in the persistent store. For more information, see the Dell Chassis Management Controller for PowerEdge FX2/FX2s RACADM Command Line Reference Guide available at dell.com/support/manuals. -
Page 19: Licensable Features In Cmc
Learn More — Learn more about an installed license, or the licenses available for a component installed in the server. NOTE: For the Learn More option to display the correct page, make sure that *.dell.com is added to the list of Trusted Sites in the Security Settings. -
Page 20: Viewing Localized Versions Of The Cmc Web Interface
RACADM command, see the Dell Chassis Management Controller for PowerEdge FX2/FX2s RACADM Command Line Reference Guide available at dell.com/support/manuals. Other documents you may need To access the documents from the Dell Support site. Along with this Reference Guide, you can access the following guides available at dell.com/support/manuals. •... -
Page 21: Accessing Documents From Dell Support Site
The rack documentation included with your rack solution describes how to install your system into a rack, if required. • For the full name of an abbreviation or acronym used in this document, see the Glossary at dell.com/support/manuals. • Systems management software documentation describes the features, requirements, installation, and basic operation of the software. -
Page 22: Installing And Setting Up Cmc
Management Network: CMC and the iDRAC (on each server) and the network management ports for the switch I/O module are connected to a common internal network in the PowerEdge FX2/FX2s chassis. This allows the management network to be isolated from the server data network. -
Page 23: Daisy Chain Fx2 Cmc Network Connection
In the System Setup page, click iDRAC Settings → System Summary. The CMC IP address is displayed in the Chassis Management Controller section. For more information about iDRAC Settings page in the iDRAC GUI, see the Dell Integrated Dell Remote Access Controller (iDRAC) User’s Guide . - Page 24 Management Network Active CMC The following figure illustrates an example of incorrect cabling of CMC in stacking mode.
-
Page 25: Using Remote Access Software From A Management Station
Using remote access software from a management station You can access CMC from a management station using various remote access software. Here is a list of remote access softwares by Dell which is available from your Operating System. Table 5. CMC Interfaces... - Page 26 For a list of supported Web browsers, see the Supported Browsers section in the Dell System Software Support Matrix at dell.com/support/ manuals. Telnet Provides command line access to CMC through the network. The RACADM command line interface and the connect command, which is used to connect to the serial console of a server or IO module, are available from the CMC command line.
-
Page 27: Remote Racadm Installation
You can also launch CMC from the Dell Server Administrator or Dell OpenManage Essentials. To access CMC interface using Dell Server Administrator, launch Server Administrator on your management station. In the left pane of the Server Administrator home page, click System → Main System Chassis → Remote Access Controller. For more information, see the Dell Server Administrator User’s Guide at dell.com/support/manuals. -
Page 28: Uninstalling Remote Racadm From A Linux Management Station
You can configure and manage CMC, servers, and modules installed in the chassis through a web browser. See the “Supported Browsers" section in the Dell Systems Software Support Matrix at dell.com/support/manuals. The CMC and the management station where you use your browser must be on the same network, which is called the management network. -
Page 29: Downloading And Updating Cmc Firmware
To set the chassis name, location, date, and time by using the command line interface, see the setsysinfo and setchassisname commands. For example racadm setsysinfo —c chassisname or racadm setsysinfo —c chassislocation For more information, see the Chassis Management Controller for PowerEdge FX2/FX2s RACADM Command Line Reference Guide. Setting date and time on CMC You can manually set the date and time, or you can synchronize the date and time with a Network Time Protocol (NTP) server. -
Page 30: Configuring Leds To Identify Components On The Chassis
Configuring LEDs to identify components on the chassis You can enable the LEDs of components (chassis, servers, storage sleds, and I/O Modules) to blink so that you can identify the component on the chassis. NOTE: To modify these settings, you must have the Debug Administrator privilege on a CMC. When a compute sled is performing an identify action, the front LED of the connected storage sled also flashes the identify pattern. -
Page 31: Configuring Chassis Management At Server Mode
Configuring power button To configure the chassis power button: In the left pane, click Chassis Overview → Front Panel → Setup. On the Front Panel Configuration page, under the Power Button Configuration section, select the Disable Chassis Power Button option, and then click Apply. The chassis power button is disabled. - Page 32 • To change Chassis Management at server mode to manage and monitor, use: racadm config –g cfgRacTuning – cfgRacTuneChassisMgmtAtServer 2...
-
Page 33: Logging Into Cmc
06/16/2009 09:00:00 For more information about the sshpkauth, see the Chassis Management Controller for PowerEdge FX2/FX2s Command Line Reference Guide. Generating public keys for systems running Windows Before adding an account, a public key is required from the system that accesses the CMC over SSH. There are two ways to generate the public/private key pair: using PuTTY Key Generator application for clients running Windows or ssh-keygen CLI for clients running Linux. -
Page 34: Generating Public Keys For Systems Running Linux
To access the CMC web interface: Open a web browser supported on your system. For the latest information on supported web browsers, see the Dell Systems Software Support Matrix located at dell.com/ support/manuals. In the Address field, type the following URL, and then press <Enter>: •... -
Page 35: Logging Into Cmc Using A Smart Card
To log in as a local user, Active Directory user, or LDAP user. In the Username field, type your user name: • CMC user name: <user name> NOTE: The CMC user name can contain only alphanumeric characters and certain special characters. The at (@) symbol and following special characters are not supported: –... -
Page 36: Logging Into Cmc Using Single Sign-On
NOTE: If you changed the default HTTPS port number (port 80), access the CMC web page using domain-name is <cmcname.domain-name>:<port number>, where cmcname is the CMC host name for CMC, port number is the HTTPS port number. the domain name, and Insert the smart card and click Login. -
Page 37: Multiple Cmc Sessions
• Logging in: ssh service@<domain> or ssh service@<IP_address>, where IP_address is the CMC IP address. • Sending RACADM commands: ssh service@<domain> racadm getversion and ssh service@<domain> racadm getsel When you log in using the service account, if a passphrase was set up when creating the public or private key pair, you may be prompted to enter that passphrase again. -
Page 38: Updating Firmware
Downloading CMC firmware Before beginning the firmware update, download the latest firmware version from support.dell.com, and save it to your local system. It is recommended to follow the following update order while updating firmware for the chassis: •... -
Page 39: Viewing Currently Installed Firmware Versions Using Racadm
Viewing currently installed firmware versions using RACADM You can view the currently installed firmware versions using racadm getversion command. For more information about other RACADM commands, see the Dell Chassis Management Controller for PowerEdge FX2/FX2s RACADM Command Line Reference Guide. -
Page 40: Updating Cmc Firmware Using Racadm
For updates through OS or Lifecycle Controller, the iDRAC option Enable Shared Components Update through OS/USC must be enabled. For more information on how to enable is this option, see Integrated Dell Remote Access Controller User’s Guide. NOTE: When you update the CMC using DUP, the updates to the IOM Coprocessor available in the CMC image are applied on the next chassis power-up cycle. -
Page 41: Updating Chassis Infrastructure Firmware Using Racadm
To update chassis infrastructure firmware using RACADM, use the fwupdate sub-command. For example, racadm fwupdate <options> <firmware image>. For more information about using the RACADM commands, see the Chassis Management Controller for PowerEdge FX2/FX2s RACADM Command Line Reference Guide. NOTE: To update the chassis infrastructure firmware, make sure the servers are turned off. -
Page 42: Updating Server Component Firmware
The one-to-many update feature in CMC enables you to update server component firmware across multiple servers. You can update the server components using the Dell Update Packages available on the local system or on a network share. This operation is enabled by leveraging the Lifecycle Controller functionality on the server. - Page 43 • You can copy the directories of updates from the Dell Server Update Utility (SUU) download DVD or create and customize the required update versions in the Dell Repository Manager (DRM). You do not need the latest version of the Dell Repository Manager to create this directory.
-
Page 44: Enabling Lifecycle Controller
NOTE: Automatic filtering feature is important while using the Dell Update Package (DUP). The update programming of a DUP can be based on the type or model of a component or device. The automatic filtering behavior is designed to minimize the subsequent selection decisions after an initial selection is made. -
Page 45: Viewing Firmware Inventory
• Automatic filtering is important for firmware updates of Network Interface Controllers (NIC) and RAID Controllers. These device categories have different types and models. Similarly, the firmware update images (DUP) may be available in optimized forms, where a single DUP may be programmed to update multiple types or models of devices of a given category. Viewing firmware inventory You can view the summary of the firmware versions for all components and devices for all servers currently present in the chassis along with their status. -
Page 46: Saving Chassis Inventory Report Using Cmc Web Interface
To view firmware inventory using RACADM, use the getversion command: racadm getversion -l [-m <module>] [-f <filter>] For more information, see the Chassis Management Controller for PowerEdge FX2/FX2s RACADM Command Line Reference Guide available at dell.com/support/manuals. Saving chassis inventory report using CMC web interface To save the chassis inventory report: In the system tree, go to Server Overview, and then click Update →... -
Page 47: Lifecycle Controller Job Operations
User Name • Password For more information, see the CMC for Dell PowerEdge FX2/FX2s Online Help. Click Test Directory to verify whether the directories are readable and writeable. Click Test Network Connection to verify if the network share location is accessible. - Page 48 NIC devices on the server. This behavior is inherent in the Lifecycle Controller functionality and particularly the programming contained with the Dell Update Package (DUP). Currently, Dell Update Packages (DUP) that are less than 85 MB in size are supported.
- Page 49 CIFS or from a NFS. This method provides a quick and easy way to build a custom repository for connected systems that you own using the Dell Repository Manager and the chassis inventory file exported using the CMC Web interface. DRM enables you to create a fully customized repository that only includes the update packages for the specific system configuration.
- Page 50 SM-CLP command line interface, or operating system specific update packages downloaded from support.dell.com. For more information, see the Dell Integrated Dell Remote Access Controller (iDRAC) User’s Guide .
-
Page 51: Viewing Chassis Information And Monitoring Chassis And Component Health
In addition, the latest events in the CMC Hardware Log are also displayed. For more information, see the Dell Integrated Dell Remote Access Controller (iDRAC) User’s Guide. If your chassis is configured as a Group Lead, the Group Health page is displayed after login. It displays the chassis level information and alerts. - Page 52 The following table lists the component properties and information displayed on the Chassis Health page in web interface. Component Heath and Performance Properties Properties Quick Links • MAC Address • Firmware • CMC Status • IPv4 • Last Update • Networking •...
-
Page 53: Viewing Server Model Name And Service Tag
Viewing chassis summary To view the chassis summary information, in the left pane, click Chassis Overview → Properties → Summary. The Chassis Summary page is displayed. For more information about this page, see the CMC for Dell PowerEdge FX2/FX2s Online Help. -
Page 54: Viewing Information And Health Status Of The Ioms
However, you can override to maintain a minimum fan speed by the racadm fanoffset command. For more information about the RACADM commands, see the Chassis Management Controller for PowerEdge FX2/FX2s RACADM Command Line Reference Guide available at dell.com/support/manuals. -
Page 55: Configuring Fans
NOTE: The following message is displayed when both the fans are not present in the slots or if a fan is rotating at a low speed: Fan <number> is less than the lower critical threshold. For more information, see the Online Help. Configuring fans Fan Offset —... -
Page 56: Configuring Cmc
Configuring CMC Chassis Management Controller enables you to configure properties, set up users, and alerts to perform remote management tasks. Before you begin configuring the CMC, you must first configure the CMC network settings to allow CMC to be managed remotely. This initial configuration assigns the TCP/IP networking parameters that enable access to the CMC. -
Page 57: Enabling Or Disabling Dhcp For Dns Ip Addresses
NOTE: If you disable CMC network interface, the disable operation performs the following actions: • Disables the network interface access to out-of-band chassis management, including iDRAC and IOM management. • Prevents the down link status detection. To disable only CMC network access, disable both CMC IPv4 and CMC IPv6. NOTE: The CMC NIC is enabled by default. -
Page 58: Viewing And Modifying Cmc Network Lan Settings
To view IPv6 settings, use the cfgIpv6LanNetworking with the getconfig subcommand. To view IPv4 and IPv6 addressing information for the chassis, use the getsysinfo subcommand. For more information about the subcommands and objects, see the Chassis Management Controller for PowerEdge FX2/FX2s RACADM Command Line Reference Guide. -
Page 59: Configuring Auto Negotiation, Duplex Mode, And Network Speed (Ipv4 And Ipv6)
where < name > is a string of up to 63 alphanumeric characters and hyphens. For example: cmc-1, d-345. NOTE: If a DNS Domain name is not specified then the maximum number of characters is 63. If a domain name is specified then the number of characters in CMC name plus the number of characters in the DNS Domain Name must be less than or equal to 63 characters. -
Page 60: Configuring Management Port 2 Using Racadm
• When Management Port 2 is set for Stacking but is cabled for Redundant (two connections to the TOR switch), routing loops could cause a network storm. Configuring Management Port 2 using RACADM To specify Redundant operation, use racadm config –g cfgNetTuning –o cfgNetTuningNicRedundant 1 command. -
Page 61: Enabling Fips Mode Using Racadm
CMC includes a web server that is configured to use the industry-standard SSL security protocol to accept and transfer encrypted data from and to clients over the Internet. The web server includes a Dell self-signed SSL Digital Certificate (Server ID), and is responsible for accepting and responding to secure HTTP requests from clients. -
Page 62: Configuring Cmc Extended Storage Card
• cfgRacTuneRemoteRacadmEnable For more information about these objects, see the Chassis Management Controller for PowerEdge FX2/FX2s RACADM Command Line Reference Guide available at dell.com/support/manuals. If the firmware on the server does not support a feature, configuring a property related to that feature displays an error. For example, using RACADM to enable remote syslog on an unsupported iDRAC displays an error message. -
Page 63: Adding Members To Chassis Group
To set up the Chassis Group using the CMC web interface: Log in with chassis administrator privileges to the leader chassis. Click Setup → Group Administration. On the Chassis Group page, under Role, select Leader. A field to add the group name is displayed. Type the group name in the Group Name field, and then click Apply. -
Page 64: Disabling An Individual Member At The Member Chassis
Click Setup → Group Administration. In the Chassis Group page, under Role, select None, and then click Apply. The lead chassis then communicates to all the members that they have been removed from the group. The lead chassis can be assigned as a leader or member of a new group. -
Page 65: Synchronizing A New Member With Leader Chassis Properties
Select only those setting categories that you want identically configured, across all members of the chassis group. For example, select Logging and Alerting Properties category, to enable all chassis in the group to share the logging and alerting configuration settings of the lead chassis. Click Save. -
Page 66: Chassis Configuration Profiles
Chassis Configuration Profiles The Chassis Configuration Profiles feature enables you to configure the chassis with the chassis configuration profiles stored in the network share or local management station, and also restore configuration of the chassis. To access the Chassis Configuration Profiles page in the CMC web interface, in the system tree, go to Chassis Overview and click Setup →... -
Page 67: Viewing Stored Chassis Configuration Profiles
Chassis NOTE: You can import chassis configuration profiles using RACADM. For more information, see the Management Controller for Dell PowerEdge M1000e RACADM Command Line Reference Guide . Applying Chassis Configuration Profiles You can apply chassis configuration to the chassis if the chassis configuration profiles are available as stored profiles on the network share. -
Page 68: Editing Chassis Configuration Profiles
Editing Chassis Configuration Profiles You can edit chassis configuration profile name of a chassis. To edit a chassis configuration profile name, perform the following tasks: Go to the Chassis Configuration Profiles page. In the Chassis Configuration Profiles → Stored Profiles section, select the required profile and then click Edit Profile. -
Page 69: Importing Chassis Configuration Profiles
To export the chassis configuration profiles as clone.xml file, type the following: racadm –r xx.xx.xx.xx –u USERNAMECMC –p PASSWORDCMC get –f clone.xml –t xml Importing Chassis Configuration profiles You can import chassis configuration profiles from network share to another chassis by using the set command. To import the chassis configuration profiles from CIFS network share, type the following: racadm set –f clone.xml –t xml –l //xx.xx.xx.xx/PATH –u USERNAME –p PASSWORDCMC To import the chassis configuration profiles from NFS network share, type the following:... -
Page 70: Parsing Rules
When you query a specific CMC card using its group ID and object ID, RACADM creates the racadm.cfg configuration file from the retrieved information. By exporting the file to one or more CMCs, you can configure your controllers with identical properties in a minimal amount of time. -
Page 71: Modifying The Cmc Ip Address
• All parameters are specified as "object=value" pairs with no white space between the object, =, or value. White spaces that are included after the value are ignored. A white space inside a value string remains unmodified. Any character to the right of the = (for example, a second =, a #, [, ], and so on) is taken as-is. - Page 72 # comment, the rest of this line is ignored cfgNicGateway=10.35.9.1 The command racadm config -f <myfile>.cfg parses the file and identifies any errors by line number. A correct file updates the proper entries. Additionally, you can use the same getconfig command from the previous example to confirm the update.
-
Page 73: Configuring Servers
Configuring servers You can configure the following settings of a server: • Slot Names • iDRAC Network Settings • DRAC VLAN Tag Settings • First Boot Device • Server FlexAddress • Remote File Share • BIOS Settings Using Server Clone Configuring slot names Slot names are used to identify individual servers. -
Page 74: Configuring Idrac Network Settings
For more information about the OMSA agent, see the Dell OpenManage Server Administrator User's Guide available at dell.com/support/manuals. To use the iDRAC DNS name as slot name, select Use iDRAC DNS Name for Slot Name option. This option replaces the static slot names with the respective iDRAC DNS names, if it is available. - Page 75 Setting Description Confirm iDRAC Root Password Allows you to retype the password provided in the Password field. Enable iDRAC LAN Enables or disables the iDRAC LAN channel. By default, this option is cleared. Enable iDRAC IPv4 Enables or disables IPv4 on iDRAC. By default, this option is selected.
-
Page 76: Quickdeploy Ip Address Assignments For Servers
Setting Description iDRAC IPv6 Gateway Specifies the default IPv6 gateway to be assigned to the iDRACs. The default value is "::". iDRAC IPv6 Prefix Length Specifies the prefix length to be assigned for the IPv6 addresses on the iDRAC. The default value is 64. Use CMC DNS Settings Enables the CMC DNS Server settings ( IPv4 and IPv6) that are propagated to iDRAC when a blade server is inserted in... -
Page 77: Modifying Idrac Network Settings For Individual Server Idrac
• cfgSessionManagement For more information about the property default values and ranges, see the Dell Integrated Dell Remote Access Controller (iDRAC) RACADM Command Line Reference Guide and Chassis Management Controller for PowerEdge FX2/FX2s RACADM Command Line Reference Guide available at dell.com/support/manuals. -
Page 78: Configuring Idrac Vlan Tag Settings Using Web Interface
On the VLAN Tag Settings page, in the iDRAC section, enable VLAN for the servers, set the priority and enter the ID. For more information about the fields, see the CMC for Dell PowerEdge FX2/FX2s Online Help. Click Apply to save the settings. -
Page 79: Setting First Boot Device For Multiple Servers Using Cmc Web Interface
To set the first boot device, use the cfgServerFirstBootDevice object. To enable boot once for a device, use the cfgServerBootOnce object. For more information about these objects, see the Chassis Management Controller for PowerEdge FX2s RACADM Command Line Reference Guide available at dell.com/support/manuals. -
Page 80: Configuring Sled Network Uplink
On the Deploy Remote File Share page, type appropriate data in the fields. For more information about the field descriptions, see the CMC for Dell PowerEdge FX2/FX2s Online Help. To connect to a remote file share, click Connect. To connect a remote file share, you must provide the path, user name, and password. -
Page 81: Configuring Profile Settings Using Server Configuration Replication
On the Profiles page, in the Apply Profile section, click Manage Profiles. The Manage BIOS Profiles page is displayed. • To edit a profile, click Edit. • To view BIOS settings, click View. • To delete a profile, click Delete. For more information about the field descriptions, see the CMC for Dell PowerEdge FX2/FX2s Online Help. -
Page 82: Adding Or Saving Profile
Adding or saving profile Before copying the properties of a server, first capture the properties to a stored profile. Create a stored profile and provide a name and optional description for each profile. You can save a maximum of 16 stored profiles on the CMC nonvolatile extended storage media. -
Page 83: Importing Profile
Click OK to apply the profile to the selected server. The selected profile is applied to the servers and the servers may be rebooted immediately, if necessary. For more information, see the CMC for Dell PowerEdge FX2/FX2s Online Help. Importing profile You can import a server profile that is stored on a management station to CMC. -
Page 84: Viewing Profile Settings
To view profile settings of the stored server profiles, go to the Server Profiles page. In the Server Profiles section, click View in the View Profile column for the required server. The View Settings page is displayed. For more information on the displayed settings, see the CMC for Dell PowerEdge FX2/FX2s Online Help. Viewing profile log To view the profile log, in the Server Profiles page, see the Recent Profile Log section. -
Page 85: Quick Deploy Of Profiles
Quick Deploy of profiles The Quick Deploy feature enables you to assign a stored profile to a server slot. Any server supporting server configuration replication that is inserted into a slot is configured using the profile assigned to that slot. You can perform the Quick Deploy action only if the Action When Server is Inserted option in the Deploy iDRAC page is set to Server Profile or Quick Deploy and Server Profile. -
Page 86: Saving Boot Identity Profiles
• Initial setup – Create a range of virtual MAC addresses. To create a MAC address, you must have Chassis Configuration Administrator and Server Administrator privileges. – Save boot identity profile templates and customize the boot identity profiles on the network share by editing and including the SAN boot parameters that are used by each server. -
Page 87: Clearing Boot Identity Profiles
To apply a profile to a server, perform the following tasks: Go to the Server Profiles page. In the Boot Identity profiles section, select the server on which you want to apply the selected profile. The Select Profile drop-down menu gets enabled. NOTE: The Select Profile drop-down menu displays all available profiles that are sorted by type from the network share. -
Page 88: Deleting Boot Identity Profiles
To export a stored profile, perform the following tasks: Go to the Server Profiles page. In the Boot Identity Profiles → Stored Profiles section, select the required profile and then click Export Profile. A File Download message is displayed prompting you to open or save the file. Click Save or Open to export the profile to the required location. -
Page 89: Removing Mac Addresses
The valid values are from 1 to 3000. Click OK to add MAC addresses. For more information, see the CMC for Dell PowerEdge FX2/FX2s Online Help. Removing MAC Addresses You can remove a range of MAC addresses from the network share by using the Remove MAC Addresses option available in the CMC web interface. -
Page 90: Launching Idrac From Server Status Page
Click the server for which you want to launch the iDRAC Web interface. On the Servers Status page, click Launch iDRAC GUI. The iDRAC Web interface is displayed. For information about the field descriptions, see the CMC for Dell PowerEdge FX2/ FX2s Online Help. -
Page 91: Configuring Storage Sleds
NOTE: This section is applicable only to dual-controller storage modules. NOTE: You can also configure and monitor storage sleds using the iDRAC Comprehensive Embedded Management Integrated Dell Remote Access Controller (iDRAC) User’s Guide . (CEM). For more information, see the Configuring storage sleds in split-single mode In split-single mode, the two RAID controllers are mapped to a single compute sled. -
Page 92: Configuring Storage Sleds Using Racadm
<command> --proxy Example: racadm getractime --proxy You can also access the iDRAC RACADM remotely. For more information, see the section, “RACADM Proxy”, in the Integrated Dell Remote Access Controller 8 (iDRAC8) Version 2.10.10.10 RACADM Command Line Interface Reference Guide. -
Page 93: Configuring Cmc To Send Alerts
To save the settings, click Apply. Enabling or disabling alerts using RACADM To enable or disable generating alerts, use the cfgAlertingEnable RACADM object. For more information, see the Dell Chassis Management Controller for PowerEdge FX2/FX2s RACADM Command Line Reference Guide. - Page 94 Dell Chassis Management NOTE: For more information on configuring SNMP protocol and trap format, see the Controller for PowerEdge FX2/FX2s RACADM Command Line Reference Guide . Configuring SNMP Trap Alert Destinations Using CMC Web Interface To configure IPv4 or IPv6 alert destination settings using CMC Web interface: In the system tree, go to Chassis Overview, and then click Alerts →...
-
Page 95: Configuring E-Mail Alert Settings
NOTE: The commands in steps 2–5 overwrites any existing settings configured for the index specified (1–4). To determine whether an index has previously configured values, type: racadm getconfig -g cfgTraps -i <index>. If the index is configured, values appear for the cfgTrapsAlertDestIPAddr and cfgTrapsCommunityName objects. - Page 96 -g cfgEmailAlert — I <index> . If the index is configured, values appear for the cfgEmailAlertAddress and cfgEmailAlertEmailName objects. For more information, see the RACADM Command Line Reference Guide for iDRAC and CMC available at dell.com/support/ manuals.
-
Page 97: Configuring User Accounts And Privileges
Configuring user accounts and privileges You can setup user accounts with specific privileges (role-based authority) to manage your system with CMC and maintain system security. By default, CMC is configured with a default root account. As an administrator, you can set up user accounts to allow other users to access the CMC. - Page 98 Privilege Description NOTE: CMC users with the Chassis Configuration Administrator privilege can configure power settings. However, the Chassis Control Administrator privilege is required to perform chassis power operations, including power on, power off, and power cycle. User Configuration Administrator User can: •...
- Page 99 Privilege Description • Power on • Power off • Power cycle • Graceful shutdown • Server Reboot Test Alert User User can send test alert messages. Debug Command Administrator User can execute system diagnostic commands. Fabric A Administrator User can set and configure the Fabric A IOM. The CMC user groups provide a series of user groups that have pre-assigned user privileges.
-
Page 100: Modifying Root User Administrator Account Settings
Table 13. Comparison of Privileges Between CMC Administrators, Power Users, and Guest Users Privilege Set Administrator Permissions Power User Permissions Guest User Permissions CMC Login User Chassis Configuration Administrator User Configuration Administrator Clear Logs Administrator Chassis Control Administrator (Power commands) Server Administrator Test Alert User Debug Command... -
Page 101: Configure Local Users Using Racadm
Standard schema solution that uses Microsoft’s default Active Directory group objects only. • Extended schema solution that has customized Active Directory objects provided by Dell. All the access control objects are maintained in Active Directory. It provides maximum flexibility to configure user access on different CMCs with varying privilege levels. -
Page 102: Configuring Standard Schema Active Directory
In Active Directory, a standard group object is used as a role group. A user who has CMC access is a member of the role group. To give this user access to a specific CMC card, the role group name and its domain name need to be configured on the specific CMC card. -
Page 103: Configuring Extended Schema Active Directory
< Search Domain > is the root level domain to use within the query and < Service Name > is the service name to use within the query. For example: _ldap._tcp.dell.com where ldap is the service name and dell.com is the search domain. -
Page 104: Configuring Generic Ldap Directory Service Using Racadm
_ldap._tcp.domainname.com ldap in the above query is the cfgLDAPSRVLookupServiceName property. cfgLDAPSRVLookupDomainName is configured to be domainname.com. For more information about the RACADM commands, see the Dell Chassis Management Controller for PowerEdge FX2/FX2s RACADM Command Line Reference Guide available at dell.com/support/manuals. -
Page 105: Configuring Cmc For Single Sign-On Or Smart Card Login
Configuring CMC for Single Sign-On or Smart Card login This section provides information to configure CMC for Smart Card login and Single Sign-On (SSO) login for Active Directory users. SSO uses Kerberos as an authentication method allowing users, who have signed in as an automatic- or single sign-on to subsequent applications such as Exchange. -
Page 106: Prerequisites For Single Sign-On Or Smart Card Login
Prerequisites for Single Sign-On or Smart Card login The pre-requisites to configure SSO or Smart Card logins are: • Setup the Kerberos realm and Key Distribution Center (KDC) for Active Directory (ksetup). • A robust NTP and DNS infrastructure to avoid issues with clock drift and reverse lookup. •... -
Page 107: Mozilla Firefox
Users Using Web Interface To configure Active Directory SSO or smart card login for CMC: CMC for Dell PowerEdge FX2/FX2s Online Help . NOTE: For information about the options, see the While configuring Active Directory to setup a user account, perform the following additional steps: •... -
Page 108: Uploading Keytab File
A command success indicates that CMC is able to acquire Kerberos credentials and access the user's Active Directory account. If the command is not successful, resolve the error and run the command again. For more information, see the Dell Chassis Management Controller for PowerEdge FX2/FX2s RACADM Command Line Reference Guide on dell.com/support/manuals. -
Page 109: Configuring Cmc To Use Command Line Consoles
Command Description racadm RACADM commands begin with the keyword racadm, and then followed by a subcommand. For more information, see Dell Chassis Management Controller for PowerEdge FX2/FX2s RACADM Command Line Reference Guide. connect Connects to the serial console of a server or I/O module. For... -
Page 110: Using Ssh With Cmc
Four simultaneous SSH sessions are supported at a time. The session timeout is controlled by the cfgSsnMgtSshIdleTimeout property. For more information about the RACADM commands, see the Dell Chassis Management Controller for PowerEdge FX2/ FX2s RACADM Command Line Reference Guide available at dell.com/support/Manuals. -
Page 111: Configuring Terminal Emulation Software
06/16/2009 09:00:00 For more information about the sshpkauth, see the Chassis Management Controller for PowerEdge FX2/FX2s Command Line Reference Guide. Configuring terminal emulation software CMC supports a serial text console that can be launched using any terminal emulation software. Following are the examples of terminal emulation software that can used to connect to CMC. -
Page 112: Configuring The Managed Server Bios For Serial Console Redirection
Configuring the managed server BIOS for serial console redirection You can use a Remote Console session to connect to the managed system using the iDRAC7 web interface (see the Dell Integrated Dell Remote Access Controller (iDRAC) User’s Guide on dell.com/support/manuals). -
Page 113: Configuring Windows For Serial Console Redirection
NOTE: Make sure that the On with console redirection via COM1 option is selected. Enable Redirection After Boot (default value is disabled). This option enables BIOS console redirection across subsequent reboots. Save the changes and exit. The managed system restarts. Configuring Windows for serial console redirection There is no configuration necessary for servers running the Microsoft Windows Server versions, starting with Windows Server 2003. -
Page 114: Configuring Linux For Server Serial Console Redirection After Boot
When you edit the /etc/grub.conf file, follow these guidelines: • Disable GRUB's graphical interface and use the text-based interface. Else, the GRUB screen is not displayed in console redirection. To disable the graphical interface, comment out the line starting with splashimage. •... -
Page 115: Managing Cmc Using Idrac Racadm Proxy
Test Alert User System Operations Debug Command Administrator Debug Fabric x Administrator (where x is A, B, or C) System Control For more information, see the Dell Chassis Management Controller Version 1.4 for PowerEdge FX2/FX2s RACADM Command Line Reference Guide. -
Page 116: Using Flexaddress And Flexaddress Plus Cards
Using FlexAddress and FlexAddress Plus cards This section provides information about FlexAddress and how to use FlexAddress Plus card to configure FlexAddress. NOTE: The FlexAddress feature is licensed. This feature license is included in the Enterprise License. About FlexAddress FlexAddress allows CMC to assign WWN/MAC IDs to a particular slot and override the factory IDs. Hence, if the server module is replaced, the slot based WWN/MAC IDs remain the same. -
Page 117: Verifying Flexaddress Activation
Dell Feature Cards may contain more than one feature. Once any feature included on a Dell Feature Card has been activated on a chassis, any other features that may be included on that Dell Feature Card cannot be activated on a different chassis. In this case,... -
Page 118: Deactivating Flexaddress
ERROR: Unable to deactivate the feature because the chassis is powered ON NOTE: To activate the FlexAddress feature again, re-boot the CMC. For further information about the command, see the feature command section of the Dell Chassis Management Controller for PowerEdge FX2/FX2s RACADM Command Line Reference Guide. -
Page 119: Command Messages
Command messages The following table lists the RACADM commands and output for common FlexAddress situations. Table 20. FlexAddress commands and output Situation Command Output The feature card inserted is SD card in the CMC module is bound to $racadm featurecard -s valid and contains the another service tag. -
Page 120: Flexaddress Dell Software License Agreement
Software. If you are a commercial customer of Dell or a Dell affiliate, you hereby grant Dell, or an agent selected by Dell, the right to perform an audit of your use of the Software during normal business hours, you agree to cooperate with Dell in such audit, and you agree to provide Dell with all records reasonably related to your use of the Software. -
Page 121: Viewing Wwn/Mac Address Information
You acknowledge that you have read this agreement, that you understand it, that you agree to be bound by its terms, and that this is the complete and exclusive statement of the agreement between you and Dell regarding the Software. -
Page 122: Viewing Basic Wwn/Mac Address Information Using Web Interface
You can also export the WWN/MAC Addresses information for all the servers in the chassis to a local folder. For information about the fields, see the CMC for Dell PowerEdge FX2/FX2s Online Help. Viewing basic WWN/MAC address information using web interface To view WWN/MAC Address information for each server slot or all servers in a chassis, in the basic mode: Click Server Overview →... -
Page 123: Viewing Wwn/Mac Address Information Using Racadm
If a particular partition is disabled, the status is displayed as Disabled and the row displaying the partition is greyed out. For information about the fields, see the CMC for Dell PowerEdge FX2/FX2s Online Help. Viewing WWN/MAC address information using RACADM To view WWNn/MAC address information for all servers or specific servers using RACADM, use the getflexaddr and getmacaddress subcommands. - Page 124 For more information on the getflexaddr and getmacaddress subcommand, see the Dell Chassis Management Controller for PowerEdge FX2/FX2s RACADM Command Line Reference Guide.
-
Page 125: Managing Fabrics
Managing Fabrics The chassis supports two fabric types: Fabric A1 and Fabric A2, which are used by the two I/O Modules, and are always connected to the on-board Ethernet adapters of the servers. NOTE: In the PowerEdge FX2s chassis, fabrics B and C are the PCIe connection to the PCIe Extension cards. Following IO Modules are supported: •... -
Page 126: Configuring Network Settings For Iom Using Racadm
Configuring network settings for IOM using RACADM To configure the network settings for an IOM by using RACADM, set the date and time. See the deploy command section in the Dell Chassis Management Controller for PowerEdge FX2/FX2s RACADM Command Line Reference Guide. -
Page 127: Updating Iom Software Using Cmc Web Interface
IOM must be set to MXL or IOA and you must have the Fabric A Administrator privilege. The Dell PowerEdge FX2 MXL GUI supports changing the switch mode to IOA from MXL and the PowerEdge FX2 IOA GUI supports changing the switch mode to MXL from IOA. -
Page 128: Launching Ioa/Mxl Gui From The I/O Module Overview Page
Launching IOA/MXL GUI from the I/O Module Overview page In the directory tree, go to I/O Module Overview. On the I/O Module Status page, click Launch I/O Module GUI. The IOA/MXL login page is displayed. Launching IOA/MXL GUI from the I/O Module Status page In the directory tree, under the I/O Module Overview, click an IOA/MXL switch. -
Page 129: Using Vlan Manager
You can assign or view the VLAN settings on the IOMs by using the VLAN Manager option. NOTE: This feature is supported only on Dell PowerEdge I/O Aggregator. After the mode of the I/O Aggregator is changed to standalone from stacking, remove the startup configuration and reload the I/O Aggregator. -
Page 130: Viewing The Vlan Settings On Ioms Using Cmc Web Interface
The network settings are configured for the IOM(s). Viewing the VLAN settings on IOMs using CMC web interface To view the VLAN settings on IOM(s) using the CMC Web interface: Go to I/O Module Overview, and click Setup → VLAN Manager. The VLAN Manager page is displayed. -
Page 131: Resetting Vlans For Ioms Using Cmc Web Interface
An Operation Successful message is displayed. The current VLAN settings that are assigned to the IOMs are displayed in the VLAN Assignment Summary field. Resetting VLANs for IOMs using CMC web interface To reset VLANs for IOM(s) to default configurations using the CMC Web interface: Go to I/O Module Overview, and click Setup →... -
Page 132: Managing And Monitoring Power
The PowerEdge FX2/FX2s enclosure consumes AC power and distributes the load across the active power supply unit (PSU). The system can deliver up to 3371 Watts of AC power that is allocated to server modules and the associated enclosure infrastructure. -
Page 133: Grid Redundancy Policy
OpenManage Power Center (OMPC) can be used to monitor and control power consumption of the machines in a data center. PowerEdge FX2/FX2s enables OMPC by providing a provision to set the power cap for the chassis, and bounds to guide the setting of the power cap. -
Page 134: Viewing Power Consumption Status Using Cmc Web Interface
Open a serial/Telnet/SSH text console to CMC, log in, and type: racadm getpbinfo For more information about getpbinfo, including output details, see the getpbinfo command section in the Dell Chassis Management Controller for PowerEdge FX2/FX2s RACADM Command Line Reference Guide. -
Page 135: Configuring Power Budget And Redundancy
Table 21. SEL events for power supply changes Power Supply Event System Event Log (SEL) Entry Insertion Power supply is present. Removal Power supply is absent. AC input received The power input for power supply has been restored. AC input lost The power input for power supply is lost. - Page 136 Configuring power budget and Redundancy using RACADM NOTE: To perform power management actions, you must have the Chassis Configuration Administrator privilege. To enable and set the redundancy policy: Open a serial/Telnet/SSH text console to CMC and log in. Set properties as needed: •...
-
Page 137: Executing Power Control Operations
For information about RACADM commands for chassis power, see the config, getconfig, getpbinfo, and cfgChassisPower sections in the Dell Chassis Management Controller for PowerEdge FX2/FX2s RACADM Command Line Reference Guide. Executing Power Control Operations You can execute the following power control operation for the chassis, servers, and IOM. -
Page 138: Executing Power Control Operations On The Iom
-m switch <action> where <action> indicates the operation you want to execute: power cycle. For information about RACADM commands, see the Dell Chassis Management Controller for PowerEdge FX2/FX2s RACADM Command Line Reference Guide. available at dell.com/support/manuals. Configuring Sled Power Button You can configure the Sled Power Button to disable, so that when you press the Sled power button, it has no effect. -
Page 139: Configuring Pcie Slots
Configuring PCIe slots The PowerEdge FX2/FX2s chassis optionally contain eight PCIe slots where each PCIe slot is assigned to a specific sled. By default, all PCIe slots are mapped. You can enable or disable the assignment of PCIe slots to the servers using the CMC web interface or RACADM commands. -
Page 140: Viewing Pcie Slot Properties Using Cmc Web Interface
For more information about mapping PCIe slots, see the Dell PowerEdge FD332 Owner’s Manual. For more information about managing PCIe slots, see the CMC for Dell PowerEdge FX2/FX2s Online Help. NOTE: The Agent-free monitoring feature is not available for the PCIe PERC and Network cards in the Chassis PCIe slots. - Page 141 –g cfgPCIe –o cfgPCIeReassignmentEnable 1 To disable a PCIe reassignment, run the following command: racadm config –g cfgPCIe –o cfgPCIeReassignmentEnable 0 For more information, see the Dell Chassis Management Controller for PowerEdge FX2/FX2s RACADM Command Line Reference Guide available at dell.com/support/Manuals.
-
Page 142: Troubleshooting And Recovery
Supported interfaces • CLI RACADM • Remote RACADM • Telnet RACADM racdump includes the following subsystems and aggregates the following RACADM commands. For more information about racdump, see the Dell Chassis Management Controller for PowerEdge FX2/FX2s RACADM Command Line Reference Guide. -
Page 143: Downloading Snmp Management Information Base (Mib) File
– Resolution A: Check and replace the AC cord. Check and confirm that the power distribution unit providing power to the power supply is operating as expected. If the failure still persists, call Dell customer service for replacement of the power supply. -
Page 144: Troubleshooting Alerts
• Problem: Inserted a new server into the enclosure with sufficient power supplies, but the server does not power on. – Resolution A: Check for the system input power cap setting—it might be configured too low to allow any additional servers to be powered up. -
Page 145: Resetting Components
The Reset Components page is displayed. To reset the CMC, in the CMC Status section, click Reset CMC. The CMC that is available is rebooted. For more information, see the CMC for Dell PowerEdge FX2/FX2s Online Help Saving or Restoring Chassis Configuration This is a licensed feature. -
Page 146: Interpreting Led Colors And Blinking Patterns
If the ‘*’ is not displayed for one of the configured servers, the settings may not be configured correctly. The output of this command contains detailed NTP statistics that may be useful in debugging the problem. If you attempt to configure a Windows-based NTP server, it may help to increase the MaxDist parameter for ntpd. Before changing this parameter, understand all the implications, since the default setting must be large enough to work with most NTP servers. - Page 147 Component LED Color, Blinking Pattern Status Blue, glowing steadily Server is selected on the KVM Blue, blinking User-enabled module identifier Amber, glowing steadily Not used Amber, blinking Fault Blue, dark No fault IOM (Common) Green, glowing steadily Turned on Green, blinking Firmware is being uploaded Green, dark Turned off...
- Page 148 FW images] CMC has corrupted images • If the prompt indicates a self test failure, there are no serviceable components on CMC. CMC is bad and must be returned to Dell. • If the prompt indicates Bad FW Images, complete tasks in Recovering Firmware Image1.
-
Page 149: Troubleshooting Network Problems
NOTE: Connect the network cable to the left most RJ45. NOTE: In recover mode, you cannot ping CMC normally because there is no active network stack. The recover ping <TFTP server IP> command allows you to ping to the TFTP server to verify the LAN connection. You may need to use the recover reset command after setniccfg on some systems. -
Page 150: Resetting Forgotten Administrator Password
Damage due to servicing that is not authorized by Dell is not covered by your warranty. Read and follow the safety instructions that came with the product. - Page 151 Table 26. CMC Password Jumper Settings J_PWORD (default) The password reset feature is disabled. The password reset feature is enabled. Slide the CMC module into the enclosure. Reattach any cables that were disconnected. NOTE: Make sure that the CMC module is active until the remaining steps are completed. Wait for the CMC to finish rebooting.
-
Page 152: Frequently Asked Questions
Frequently asked questions This section lists the frequently asked questions about the following: • RACADM • Managing and Recovering a Remote System • Active Directory • RACADM After performing a CMC reset (using the RACADM racreset subcommand), when a command is entered, the following message is displayed: racadm <subcommand>... -
Page 153: Active Directory
Yes. In mixed mode, all objects used by the CMC querying process (among user, RAC Device Object, and Association Object) must be in the same domain. The Dell-extended Active Directory Users and Computers Snap-In checks the mode and limits users in order to create objects across domains, if in a mixed mode. -
Page 154: Iom
Can these Dell-extended objects (Dell Association Object, Dell RAC Device, and Dell Privilege Object) be in different domains? The Association Object and the Privilege Object must be in the same domain. The Dell-extended Active Directory Users and Computers Snap-In allows to create these two objects in the same domain only. Other objects can be in different domains.