Electrolux EKC6461AOK User Manual
Hide thumbs
Also See for EKC6461AOK:
- User manual (32 pages) ,
- User manual (32 pages) ,
- User manual (32 pages)
Table of Contents
Advertisement
Quick Links
Advertisement
Table of Contents

Related Manuals for Electrolux EKC6461AOK


Summary of Contents for Electrolux EKC6461AOK
- Page 1 EKC6461AOK EKC6461AOW EKC6461AOX Cooker User Manual...
-
Page 2: Table Of Contents
14. ENERGY EFFICIENCY.................. 24 WE’RE THINKING OF YOU Thank you for purchasing an Electrolux appliance. You’ve chosen a product that brings with it decades of professional experience and innovation. Ingenious and stylish, it has been designed with you in mind. So whenever you use it, you can be safe in the knowledge that you’ll get great results every time. -
Page 3: Safety Information
ENGLISH SAFETY INFORMATION Before the installation and use of the appliance, carefully read the supplied instructions. The manufacturer is not responsible if an incorrect installation and use causes injuries and damages. Always keep the instructions with the appliance for future reference. 1.1 Children and vulnerable people safety WARNING! Risk of suffocation, injury or permanent... -
Page 4: Safety Instructions
Do not use a steam cleaner to clean the appliance. • Metallic objects such as knives, forks, spoons and lids • should not be placed on the hob surface since they can get hot. If the glass ceramic surface / glass surface is cracked, •... -
Page 5: Electrical Connection
ENGLISH • Make sure that the appliance is • Use only correct isolation devices: line installed below and adjacent safe protecting cut-outs, fuses (screw type structures. fuses removed from the holder), earth • Parts of the appliance carry current. leakage trips and contactors. Close the appliance with furniture to •... - Page 6 2.4 Care and Cleaning • Do not let sparks or open flames to come in contact with the appliance when you open the door. WARNING! • Open the appliance door carefully. Risk of injury, fire, or The use of ingredients with alcohol damage to the appliance.
-
Page 7: Product Description
ENGLISH • Only use lamps with the same • Cut off the mains cable and discard it. specifications. • Remove the door catch to prevent children and pets to get closed in the 2.6 Disposal appliance. 2.7 Service WARNING! Risk of injury or suffocation. •... -
Page 8: Before First Use
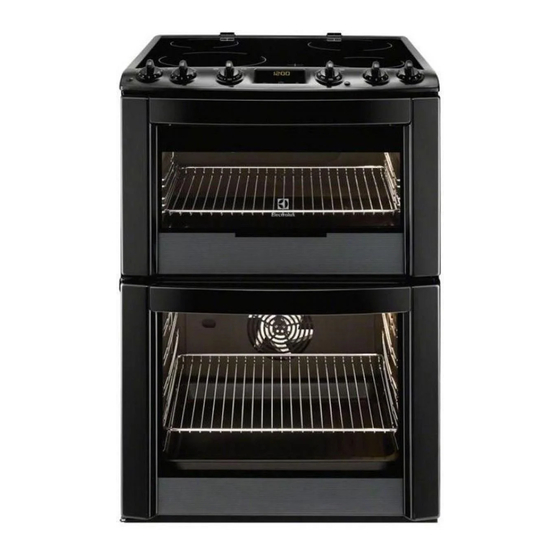
3.3 Cooker control panel Knobs for the hob Knob for the top oven functions Electronic programmer Knob for the main oven functions Temperature lamp / symbol / indicator for the main oven Temperature lamp / symbol / indicator for the top oven 3.4 Accessories... -
Page 9: Hob - Daily Use
ENGLISH Accessories can become hotter than and smoke. This is normal. Make sure usual. The appliance can emit an odour that the airflow is sufficient. 5. HOB - DAILY USE Turn the knob to a necessary heat WARNING! setting. Refer to Safety chapters. To complete the cooking process, turn the knob to the off position. -
Page 10: Hob - Care And Cleaning
Heat setting Use to: Time Hints (min) 1 - 2 Solidify: fluffy omelettes, 10 - 40 Cook with a lid on. baked eggs. 2 - 3 Simmer rice and milkbased 25 - 50 Add the minimum twice as dishes, heating up ready- much liquid as rice, mix milk cooked meals. -
Page 11: Oven - Daily Use
ENGLISH 8. OVEN - DAILY USE 1. Turn the knob for the top / main oven WARNING! functions to select an oven function. Refer to Safety chapters. 2. To deactivate the oven turn the knob for the top / main oven functions to 8.1 Activating and deactivating the off position. -
Page 12: Cooling Fan
Symbol Oven function Application Defrost To defrost frozen food. 100 - 250 Thermaflow® To bake on 1 shelf position and to dry food. Set the temperature 20 - 40 °C lower than for Con‐ ventional Cooking. 8.4 Cooling fan •... -
Page 13: Oven - Clock Functions
ENGLISH 1. Put the trivet into the deep pan so 2. Put the deep pan into the oven on that the supports of the wire shelf the necessary shelf position. point down. 9. OVEN - CLOCK FUNCTIONS 9.1 Display A. Function indicators B. -
Page 14: Oven - Hints And Tips
Clock function Application To set the time of day when the oven should deactivate. For the Minute Minder You can use the functions function the display shows Duration and End the time left. the same time to set the time 3. - Page 15 ENGLISH • The manufacturer recommends that the temperature setting. The you use the lower temperature the differences equalize during the baking first time. procedure. • If you cannot find the settings for a • With longer baking times, you can special recipe, look for the one that is deactivate the oven approximately 10 almost the same.
- Page 16 10.5 Conventional Baking - Top Oven Food Temperature (°C) Time (min) Shelf posi‐ tion Biscuits 170 - 190 10 - 20 Bread 200 - 220 30 - 35 Bread rolls / buns 200 - 220 10 - 15 Cakes: Small & Queen...
- Page 17 ENGLISH Food Temperature (°C) Time (min) Shelf posi‐ tion Souffles 170 - 180 20 - 30 Vegetables: Baked Jacket Po‐ 180 - 190 60 - 90 tatos Vegetables: Roast Potatos 180 - 190 60 - 90 Yorkshire Pudding Large 220 - 210 25 - 40 Yorkshire Pudding Individual 210 - 220...
- Page 18 Food Temperature (°C) Time (min) Shelf posi‐ tion Pastry: Puff Follow manufacturer`s instructions. Reduce the temperature for Fan oven by 20 °C. Plate Tarts 180 - 190 25 - 45 Quiches / Flans 170 - 180 25 - 45...
- Page 19 ENGLISH Food Temperature Time (min) (°C) Duck 180 - 200 25 - 35 minutes per 0.5 kb (1 lb) and 25 - 30 minutes over Pheasant 170 - 190 35 - 40 minutes per 0.5 kb (1 lb) and 35 - 40 minutes over Rabbit 170 - 190...
-
Page 20: Oven - Care And Cleaning
• Use the first shelf position. The one 10.11 Defrost on the bottom. • Remove the food packaging. Put the food on a plate. • Do not cover it with a bowl or a plate. This can extend the defrost time. - Page 21 ENGLISH 11.4 Removing the shelf 2. Hold the door trim on the top edge of the door at the two sides and push supports inwards to release the clip seal. To clean the oven, remove the shelf supports. 1. Pull the front of the shelf support away from the side wall.
-
Page 22: Troubleshooting
1. Deactivate the appliance. To replace the glass panels, 2. Remove the fuses from the fuse box do the same steps in or deactivate the circuit breaker. reverse. Before you lower the trim, attach the A trim The back lamp part to the door. -
Page 23: Installation
ENGLISH Problem Possible cause Remedy The lamp does not oper‐ The lamp is defective. Replace the lamp. ate. The display shows "12.00". There was a power cut. Reset the clock. Steam and condensation You left the dish in the Do not leave the dishes in settle on the food and in oven for too long. -
Page 24: Energy Efficiency
This appliance is supplied without a main plug or a main cable. 13.5 Covering terminal board 14. ENERGY EFFICIENCY 14.1 Product information for hob according to EU 66/2014 Model identification EKC6461AOK EKC6461AOW EKC6461AOX Type of hob Hob inside Freestanding Cooker Number of cooking zones... - Page 25 • If it is possible, always put the lids on the cookware. 14.3 Product Fiche and information for ovens according to EU 65-66/2014 Supplier's name Electrolux EKC6461AOK Model identification EKC6461AOW EKC6461AOX Top oven: 105.6 Energy Efficiency Index Main oven: 104.6...
- Page 26 EKC6461AOK 61.3 kg Mass EKC6461AOW 61.0 kg EKC6461AOX 59.6 kg EN 60350-1 - Household electric cooking – When the cooking duration is appliances - Part 1: Ranges, ovens, longer than 30 minutes, reduce steam ovens and grills - Methods for the oven temperature to measuring performance.
- Page 27 ENGLISH...
- Page 28 www.electrolux.com/shop...