Table of Contents
Advertisement
Quick Links
Advertisement
Table of Contents
Troubleshooting

Related Manuals for Motorola PDR 3500


Summary of Contents for Motorola PDR 3500
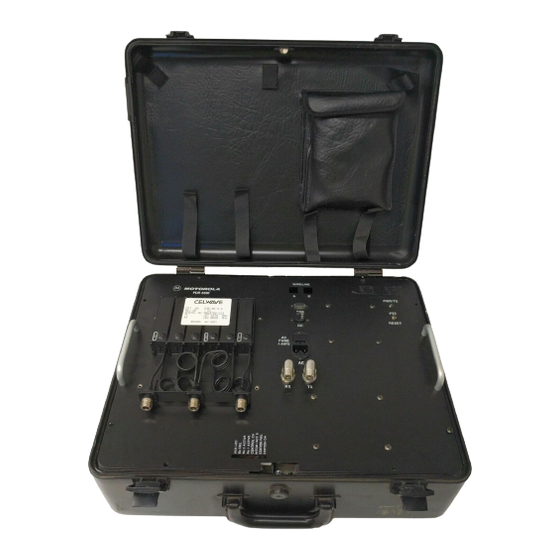
- Page 1 PDR 3500 Portable Repeater Basic Service Manual...
-
Page 2: Table Of Contents
Safe and Efficient Operation of Motorola Two-way Radios ....... . . - Page 3 PDR 3500 RSS Port ........
- Page 4 Physical Replacement of the Receiver Module ........... . . 9-29 After Installing the New Receiver Module .
- Page 5 Figure 2. Switches , Pushbuttons , Connectors, and LED Indicators for PDR 3500 ......
-
Page 6: Foreword
The information contained in this manual supplement relates to all PDR 3500 stations, unless otherwise specified. This manual provides sufficient information to enable service shop personnel to troubleshoot and repair a PDR 3500 to the module level. Safety Information Before operating a PDR 3500 station, please read the “Safety Information”... -
Page 7: Parts Ordering
Accessories and Aftermarket Division Attention: International Order Processing 1313 E. Algonquin Road Schaumburg, IL 60196 Parts Identification 1-847-538-0021 (Voice) 1-847-538-8194 (FAX) Related Documents Quantar User’s Guide (Motorola part number 68P81095E05) RSS User’s Guide (Motorola part number 68P81085E35) September 27, 2000 68P81093C75-O... -
Page 8: Safety Information
Your radio contains a transmitter and a receiver. When it is ON, it Characteristics receives and transmits radio frequency (RF) energy. Exposure to Radio Your Motorola radio is designed to comply with the following national and international standards and guidelines regarding Frequency Energy exposure of human beings to radio frequency electromagnetic energy (EME): •... -
Page 9: Electromagnetic Interference/Compatibility
• Australian Communications Authority Radiocommunications (Electromagnetic Radiation - Human Exposure) Standard 1999 (applicable to wireless phones only) Electromagnetic NOTE: Nearly every electronic device is Interference/ susceptible to electromagnetic interference (EMI) if inadequately shielded, designed or Compatibility otherwise configured for electromagnetic compatibility. -
Page 10: Operational Warnings
Operational Warnings • Vehicles with an air bag WARNING: Do not place a portable radio in the area over an air bag or in the air bag deploy- ment area. Air bags inflate with great force. If a portable radio is placed in the air bag deploy- ment area and the air bag inflates, the radio may be propelled with great force and cause serious injury to occupants of the vehicle. -
Page 11: Antenna Installation
The table below lists the minimum distance for several different ranges of rated radio power. Table 1: Rated Power and Distance Rated Power of Vehicle-Installed Minimum Distance from Mobile Two-Way Radio Transmitting Antenna 7 to 15 Watts 1 Foot (30.5 Centimeters) 16 to 50 Watts 2 Feet (61 Centimeters) More than 50 Watts... -
Page 12: Introduction
Introduction General The Motorola PDR 3500 Station provides conventional analog, ASTRO™ , ASTRO CAI™ , and SECURENET™ capabilities in a compact, software-controlled design. The station architecture and microprocessor-controlled Station Control Module allow for fast and reliable upgrading. FLASH memory in the Station Control Module allows software updates to be performed locally (using serial port), or remotely via modem. -
Page 13: Wireline Circuitry
Wireline Circuitry The station wireline circuitry provides a wide variety of telephone interfaces, including analog, ASTRO, ASTRO CAI, SECURENET, Tone Remote Control, and DC Remote Control. Telephone line connections are easily made to the wireline circuitry via connectors on the top panel. Switching Power The station features a switching-type power supply, accepting a Supply... -
Page 14: System Applications
System Applications Local Control The PDR 3500 is an APCO 25 digital repeater. The station is identical in operation to the Quantar station, hence there is no local control capability. There is no digital-to-audio translation within the station. Local control style operation can be accomplished in several ways: a. -
Page 15: External Duplexer Operation
Repeater RA or Cross The PDR 3500 can be configured for Repeater RA or cross band Band Repeater repeater operation by adding the wireline card and the Astro modem to the each repeater. -
Page 16: Models And Specifications
Models and Specifications Model Chart Table 2: Model Structure Model Description P2066A 132-154 MHz P2067A 150-174 MHz P2068A 403-433 MHz P2069A 438-470 MHz P2070A 470-494 MHz P2071A 494-512 MHz Description PLD1177_ Receiver VHF R1 PLD1178_ Exciter VHF R2 PLD1179_ Receiver VHF R2 PLD1180_ Exciter VHF R2 PLE1254... -
Page 17: Maintenance Specifications
H338AC Add: Transit Case Adds a transit case for increased protection during transport. Maintenance The following are the PDR 3500 specifications for analog as Specifications measured per the revised EIA/TIA 603 Standards and for digital as measured per TIA TSB-102.CAAB: Table 4: Specifications... - Page 18 Table 5: Specifications, continued DUPLEXER Repeat frequency spread, TX/TX: 300 kHz VHF minimum duplexer T-R separation 3 MHz: 132-174 MHz UHF minimum duplexer T-R separation 3 MHz: 403-520 MHz AC power voltage range: 80-265 Vac AC power frequency input: 49-61 Hz External DC power: 11-16 Vdc CURRENT DRAIN...
- Page 19 Notes September 27, 2000 68P81093C75-O...
-
Page 20: Approved Accessories
Approved Accessories General The following accessories are recommended by Motorola for use with the PDR 3500 Portable Repeater. Antenna One of the following antennas should be used: • The magnetic-mount whip antenna (Motorola part number PAN6003A) shipped with the PDR 3500. - Page 21 Notes Running H/F 6-# September 27, 2000 68P81093C75-O...
-
Page 22: Setup And Connections
Setup and Connections Programming with Introduction The PDR 3500 uses the same RSS (Radio Service Software) as the Quantar/Quantro family. Some values shown in RSS screens may not be valid due to hardware differences between the Quantar Station and the PDR 3500. A thorough explanation of the differences will be given in the following sections. -
Page 23: Using The Rss
Hardware Configuration Screen. 1. The first field to verify is the Hardware Platform field. The PDR 3500 is designed using the Quantar profile; it will not operate properly in any other mode. 2. The next field to verify is the System Type field. This field should be set to “Conventional.”... - Page 24 4. Enter the power from the meter in the field shown in the RSS, then hit F7 for the PDR 3500 to adjust the PA power output level. 5. Once the unit adjusts the power, again keyup the station, read the RF power from the meter, dekey the station, enter the level in the RSS field, and hit F7 again to adjust.
-
Page 25: Channel Information
In most applications, the Tx Idle Frequency should remain the same as the Tx Frequency. However, in case of portable or mobile radios unsquelching near the PDR 3500, adjust the Tx Idle frequency to Tx Frequency -6.25 kHz. 2. Set the modulation type to either Analog, ASTRO, ASTRO CAI,... -
Page 26: Electrical Connections
• AC Input Power Connection Connections Each PDR 3500 is shipped with an eight foot, 3-conductor line cord. Attach the receptacle end of the cord to the AC input plug located on the station top panel. Plug the 3-prong plug into a 110 V or 220 V AC grounded outlet. -
Page 27: Separate Rx And Tx Connectors
“TX” (Figure 2). Please refer to the Antenna Spacing Chart on page 4-1 in this manual. Duplexer The duplexer allows the PDR 3500 to use a single antenna for both transmit and receive. 1. Connect the UHF connector labeled “RX” on the station top panel, to the N-type connector labeled “RX”... -
Page 28: Operation
Operation Description This section describes the switches, pushbuttons, connectors, and LED indicators on the PDR 3500 station used during local operation of the station and servicing. Summary of Switches, The following switches, pushbuttons, and connectors allow the Pushbuttons, and station to be operated or serviced locally. See Figure 2 for the location and function of these controls and connectors. -
Page 29: Table 8 Switches, Pushbuttons, And Led Indicators
Receive Transmit Antenna UHF Jack UHF Jack MAEPF-27065-O Figure 2 . Switches , Pushbuttons , Connectors, and LED Indicators for PDR 3500 Table 8 Switches, Pushbuttons, and LED Indicators Item Name Purpose EIA-232 RSS Port Connector Used to connect an IBM® PC (or compatible PC), running RSS software. -
Page 30: Troubleshooting
Troubleshooting Introduction This section provides troubleshooting recommendations and procedures for the PDR 3500 station and associated ancillary equipment. Troubleshooting The troubleshooting procedures and supporting diagrams allow the Overview service technician to isolate station faults to the module/assembly level, or to a limited portion of the motherboard circuitry. -
Page 31: Troubleshooting Overview
RSS are provided in the RSS User’s Guide (manual number 68P81085E35). Troubleshooting Overview Introduction Two procedures are provided for troubleshooting the PDR 3500 station and ancillary equipment. Each procedure is designed to quickly identify faulty modules, and replace them with known working modules. Procedure 1: Routine... -
Page 32: Figure 3 Pdr 3500 Station Troubleshooting Overview (Procedure 1: Routine Maintenance)
RUN STATION DIAGNOSTICS (RSS USER’S GUIDE–68P81085E35) • USING RSS, RUN DIAGNOSTICS ON STATION MODULES MODULE GO TO TROUBLESHOOTING SUSPECTED PROCEDURE 2 FLOW CHART OF BEING FAULTY? DONE Figure 3 PDR 3500 Station Troubleshooting Overview (Procedure 1: Routine Maintenance) 68P81093C75-O September 27, 2000... - Page 33 • USING RSS, ACCESS DIAGNOSTICS SCREEN, RUN DIAGNOSTICS, AND INTERPRET RESULTS MODULE GO TO MODULE REPLACEMENT SUSPECTED PROCEDURES ON page 25 OF BEING FAULTY? GO TO Figure 4 PDR 3500 Station Troubleshooting Overview (Procedure 2: Reported or Suspected Problem) September 27, 2000 68P81093C75-O...
-
Page 34: Figure 4. Pdr 3500 Station Troubleshooting Overview (Procedure 2: Reported Or Suspected Problem)
• PERFORM VERIFYING RECEIVER CIRCUITRY TESTS (Page 14) TO ISOLATE PROBLEM TO RECEIVER CIRCUITRY REPLACE FAULTY MODULE AS DESCRIBED IN MODULE RELACEMENT PROCEDURES BEGINNING ON page 25 Figure 4 PDR 3500 Station Troubleshooting Overview (Procedure 2: Reported or Suspected Problem) (Continued) 68P81093C75-O September 27, 2000... -
Page 35: Interpreting Led Indicators
Figure 5 for the location of all LED indicators on the station’s equipment. A listing of each LED indicator, along with a description of the status indicated by each LED, is shown in Table 9. Table 9: PDR 3500 Station LED Indicator Functions LED Location LED Name Status Definition... - Page 36 – BLINKING ONCE PER SECOND when Receiver #1 is non-functional* – BLINKING TWICE PER SECOND when Receiver #2 is non-functional* or when SAM module, or UHSO Module, is non-functional (unused in PDR 3500) – OFF when RECEIVER is functional* (or no receiver module installed)
- Page 37 September 27, 2000 68P81093C75-O...
-
Page 38: Figure 5 Pdr 3500 Led Indicators And Front Panel Buttons And Connectors
PTT/Reset Switch WL On WL Fail WIRELINE INTERFACE MODULE (Front Panel) Tx Lock PA Full PA Low PA Fail EXCITER MODULE (Front Panel) MAEPF-27030-O Figure 5 PDR 3500 LED Indicators and Front Panel Buttons and Connectors 68P81093C75-O September 27, 2000... -
Page 39: Interpreting Alarm Alert Tones
Alarm is reported when station loses AC/DC line power and reverts to battery backup. Alarm is cleared when station receives AC/DC power. Should not occur in PDR 3500. PA Fail Alarm is reported when PA fails to keyup to full ouput power. -
Page 40: Verifying Transmitter Circuitry
Transmitter-related circuitry on the Station Control Module (SCM) In general, the transmitter circuitry is exercised by injecting and measuring signals using a Motorola R2001 Communications Analyzer (or equivalent). Measured values outside the acceptable range indicate a faulty module; values within range verify proper operation of the above listed modules and circuitry. -
Page 41: Figure 6 Test Equipment Setup For Verifying Transmitter Circuitry
If duplexer or relay not used, disconnect cable from top panel transmit output port. Dummy Load Antenna Motorola R2001 Communications Analyzer COMMUNICATIONS SYSTEM ANALYZER Connect antenna to R2001 antenna input. Be sure to pull RF Port Select Knob out to select antenna rf input. - Page 42 Step 3. Press the PTT button and observe the LED indicators on the Exciter Module front panel. • If PA Low or PA Fail LED is lit, suspect the following: Power Amplifier Module failure Exciter Module failure Loose or bad Exciter-to-PA RF cable DIP switches on backplane are set for incorrect station frequency band.
- Page 43 If the station still does not generate rated power, suspect the following: Power Amplifier Module failure Exciter Module failure Loose or faulty Exciter-to-PA RF cable Faulty forward voltage or control voltage translation circuitry on backplane Step 5. If the PA power out is okay, setup R2001 for spectrum analyzer display.
-
Page 44: Verifying Receiver Circuitry
Receiver-related circuitry in the Station Control Module (SCM) In general, the receiver circuitry is exercised by injecting and measuring signals using a Motorola R2001 Communications Analyzer (or equivalent). Measured values outside the acceptable range indicate a faulty module; values within range verify proper operation of the above listed modules and circuitry. -
Page 45: Verifying Receiver Circuitry Procedure
R2001 is outputting a carrier signal Step 3. Set R2001 to generate a 0.5 µV (-13 dBm) FM signal at the PDR 3500 receiver frequency, modulated by a 1 kHz tone at 3 kHz deviation. The 1 kHz tone should be audible through the handset (or external speaker). -
Page 46: Figure 7 Test Equipment Setup For Verifying Receiver Circuitry
COMMUNICATIONS SYSTEM ANALYZER OSCILLOSCOPE MONITOR RF SECTION Oscilloscope Station Input Receive Connector Station Control Module Front Panel Volume Up Button RJ-11 to BNC Test Cable Motorola Part No. 01-82069W01 (Available from Motorola WASPD) MAEPF-27034-O 68P81093C75-O September 27, 2000 9-17... - Page 47 Step 5. Use the Volume Up button to increase the volume to maximum. Measure the audio level using the R2001. • Audio level should measure approximately 0.75 to 1.5 V p-p. If not, suspect faulty SCM. Step 6. Change R2001 injection signal to •...
-
Page 48: Figure 8A. Coupled Receiver Connection. (Top) B. Coupled Duplexer Connection. (Bottom)
COMMUNICATIONS SYSTEM ANALYZER PDR 3500 Top Panel OSCILLOSCOPE MONITOR RF SECTION Duplexer RF Output Motorola R2001 Communications Analyzer Capacitive Coupler (Isolated T) Dummy Load MAEPF-27035-O COMMUNICATIONS SYSTEM ANALYZER PDR 3500 Top Panel OSCILLOSCOPE MONITOR RF SECTION Duplexer RF Output Motorola... -
Page 49: Figure 9 Disabling The Transmitter
Press and hold Intcm/Acc D LED Station Control Module Shift Button. should Flash yellow. Press Vol Down/ Exciter PA Full LED should Module Access Disable NOT illuminate. MAEPF-27037-O Figure 9 Disabling the Transmitter Step 11. Measure the 12dB SINAD sensitivity and make a note of the level. -
Page 50: Verifying Receiver Circuitry (Digital-Capable Stations)
Step 14. Steps 14 and 15 will test the effect of duplexer quieting on receive sensitivity. Re-enable the transmitter by holding down the Shift button again and pressing the Access Disable button on the SCM. The following lights should indicate that the station is now operating as a repeater: •... -
Page 51: Required Test Equipment
The transmitter circuitry is exercised by injecting and measuring signals using a Motorola R2670 Communications Analyzer (or equivalent), and analyzing the Bit Error Rate using the RSS. Measured values outside the acceptable range indicate a faulty module; values within range verify proper operation of the above modules and circuitry. -
Page 52: Wiring Diagram
• VHF: 0.29 µV (-117.7 dBm) • UHF: 0.43 µV (-114.4 dBm) NOTE: For VHF and UHF stations only, refer to 5. Preselector Field Tuning Procedure in this section, for procedures to tune the receiver preselector. Step 4. Note the receiver BER reading. The BER reading should be 5% or less. -
Page 53: Figure 10 Interconnect Diagram
Power Supply AC Jack Switch Motherboard Terminal Tabs Receiver Exciter MAEPF-27080-O Figure 10 Interconnect Diagram Reference From Description Top panel UHF Receiver mini-UHF Receive RF coaxial cable Top panel AC connector Power supply terminals H, N, GND 120/240 VAC to power supply Power supply terminals POS, Backplane terminals WHT, BLK 14 VDC from power supply... -
Page 54: Module Replacement Procedures
When servicing the equipment, you must take precautionary steps to prevent damage to the modules from static discharge. Complete information on prevention of static protection is provided in Motorola publication number 68P81106E84, available through the Accessories and Aftermarket Division. Some additional precautions are as follows: •... -
Page 55: Care Of Gold-Plated Connector Contacts
Module Replacement This section discusses the replacement of each of the PDR 3500’s modules and related requirements and considerations. 9-26 September 27, 2000 68P81093C75-O... -
Page 56: Station Control
Station Control Before Removing the Old Station Control Module A new SCM contains settings in a codeplug (EEPROM). Those settings can be configured, using the RSS, after the module has been installed. If the old SCM is capable of communicating with the RSS, the old codeplug can be read from the SCM and saved to disk to be programmed into the new SCM. -
Page 57: Wireline
If no preexisting codeplug is available, the new codeplug must be configured manually using the RSS. See the Setup and Connections section of this manual or the RSS User’s Guide (68P81085E35) for details. 2. Perform the following alignment procedures as described in the RSS User’s Guide (68P81085E35) or the Setup and Connections section of this manual, or both. -
Page 58: After Installing The New Wireline Module
• Two-wire/four-wire select jumper • DC remote control selection jumpers 6. Insert the new module. Make sure it is in the cardguides; push it firmly into the chassis until it seats into the card-edge connectors on the backplane. (Do not slam the board against the backplane or push any harder than necessary to seat the connectors.) 7. -
Page 59: After Installing The New Receiver Module
3. Remove the cover plate on the left end of the front of the station by removing two Torx screws from the front of the plate. Remove the four Phillips screws from the side and bottom edges of the plate. Remove two more Phillips screws from the bottom of the chassis under the preselector. -
Page 60: Exciter
Exciter Frequency Band When replacing the Exciter Module, it is important to remember the Considerations frequency-sensitive nature of the Exciter/Power Amplifier combination. The Exciter and the PA must match according to the model breakdown table in this manual. If an Exciter with a new frequency band is being installed, the corresponding PA must be installed, as described in the Power Amplifier subsection of “Module Replacement.”... -
Page 61: Power Amplifier
Exciter must be installed, as described in the Exciter subsection of “Module Replacement.” Of equal importance, the PDR 3500 motherboard contains circuitry which translates between the Exciter from the original Quantar and the PA from the Spectra™ mobile radio. Since the translations depend upon the frequency band of the Exciter and the PA, this circuitry is also frequency-sensitive. -
Page 62: After Installing The New Power Amplifier
5. Reconnect all four cables removed in Step 4. The ribbon cable connector is keyed so it cannot be attached incorrectly. Remember to reattach the metal clip over the ribbon cable connector. 6. Take the sheet of black thermal conductive film that was between the old PA and the chassis and place it on the new PA. -
Page 63: Backplane
12 of the Backplane subsection of “Module Replacement.” Backplane Before Installing the New The PDR 3500 motherboard contains circuitry which translates Backplane between the Exciter from the original Quantar and the PA from the Spectra™ mobile radio. Since the translations depend upon the frequency band of the Exciter and the PA, this circuitry is also frequency-sensitive. -
Page 64: After Installing The New Power Amplifier
9. Lay the new backplane behind the station, and attach all the wires as shown in Figure 10: Interconnect Diagram. 10. Hold the backplane in position behind the chassis. Ensure the wires from the backplane do not bind against the Power Supply. Slide the top of the board toward the chassis top panel, making sure the two RJ-45 connectors fit into their cutouts. -
Page 65: Required Test Equipment
Required Test The following test equipment is required to properly tune the Equipment preselector assembly: • RF Signal Generator: Motorola R2600 Communications Analyzer, R2001 Communications Analyzer (see note), or HP8656A signal generator (or equivalent) • Dip/Peak Monitor: HP435B Power Meter (or... -
Page 66: Preparing Equipment
Preparing Equipment Step 1. Make sure the Receiver Module (with the Preselector Assembly) is installed in a functional PDR 3500. Step 2. Remove the chassis from its case by removing the eight Phillips screws from the edges of the station’s top panel. -
Page 67: Vhf Tuning Procedure
Figure 12 Test Equipment Setup for Preselector Field Tuning VHF Tuning Procedure Step 1. Provide power to the PDR 3500 through either DC or AC (to provide the active 50 Ω termination). Step 2. Adjust the signal generator to the frequency calculated on page 36. -
Page 68: Uhf Tuning Procedure
Step 3. Insert the tuning probe into the cavity “H1” and adjust tuning screw 1 for a PEAK. Step 4. Leave the tuning probe in cavity “H1” and adjust tuning screw 2 for a DIP. Step 5. Insert the tuning probe into cavity “H2” and adjust tuning screw 3 for a DIP. -
Page 69: Preparing Equipment
Step 3. Using F in place of the station receive frequency, perform Step 1 through Step 4 above. Preparing Equipment Step 1. Make sure the Receiver Module (with the Preselector Assembly) is installed in a functional PDR 3500. 9-40 September 27, 2000 68P81093C75-O... -
Page 70: Tuning Procedure
Step 2. Remove the chassis from its case by removing the eight Phillips screws from the edges of the station’s top panel. Step 3. Remove the two Torx screws from the Receiver Module front panel and remove the four Phillips screws. -
Page 71: Figure 15 Location Of Tuning Screws And Cavity Probe Holes
Step 3. Insert the tuning probe into the cavity “U2” and adjust tuning screw 2 for a PEAK. Step 4. Tighten tension nut on tuning screw 2 to at least 12 in. – lb. and fine tune tuning screw 2 for a PEAK. Step 5. -
Page 72: Functional Theory Of Operation
Functional Theory of Operation The following functional theory of operation provides an overview of the station circuitry. For a more thorough functional description of a particular module, refer to the appropriate section of the Quantar User’s Guide (68P81095E05). Refer to the block diagram in Figure 16. -
Page 73: Power Amplifier Module Operation
Power Amplifier The PDR 3500 uses the mid-power Spectra RF power amplifier (RF Module Operation PA) board, housed in a heavy-duty, shielded, aluminum heat sink. The gain of the RF PA board is controlled by the power control voltage from the Exciter Module. -
Page 74: Station Control Module
Station Control Module Introduction The Station Control Module (SCM) is the microprocessor-based controller for the station. Major components include the following: • MC68360 microprocessor, • 56002 Digital Signal Processor (DSP) • Two Application Specific Integrated Circuit (ASIC) devices (host and DSP). Station Control Module The Host Microprocessor (µP) serves as the controller for the SCM, Operation... -
Page 75: Power Supply Module Operation
• Two FLASH memory ICs (which contain the WIB operating software downloaded by the SCM) • An ASIC device to process and route the various audio signals Analog, SECURENET, and ASTRO signals are processed as follows: • Analog signals are converted to digital signals and routed to the Station Control Module via the Time Division Multiplex (TDM) bus.