Motorola MC2100 User Manual
Mc21xx series
Hide thumbs
Also See for MC2100:
- Integrator manual (102 pages) ,
- Quick start manual (2 pages) ,
- Quick start manual (2 pages)
Table of Contents
Advertisement
Quick Links
Advertisement
Table of Contents
Troubleshooting

Related Manuals for Motorola MC2100


Summary of Contents for Motorola MC2100
- Page 1 MC21XX SERIES MOBILE COMPUTER USER GUIDE...
- Page 3 MC21XX SERIES MOBILE COMPUTER USER GUIDE 72E-155020-01 Rev. 101411 October 2011...
- Page 4 Motorola. No right to copy a licensed program in whole or in part is granted, except as permitted under permitted un itte copyright law.
-
Page 5: Revision History
Revision History Changes to the original guide are listed below: Change Date Description... - Page 6 MC21XX Series User Guide...
-
Page 7: Table Of Contents
TABLE OF CONTENTS Revision History ..........................iii ............About This Guide Introduction ............................. i ............Documentation Set ........................i ............Configurations..........................ii ............. Software Versions ........................ii ............Chapter Descriptions ........................iii ............. Notational Conventions........................iii ...... - Page 8 MC21XX Series User Guide Windows CE Desktop ........................2-2 Using the Keypad to Navigate Applications ................... 2-2 Key Combinations ........................2-2 Selecting Items ........................2-3 Adjusting the Volume ........................2-4 Adjusting the Screen Brightness ....................2-4 Windows CE Status Icons ......................2-5 Battery Unknown Icon ......................
- Page 9 Table of Contents Imager Scanning ........................3-4 DataWedge ............................ 3-5 Enable DataWedge ........................3-5 Disable DataWedge ......................... 3-5 Adjusting the Scan Beeper Volume ....................3-5 Using CtlPanel ......................... 3-5 Using DataWedge ........................3-5 Chapter 4: Bluetooth Introduction ............................ 4-1 ..........
- Page 10 viii MC21XX Series User Guide LED Charge Indications ......................6-12 Holster ............................6-13 Handstrap ............................6-14 Installation ..........................6-14 Removal ........................... 6-15 Lanyard ............................6-16 Installation ..........................6-16 Removal ........................... 6-16 ... Tether Installation .......................... 6-17 ....Chapter 7: Maintenance & Troubleshooting Introduction ............................
-
Page 11: About This Guide
Applications for oft Applications for developed applications. eloped applications. loped applications. • Application Guide for Motorola Enterprise Mobility Devices - describes how to use Motorola Enterprise Application Guide fo Application Guid Mobility developed applications. Mobility developed Mobility developed •... -
Page 12: Configurations
MC21XX Series User Guide Configurations This guide covers the following configurations: Data Operating Configuration Radios Display Memory Capture System MC2100 None Color, no touch 128 MB RAM/ Linear imager Windows CE 6.0 Windo 256 MB Flash or 1D laser MC2180 WLAN: 802.11 b/g/n... -
Page 13: Chapter Descriptions
C The following conventions are used in this document: owin • The term “mobile computer” refers to the Motorola MC21XX. • Italics are used to highlight the following: • Chapters and sections in this and related documents • Dialog box, window and screen names •... -
Page 14: Related Documents And Software
Software type and version number Motorola responds to calls by email, telephone or fax within the time limits set forth in support agreements. If your problem cannot be solved by Motorola Enterprise Mobility Support, you may need to return your equipment for servicing and will be given specific directions. - Page 15 About This Guide Manufacturing Label Location...
- Page 16 MC21XX Series User Guide...
-
Page 17: Service Information
Quick Start G AC line cord has to be ordered separately. NOTE NOTE Inspect the equipment for damage. If any equipment is missing or damaged, contact the Motorola Enterprise Mobility Support immediately. See Service Information on page xvi for contact information. -
Page 18: Features
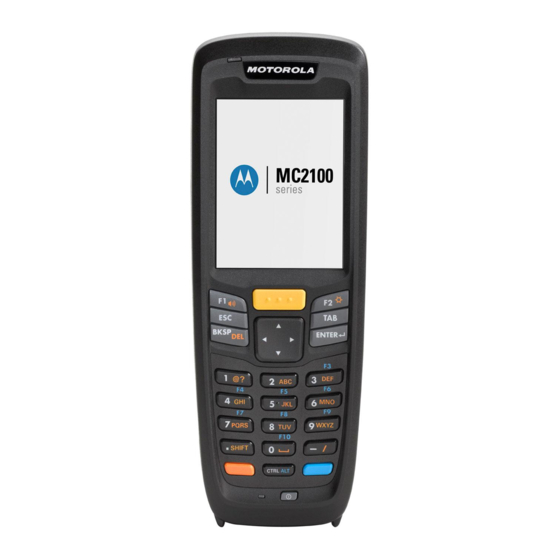
1 - 2 MC21XX Series User Guide Features The features of the MC21XX mobile computer are shown in Figure 1-1 Figure 1-2. LED Indicator Display Scan Buttons Scan But an But Navigation Pad Volume Up Button Power (Default) Programmable MC2180 only Volume Down Button (Default) Programmable MC2180 only... -
Page 19: Mobile Computer Startup
Getting Started 1 - 3 Battery Battery Release Latch Battery Release atte Mini Stylus Mini Stylus Mini Speaker Speaker Exit Window MC21XX Mobile Computer (Back View) puter (Back View) uter (Back View) Figure 1-2 Mobile Computer Startup rtup rtup To start using the MC21XX: MC21XX: MC21XX: •... -
Page 20: Install Main Battery
1 - 4 MC21XX Series User Guide NOTE Select microSD cards with environmental and/or the write cycle performance specifications that meet or exceed the application requirements. To insert the microSD card: Place the MC21XX face-down on surface. Slide the card holder door down to unlock. Lift the microSD card holder door. -
Page 21: Battery Charging
Getting Started 1 - 5 Insert Battery Figure 1-5 Battery Charging CAUTION Ensure that you follow the guidelines for battery safety described in uidelines for battery safe elines for battery saf Battery Safety Guidelines on page 7-2. The main battery can be charged before insertion into the MC21XX or after it is installed. Use the Four-slot efore insertion into th efore insertion into th Battery Charger to charge the main battery (out of the MC21XX) or the supplied power supply to charge the... - Page 22 1 - 6 MC21XX Series User Guide AC Line Cord Power Supply Power Port Barrel Jack Charging Using Power Supply Figure 1-6 Connect the AC Line Cord to the power supply. Connect the AC plug to an AC outlet. Lift the rubber plug covering the MC21XX power port. power port.
-
Page 23: Spare Battery Charging
Getting Started 1 - 7 Spare Battery Charging To charge a spare battery: Connect the Four-slot Battery Charger to the appropriate power source. See Chapter 6, Accessories setup instructions. Insert the spare battery, bottom first, into the spare battery charging slot and gently press down on the y pres battery to ensure proper contact. -
Page 24: Main Battery Removal
1XX. Press the Power button to place the MC21XX in suspend mode. On the MC2180, tap Safe Battery Swap. On the MC2100, using the navigation pad, scroll down to Safe Battery Swap. Press the Enter key. Battery Swap attery Swap. Press . -
Page 25: Turning Off The Radios
Getting Started 1 - 9 Turning Off the Radios NOTE MC2180 only. WLAN Radio To turn off the WLAN radio tap the Fusion Signal Strength icon on the task tray and select Disable Radio. An d select X appears in the icon indicating that the radio is disabled (off). Fusion Signal Strength Icon Fusion Signal Strength Icon Figure 1-9... - Page 26 1 - 10 MC21XX Series User Guide...
-
Page 27: Chapter 2 Operation
These applications were not developed used by application de used by application to support end users. Refer to the Application Guide for Motorola Enterprise Mobility Devices for the sample to support end use to support end use applications. -
Page 28: Mc21Xx Series User Guide
Figure 2-2 Using the Keypad to Navigate Applications e Keypad to Na e Keypad to N The MC2100 screen is a non-touch screen and therefore navigation and control of an application is performed 2100 screen 2100 using the keypad. keypad... -
Page 29: Selecting Items
Operation 2 - 3 Key Combinations Table 2-1 Action Key Combination Access the Start menu on the Task bar Press CTRL - ESC Switch fields within an application Press TAB Close windows or cancel operations Press ESC Access the Task Manager Press ALT - TAB Minimize current window Press ALT - ESC... -
Page 30: Adjusting The Volume
2 - 4 MC21XX Series User Guide Adjusting the Volume To adjust the beeper volume on the MC2100 and the audio volume on the MC2180: Press Orange key - F1. The volume control box appears. Volume Control Box Figure 2-3 Use the navigation pad to adjust the volume. -
Page 31: Windows Ce Status Icons
Operation 2 - 5 Windows CE Status Icons The taskbar (at the bottom of the screen) displays the Start button, active programs and status icons. The taskbar icons are described in Table 2-2. The taskbar icons display the function status, indicate what programs are active and indicate the battery charge status. -
Page 32: Battery Unknown Icon
2 - 6 MC21XX Series User Guide Taskbar Icons (Continued) Table 2-2 Icon Description Wireless Connection Status: Indicates WLAN signal strength. DataWedge Running: Indicates that the DataWedge application is running. DataWedge Idle: Indicates that the DataWedge application is idle. Shift: Indicates that the Shift function is selected. Shift Lock: Indicates that the Shift Lock function is selected. -
Page 33: Programs Menu
From the Start menu, tap Programs to open the Programs menu. The programs installed on the MC21XX programs installed on programs installed on with Windows CE display in the Programs menu. Refer to the Application Guide for Motorola Enterprise tion Guide for Motoro on Guide for Moto ®... -
Page 34: Control Panel
2 - 8 MC21XX Series User Guide Control Panel Table 2-4 lists the applications in the Control Panel. Programs on the Control Panel Table 2-4 Icon Description Icon Description Backlight: Adjust the backlight Bluetooth Device Properties: Launch Propert brightness and power settings. the Bluetooth application. -
Page 35: Keyboard Input Panel Button
Operation 2 - 9 Keyboard Input Panel Button On the MC2180, use the Keyboard Input Panel as an alternate input device. For more information, see Entering Information Using the Keyboard Input Panel on page 2-12. Desktop Display Button On the MC2180, use the Desktop Display button to minimize all open programs and display the desktop. displa Task Manager and Properties Use the Task Manager to control an application’s use and use the Properties functions to set display and... -
Page 36: Stylus
2 - 10 MC21XX Series User Guide • Check the Auto hide checkbox to make the taskbar disappear, touch the bottom of the display to make the taskbar return. • Check the Show Clock checkbox to display the clock on the taskbar. Select OK to save the settings and exit the window. -
Page 37: Entering Information
Operation 2 - 11 Mini Stylus Installation Figure 2-10 Use the stylus for selecting items and entering information on the screen. The stylus functions as a pen and a reen. The stylus funct n. The stylus funct mouse. Tap the touch screen once with the stylus to select options and open menu items. s and open menu item s and open me Using the Stylus... -
Page 38: Entering Information Using Keypad
2 - 12 MC21XX Series User Guide Entering Information Using Keypad The alphanumeric keypad produce the 26-character alphabet (A - Z), numbers (0 - 9), function keys and assorted characters. The keypads default characters/functions are printed white, the ALPHA character/functions are printed orange and the functions are printed blue. See Appendix B, Keypad for keypad special functions and special character generation. -
Page 39: Performing A Cold Boot
Press the Power button to place the MC21XX in suspend mode. On the MC2180, tap Safe Battery Swap. On the MC2100, using the navigation pad, scroll down to Safe Battery Swap. Press the Enter key. fe Battery Swap fe Battery Swap. -
Page 40: Battery Health
2 - 14 MC21XX Series User Guide Power Settings - Wakeup Tab Figure 2-13 Battery Health The health of the battery can be viewed on the MC21XX Power applet. Select Start > Settings > Power icon > er applet. Select applet. -
Page 41: Using The Keypad
Operation 2 - 15 Using the Keypad Single-hand Method Single-hand Method Single-hand Method Two-hand Method Entering Data on the Keypad Entering Data Enter Figure 2-14 re 2-14 re 2-14... -
Page 42: Browser
2 - 16 MC21XX Series User Guide Browser NOTE MC2180 only. To use the browser: Tap Start > Programs > Neon 1. The browser window appears. Address Bar Menu Bar Display Address and Menu Bar Browser Figure 2-15 Full screen Favorites Favorite vorite... -
Page 43: Installation
Operation 2 - 17 Installation To install TEAM Client: Tap Start > Programs > TEAM Client Configuration. Follow the on-screen prompts. Warm boot the MC2180. Group Broadcast Communication Buttons Group Broadcast Private Response MC2180 TEAM Express Button Assignment Figure 2-17 •... - Page 44 2 - 20 MC21XX Series User Guide...
-
Page 45: Chapter 3 Data Capture
CHAPTER 3 DATA CAPTURE Introduction The MC21XX provides three types of data capture options: re options: e options: • linear imager • 1D laser scanner • 2D imager (MC2180 only). Linear Imager The MC21XX with an integrated linear CCD imager has the following features: tegrated linear CCD i tegrated linear CCD i •... -
Page 46: Operational Modes
Practice quickly shows what tolerances to work within. NOTE Contact the Motorola Enterprise Mobility Support Center if chronic scanning difficulties develop. Decoding of properly printed bar codes should be quick and effortless. -
Page 47: Laser Scanning And Linear Imaging
Data Capture 3 - 3 Laser Scanning and Linear Imaging To scan bar codes with the MC21XX: Ensure that the MC21XX is loaded with a scanning application. See DataWedge on page 3-5 for more information. If the MC21XX is equipped with a rotating head, adjust the head prior to scanning. Aim the scan window at the bar code. -
Page 48: Imager Scanning
3 - 4 MC21XX Series User Guide NOTE Scanning procedures depend on the application and MC21XX configuration. An application may use different scanning procedures from the one listed above. Imager Scanning To read a bar code, a scan-enabled application is required. The MC21XX contains the DataWedge application that allows the user to enable the scanner to decode bar code data and display the bar code content. -
Page 49: Datawedge
Data Capture 3 - 5 NOTE Imager decoding usually occurs instantaneously. The MC2180 repeats the steps required to take a digital picture (image) of a poor or difficult bar code as long as the scan button remains pressed. DataWedge Enable DataWedge To enable DataWedge: Tap Start >... - Page 50 3 - 6 MC21XX Series User Guide Select 5. Feedback. Select 2. On Send. Select 1. Beeper. Select 4. Volume. Enter a value between 0 and 3 where 0 is the lowest and 3 the highest. Select Save.
-
Page 51: Chapter 4 Bluetooth
Hop Sequence Modification - Avoids interference by selectively reducing the number of hopping channels. • Channel Maintenance - A method for periodically re-evaluating the channels. When AFH is enabled, the Bluetooth radio “hops around” (instead of through) the 802.11b high-rate channels. AFH coexistence allows Motorola mobile computers to operate in any infrastructure. -
Page 52: Security
4 - 2 MC21XX Series User Guide The Bluetooth radio in this MC2180 operates as a Class 2 device power class. The maximum output power is 2.5mW and the expected range is 32.8 feet (10 meters). A definition of ranges based on power class is difficult to obtain due to power and device differences, and whether one measures open space or closed office space. -
Page 53: Bluetooth Power States
Bluetooth 4 - 3 Bluetooth Power States Cold Boot Performing a cold boot turns off the state of the Bluetooth radio. Warm Boot Performing a warm boot turns off the state of the Bluetooth radio. Suspend When there is an active Bluetooth connection, the Bluetooth radio goes into low power mode maintaining the s into low power mod into low power mo active connection. -
Page 54: Using Microsoft Bluetooth Stack
4 - 4 MC21XX Series User Guide Using Microsoft Bluetooth Stack The following sections provide information on using the Microsoft Bluetooth stack. Power Modes The Bluetooth radio switches between normal and low power modes automatically. When data transfer is data required, the radio goes into normal mode. -
Page 55: Available Services
Bluetooth 4 - 5 Select Trusted. A dialog box appears. Tap Yes. The Bluetooth window appears. Enter PIN Figure 4-3 Enter a PIN and then tap OK. Enter the PIN on the other device. The device in the list become trusted (key icon). sted (key icon). - Page 56 4 - 6 MC21XX Series User Guide...
-
Page 57: Chapter 5 Wireless Applications
MC21XX. Refer to th MC21XX. Refer to th information on configuring wireless profiles. Go to on on configuring wire on on configuring wire http://www.motorola.com/enterprisemobility/manuals for the latest version of this guide. See version of this guide. sion of this guide. - Page 58 5 - 2 MC21XX Series Integrator Guide Signal Strength Icon Wireless Launcher Menu Figure 5-1 Many of the items in the menu invoke one of the Fusion applications. These menu items and their ations. These menu ite ations. These menu it corresponding applications are summarized in Table 5-1.
-
Page 59: Signal Strength Icon
Wireless Applications 5 - 3 Signal Strength Icon The Signal Strength icon in the task tray indicates the mobile computer’s wireless signal strength as follows: Signal Strength Icons Descriptions Table 5-2 Icon Status Action Excellent signal strength WLAN network is ready to use. Very good signal strength WLAN network is ready to use. - Page 60 5 - 4 MC21XX Series Integrator Guide Enter the Manage Profile screen, select the profile (press and hold), and select the Connect option in the context menu that appears.
-
Page 61: Introduction
Chapter 6 Accessories Introduction The MC21XX accessories provide a variety of product support capabilities. Accessories include cradles, oduct support capabil oduct support capabil cables and spare battery chargers. Table 6-1 lists the MC21XX accessories. sts the MC21XX acce sts the MC21XX MC21XX Accessories Table 6-1 Accessory... - Page 62 6 - 2 MC21XX Series User Guide MC21XX Accessories (Continued) Table 6-1 Accessory Part Number Description International AC Line Cord Provides power to the 2-wire power supply. Purchase separately. US AC Line Cord 23844-00-00R Provides power to the 3-wire power supply. International AC Line Cord Provides power to the 3-wire power supply.
-
Page 63: Single-Slot Usb Cradle
Accessories 6 - 3 Single-slot USB Cradle CAUTION Ensure that you follow the guidelines for battery safety described in Battery Safety Guidelines on page 7-2. The Single-slot USB cradle: • Provides 5.4VDC power for operating the MC21XX and charging the battery. •... -
Page 64: Four-Slot Charge Only Cradle
6 - 4 MC21XX Series User Guide Four-slot Charge Only Cradle CAUTION Ensure that you follow the guidelines for battery safety described in Battery Safety Guidelines on page 7-2. The Four-slot Charge Only cradle: • Provide 5.4 VDC power for operating the MC21XX and charging the battery. •... -
Page 65: Four-Slot Ethernet Cradle
Accessories 6 - 5 Four-slot Ethernet Cradle CAUTION Ensure that you follow the guidelines for battery safety described in Battery Safety Guidelines on page 7-2. The Four-slot Ethernet cradle: • Provide 5.4 VDC power for operating the MC21XX and charging the battery. •... -
Page 66: Speed Led
6 - 6 MC21XX Series User Guide Speed LED The green Speed LED lights to indicate that the transfer rate is 100 Mbps. When it is not lit it indicates that the transfer rate is 10 Mbps. Link LED The yellow Link LED blinks to indicate activity, or stays lit to indicate that a link is established. When it is not lit, ed. -
Page 67: Four-Slot Spare Battery Charger
Accessories 6 - 7 Four-slot Spare Battery Charger CAUTION Ensure that you follow the guidelines for battery safety described in Battery Safety Guidelines on page 7-2. The Four-slot Spare Battery Charger simultaneously charges up to four spare batteries. Spare Battery Charging To charge up to four spare batteries: Insert the spare battery into the spare battery charging slot, contact end first. -
Page 68: Modem Adapter Cable/Modem Dongle
6 - 8 MC21XX Series User Guide Modem Adapter Cable/Modem Dongle Use the Modem Adapter Cable and Modem Dongle to enable data communication between the MC21XX and a host computer, remotely through the phone lines, and synchronizes information between the MC21XX and a host computer. -
Page 69: Setup
Accessories 6 - 9 Setup Connecting to the MC21XX Modem Adapter Cable Modem Dongle Modem Dongle Setup Dongle Setup Dongle Setup Figure 6-7 Do not connect the modem's 15-pin connector into a VGA port of a host computer. Do not conne Do not conne CAUTION AUTION... - Page 70 6 - 10 MC21XX Series User Guide Modem LED Indicator Table 6-2 Indication Modem is not properly connected to the MC21XX; modem is not receiving power. Green Modem is connected to the MC21XX and is receiving power. Solid Amber MC21XX is communicating with the host computer.
-
Page 71: Usb Activesync/Charge Cable
Accessories 6 - 11 USB ActiveSync/Charge Cable The USB ActiveSync/Charge cable: • Provide the MC21XX with operating and charging power when used with the approved power supply. • Synchronize information between the MC21XX and a host computer. With customized or third party software, it can also synchronize the MC21XX with corporate databases. -
Page 72: Led Charge Indications
6 - 12 MC21XX Series User Guide The MC21XX LED Indicator indicates the MC21XX battery charging status. The battery usually charges in less than four hours. See, Table 1-1 on page 1-6 for charging status indications. When charging is complete, remove the cable by gently pulling the MC21XX and the cable apart until the snaps release the MC21XX. -
Page 73: Holster
Accessories 6 - 13 Holster The holster provides a holder for the MC21XX. Holster Figure 6-10 The holster holds the MC21XX on a belt or waist band. Slide the MC21XX into the holster with the screen belt or waist band. Sli elt or waist band. -
Page 74: Handstrap
6 - 14 MC21XX Series User Guide Handstrap Loop Hook Material Loop Material Mini Stylus Holder Belt Buckle Handstrap Figure 6-11 Installation To install the handstrap: Feed both loops through the mounting slots. through the mounting hrough the mounting Strap Tab Loop Mounting Slots Feed Loops Through Mounting Slots... - Page 75 Accessories 6 - 15 Secure Tab Figure 6-13 Press the tab down to secure. Feed the belt through the handstrap bar. Connect Handstrap to Handstrap Bar nect Handstrap to Han ct Handstrap to Han Figure 6-14 Feed the belt through the buckle. he belt through the bu he belt through the bu Removal...
-
Page 76: Removal
6 - 16 MC21XX Series User Guide Lanyard Buckle Belt Mini Stylus Holder us Holder Lanyard Figure 6-15 Installation Feed the belt through the handstrap bar. handstrap bar. ands Lanyard Installation Figure 6-16 Feed the belt through the buckle. Removal... -
Page 77: Tether Installation
Accessories 6 - 17 Tether Installation Use the tether to attach the mini stylus or pen stylus to the MC21XX handstrap bar. To install the tether: Insert loop into mounting hole on stylus. Feed other end through loop and pull taught. Feed loop into mounting hole on handstrap bar. - Page 78 6 - 18 MC21XX Series User Guide...
-
Page 79: Chapter 7 Maintenance & Troubleshooting
MC21XX screen. ect on the surface of ect on the surface of Motorola recommends using a screen protector, p/n TBS. recommends using a ommends using • The screen of the MC21XX is glass. Do not to drop the MC21XX or subject it to strong impact. -
Page 80: Battery Safety Guidelines
MC21XX Series User Guide • A screen protector is applied to the MC21XX. Motorola recommends using this to minimize wear and tear. Screen protectors enhance the usability and durability of touch screen displays. Benefits include: • Protection from scratches and gouges •... -
Page 81: Cleaning
Always wear eye protection. Read warning label on compressed air and alcohol product before using. fore using. fore using If you have to use any other solution for medical reasons please contact Motorola for more please contact Motorol ease contact Motoro information. -
Page 82: Cleaning The Mc21Xx
7 - 4 MC21XX Series User Guide • Cotton tipped applicators • Isopropyl alcohol • Can of compressed air with a tube. Cleaning the MC21XX Housing Using the alcohol wipes, wipe the housing including keys and in-between keys. Display The display can be wiped down with the alcohol wipes, but care should be taken not to allow any pooling of e taken not to allow a aken not to allow a liquid around the edges of the display. -
Page 83: Cleaning Frequency
Maintenance & Troubleshooting 7 - 5 All sides of the connector should also be rubbed with the cotton tipped applicator. Do not point nozzle at yourself and others, ensure the nozzle or tube is away from your face. CAUTION Spray compressed air in the connector area by pointing the tube/nozzle about ½ inch away from the surface. -
Page 84: Troubleshooting
7 - 6 MC21XX Series User Guide Troubleshooting MC21XX Troubleshooting the MC21XX Table 7-1 Problem Cause Solution MC21XX does not turn Main battery not Charge or replace the main battery. charged. Main battery not Ensure the battery is installed properly. See ed properly. - Page 85 Re-calibrate the screen. Tap Start > Control Panel > Stylus buttons or icons does calibrated correctly. > Calibration tab. Tap the Recalibrate button. not activate the MC2100 does not Normal operation. corresponding feature. have a touch screen. The system crashed.
-
Page 86: Single-Slot Usb Cradle
7 - 8 MC21XX Series User Guide Single-slot USB Cradle Troubleshooting the Single-slot USB Cradle Table 7-2 Symptom Possible Cause Solution MC21XX battery is not Cradle is not receiving power. Ensure the power cable is connected securely to charging (LED both the cradle and to AC power. -
Page 87: Four-Slot Spare Battery Charger
Maintenance & Troubleshooting 7 - 9 Four-slot Spare Battery Charger Troubleshooting the Four-slot Spare Battery Charger Table 7-4 Symptom Possible Cause Solution Spare battery is not Charger is not Ensure the power cable is connected securely to both the charging (Spare receiving power. - Page 88 7 - 10 MC21XX Series User Guide...
-
Page 89: Mc21Xx And Accessory Technical Specifications
(6.76 in L x 2.40 in W x 1.24 in D) (6.76 in L x Weight (including battery) attery) attery) MC2100: 228 g (8.04 oz) MC21 MC21 MC2180: 236 g (8.32 oz) Display 2.8 inch TFT Color QVGA (240 x 320) display with backlight... - Page 90 A - 2 MC21XX Series User Guide MC21XX Technical Specifications (Continued) Table A-1 Item Description Performance Characteristics Marvell PXA320 processor at 624 MHz Operating System ® Microsoft Embedded CE 6.0 Core Memory 128 MB RAM/256 MB Flash Output Power USB: 5 VDC @ 300 mA max. User Environment Operating Temperature -10°C to 50°C (-14°F to 122°F)
- Page 91 Specifications A - 3 MC21XX Technical Specifications (Continued) Table A-1 Item Description Wireless PAN (MC2180 only) Bluetooth v2.0 with Enhanced Data Rate (EDR); integrated antenna Data Capture Specifications Options Linear imager 1D laser scanner 2D imager Linear Imager Specifications Optical Resolution 5 mil minimum element width Roll ±...
- Page 92 A - 4 MC21XX Series User Guide MC21XX Technical Specifications (Continued) Table A-1 Item Description Ambient Light Sunlight - 96,900 Lux Aiming Element (VLD) 655 nm ± 10 nm Laser Illumination Element (LED) 625 nm ± 5 nm LEDs (2x)
-
Page 93: Appendix B Keypad
Appendix B Keypad Introduction The MC21XX is available with a 27-key keypad. NOTE For information about using the soft keyboard input panel. For more information, see e soft keyboard input pa keyboard input Entering Information Using the Keyboard Input Panel on page Panel on page 2-12 Panel on page 2-12. - Page 94 B - 2 MC21XX Series User Guide 27-Key Keypad Figure B-1 27-Key Descriptions Table B-1 Description Power (red) Powers the MC21XX screen on and off (resume and suspend). wers the MC21XX scre he MC21XX scre Scan (yellow) Used in scanning applications, press to scan a bar code. This key has the same Used in scanning sed in scanning function as activating the side mounted scan buttons.
- Page 95 Keypads B - 3 27-Key Descriptions (Continued) Table B-1 Description Numeric/Alpha/Special Numeric, alpha or special function keys. Numeric by default. Function Produces a special function when the blue FUNC key is activated. Produces alpha values when the orange ALPHA key is activated. In Alpha state, produces the lower case alphabetic characters on the key.
- Page 96 B - 4 MC21XX Series User Guide 27-key Keypad Input Modes Table B-2 Orange Key Orange + Shift Keys Numeric Mode (Alpha Lowercase Mode) (Alpha Uppercase Mode) SHIFT + Key Press Press Press Press Press Press Press Press See Note 2 See Note 2 space >...
- Page 97 Keypads B - 5...
- Page 98 B - 6 MC21XX Series User Guide...
-
Page 99: Glossary
GLOSSARY API. An interface by means of which one software component communicates with or controls another. Usually used to onent communicates w nent communicates w refer to services provided by one software component to another, usually via software interrupts or function calls nent to another, usual nent to another, u Aperture. - Page 100 Glossary - 2 Enter Book Name Here Bar Width. Thickness of a bar measured from the edge closest to the symbol start character to the trailing edge of the same bar. BIOS. Basic Input Output System. A collection of ROM-based code with a standard API used to interface with standard PC hardware.
- Page 101 INDEX Numerics four-slot spare battery charger four-slot spare battery ur-slot spare battery LED indicators ......6-7 LED indicators LED indica 27-key keypad .
- Page 102 Index - 2 MC21XX Series User Guide four-slot charge only cradle ....6-4 four-slot cradles icons battery charging ..... . 6-4 alpha mode .
- Page 103 Index - 3 numeric keypad battery charging ......6-3 input modes ......B-4 soft reset .
- Page 104 Index - 4 MC21XX Series User Guide...
- Page 106 MOTOROLA, MOTO, MOTOROLA SOLUTIONS and the Stylized M Logo are trademarks or registered trademarks of Motorola Trademark Holdings, LLC and are used under license. All other trademarks are the property of their respective owners. © 2011 Motorola Solutions, Inc. All Rights Reserved.