Nokia Thermo Installation And Operating Instructions Manual
Smart temporal thermometer
Hide thumbs
Also See for Thermo:
- Quick installation manual (16 pages) ,
- Quick installation manual (16 pages) ,
- Quick installation manual (16 pages)

Related Manuals for Nokia Thermo


Summary of Contents for Nokia Thermo
- Page 1 Nokia Thermo Smart Temporal Thermometer Installation and Operating Instructions Nokia Thermo EN - 1 v2.0 | April 2018...
-
Page 2: Table Of Contents
Installing the Nokia Thermo app ���������������������������������������������������������������������������������������� 7 Installing my Nokia Thermo ����������������������������������������������������������������������������������������������� 7 Customizing the settings of the Nokia Thermo ......16 Changing the configuration of your Nokia Thermo �������������������������������������������������������� 16 Changing the units ����������������������������������������������������������������������������������������������������������� 18 Changing the system authorizations ������������������������������������������������������������������������������� 19 Using my Nokia Thermo ..............21... - Page 3 Using Thermia (iOS only) �������������������������������������������������������������������������������������������������� 42 Dissociating my Nokia Thermo ............43 Cleaning and maintenance ..............45 Cleaning my Nokia Thermo ���������������������������������������������������������������������������������������������� 45 Changing the batteries ����������������������������������������������������������������������������������������������������� 45 Updating my Nokia Thermo ��������������������������������������������������������������������������������������������� 45 User guide copyright ................48 Legal notice ..................48 Medical device ������������������������������������������������������������������������������������������������������������������� 48 Personal data ��������������������������������������������������������������������������������������������������������������������...
-
Page 4: Minimum Requirements
Get personalized advice For device compatibility information, refer to “Specifications” on page 50. OS version You need iOS 8 (or higher) or Android 5.0 (or higher) to install and run the Nokia Thermo app. Nokia Thermo EN - 4 v2.0 | April 2018... -
Page 5: Nokia Thermo Description
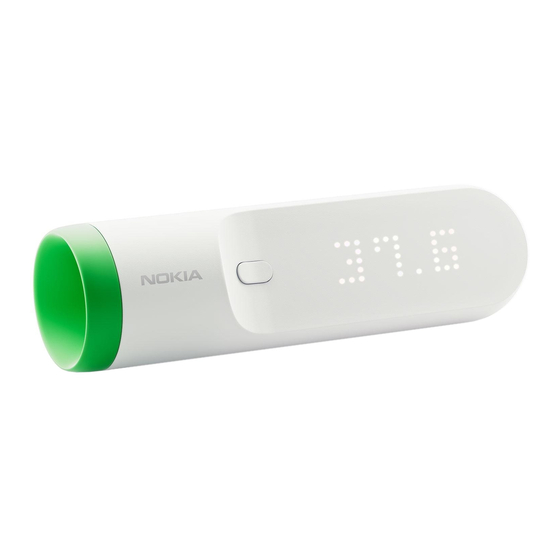
Nokia Thermo description Overview The Nokia Thermo is the most advanced temporal thermometer in the world. Not only does it have a sleek design, it is also really easy to use, accurate and hygienic. Thanks to the HotSpot Sensor™ technology, you simply have to press the button and run your Nokia Thermo across your forehead. -
Page 6: Product Description
Product description (1) Main button (2) Sensor (3) Screen (4) Touch-sensitive area (5) Diagnostic LED (6) Battery cover Nokia Thermo EN - 6 v2.0 | April 2018... -
Page 7: Setting Up My Nokia Thermo
When a new version of the Nokia Thermo app is available, you will automatically be prompted to update it. Installing my Nokia Thermo The Nokia Thermo can be installed on multiple accounts but it has a limitation of eight users. I’m new to Nokia®... - Page 8 7. Add extra family members if you would like to or tap Next. You can add other family members later on if needed. 8. Tap Next. 9. Press and hold the button for 8 seconds until the display shows “SETUP”. Nokia Thermo EN - 8 v2.0 | April 2018...
- Page 9 10. Tap Next. 11. Tap the Nokia Thermo you want to install from the popup window (iOS only). 12. Tap Quick setup to use the Wi-Fi network already configured on your device or Setup another network if you want to use another one.
- Page 10 13. Tap Next. 14. Tap Start to watch the tutorial or Skip to skip it. 15. Tap Got it! Nokia Thermo EN - 10 v2.0 | April 2018...
- Page 11 16. Tap Next to watch the tutorial or Skip to skip it. 17. Tap Done. I already have a Nokia® account If you already have a Nokia® account, perform the following steps: 1. Open the Nokia Thermo app. 2. Log in to your Nokia® account.
- Page 12 3. Tap Settings. 4. Tap Install a Thermo. 5. Tap Install. Nokia Thermo EN - 12 v2.0 | April 2018...
- Page 13 6. Press and hold the button for 8 seconds until the display shows “SETUP”. 7. Tap Next. 8. Tap the Nokia Thermo you want to install from the popup window (iOS only). 9. Tap Quick setup to use the Wi-Fi network configured on your device or Setup another network if you want to use another one.
- Page 14 For Bluetooth use, tap I don’t have a Wi-Fi network. 10. Tap Next. 11. Tap Start to watch the tutorial or Skip to skip it. 12. Tap Got it! Nokia Thermo EN - 14 v2.0 | April 2018...
- Page 15 13. Tap Next to watch the tutorial or Skip to skip it. 14. Tap Done. Nokia Thermo EN - 15 v2.0 | April 2018...
-
Page 16: Customizing The Settings Of The Nokia Thermo
If you want to switch from a Bluetooth configuration to a Wi-Fi configuration. If you want to switch from a Wi-Fi configuration to a Bluetooth configuration, you’ll need to dissociate your Nokia Thermo and install it again from scratch. Refer to “Dissociating my Nokia Thermo”... - Page 17 4. Tap Configure a Wi-Fi network. 5. Press and hold the button for 8 seconds until the display shows “SETUP”. 6. Tap Next. 7. Tap the Nokia Thermo you want to install. Nokia Thermo EN - 17 v2.0 | April 2018...
-
Page 18: Changing The Units
8. Tap Quick setup to use the Wi-Fi network configured on your device or Setup another network if you want to use another one. If you want to set up your Nokia Thermo in Bluetooth, tap I don’t have a Wi-Fi network. 9. Tap Allow. -
Page 19: Changing The System Authorizations
Nokia Thermo. Note that if your Nokia Thermo is linked to several accounts, you’ll have to change the temperature unit on both accounts for the change to be reflected on the display of your Nokia Thermo. - Page 20 2. Tap Settings. 3. Tap System authorizations. 4. Disable or enable the authorizations you want. Nokia Thermo EN - 20 v2.0 | April 2018...
-
Page 21: Using My Nokia Thermo
2. Press the button of your Nokia Thermo. 3. Scan across the forehead in a straight line, starting from the center of the forehead. Direct contact with the skin is not necessary. The Nokia Thermo can be up to 1 cm (0.5 in.) away from your skin. -
Page 22: Assigning A Measurement
2. Press the button to confirm your choice. The fever status LED turns on. Your Nokia Thermo will power off after a few seconds. Your measurement is sent to the app after your Nokia Thermo turns off. -
Page 23: Using The Nokia Thermo App
(symptoms experienced, medicine taken, pictures and notes). To view a Timeline, you simply have to log in to the Nokia Thermo app and tap the name of the person whose Timeline you want to check. Viewing the Timeline The Timeline contains a list of various items, sorted by date and time. - Page 24 The temperature itself with a diagram indicating the fever status • A field allowing you to add a comment • Buttons allowing you to attach extra information to the measurement, such as medicine, symptoms, and/or pictures Nokia Thermo EN - 24 v2.0 | April 2018...
-
Page 25: Adding Timeline Items
Adding Timeline items Adding manual temperature measurements While any temperature measurement taken with the Nokia Thermo is automatically sent to the appropriate user’s Timeline, you also have the option to add manual temperature measurements. To do so, perform the following steps: 1. - Page 26 Adding a note You can add notes to your Timeline, if you want to keep track of how your symptoms are evolving, for example. To do so, perform the following steps: 1. Open the Nokia Thermo app. Nokia Thermo EN - 26...
- Page 27 2. Tap the name of the person whose Timeline you want to update. 3. Tap +. 4. Tap Note. Nokia Thermo EN - 27 v2.0 | April 2018...
- Page 28 5. Enter your note and tap Save. Nokia Thermo EN - 28 v2.0 | April 2018...
- Page 29 Timeline. To do so, perform the following steps: 1. Open the Nokia Thermo app. 2. Tap the name of the person whose Timeline you want to update. 3. Tap +.
- Page 30 Adding symptoms If you want to keep track of any symptoms you might experience, you can add them to your Timeline. To do so, perform the following steps: 1. Open the Nokia Thermo app. Nokia Thermo EN - 30 v2.0 | April 2018...
- Page 31 2. Tap the name of the person whose Timeline you want to update. 3. Tap +. 4. Tap Symptoms. Nokia Thermo EN - 31 v2.0 | April 2018...
- Page 32 You can add a picture to your Timeline if you want to. To do so, perform the following steps: 1. Open the Nokia Thermo app. 2. Tap the name of the person whose Timeline you want to update. Nokia Thermo EN - 32...
- Page 33 3. Tap +. 4. Tap Picture. 5. Tap Select picture to use an existing photo or Take picture to take one. 6. If you’ve chosen to take a picture, tap Use Photo to confirm. Nokia Thermo EN - 33 v2.0 | April 2018...
-
Page 34: Assigning A Measurement
Assigning an unassigned measurement If you’ve taken a measurement using your Nokia Thermo but didn’t assign it right away, you can do so from the Nokia Thermo app. To do so, perform the following steps: 1. Open the Nokia Thermo app. - Page 35 2. Tap the name of the person you’ve wrongly assigned the measurement to. 3. Tap the measurement you’ve wrongly assigned. 4. Tap the assignment icon in the top right corner. Nokia Thermo EN - 35 v2.0 | April 2018...
-
Page 36: Deleting Data
You can delete any Timeline item (be it temperature measurements, symptoms, medicine, pictures or comments) if you choose to. To do so, perform the following steps: 1. Open the Nokia Thermo app. 2. Tap the name of the person whose Timeline you want to update. - Page 37 3. Swipe left on the item you want to delete and tap Delete. Note that you won’t be able to retrieve your data after this. Nokia Thermo EN - 37 v2.0 | April 2018...
-
Page 38: Setting A Reminder
Setting a reminder If your latest temperature measurement indicated a high fever, or if you’ve entered symptoms that may be worrying, the Nokia Thermo app offers the possibility of setting a reminder to make sure you monitor the situation regularly. - Page 39 3. Tap +. 4. Tap Reminder. 5. Select the frequency and time range of the reminders. You can cancel the reminder at any time by editing it and tapping Stop reminders. Nokia Thermo EN - 39 v2.0 | April 2018...
-
Page 40: Sharing My Data
As such, they will be lost if you log out from the app and then log back in. Sharing my data At this point, it is not possible to share your data with anyone from the Nokia Thermo app. This option will be available at a future date. - Page 41 4. Tap Allow. 5. Go to Apple Health > Sources > Thermo. 6. Select the data you want to share with Apple Health. Nokia Thermo EN - 41 v2.0 | April 2018...
-
Page 42: Getting Personalized Advice
Getting personalized advice Getting Insights Whenever you add a temperature, be it manually in the Nokia Thermo app or using your Nokia Thermo, the Nokia Thermo app displays Insights at the top of your Timeline. Insights are also displayed whenever you add symptoms or medicine to your Timeline. -
Page 43: Dissociating My Nokia Thermo
Dissociating my Nokia Thermo If you want to stop using your Nokia Thermo and clear all user data from the device, you have to dissociate it from your account first. This can be useful if you want to give it to someone else. - Page 44 4. Tap Remove. 5. Tap Remove from my account. Note that dissociating your Nokia Thermo, won’t delete any of your data from the Nokia Thermo app. Nokia Thermo EN - 44 v2.0 | April 2018...
-
Page 45: Cleaning And Maintenance
When the battery level is getting low, it is time to change the batteries. To do so, perform the following steps: 1. Lift the magnetic cover of the battery compartment of your Nokia Thermo to open it. 2. Remove the old batteries and dispose of them in accordance with local regulations. - Page 46 2. Tap Settings. 3. Tap your Nokia Thermo. 4. Tap Update my device. Nokia Thermo EN - 46 v2.0 | April 2018...
- Page 47 5. Press and hold the button for 8 seconds until the display shows “SETUP”. 6. Tap Next. 7. Tap the Nokia Thermo you want to install. 8. Tap Upgrade. 9. Tap Close when the upgrade is complete. Nokia Thermo EN - 47...
-
Page 48: User Guide Copyright
• The Nokia Thermo is a medical device and has been validated by competent authorities. • The Nokia Thermo app is not a medical device. Any advice or insight given by the app cannot replace medical attention. Personal data •... -
Page 49: Safety Instructions
Make sure you consult a doctor should the fever and/or symptoms be persistent or worrying in any way. • Do not allow your Nokia Thermo to come in contact with liquids. If it gets wet, make sure you let it dry before trying to use it. •... -
Page 50: Specifications
Compatible devices • Android 5.0 devices (and above) • iPhone (4S or higher) • iPod touch (5 generation) Compatible OS • Android 5.0 and above • iOS 8.0 and above • Nokia Thermo App Nokia Thermo EN - 50 v2.0 | April 2018... -
Page 51: Document Release Overview
Release date Modifications July 2016 v1.0 First release April 2018 v2.0 Nokia update The screenshots in this manual are used for explanatory purposes. Your actual screens may differ from the screenshots in this manual. Nokia Thermo EN - 51 v2.0 | April 2018... -
Page 52: Warranty
(“Warranty Period”). Nokia®’s published guidelines include but are not limited to information contained in technical specifications, safety instructions or quick start guide. Withings does not warrant that the operation of the Nokia Thermo will be uninterrupted or error-free. Nokia® is not responsible for damage arising from failure to follow instructions relating to the Nokia Thermo’s use. -
Page 53: Regulatory Statements
(2) This device must accept any interference received, including interference that may cause undesired operation. This device complies with the R&TTE Directive. A copy of the EU Declaration of Conformity is available online at: https://health.nokia.com/ fr/en/compliance. Nokia Thermo EN - 53 v2.0 | April 2018...