KitchenAid KSB5010 Service & Repair Manual
Intended for professional technician only, magnetic drive torrent blender
Hide thumbs
Also See for KSB5010:
- Quick start manual (6 pages) ,
- Instructions manual (56 pages) ,
- Quick start manual (2 pages)

Related Manuals for KitchenAid KSB5010


Summary of Contents for KitchenAid KSB5010
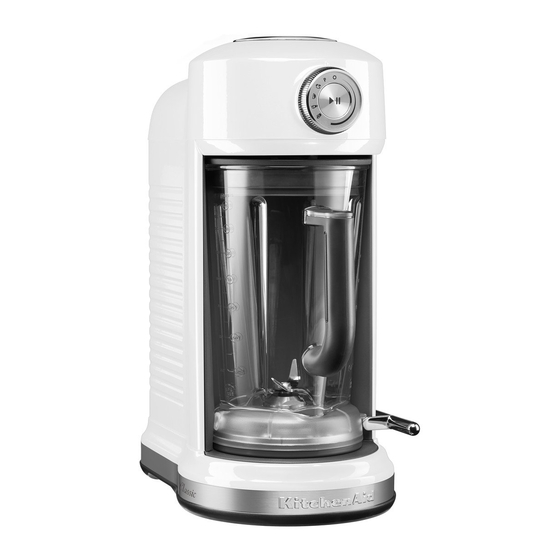
- Page 1 ® KitchenAid Magnetic Drive Torrent™ Blender Service/Repair Manual Intended for Professional Technician Only Domestic Model KSB5010 (Includes International model) 5KSB5080 (AU, EU, UK), 5KSB5085 (AU) W11036951...
-
Page 2: Table Of Contents
Torrent Blender Screw Torques Introduction ® All KitchenAid Products are well designed. Normally they will give continual use year after year without service attention. Records have been maintained to determine and correct, through improved design, any troubles that might possibly develop. - Page 3 Attachment Parts List Illus. No. Part No. Description Illus. No. Part No. Description W10690049 Lid, Blender W10630713 Funnel, Blender W10627688 Jar Assembly W10667686 Cap Assembly - 3 -...
- Page 4 International Models Only - 4 -...
-
Page 5: Unit Parts List
Unit Parts List Illus. No. Part No. Description Illus. No. Part No. Description Literature Parts W10625865 Base, Blender W10683173 Use & Care Guide, W10001200 Screw European/Britain W10729916 Use & Care Guide, Australian Foot, Blender W10679580 Use & Care Guide, domestic W10524701 Black W10667412... -
Page 6: Important Service Workplace Safety Recommendations
® Domestic KitchenAid Torrent™ Blender All disassembly and assembly procedures Model KSB5010 discussed in this manual should be conducted ® with the unit disconnected from the AC power International KitchenAid Torrent™ Blender source. -
Page 7: Important Safeguards
Volt/Ohm Meter IMPORTANT SAFEGUARDS The following equipment will greatly assist the technician ® ® in servicing KitchenAid Portable Appliances: Ensure the KitchenAid service technician is aware of the operating safeguards recommended to the customer: Low pressure compressed air to remove debris 1. -
Page 8: Service Procedures
Fig. 1) Remove the screw at the back of the upper housing This manual is written as a step-by-step guide to ® disassemble and reassemble the KitchenAid Torrent™ Blender to gain access to the systems within the unit that are in need of repair. For models covered in this manual, refer to the index page. - Page 9 5. While holding the upper cover to the upper housing with one hand, upright the blender on the work surface (Fig. 3). Fig. 5) Remove the 3 screws holding the collar to the housing 8. Remove the UI from the upper housing by depressing the (4) plastic tabs that secure it in place Fig.
- Page 10 9. Remove the (4) 6-32 x .250 screws that secure the safety interlock switches to the upper cover. 10. Unplug the safety interlock switch assembly from the electronic control circuit board and set it aside on the workbench with the screws (Fig. 8). Fig.
- Page 11 Fig. 12) Use a small flat blade screwdriver to release the front Fig. 14) Loosen the two screws on the back of the front (plastic) housing and upper cover. plastic cover to release the upper cover. 16. Remove the upper blender seal (rubber) from the upper cover (Fig.
-
Page 12: Electronics Access (Hall Sensor, Control Board, Motor Lead And Speaker)
Electronics Access (Hall Sensor, Control Board, Motor lead and Speaker) 17. Remove the insulation from the unit by maneuvering the motor wires through the split in the material and pulling the insulation frame away from the front of the motor (Fig. 16). Fig. -
Page 13: Surround And Power Cord Removal
21. Remove the electronic control circuit board grounding screw from the inside of the surround housing (Fig. 21). Fig. 23) Remove 2 screws that hold the surround to the lower housing from the top 24. Invert the unit on the workbench and remove the (5) Fig. - Page 14 25. Remove the (5) 10-24 x .750 screws that hold the base to the lower housing (Fig. 25). Remove the base with the screws and set aside. Fig. 26) Remove the 2 remaining screws securing the surround to the lower housing Fig.
-
Page 15: Lower Housing Disassembly (Belt Removal And Replacement)
29. Remove the ground wire from the surround by removing the 8-32 x .375 screw from the ground wire terminal at the rear of the surround (Fig. 29) and set the cord with the screw on the workbench. Grease in center of lower cover Fig. - Page 16 Fig. 33) Remove the jar release lever from the lower housing Fig. 35) Tuck the belt through the opening near the front coupler pulley 33. Invert the unit and remove the belt from the motor pulley by lifting up on the belt and turning the pulley Start the belt into the slot at either side of the to help it up and off of the pulley.
- Page 17 36. To remove the belt, fold the belt on the bottom side of the lower blender housing and pull it through the slot in the lower housing at the rear of the coupler pulley (Fig. 38). Fig. 38) work the belt over the motor pulley with the ribbed side toward the pulley turning the motor pulley as you go 40.
-
Page 18: Lower Housing Reassembly
Fig. 39) move the belt onto the next groove in the pulley Fig. 41) belt ribs lined up with the grooves in the motor pulley 42. A properly installed belt will resemble Figures 40 & Lower Housing reassembly 41. Figure 40 shows the belt ribs aligning with the pulley grooves on the coupler pulley. - Page 19 44. Reassemble the Jar Release Lever, with spring.(Fig.42) Attach the Jar Release and spring back on the lower with the spring behind the motor mount.(Fig. 43) Fig. 44) put the front housing gasket in place over the tabs on the lower housing. Fig.
-
Page 20: Installing The Cord And Surround Housing
Fig. 47) fix the power cord ground screw to the surround the trimband should be installed upside down. That housing way the KitchenAid logo will be right side-up when 48. Insert the power cord grommet into the cord slot in the unit is set upright. - Page 21 Fig. 47) Tighten the screws that hold the blender base to the lower housing 52. Replace the (5) rubber feet and set the unit upright on the work bench. Replace the (2) Fig. 48) Tighten the 2 screws that hold the surround to the lower housing from the top - 21 -...
-
Page 22: Installing The Electronics (Speaker, Control Board, Hall Sensor And Insulation)
Installing the Electronics (Speaker, Control Board, Hall Sensor and Insulation) 53. Mount the speaker box to the inside of the surround housing with the (2) screws that were removed in step 20. Fig. 51) Secure the electronic control circuit board to the surround housing with 2 screws 56. -
Page 23: Surround/Upper Cover And Safety Interlock Switch Replacement
59. Slide the upper/surround cover assembly into place such that the upper cover slides underneath of the lip on the surround housing (Fig. 56). Secure with the (4) 8-32 x .325 screws removed in step 12 (Fig. 57). Fig. 53) Install the insulation around and in front of the motor Slide upper/surround assembly under the top edge of the surround housing (red arrows) Fig. -
Page 24: Upper Housing Reassembly
Safety Interlock Switch plug Speaker wire harness plug Fig. 58) Reinstall the jar bumper from the inside of the front Fig. 60) plug the speaker and safety interlock switch wire plastic housing by turning out counter-clockwise harnesses into the electronic control circuit board 61. - Page 25 Fig. 62) secure the collar to the upper housing with 3 screws Fig. 64) Secure the upper housing to the blender assembly by tightening the rear housing screw 65. While holding the upper housing assembly with one hand, plug the UI wire harness into the electronic control circuit board opposite the speaker and safety interlock switch (Fig.
-
Page 26: A Tools Required For Torrent Blender Service
Appendix A Tools Required for Torrent Blender Service Fig. 66) Hand Tools required for repair of the KitchenAid Magnetic Drive Torrent Blender. Tool List: 1. #R2 Square Bit Screwdriver 2. #2 Phillips Screwdriver 3. Large Flat Blade Screwdriver 4. 5/32” Hex Wrench 5. -
Page 27: B Troubleshooting Quick Reference Guide
Appendix B Troubleshooting Quick Reference Guide Problem Cause Solution Blender does not run at all Unit not plugged in Plug into a grounded 3 prong outlet. (no lights). Faulty Power Receptacle Check the power supply receptacle to make sure it’s (outlet) “hot.”... -
Page 28: C Torrent Blender Screw Torques
Troubleshooting Quick Reference Guide (continued) Blender vibrates on work Worn, dirty or damaged Replace worn or damaged Base Foot/Feet. Remove any surface. Feet. dirt with a mild soap and water solution. Jar not fully inserted into Check the jar to make sure it is fully seated to the tab blender housing.