
Related Manuals for Sharp AQUOS LC-15B5M


Summary of Contents for Sharp AQUOS LC-15B5M
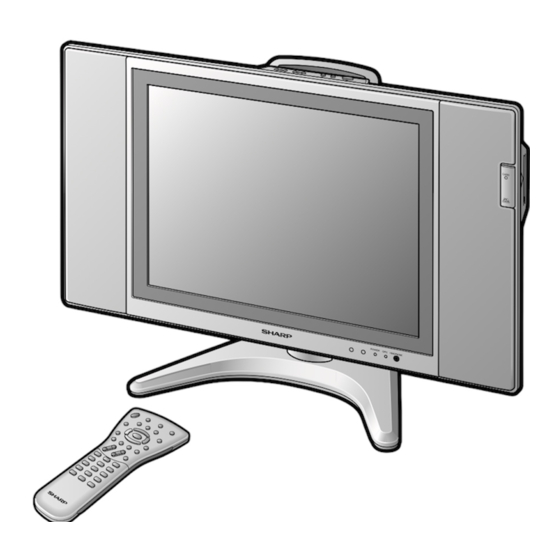
- Page 1 Printed on 100% post-consumer recycled paper. LC-15B5M LC-20B5M LCD COLOUR TELEVISION OPERATION MANUAL Printed in Japan TINS-B130WJZZA 04P02-JMM...
-
Page 2: Table Of Contents
LCD COLOUR TELEVISION Contents Dear SHARP customer ... 2 Important Safety Precautions ... 2 Supplied Accessories ... 4 Preparation ... 5 Installing Batteries in the Remote Control ... 5 Using Remote Control ... 5 Power Connection ... 6 Antenna Connection ... 6 Listening with Headphones ... -
Page 3: Dear Sharp Customer
Dear SHARP customer Thank you for your purchase of the SHARP LCD colour TV product. To ensure safety and many years of trouble-free operation of your product, please read the Important Safety Precautions carefully before using this product. Important Safety Precautions Electricity is used to perform many useful functions, but it can also cause personal injuries and property damage if improperly handled. - Page 4 • Cleaning—Unplug the AC cord from the AC outlet before cleaning the product. Use a damp cloth to clean the product. Do not use liquid cleaners or aerosol cleaners. • Water and moisture—Do not use the product near water, such as bathtub, washbasin, kitchen sink, laundry tub, swimming pool and in a wet basement.
-
Page 5: Supplied Accessories
Supplied Accessories Make sure the following accessories are provided with the LCD TV set. Remote control pages 5 and 9 Antenna cable page 6 AC adapter page 6 “AAA” size batteries (×2) page 5 AC cord *Product shape varies in some countries. page 6 Operation manual Cable holder... -
Page 6: Preparation
Preparation Installing Batteries in the Remote Control Before using the LCD TV set for the first time, install the two “AAA” size batteries supplied in the remote control. When the batteries become depleted and the remote control fails to operate, replace the batteries with new “AAA” size batteries. Open the battery cover. -
Page 7: Power Connection
Preparation (Continued) Connect to the DC input terminal of the LCD TV set. Pull down the hook to open the cover. ■ Using the AC adapter • Although the AC adapter may become warm during use, this is not a malfunction. •... -
Page 8: Part Names Of Main Unit
Part Names of Main Unit Controls Upper control panel LC-20B5M VOL ( ) / ( ) CH ( ) / ( ) LC-15B5M Speaker OPC sensor Remote sensor NOTE • TV/VIDEO, CH ( ), VOL (–)/(+) and MENU on the main unit have the same functions as the same buttons on the remote control. Fundamentally, this operation manual provides a description based on operation using the remote control. -
Page 9: How To Fix The Cables
Part Names of Main Unit (Continued) Terminals S-VIDEO VIDEO AV-IN1 AUDIO (L) AUDIO (R) VIDEO AUDIO (L) AV-IN2/OUT AUDIO (R) • Pull the cables connected to each terminal through the holes and close the left and right terminal covers. Push the cables into the grooves of the support covers. Insert the cable holder (supplied) from above the support cover and fix the cables. -
Page 10: Part Names Of Remote Control
Part Names of Remote Control Records the motion picture. (P.32) HOLD Temporarily holds the current Teletext page. (P.25) POWER (P.10) SUBTITLE Displays the Teletext Subtitle directly. (P.25) Returns to normal screen in Teletext mode. (P.25) RETURN Return to the previous screen. Red, Picture Menu (P.16) Green, Sound Menu... -
Page 11: Basic Operation
Basic Operation Turning On and Off the Main Power POWER indicator ● Press MAIN POWER. The POWER indicator instantantly changes from blinking red to green and the LCD TV set is turned on. On-screen display NOTE • The On-screen display disappears after a few seconds. ●... -
Page 12: Sound Volume
Sound Volume ■ To adjust the volume ● Press VOL (+) to increase the sound volume. The numerical value increases. Volume ● Press VOL (–) to decrease the sound volume. The numerical value decreases. Volume ■ To mute the sound ●... -
Page 13: Preset
Preset On-Screen Display Language Selection MENU on the LCD TV set can also be used to select the language. Upper control panel Press MENU (PRESET-1) on the upper part of the LCD TV set for more than 2 seconds to display the PRESET mode screen. -
Page 14: Presetting The Channels (Manual)
Presetting the Channels (MANUAL) ■ Setting a channel to a desired TV station: Upper control panel 1, 2, 6 Press MENU (PRESET-1) on the upper part of the LCD TV set for more than 2 seconds. The AUTO mode screen appears. Sound system Auto ( B/G ) 48.25MHz... -
Page 15: Channel Setting
Preset (Continued) Channel Setting Press MENU to display the MENU screen. Press \/| to select “Setup”. Press '/" to select “CH setup”, and press OK. M e n u [ S e t u p s e t u p ] S e t u p s e t u p C l o c k... -
Page 16: Selecting Menu Items
Selecting Menu Items Selecting Menu Items ■ Menu Setting Screens For details on using each setting screen, refer to the page number indicated. Picture M e n u [ P i c t u r e ( T V ) ] M e n u [ P i c t u r e ( T V ) ] P i c t u r e S o u n d... -
Page 17: Basic Adjustment Settings
Basic Adjustment Settings Picture Adjustments Adjust the picture to your preference with the following picture settings. Press MENU to display the Menu screen. • The Picture Menu screen can be displayed directly by pressing the Red. Press \/| to select “Picture”. Press '/"... -
Page 18: Dnr (Digital Noise Reduction)
DNR (Digital Noise Reduction) Produces a clearer video image. Press MENU to display the Menu screen. • The Picture Menu screen can be displayed directly by pressing the Red. Press \/| to select “Picture”. Press '/" to select “Advanced”, and press OK. M e n u [ P i c t u r e ( T V ) A d v a n c e d ] P i c t u r e C o n t r a s t... -
Page 19: Sound Adjustments
Basic Adjustment Settings (Continued) Sound Adjustments You can adjust the sound quality to your preference with the following settings. Press MENU to display the Menu screen. • The Sound Menu screen can be displayed directly by pressing the Green. Press \/| to select “Sound”. Press '/"... -
Page 20: Av2 In/Out
AV2 In/Out Press MENU to display the Menu screen. Press \/| to select “Setup”. Press '/" to select “AV2 In/Out”, and press OK. M e n u [ S e t u p I n / O u t ] A V 2 S e t u p s e t u p... -
Page 21: Features
Basic Adjustment Settings (Continued) Features The Feature items can be set by the user. Press MENU and the Menu screen is displayed. Press \/| to select “Features”. Press '/" to select the desired adjustment item, and press OK. M e n u [ F e a t u r e s ] F e a t u r e s B a c k l i g h t T i m e r... -
Page 22: Timer Function
Timer Function Press MENU to display the Menu screen. • The Timer function Menu screen can be displayed directly by pressing the Yellow. Press \/| to select “Features”. Press '/" to select “Timer function”, and press OK. M e n u [ F e a t u r e s T i m e r F e a t u r e s B a c k l i g h t... -
Page 23: Nicam Broadcast Selection
NICAM Broadcast Selection To let you enjoy NICAM broadcasting, this LCD TV receives NICAM stereo system, bilingual, and monaural broadcasts. Stereo The LCD TV set is receiving a stereo broadcast. • Each time you press MPX, the mode changes between “NICAM STEREO”... -
Page 24: A2 Stereo Broadcast Selection
A2 Stereo Broadcast Selection To let you enjoy A2 stereo broadcasting, this TV receives A2 stereo system and bilingual broadcasts. Stereo The LCD TV set is receiving a stereo broadcast. • Each time you press MPX, the mode changes between “STEREO”... -
Page 25: Teletext
• If there are subpages, a control line holding the operat- ing instructions for subpages can be displayed on line 3 6 9 SHARP - T EXT 0 2 : 5 2 : 2 1 1 0 0 2 0 0... - Page 26 Press SUBPAGE. The control line with the subpage numbers is displayed on line 24, and the number of the currently selected subpage is displayed in blue. 3 6 9 SHARP - T EXT 0 2 : 5 2 : 2 1 1 0 0 2 0 0 Press \/| to select the desired subpage number.
-
Page 27: Before Using Memory Cards
■ Important Notes on Using Memory Cards • SHARP cannot be held responsible for misuse of the LCD TV set, any troubles during use, or other problems, or any damages arising out of the use of the LCD TV set, except for those cases for which Sharp is liable by law. -
Page 28: About Memory Cards
About Memory Cards ■ You can use memory cards (commercially available) for recording and playing back pictures. • Please use an appropriate PC card adapter (commer- cially available) for each memory card. • The following memory cards are available. (Note that names for memory cards vary depending on the manufacturer.) Memory card name SD Memory Card... -
Page 29: Loading A Pc Card Adapter
Loading a PC Card Adapter Loading a PC Card Adapter You need to set a memory card in a PC card adapter before loading it. (See page 27.) Check the Card Eject button is pressed. Insert a PC card adapter into the PC card slot on the LCD TV set slowly. -
Page 30: Playing Back Mode
Playing Back Mode Select Mode Switches the mode between motion picture and still picture. Press CARD. • The playback mode used when recording is displayed. Each time you press this button, the mode is switched as follows. [Motion Picture] V i d e o V i d e o 1 3 / 0 5 / 0 4 T h u... -
Page 31: Recording/Playing Back A Memory Card
Recording/Playing Back a Memory Card Recording on the Memory Card When Recording Motion Pictures: ● Set the picture quality for recording motion pictures. → ● Set the date, channel, and picture quality for the programme you want to record. → ●... -
Page 32: Recording On A Memory Card (Video Setup)
Recording on a Memory Card (Video Setup) Rec Mode Use this setting for recording images you are currently watching. Select the recording mode (picture quality) for a motion picture. Press MENU to display the Menu screen. Press \/| to select “Card”. Press '/"... -
Page 33: Recording A Tv Programme In Real-Time
Recording a TV Programme in Real-time Recording as a Motion Picture Press Cyan to check that the desired recording mode has been selected and that the memory card has enough space for recording. MAIN POWER Card Lamp When recording: Red Press Channel Select, CH ( select the channel you want to record. -
Page 34: Setting Timer Recording
Setting Timer Recording Adjusting the Clock The LCD TV set has a built-in clock. Be sure to adjust the clock with “Clock setup” in “Setup” before setting the timer. (See page 14.) Timer Rec Set the date, start time, end time, channel, and record mode for the TV programme you want to record. -
Page 35: Checking The Programme List
Setting Timer Recording (Continued) Press \/| to select “CH”. • When you press ', channels are displayed in forward direction. • When you press ", channels are displayed in backward direction. M e n u [ C a r d M e n u [ C a r d T i m e r T i m e r... -
Page 36: Checking The Recording Mode
Checking the Recording Mode Press Cyan. R e m a i n S P / R e m a i n • If you turn the power off using POWER on the remote control while timer recording is set, both picture and sound go off at the preset recording start time and then the recording will start. -
Page 37: Playing Back Motion Pictures (Normal Mode)
Playing Back Motion Pictures (Normal Mode) Normal Playback Modes for Playing Back Motion Pictures Normal/Repeat/Slowmotion/Zoom The Playback Quality of the Memory Card As the memory card of this device records conforming to the MPEG-4 system (image compression technology), the replay image will not have the same picture quality as the image while it was being recorded. -
Page 38: Playing Back Motion Pictures (Special Mode)
Playing Back Motion Pictures (Special Mode) Press \/| to select “Off”, “File” or “All”, and press OK. V i d e o V i d e o 1 3 / 0 5 / 0 4 T h u 1 1 : 1 4 / 0 5 / 0 4 F r i 1 1 :... -
Page 39: Zoom
Playing Back Motion Pictures (Special Mode) (Continued) ■ The Screen When Slowmotion is Specified NOTE • During slowmotion playback, no sound is output. • To cancel slowmotion playback, set “Slowmotion” to “Off”. Zoom Press CARD to switch to the motion picture mode. •... -
Page 40: Protecting/Deleting Motion Pictures
Protecting/Deleting Motion Pictures Protecting Motion Picture Files You can protect files you do not want to be deleted. Press CARD to display the list of recorded motion pictures. Press MENU to display the Menu screen. Press \/| to select “Card”. Press '/"... -
Page 41: Deleting One Motion Picture File
Protecting/Deleting Motion Pictures (Continued) Deleting One Motion Picture File This operation deletes one file that have not been set for protecting. Perform steps 1 to 4 in Protecting Motion Picture Files to display the “Edit” screen. Press '/" to select “Delete file”, and press OK. M e n u [ C a r d M e n u [ C a r d V i d e o... -
Page 42: Playing Back Still Pictures
Playing Back Still Pictures Modes for Playing Back Still Pictures You can specify various modes with “Card” in the Menu screen. ■ Listing Still Pictures; Index (page 42) (1) Lists nine still pictures at a time. (2) Displays one still picture you select in full screen. S t i l l (2) One Picture at a Time 1 3 /... -
Page 43: Listing Still Pictures (Index)
Playing Back Still Pictures (Continued) Listing Still Pictures (Index) Fast paging in forward/backward direction When multiple still pictures are recorded, you can speed up paging in forward/backward direction by keeping \/| depressed during paging forward/backward direction. Insert the memory card. Press CARD to display the index of still picture. -
Page 44: Slideshow Setup
Slideshow Setup You can set the interval to 1-10 seconds, 1 minute, 15 minutes, or 60 minutes, and select the playback order from among “Normal”, “Random” or “My programme”. Press CARD to display the index of still picture. S t i l l 1 3 / 1 1 : 3 5 Press MENU to display the Menu screen. -
Page 45: My Programme
Playing Back Still Pictures (Continued) My Programme You can select up to 32 pictures and specify the order for displaying in slideshow. Press CARD and the index of still picture is displayed. S t i l l 1 3 / 1 1 : 3 5 Press MENU to display the Menu screen. -
Page 46: Rotate
Press \/| to select “Yes”, and press OK. • The slideshow will be started. Press MENU to exit. Rotate You can rotate a displayed picture file. Playback the memory card. Display the picture you want to rotate in either the card playback mode or the slideshow mode. -
Page 47: Audio Select
Playing Back Still Pictures (Continued) Audio Select Playing background music when playing back a card. You can output the sound of other devices (e.g. TV or VCR) when playing back a card. Playback the memory card. Display the picture in either the card playback mode or the slideshow mode. -
Page 48: Recording On A Memory Card
Recording on a Memory Card Shutter Click Enables you to make sure that whenever a still picture is captured the shutter sounds. Press MENU to display the Menu screen. Press \/| to select “Card”. Press '/" to select “Still setup”, and press OK. M e n u [ C a r d s e t u p ] S t i l l... -
Page 49: Capturing A Tv Programme In Real-Time
Capturing a TV Programme in Real-time Capturing as Still Pictures Press Channel Select, CH ( select the channel you want to record. Press CAPTURE. • The screen freezes for a moment, and the image is recorded as a still picture. •... -
Page 50: Protecting/Deleting Still Pictures
Protecting/Deleting Still Pictures Protecting Still Picture Files You can protect files you do not want to be deleted. Press CARD to display the index of still picture. Press MENU to display the Menu screen. Press \/| to select “Card”. Press '/" to select “Still setup”, and press OK. M e n u [ C a r d s e t u p ] S t i l l... -
Page 51: Deleting One Still Picture File
Protecting/Deleting Still Pictures (Continued) Deleting One Still Picture File This operation deletes one file that have not been set for protecting. Perform steps 1 to 4 in Protecting Still Picture Files to display the “Edit” screen. Press '/" to select “Delete file”, and press OK. M e n u [ C a r d M e n u [ C a r d S t i l l... -
Page 52: Formatting The Card
Formatting the Card All motion picture and still picture files are deleted including any files that have been set for protecting. Run the memory card. Press MENU to display the Menu screen. Press \/| to select “Card”. Press '/" to select “Format”, and press OK. M e n u [ C a r d F o r m a t ] C a r d... -
Page 53: Connecting With External Devices
Connecting with External Devices You can enjoy picture and sound by connecting a VCR or a home video game system to the terminals located on the rear of the LCD TV set. When connecting an external device, turn off the power of the LCD TV set first to prevent any possible damage. Example of external devices that can be connected External devices that can be connected to AV-IN1 terminal... - Page 54 Connecting a VCR, DVD player or a Camcorder (AV-IN1/2/COMPONENT) NOTE • If your VCR (or other external devices) has an S-Video terminal, S-VIDEO connection is recommended. (Use an S-video cord.) • When you connect external devices to both S-VIDEO and VIDEO terminals (and if you select AV-IN1), you can only view pictures from the S-VIDEO terminal.
- Page 55 Connecting with External Devices (Continued) Outputting video and audio (video output) You can output video and audio data from the LCD TV set through the AV output terminals (AV-OUT). • When using as an OUTPUT terminal, select “Setup” in the Menu and set “AV2 In/Out” to “Out”. (See page 19.) •...
-
Page 56: Troubleshooting
Troubleshooting Before calling for repair services, check the following items for possible remedies to the encountered sympotoms. LCD TV set Problem Picture Sound There is no picture or sound. There is no Picture picture. There is no picture from AV-IN 1/2. There is no sound. - Page 57 Troubleshooting (Continued) Antenna Problem The picture is not sharp. The picture moves. The picture is doubled or tripled. The picture is spotted. There are stripes on the screen or colours fade. • The reception may be weak. • The state of the broadcast may also be bad.
-
Page 58: Specifications
25°C room under standard lighting and brightness conditions. ■ As a part of policy of continuous improvement, SHARP reserves the right to make design and specification changes for the LCD TV set improvement without prior notice. The performance specification figures indicated are nominal values of production units. There may be some deviations from these values in individual units. -
Page 59: Time Zone Table
Time Zone Table Only major regions are shown below. Check the actual time difference of your area. Region * New Zealand * Fiji New Caledonia Australia (AEST) • ACT (Canberra) • NSW (Sydney) • QLD (Brisbane) • VIC (Melbourne) • TAS (Hobart) Papua New Guinea Australia (ACST) •... -
Page 60: Dimensional Drawings
Dimensional Drawings LC-15B5M Unit: mm... - Page 61 Dimensional Drawings (Continued) LC-20B5M 403.3 Unit: mm...