Advertisement
Quick Links
Advertisement

Related Manuals for Asus WiGig Dock


Summary of Contents for Asus WiGig Dock
-
Page 1: Quick Start Guide
ASUS WiGig® Dock Quick Start Guide ETC14484 / First Edition / September 2018... - Page 2 Table of contents English ........................3 繁體中文 ......................12 簡體中文 ......................21...
-
Page 3: Product Features
Product Features • Ultrafast WiGig® 802.11ad with 60GHz • Latency-free data connection for super-smooth visuals • Transfer data wirelessly at up to 4.6Gbps high speed • The Dock lets you connect your WiGig®-compatible device wirelessly to a big-screen for an ultimate experience. • By using the WiGig® Dock Wireless Manager on your laptop, you can easily connect your laptop to the Dock and perform basic management. • To change more advanced settings, you can use the Web GUI (Web Graphical User Interface) of the Dock. Please refer to the e-manual for more information. Package Contents • ASUS WiGig® Dock unit • Power adapter • User manual (Quick Start Guide and Warranty Card) -
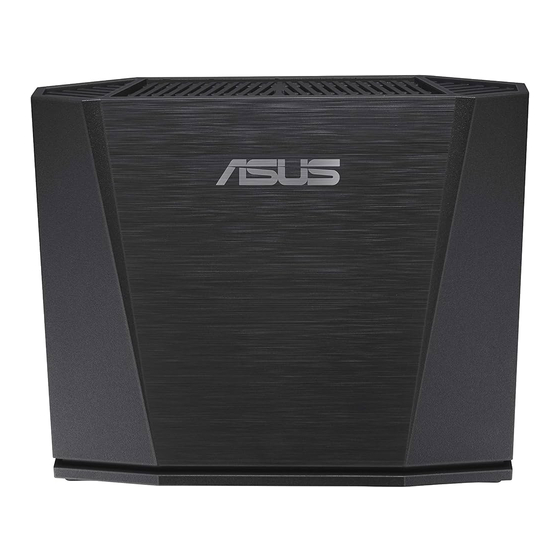
Page 4: Product Overview
Product Overview LED indicator LED indicator Description The Dock is not turned on. The Dock is turned on and the Blue system is booting up. The Dock is turned on and the Blinking red system is ready. The system is turned on and is connecting to a device. The Dock is turned on and the Fast blinking red reset button has been pressed. - Page 5 Rear connectors Power button Power connector Reset button USB 3.0 port HDMI port Port Description HDMI port Display connection USB 3.0 port USB device connection Press and hold this button for 10 seconds to reset the Dock to its default settings. Reset button Caution: Your settings will be erased. Power adapter connection Power connector/ button and power button for turning on the Dock...
-
Page 6: Specifications Summary
Specifications Summary Wireless protocol IEEE 802.11ad Dimensions 124 x 100 x 48mm Weight 345g Interface 1 x HDMI 1 x USB 3.0 Number of Docking service: 1 user connected users Security GCMP Power Adapter AC 100V–240V input DC 12V / 2.0A output Temperature Operating temperature: 0°C to +35°C Storage temperature: –20°C to +70°C... - Page 7 How to Use ASUS WiGig® Dock 1. Connect the power adapter to the Dock and to a wall outlet. Press the power button to turn on the device. Caution: Always power up the device using the power adapter that came with this product. Using an adapter with an inappropriate voltage and current could damage this device. Power button 2. Wait until the LED light on the front panel blinks in red to indicate the Dock is standing by and ready to be connected.
- Page 8 3. Connect the devices that you want to use to an appropriate port of the Dock (such as a projector, or a USB storage device). 4. Place your device within the reception range of the Dock. Approx.120°...
- Page 9 Connect Your Phone to the Dock 1. Swipe down from the top of your phone screen to access commonly used features. 2. Swipe over until you see the icon. 3. Press and hold the WiGig® icon. Switch On WiGig®, and select WiGigDock_11ad_b4b8.
- Page 10 4. Enter 1234567890 into the password field and click “Connect” to connect to the Dock. 5. The following notification will pop up on your phone, and the WiGig® icon will turn orange. Your phone is now connected to the Dock. Note: Please do not block the antennas of devices that are connected to the Dock, as this could interfere with the transmission of images, audio, or video.
- Page 11 6. The images below show the ROG Phone in two typical hand holds. The red boxes indicate the location of the antennas. For optimal transmission quality, please ensure that you do not block these areas when using your phone while it is connected to the Dock. Note: Instructions for connecting more WiGig®-compatible devices will be available soon on ASUS website at https:// www.asus.com/...
- Page 12 產品特色 • 超高速 60GHz Wi-Fi,符合 WiGig® 802.11ad 標準。 • 無延遲資料連線,帶來超流暢的視覺效果。 • 無線資料傳輸速度高達 4.6Gbps。 • 使用 ASUS 無線投影基座可透過無線連線將 WiGig® 相 容裝置連線至超大螢幕,帶來極致體驗。 • 使用電腦端的無線投影基座管家,即可輕鬆將電腦與 基座連線以進行基本管理。 • 請至基座的使用者設定頁面(Web GUI)進行更多高階 設定。欲獲得更多資訊,請參考電子版手冊。 包裝內容物 • ASUS 無線投影基座 • 電源變壓器 • 使用手冊(快速使用指南與華碩產品服務手冊)...
- Page 13 產品概述 LED 指示燈 LED 指示燈 說明 LED 指示燈 電源未開啟。 熄滅 電源已開啟,系統正在啟動。 藍色 電源已開啟,軟體已準備就 紅色閃爍 緒。 電源已開啟,系統已啟動並正 紅色 在與裝置連線。 電源已開啟並已按下重置按 紅色快速閃爍 鈕。...
- Page 14 後視圖 電源按鈕 電源插孔 重置按鈕 USB 3.0 連接埠 HDMI 連接埠 連接埠 說明 HDMI 連接埠 連接顯示器 USB 3.0 連接埠 連接 USB 裝置 按住此按鈕 10 秒可將基座 重置為預設值。 重置按鈕 注意!您的設定將被清除。 將電源變壓器插入電源插孔 電源插孔 / 按鈕 並按下電源按鈕,以開啟投 影基座。...
- Page 15 規格概要 無線協定 IEEE 802.11ad 尺寸 124 x 100 x 48mm 重量 345g 1 x HDMI 連接埠 連接埠 1 x USB 3.0 連接埠 可連線裝置數量 加密方式 GCMP 電源變壓器 輸入:100V–240V(AC) 輸出:12V / 2.0A(DC) 溫度 運作溫度:0°C 至 +35°C 儲存溫度:–20°C 至 +70°C...
- Page 16 如何使用 ASUS 無線投影基座 1. 將電源變壓器的一端連接至基座,另一端連接至墻面 電源插座,按下電源按鈕以開啟裝置。 注意! 請 使用產品隨附的電源變壓器為裝置供電,使用錯 誤電壓與電流的變壓器將會對裝置造成毀損。 電源按鈕 2. 等待直至前面板上的 LED 燈變為紅色閃爍,說明基座 已準備就緒,可與裝置進行連線。...
- Page 17 3. 將您想要使用的裝置連接至合適的連接埠(例如:投 影機或 USB 儲存裝置)。 4. 請將裝置放置在基座的訊號接收範圍內。 約 120°...
- Page 18 將手機與基座連線 1. 從手機螢幕頂部向下滑動以顯示常用功能。 2. 在手機螢幕滑動直至找到 圖示。 3. 按住 WiGig® 圖示,將 WiGig® 切換至開啟狀態,然後 選擇「WiGigDock_11ad_b4b8」。...
- Page 19 4. 在密碼欄中輸入「1234567890」,然後點選「連線」 與基座進行連線。 5. 手機螢幕上將會彈出以下通知,WiGig® 圖示變為橘 色,表示您的手機已與基座連線。 注意: 請 勿遮蓋裝置的天線,這將有可能干擾圖像、音效 或影片的傳輸。...
- Page 20 6. 下圖展示了兩種典型的手持 ROG 手機的方式,紅框則 表示天線的位置。為實現優良的傳輸品質,請確保您 在連線基座使用手機時未遮蓋此區域。 注意: 稍 後可至華碩官網:https://www.asus.com/tw/ 獲得 關於連線更多 WiGig® 相容裝置的說明。...
- Page 21 產品特色 • 超高速 60GHz Wi-Fi,符合 WiGig® 802.11ad 標準。 • 無延遲數據連接,帶來超流暢的視覺效果。 • 無線數據傳輸速度高達 4.6Gbps。 • 使用 ASUS 無線傳屏底座可通過無線連接將 WiGig® 兼 容設備連接至超大屏幕,帶來優質體驗。 • 使用電腦端的無線傳屏底座管家,即可輕鬆將電腦與 底座連接以進行基本管理。 • 請至底座的用戶設定頁面(Web GUI)進行更多高級 設置。欲獲取更多信息,請參考電子版手冊。 包裝內容物 • ASUS 無線傳屏底座 • 電源適配器 • 用戶手冊(快速使用指南與華碩產品服務手冊)...
- Page 22 產品概述 LED 指示燈 LED 指示燈 說明 LED 指示燈 電源未開啟。 熄滅 電源已開啟,系統正在啟動。 藍色 電源已開啟,軟件已準備就 紅色閃爍 緒。 電源已開啟,系統已啟動并正 紅色 在與設備連接。 電源已開啟并已按下復位按 紅色快速閃爍 鈕。...
- Page 23 後視圖 電源按鈕 電源插孔 復位按鈕 USB 3.0 接口 HDMI 接口 接口 說明 HDMI 接口 連接顯示器 USB 3.0 接口 連接 USB 設備 按住此按鈕 10 秒可將底座 復位為默認設置。 復位按鈕 注意!您的設置將被清除。 將電源適配器插入電源插孔 電源插孔 / 按鈕 并按下電源按鈕,以開啟傳 屏底座。...
- Page 24 規格概要 無線協議 IEEE 802.11ad 尺寸 124 x 100 x 48 毫米 重量 345 克 1 x HDMI 接口 接口 1 x USB 3.0 接口 可連接設備數量 加密方式 GCMP 電源適配器 輸入:100V–240V(AC) 輸出:12V / 2.0A(DC) 溫度 運行溫度:0°C 至 +35°C 存儲溫度:–20°C 至 +70°C...
- Page 25 如何使用 ASUS 無線傳屏底座 1. 將電源適配器的一端連接至底座,另一端連接至墻面 電源插座,按下電源按鈕以開啟設備。 注意! 請 使用產品隨附的電源適配器為設備供電,使用錯 誤電壓與電流的適配器將會對設備造成損壞。 電源按鈕 2. 等待直至前面板上的 LED 燈變為紅色閃爍,說明底座 已準備就緒,可與設備進行連接。...
- Page 26 3. 將您想要使用的設備連接至合適的接口(例如:投影 儀或 USB 存儲設備)。 4. 請將設備放置在底座的信號接收範圍內。 約 120°...
- Page 27 將手機與底座連接 1. 從手機屏幕頂部向下滑動以顯示常用功能。 2. 在手機屏幕滑動直至找到 圖標。 3. 按住 WiGig® 圖標,將 WiGig® 切換至開啟狀態,然後 選擇【WiGigDock_11ad_b4b8】。...
- Page 28 4. 在密碼欄中輸入“1234567890”,然後點擊“連 接”與底座進行連接。 5. 手機屏幕上將會彈出以下通知,WiGig® 圖標變為橘 色,說明您的手機已與底座連接。 注意: 請 勿遮蓋設備的天線,這將有可能干擾圖像、音頻 或視頻的傳輸。...
- Page 29 6. 下圖展示了兩種典型的手持 ROG 手機的方式,紅框 則表示天線的位置。為實現優良的傳輸品質,請確保 您在連接底座使用手機時未遮蓋此區域。 注意: 稍 後可至華碩官網:https://www.asus.com.cn/ 獲 取關於連接更多 WiGig® 兼容設備的說明。...