Philips Sonicare FlexCare Platinum Manual
Hide thumbs
Also See for Sonicare FlexCare Platinum:
- User manual (312 pages) ,
- Manual (312 pages) ,
- Instructions manual (25 pages)
Advertisement
Available languages
Available languages
Quick Links
Advertisement

Related Manuals for Philips Sonicare FlexCare Platinum


Summary of Contents for Philips Sonicare FlexCare Platinum
- Page 1 FlexCare Platinum 14/04/15 1 35_020_9771_1_Book_Simp_A6_v1.indd 1...
- Page 2 35_020_9771_1_Book_Simp_A6_v1.indd 2 14/04/15 10:40...
- Page 3 35_020_9771_1_Book_Simp_A6_v1.indd 3 14/04/15 10:40...
- Page 4 35_020_9771_1_Book_Simp_A6_v1.indd 4 14/04/15 10:40...
-
Page 5: Table Of Contents
ENGLISH 6 DEUTSCH 20 ESPAÑOL 55 FRANÇAIS 70 ITALIANO 86 NEDERLANDS 101 PORTUGUÊS 117 35_020_9771_1_Book_Simp_A6_v1.indd 5 14/04/15 10:40... -
Page 6: English
ENGLISH Introduction Congratulations on your purchase and welcome to Philips! at www.philips.com/welcome. Important Read this user manual carefully before you use the appliance and save it for future reference. Danger - Keep the charger and/or sanitiser away from water. Do not place or store it over or near water... - Page 7 ENGLISH - The appliance is suitable for mains voltages ranging from 100 to 240 volts. - If the appliance is damaged in any way (brush stop using it. This appliance contains no contact the Consumer Care Centre in your country (see chapter ‘Guarantee and support’). - This appliance can be used by children aged from 8 years and above and persons with reduced given supervision or instruction concerning use of...
- Page 8 ENGLISH - Consult your dentist if excessive bleeding occurs after using this toothbrush or if bleeding continues dentist if you experience discomfort or pain when you use the Sonicare. - The Sonicare toothbrush complies with the safety standards for electromagnetic devices. If you have your physician or the device manufacturer of the implanted device prior to use.
- Page 9 - If the sanitiser has been used for 3 consecutive for at least 30 minutes before you start another UV clean cycle. This Philips appliance complies with all applicable standards and 35_020_9771_1_Book_Simp_A6_v1.indd 9 14/04/15 10:40...
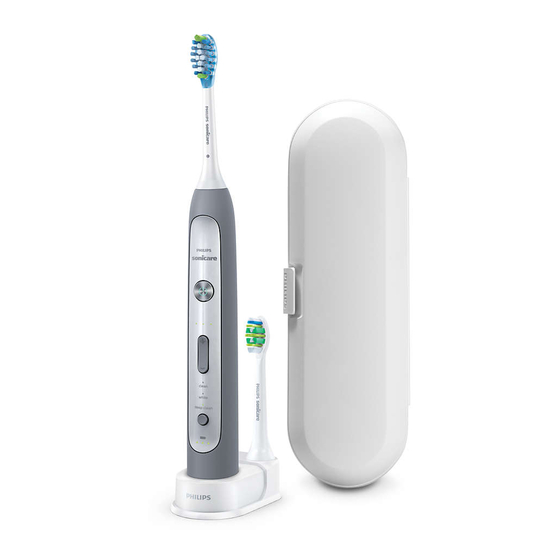
- Page 10 ENGLISH Hygienic travel cap Handle Power on/off button Intensity level indicator Intensity level button (+ and -) Brushing modes Mode button Battery level indicator 10 UV sanitiser and base with integrated charger and cord wrap Not shown: UV light bulb Not shown: Sanitiser drip tray Not shown: Protective screen for UV light bulb 11 Mains cord with plug...
- Page 11 ENGLISH Charging the appliance Put the plug of the charger or sanitiser in a wall socket. Place the handle on the charger (Fig. 3). toothbrush is charging. Note: It takes at least 24 hours to fully charge the battery. Using the appliance Brushing instructions Wet the bristles (Fig.
-
Page 12: English
ENGLISH Begin brushing in section 1 (outside top teeth) and brush for section 2 (inside top teeth). Continue brushing in section 3 (outside bottom teeth) and brush for 30 seconds (45 seconds in Deep Brush section 4 for 30 seconds until the toothbrush switches off (Fig. - Page 13 ENGLISH Intensity levels per mode Low: 1 LED indicator light. : 2 LED indicator lights. High: 3 LED indicator lights. Note: to adjust the intensity level to the next higher or lower level, you can press the + button to increase intensity or the - button to decrease intensity at any time during the brushing cycle.
- Page 14 ENGLISH Quadpacer The Quadpacer is an interval timer that has a short beep and pause to remind you to brush the 4 sections of your mouth. Depending on all 3 modes and at all 3 intensity levels (Fig. 10). The Quadpacer feature on this type has been activated. To deactivate or reactivate the Quadpacer feature: Place the handle with a brush head attached on the plugged-in charger or sanitiser.
- Page 15 ENGLISH properly move through the Easy-start ramp-up cycle. Note: Using the Easy-start feature beyond the initial ramp-up period is not recommended and reduces Sonicare’s effectiveness in removing plaque. With the UV sanitiser you can clean your brush head after every use (Fig.
- Page 16 ENGLISH Cleaning Toothbrush handle water (Fig. 15). Do not push on the rubber seal on the metal shaft with sharp objects, as this may cause damage. Use a damp cloth to wipe the entire surface of the handle. products to clean the handle or the brush head. Brush head Rinse the brush head and bristles after each use (Fig.
- Page 17 Replace Sonicare brush heads every 3 months to achieve optimal results. Only use genuine Philips Sonicare replacement brush heads. Ordering accessories www.shop.philips.com/ service or go to your Philips dealer. You can also contact the Philips Consumer Care Centre in your country (see the worldwide guarantee 35_020_9771_1_Book_Simp_A6_v1.indd 17 14/04/15 10:40...
- Page 18 ENGLISH Recycling This symbol on a product means that the product is covered by European Directive 2012/19/EU (Fig. 19). This symbol means that the product contains a built-in rechargeable battery covered by European Directive 2006/66/EC which cannot be disposed of with normal household waste. Follow the instructions in section ‘Removing the rechargeable battery’...
- Page 19 Hold the handle upside down and push down on the shaft to release the internal components of the handle (Fig. 22). circuit board and pry the battery from the plastic carrier (Fig. 23). Guarantee and support www.philips.com/ support Guarantee restrictions The terms of the international guarantee do not cover the following: Brush heads.
-
Page 20: Deutsch
DEUTSCH Einführung www.philips.com/welcome. Wichtig Lesen Sie diese Bedienungsanleitung vor dem bewahren Sie sie für eine spätere Verwendung auf. Gefahr - Halten Sie das Ladegerät und/oder die Reinigungsstation von Wasser fern. Stellen Sie sie nicht über oder nahe einer mit Wasser gefüllten Sie Ladegerät und/oder Reinigungsstation nicht in... - Page 21 Sauerstoff verabreicht wird. - Er ist für Stromspannungen zwischen 100 und und/oder Reinigungsstation). Die Geräteteile lassen sich nicht vom Benutzer warten/reparieren. Philips Service-Center in Ihrem Land (siehe “Garantie und Support”). Mangel an Erfahrung und Kenntnis verwendet Anweisung zum sicheren Gebrauch des Geräts erhalten und die Gefahren verstanden haben.
- Page 22 DEUTSCH wenn die UV-Lampe bei offener Klappe noch menschliche Auge und die Haut sein. Halten Sie die UV-Reinigungsstation immer von Kindern fern. Achtung das Ladegerät und/oder die Reinigungsstation nie in der Spülmaschine. - Wenn in den vergangenen 2 Monaten ein chirurgischer Eingriff an Ihren Zähnen oder am Benutzung der Zahnbürste Ihren Zahnarzt einer Woche immer noch anhält.
- Page 23 DEUTSCH Sonicare Ihren Arzt. Sollten Sie bei Gebrauch des Geräts Unbehagen - Die Sonicare Zahnbürste ist ein Gerät zur Verwendung durch mehrere Patienten in einer zeigen. - Benutzen Sie nur die vom Hersteller für diese einem milden Reinigungsmittel und Wasser reinigen.
- Page 24 DEUTSCH UV-Lampe nicht. - Verwenden Sie die UV-Reinigungsstation nicht - Wenn die Reinigungsstation 3 UV- starten. Elektromagnetische Felder Dieses Philips Gerät erfüllt sämtliche Normen und Regelungen bezüglich 35_020_9771_1_Book_Simp_A6_v1.indd 24 14/04/15 10:40...
- Page 25 DEUTSCH Griff Ein-/Ausschalter Anzeige der Intensitätsstufe Einstelltaste für Intensitätsstufe (+ und -) Putzmodi Modus-Taste 10 UV-Reinigungsstation und Basisstation mit integriertem Ladegerät und Nicht abgebildet: UV-Lampe Nicht abgebildet: Abtropfschale der UV-Reinigungsstation Nicht abgebildet: Schutzschirm für UV-Lampe Gerätetypen) 13 Reiseladegerät Nicht abgebildet: Transporttasche Hinweis: Abhängig vom gekauften Modell kann der Packungsinhalt variieren.
- Page 26 DEUTSCH Das Gerät laden Stecken Sie den Netzstecker des Ladegeräts oder der Reinigungsstation in die Steckdose. Stellen Sie das Handstück in das Ladegerät (Abb. 3). Die blinkende Akkustandsanzeige zeigt an, dass die Zahnbürste geladen wird. Das Gerät benutzen Putzanleitung Befeuchten Sie die Borsten (Abb. 4). Tragen Sie etwas Zahnpasta auf die Borsten auf.
- Page 27 DEUTSCH Beginnen Sie mit Abschnitt 1 (Außenseite Oberkiefer), und putzen Sie zu Abschnitt 2 (Innenseite Oberkiefer) wechseln. Fahren Sie danach mit Abschnitt 3 (Außenseite Unterkiefer) fort, und putzen Sie zu Abschnitt 4 (Innenseite Unterkiefer) wechseln. Putzen Sie 30 Sekunden lang in Abschnitt 4, bis die Bürste sich ausschaltet (Abb.
- Page 28 DEUTSCH um zwischen den Modi zu wechseln. Der ausgewählte Putzmodus leuchtet auf. anderen Putzmodus auswählen. Niedrig: 1 LED-Anzeige : 2 LED-Anzeigen Hoch: 3 LED-Anzeigen Hinweis: Um die Intensität auf die nächsthöhere oder niedrigere Stufe Drucksensor Eine Änderung der Vibration (und eine geringfügige Änderung des aufbewahren, damit die Akkus geladen bleiben.
- Page 29 DEUTSCH Eigenschaften Drucksensor Stellen Sie das Handstück mit einem aufgesetzten Bürstenkopf in das ans Stromnetz angeschlossene Ladegerät oder in die Reinigungsstation. lang gedrückt. Sie hören einen Signalton, der signalisiert, dass der Drucksensor Sie hören zwei Signaltöne, die signalisieren, dass der Drucksensor Quadpacer 3 Intensitätsstufen (Abb.
- Page 30 DEUTSCH Smartimer putzen. Easy-Start Setzen Sie den Bürstenkopf auf das Handstück. Stellen Sie das Handstück in das an das Stromnetz angeschlossene Ladegerät oder UV Cleaner. 35_020_9771_1_Book_Simp_A6_v1.indd 30 14/04/15 10:40...
- Page 31 DEUTSCH Die UV-Reinigungsstation macht mit jedem Gebrauch eine Vielzahl In folgenden Fällen trennen Sie die Reinigungsstation von der Stromversorgung, verwenden Sie sie nicht mehr, und wenden Sie sich an den Kundendienst: Das Fenster der Reinigungsstation ist zerbrochen oder fehlt. Hinweis: UV-Licht kann für das menschliche Auge und die Haut schädlich werden.
- Page 32 DEUTSCH einschalten. Die Reinigungsstation ist in Betrieb, wenn das Licht durch das Fenster scheint. Reinigen Sie den Bürstenkopf, das Handstück, das Reise-Ladegerät, die Hülle für das Ladegerät und die Reinigungsstation nicht in der Spülmaschine. Handstück der Zahnbürste Nehmen Sie den Bürstenkopf ab, und spülen Sie den Metallschaft mit warmem Wasser ab (Abb.
- Page 33 DEUTSCH Tauchen Sie die Reinigungsstation niemals in Wasser. Spülen Sie sie auch Reinigen Sie die UV-Reinigungsstation nicht, wenn die UV-Lampe noch heiß ist. Woche gereinigt werden. Ziehen Sie den Netzstecker der UV-Reinigungsstation. Ziehen Sie die Abtropfschale gerade heraus. Spülen Sie die Abtropfschale ab, und wischen Sie sie mit einem feuchten Tuch nach (Abb.
- Page 34 DEUTSCH Aufbewahrung Ersatz Bürstenkopf spätestens nach 3 Monaten aus. Zubehör bestellen www.shop.philips.com/service Garantieschrift). Recycling die Europäische Richtlinie 2012/19/EU gilt (Abb. 19). negativen Folgen geschützt. 35_020_9771_1_Book_Simp_A6_v1.indd 34 14/04/15 10:40...
- Page 35 Platine, und drehen Sie ihn, bis die Verbindungen zerbrechen. Nehmen Sie die Platine heraus, und lösen Sie den Akku aus der Plastikhalterung (Abb. 23). Garantie und Support Für Unterstützung und weitere Informationen besuchen Sie die Philips Website unter www.philips.com/support internationale Garantieschrift. 35_020_9771_1_Book_Simp_A6_v1.indd 35...
- Page 36 DEUTSCH Garantieeinschränkungen Die folgenden Geräteteile/Schäden unterliegen nicht den Bedingungen der internationalen Garantie: verursacht werden. Manipulation oder Reparatur durch Unbefugte. UV-Lampe. 35_020_9771_1_Book_Simp_A6_v1.indd 36 14/04/15 10:40...
- Page 37 35_020_9771_1_Book_Simp_A6_v1.indd 37 14/04/15 10:40...
- Page 38 35_020_9771_1_Book_Simp_A6_v1.indd 38 14/04/15 10:40...
- Page 39 35_020_9771_1_Book_Simp_A6_v1.indd 39 14/04/15 10:40...
- Page 40 35_020_9771_1_Book_Simp_A6_v1.indd 40 14/04/15 10:40...
- Page 41 35_020_9771_1_Book_Simp_A6_v1.indd 41 14/04/15 10:40...
- Page 42 35_020_9771_1_Book_Simp_A6_v1.indd 42 14/04/15 10:40...
- Page 43 35_020_9771_1_Book_Simp_A6_v1.indd 43 14/04/15 10:40...
- Page 44 35_020_9771_1_Book_Simp_A6_v1.indd 44 14/04/15 10:40...
- Page 45 35_020_9771_1_Book_Simp_A6_v1.indd 45 14/04/15 10:40...
- Page 46 35_020_9771_1_Book_Simp_A6_v1.indd 46 14/04/15 10:40...
- Page 47 Quadpacer Smartimer 35_020_9771_1_Book_Simp_A6_v1.indd 47 14/04/15 10:40...
- Page 48 Easy-start 35_020_9771_1_Book_Simp_A6_v1.indd 48 14/04/15 10:40...
- Page 49 35_020_9771_1_Book_Simp_A6_v1.indd 49 14/04/15 10:40...
- Page 50 35_020_9771_1_Book_Simp_A6_v1.indd 50 14/04/15 10:40...
- Page 51 35_020_9771_1_Book_Simp_A6_v1.indd 51 14/04/15 10:40...
- Page 52 35_020_9771_1_Book_Simp_A6_v1.indd 52 14/04/15 10:40...
- Page 53 35_020_9771_1_Book_Simp_A6_v1.indd 53 14/04/15 10:40...
- Page 54 35_020_9771_1_Book_Simp_A6_v1.indd 54 14/04/15 10:40...
-
Page 55: Español
ESPAÑOL Introducción Enhorabuena por la compra de este producto y bienvenido a Philips. su producto en www.philips.com/welcome. Importante manual de usuario y consérvelo por si necesitara consultarlo en el futuro. Peligro - Mantenga el cargador y el higienizador alejados del agua. No los coloque ni guarde por encima higienizador en agua ni en otros líquidos. - Page 56 ESPAÑOL higienizador en lugares donde se utilicen aerosoles (spray) o donde se administre oxígeno. - Este aparato es adecuado para voltajes de red de 100 a 240 voltios. cargador o en el higienizador). Este aparato contiene piezas que el usuario no puede contacto con el servicio de atención al cliente de su país (consulte el capítulo “Garantía y asistencia”).
- Page 57 ESPAÑOL Precaución cargador ni el higienizador en el lavavajillas. - Consulte a su dentista antes de utilizar este cepillo dental si ha sufrido cirugía oral o de las encías en - Consulte a su dentista si se produce un sangrado 1 semana de uso.
- Page 58 ESPAÑOL - No utilice un cabezal de cepillo si tiene las cerdas aplastadas o curvadas. Sustituya el cabezal del cepillo cada 3 meses o antes si aparecen signos de desgaste. - No utilice otros cabezales que no sean los recomendados por el fabricante. sódico u otro bicarbonato (frecuentes en los con agua y jabón después de cada uso.
- Page 59 ESPAÑOL Este aparato de Philips cumple los estándares y las normativas aplicables sobre exposición a campos electromagnéticos. Capuchón higiénico Mango Botón de encendido/apagado Indicador de nivel de intensidad Botón de nivel de intensidad (+ y -) Modos de cepillado Botón de modo Indicador de nivel de batería...
- Page 60 ESPAÑOL metálico hasta que encaje. Carga del aparato corriente. el cepillo dental se está cargando. Nota: Se necesitan al menos 24 horas para cargar totalmente la batería. Uso del aparato Instrucciones de cepillado Aplique una pequeña cantidad de pasta de dientes en las cerdas. Coloque las cerdas del cepillo dental sobre los dientes formando Nota: Mantenga la parte central del cepillo en contacto con los dientes en todo momento.
- Page 61 ESPAÑOL delante y hacia atrás, de forma que las cerdas lleguen a los espacios Nota: Las cerdas pueden irritar ligeramente. No frote. superiores) y cepille durante 30 segundos (45 segundos en el modo Nota: Para asegurar el cepillado uniforme de toda la boca, divida la cavidad bucal en 4 secciones mediante la función Quadpacer (consulte el capítulo “Características”).
- Page 62 ESPAÑOL Limpieza: para una limpieza diaria excepcional (modo predeterminado). Blanqueado y 30 segundos para dar brillo a los dientes anteriores. Limpieza profunda: 3 minutos de cepillado que alterna entre limpieza y masaje para ofrecer una experiencia de limpieza excepcional. Su Sonicare viene con el modo Limpieza activado. alternar entre los distintos modos.
- Page 63 ESPAÑOL 1 LED amarillo indica una carga baja. 3 LED verdes indican una carga completa. Colóquelo en el cargador para recargarlo. Nota: Para mantener la batería totalmente cargada en todo momento, puede mantener el Sonicare en el cargador cuando no lo utilice. Características Sensor de presión Este modelo de Sonicare incluye un sensor de presión activado.
- Page 64 ESPAÑOL Coloque el mango, con el cabezal del cepillo puesto, en el cargador o en el higienizador enchufados. Smartimer El temporizador Smartimer indica que el ciclo de cepillado se ha de cepillado. Los dentistas recomiendan cepillarse al menos durante 2 minutos 2 veces al día. Easy-start La función Easy-start aumenta paulatinamente la potencia a lo largo de Sonicare.
- Page 65 ESPAÑOL Con el higienizador por rayos UV puede limpiar el cabezal del cepillo Servicio de Atención al Cliente si: La lámpara de rayos UV permanece encendida cuando la puerta está abierta. La ventana está rota o se ha desprendido del higienizador. El higienizador desprende humo o si hay un olor a quemado mientras está...
- Page 66 ESPAÑOL Limpieza Quite el cabezal del cepillo y enjuague la zona del eje metálico con esenciales para limpiar el mango y el cabezal de cepillado. Cabezal de cepillado No sumerja el higienizador en agua ni lo enjuague bajo el grifo. No limpie el higienizador cuando la lámpara de rayos UV está...
- Page 67 Puede utilizar el recogecable para guardar cómodamente el cable de alimentación. Sustitución Cabezal de cepillado Sustituya los cabezales de Sonicare cada 3 meses para conseguir unos resultados óptimos. Utilice solo cabezales del cepillo de repuesto Sonicare originales de Philips. 35_020_9771_1_Book_Simp_A6_v1.indd 67 14/04/15 10:40...
- Page 68 Philips. También puede ponerse en contacto con el Servicio de Atención al Cliente de Philips en su país (consulte el folleto de garantía mundial para encontrar los datos de contacto). que no se debe tirar con la basura normal del hogar. Siga las instrucciones de la sección “Cómo extraer la batería recargable”...
- Page 69 Sujete el mango boca abajo y presione en el eje para sacar los Introduzca el destornillador debajo del circuito, junto a las Garantía y asistencia www.philips.com/support o lea el folleto de garantía mundial independiente. Restricciones de la garantía La garantía internacional no cubre los siguientes daños: Cabezales del cepillo.
-
Page 70: Français
FRANÇAIS Introduction Félicitations pour votre achat et bienvenue dans l’univers Philips ! sur le site à l’adresse suivante : www.philips.com/welcome. Important Lisez attentivement ce mode d’emploi avant d’utiliser l’appareil et conservez-le pour un usage ultérieur. Danger - Évitez tout contact du chargeur et/ou de l’assainisseur avec l’eau. - Page 71 FRANÇAIS - N’utilisez pas le chargeur et/ou l’assainisseur en extérieur ou à proximité d’une surface chauffée. Ne faites jamais fonctionner l’assainisseur dans des endroits où des produits aérosols (en spray) sont utilisés ou dans des lieux où de l’oxygène est administré.
- Page 72 FRANÇAIS - Cessez d’utiliser l’assainisseur si la lampe UV reste allumée alors que l’appareil est ouvert. Les UV peuvent être dangereux pour les yeux et la peau. Tenez toujours l’assainisseur hors de portée des enfants. Attention le chargeur et/ou l’assainisseur au lave-vaisselle. d’utiliser cette brosse à...
- Page 73 FRANÇAIS votre médecin avant d’utiliser la brosse à dents Sonicare. - Cet appareil a été conçu exclusivement pour le cessez d’utiliser l’appareil et consultez votre médecin. - La brosse à dents Sonicare est un appareil de soins personnel et n’est pas destinée à être utilisée sur plusieurs patients dans les cabinets ou établissements dentaires.
- Page 74 UV consécutifs (c’est-à-dire 3 fois à la avant de lancer un nouveau cycle de nettoyage UV. Cet appareil Philips est conforme à toutes les normes et à tous les règlements applicables relatifs à l’exposition aux champs électromagnétiques. 35_020_9771_1_Book_Simp_A6_v1.indd 74...
- Page 75 FRANÇAIS Capuchon de protection hygiénique Poignée Bouton marche/arrêt Indicateur de niveau d’intensité Bouton de niveau d’intensité (+ et -) Modes de brossage Bouton de mode Voyant de niveau de charge 10 Assainisseur UV et base avec chargeur intégré et range-cordon (sur certains modèles uniquement) Non illustré...
- Page 76 FRANÇAIS Charge de l’appareil Branchez l’assainisseur ou le chargeur sur la prise secteur. que la brosse à dents est en charge. Utilisation de l’appareil Instructions de brossage Placez les poils de la brosse sur les dents, en les inclinant légèrement (45 degrés), en appuyant fermement pour que les poils les dents.
- Page 77 FRANÇAIS Commencez le brossage par la section 1 (dents de la mâchoire supérieure, à l’extérieur) pendant 30 secondes (45 secondes en brossage à la section 3 (dents de la mâchoire inférieure, à l’extérieur) pendant 30 secondes (45 secondes en mode de la mâchoire inférieure, à...
- Page 78 FRANÇAIS Mode pour passer d’un mode à l’autre. Le mode de brossage sélectionné s’allume. Une fois le mode de brossage sélectionné, celui-ci reste actif jusqu’à Niveaux d’intensité par mode Bas : 1 voyant. : 2 voyants. Élevé : 3 voyants. moment pendant le cycle de brossage.
- Page 79 FRANÇAIS Caractéristiques Capteur de pression Cette brosse à dents Sonicare est fournie avec la fonctionnalité de capteur de pression activée. Le capteur de pression fonctionne dans les 3 modes et aux 3 niveaux d’intensité. Pour désactiver ou réactiver la fonctionnalité de capteur de pression : chargeur ou l’assainisseur préalablement branché.
- Page 80 FRANÇAIS Fonction Smartimer La fonction Smartimer indique que le cycle de brossage est terminé en Les professionnels de la santé bucco-dentaire recommandent de se brosser les dents deux fois par jour pendant au moins 2 minutes. Fonction Easy-start La fonction Easy-start augmente progressivement la puissance au cours des 14 premiers brossages pour vous permettre de vous habituer au brossage avec Sonicare.
- Page 81 FRANÇAIS Débranchez l’assainisseur, cessez de l’utiliser et appelez le Service Consommateurs si : La lampe UV reste allumée alors que l’appareil est ouvert. La vitre est cassée ou n’a pas été fournie avec l’assainisseur. De la fumée ou une odeur de brûlé s’échappe de l’assainisseur en fonctionnement.
- Page 82 FRANÇAIS Nettoyage Retirez la tête de brosse et rincez le manche métallique à l’eau des objets pointus, sous peine de l’endommager. essentielle pour nettoyer le manche ou la tête de brosse. Tête de brosse Retirez la tête de brosse du manche et rincez la base de la tête de brosse au moins une fois par semaine à...
- Page 83 FRANÇAIS Nettoyez toutes les surfaces intérieures à l’aide d’un chiffon humide. légèrement et tirez l’écran de protection. Retirez la lampe UV. Nettoyez l’écran de protection et la lampe UV à l’aide d’un chiffon humide. Réinsérez la lampe UV. Réinsérez l’écran de protection. l’écran de sorte qu’il s’enclenche dans les fentes de l’assainisseur.
- Page 84 FRANÇAIS Remplacement Tête de brosse au moins tous les 3 mois. Utilisez exclusivement des têtes de brosse de rechange Philips Sonicare. Commande d’accessoires Web www.shop.philips.com/service ou rendez-vous chez votre revendeur Philips. Vous pouvez également contacter le Service Consommateurs Philips de votre pays (voir le dépliant de garantie internationale pour les coordonnées).
- Page 85 Retirez le circuit imprimé et séparez la batterie du boîtier en Garantie et assistance consultez le site Web www.philips.com/support ou lisez le dépliant séparé sur la garantie internationale. Limites de la garantie La garantie internationale ne couvre pas les éléments suivants :...
-
Page 86: Italiano
ITALIANO Introduzione Congratulazioni per l’acquisto e benvenuti in Philips! prodotto su www.philips.com/welcome. Importante attentamente il presente manuale e conservatelo per eventuali riferimenti futuri. Pericolo - Tenete il caricatore e/o l’igienizzatore lontani dall’acqua. Non appoggiateli né riponeteli vicino a caricatore e/o l’igienizzatore in acqua o in altre caricatore e/o l’igienizzatore siano completamente... - Page 87 ITALIANO - Non utilizzate il caricabatterie e/o l’igienizzatore Non mettete l’igienizzatore in funzione dove vengono usati prodotti spray o dove viene somministrato ossigeno. - L’apparecchio funziona con tensioni comprese fra 100 e 240 V. l’apparecchio. Questo apparecchio non contiene contattate il centro assistenza clienti del vostro paese (vedere il capitolo “Garanzia e assistenza”).
- Page 88 ITALIANO Attenzione e/o l’igienizzatore nella lavastoviglie. - Se nel corso degli ultimi 2 mesi vi siete sottoposti del vostro dentista prima di utilizzare lo spazzolino. - Rivolgetevi al vostro dentista nel caso di eccessivo sanguinamento dopo l’uso dell’apparecchio o qualora tale sanguinamento continui dopo una settimana di uso.
- Page 89 ITALIANO - Non utilizzate l’apparecchio in presenza di setole rovinate o piegate. Sostituite la testina ogni 3 mesi o prima in presenza di segni di usura. - Utilizzate esclusivamente le testine consigliate dal produttore. bicarbonato di sodio o bicarbonato (impiegati di accuratamente la testina con acqua e sapone parte in plastica.
- Page 90 ITALIANO Questo apparecchio Philips è conforme a tutti gli standard e alle norme relativi all’esposizione ai campi elettromagnetici. Cappuccio igienico da viaggio Impugnatura Pulsante on/off Indicatore livello intensità Pulsante del livello di intensità (+ e -) Modalità di utilizzo Pulsante modalità...
- Page 91 ITALIANO Ricarica dell’apparecchio Inserite la spina del caricabatterie o dell’igienizzatore nella presa di corrente. Quando lo spazzolino è in carica, la spia della batteria inizia a lampeggiare. Nota: Sono necessarie almeno 24 ore per ricaricare completamente le batterie. Istruzioni d’uso Posizionate le setole dello spazzolino sui denti con una leggera Premete il pulsante on/off per accendere lo spazzolino 35_020_9771_1_Book_Simp_A6_v1.indd 91...
- Page 92 ITALIANO Iniziate la pulizia della sezione 1 (esterno dei denti superiori) e spazzolate per 30 secondi (45 secondi in modalità Deep Clean [Pulizia profonda]). Quindi, passate alla sezione 2 (interno dei denti superiori). Procedete con la sezione 3 (esterno dei denti inferiori) e spazzolate per 30 secondi (45 secondi in modalità...
- Page 93 ITALIANO Low (basso): 1 spia LED. (medio): 2 spie LED. High (elevato): 3 spie LED. Nota: per regolare il livello di intensità al livello superiore o inferiore, potete premere il pulsante + per aumentare l’intensità o il pulsante - per diminuire Pressure Sensor Una variazione nella vibrazione (ed una leggera variazione del suono) vi avvisa quando applicate troppa pressione durante la pulizia.
- Page 94 ITALIANO Caratteristiche Pressure Sensor Questo modello Sonicare è dotato della funzione Pressure Sensor attivata. Tale funzione è attiva in tutte le 3 modalità e a tutti i 3 livelli di intensità. Per disattivare o riattivare la funzione Pressure Sensor: Posizionate l’impugnatura con la testina collegata nel caricabatterie e/o igienizzatore collegato alla presa di corrente.
- Page 95 ITALIANO Smartimer La funzione Smartimer spegne automaticamente lo spazzolino per indicare che il ciclo di pulizia è completo. I dentisti consigliano la pulizia dei denti almeno due volte al giorno per almeno 2 minuti. Easy-start La funzione Easy-start aumenta leggermente la potenza per i primi 14 cicli di pulizia per agevolare la familiarizzazione con l’uso di Sonicare.
- Page 96 ITALIANO Scollegate l’igienizzatore, interrompete l’uso e rivolgetevi al centro assistenza clienti se: La lampadina a raggi UV rimane accesa nonostante lo sportello sia aperto. L’igienizzatore emette fumo o odore di bruciato durante il funzionamento. Nota: i raggi UV potrebbero essere nocivi per gli occhi e la pelle. Dopo un ciclo di pulizia, sciacquate la testina per 15 secondi ed eliminate l’acqua in eccesso.
- Page 97 ITALIANO Pulizia Impugnatura dello spazzolino Non utilizzate oggetti appuntiti sulla guarnizione in gomma intorno alla Per pulire l’impugnatura o la testina, non usate alcol isopropilico, aceto o prodotti a base di oli essenziali. Testina non immergete mai l’apparecchio in acqua e non risciacquatelo sotto l’acqua corrente.
- Page 98 Sostituzione Testina Utilizzate solo testine di ricambio Philips Sonicare. Ordinazione degli accessori www.shop.philips.com/service oppure recatevi presso il vostro rivenditore Philips. Potete contattare anche il centro assistenza Philips del garanzia internazionale). 35_020_9771_1_Book_Simp_A6_v1.indd 98 14/04/15 10:40...
- Page 99 ITALIANO Riciclaggio Questo simbolo indica che il prodotto è conforme alla Direttiva Questo simbolo indica che il prodotto contiene una batteria ricaricabile integrata conforme alla Direttiva Europea 2006/66/CE e Attenetevi alle istruzioni riportate nella sezione “Rimozione della Informatevi sulle normative locali relative alla raccolta differenziata dei prodotti elettrici ed elettronici e delle batterie ricaricabili.
- Page 100 ITALIANO Garanzia e assistenza www.philips.com/support oppure leggete l’opuscolo della garanzia internazionale. Limitazioni della garanzia I seguenti componenti sono esclusi dalla garanzia internazionale: Testine. Danni causati dall’uso di parti di ricambio non autorizzate. o riparazioni non autorizzate. o alterazione dei colori.
-
Page 101: Nederlands
NEDERLANDS Introductie dan op www.philips.com/welcome. raadplegen. Gevaar - Houd de oplader en/of de UV-reiniger uit de buurt van water. Plaats of bewaar deze niet in de enz. Dompel de oplader en/of de UV-reiniger nooit in water of een andere vloeistof. Zorg ervoor dat de oplader en/of de UV-reiniger na deze op het stopcontact aansluit. - Page 102 NEDERLANDS toegediend. tussen 100 en 240 volt. Dit apparaat bevat geen repareerbare onderdelen. op met het Consumer Care Centre in uw land vanaf 8 jaar en door personen met verminderde apparaat spelen. Reiniging en onderhoud dienen deze minimaal 8 jaar zijn en er toezicht wordt gehouden.
- Page 103 NEDERLANDS blijft branden als het deurtje open staat. Let op de UV-reiniger niet schoon in de vaatwasmachine. - Raadpleeg uw tandarts voordat u de 2 maanden een chirurgische behandeling aan uw mond of uw tandvlees hebt ondergaan. - Neem contact op met uw tandarts als er na het tandvleesbloeding optreedt of als het tandvlees nog steeds gaat bloeden nadat u het apparaat - De Sonicare-tandenborstel voldoet aan de...
- Page 104 NEDERLANDS - Dit apparaat is alleen bedoeld voor het reinigen apparaat niet langer en neem contact op met uw - De Sonicare-tandenborstel is bedoeld voor opzetborstel om de 3 maanden of eerder indien - Als uw tandpasta peroxide dan wel zuiveringszout het plastic ontstaan.
- Page 105 - Tijdens de UV-reinigingscyclus en direct erna is de heet is. hete lamp. - Als de UV-reiniger 3 opeenvolgende UV- 30 minuten uit voordat u een volgende UV- reinigingscyclus start. Dit Philips-apparaat voldoet aan alle toepasbare richtlijnen en velden. 35_020_9771_1_Book_Simp_A6_v1.indd 105 14/04/15 10:40...
- Page 106 NEDERLANDS Handvat Intensiteitsniveau-indicator Poetsmodi Indicatie voor batterij opladen (alleen bepaalde typen) Niet afgebeeld: UV-lamp 13 Reisoplader Niet afgebeeld: Reistas Klaarmaken voor gebruik De opzetborstel bevestigen kan. 35_020_9771_1_Book_Simp_A6_v1.indd 106 14/04/15 10:40...
- Page 107 NEDERLANDS Het apparaat opladen dat de tandenborstel wordt opgeladen. Opmerking: Het duurt minimaal 24 uur om de accu volledig op te laden. Het apparaat gebruiken Poetsinstructies tanden. Poets uw tanden met kleine bewegingen heen en weer, zodat de 35_020_9771_1_Book_Simp_A6_v1.indd 107 14/04/15 10:40...
- Page 108 NEDERLANDS ‘Functies’). Opmerking: Nadat u de poetsbeurt hebt voltooid, kunt u nog wat extra tijd waar vlekken voorkomen. U kunt ook uw tong poetsen met de tandenborstel Poetsmodi Clean: White: 30 seconden om uw voortanden te poetsen en te polijsten. Deep Clean: 3 minuten met wisselend poetsen en masseren voor Bij uw Sonicare is de Clean-modus geactiveerd.
- Page 109 NEDERLANDS Intensiteitsniveaus per modus Laag: 1 LED-indicatielampje. : 2 LED-indicatielampjes. Hoog: 3 LED-indicatielampjes. Opmerking: om het intensiteitsniveau te verhogen of te verlagen, kunt u op elk moment tijdens de poetsbeurt op de + knop drukken om de intensiteit te verhogen of op de - knop om intensiteit te verlagen. Druksensor Een verandering in trilling (en een geringe verandering in geluid) uit.
- Page 110 NEDERLANDS Houd de aan-uitknop en de modusknop 2 seconden ingedrukt. Quadpacer de poetsbeurt na een bepaald aantal seconden een piepje horen. netspanning aangesloten oplader of UV-reiniger. Houd de modusknop 2 seconden ingedrukt. U hoort 1 piepje dat aangeeft dat de Quadpacer is uitgeschakeld. Smartimer De Smartimer geeft aan dat de poetsbeurt is voltooid door de tandenborstel aan het eind van de poetsbeurt automatisch uit te...
- Page 111 NEDERLANDS UV-reiniger. ingeschakeld. uitgeschakeld. duren om de Easy-start-functie goed te laten werken. gewenningsperiode wordt afgeraden, omdat de Sonicare hierdoor minder Trek de stekker van de UV-reiniger uit het stopcontact, gebruik deze niet langer en bel Consumer Care wanneer: De UV-lamp blijft branden als het deurtje open staat. Houd de UV-reiniger altijd buiten het bereik van kinderen.
- Page 112 NEDERLANDS Sluit het deurtje en druk één keer op de groene aan/uitknop om de UV-reinigingscyclus te selecteren. Opmerking: U kunt de UV-reiniger alleen inschakelen als het deurtje volledig is gesloten. opent. automatisch. schijnt. Schoonmaken Handvat van tandenborstel Verwijder de opzetborstel en spoel de metalen aandrijfas af met 35_020_9771_1_Book_Simp_A6_v1.indd 112 14/04/15 10:40...
- Page 113 NEDERLANDS Gebruik geen wattenstaafje gedrenkt in isopropylalcohol, azijn of een maken. Opzetborstel Spoel de borstel en de borstelharen na iedere poetsbeurt onder de schoon. Dompel de UV-reiniger niet in water en spoel het ook niet af onder de kraan. Maak de UV-reiniger nooit schoon wanneer de UV-lamp heet is. Trek de lekbak recht uit de reiniger naar buiten.
- Page 114 Vervang de Sonicare-opzetborstels om de 3 maanden voor optimale resultaten. Accessoires bestellen Ga naar www.shop.philips.com/service om accessoires en contact opnemen met het Philips Consumer Care Centre in uw land (zie het ‘worldwide guarantee’-vouwblad voor contactgegevens). Recycling die valt onder EU-richtlijn 2006/66/EG en die niet bij het gewone 35_020_9771_1_Book_Simp_A6_v1.indd 114...
- Page 115 NEDERLANDS nooit samen met ander huisvuil weg. Als u oude producten en accu’s nodig. Neem de benodigde veiligheidsmaatregelen wanneer u de Neem de tandenborstel uit de oplader, schakel de tandenborstel in en laat de tandenborstel werken totdat deze stopt. Blijf de Sonicare om de aansluitingen af te breken.
- Page 116 NEDERLANDS Garantie en ondersteuning www.philips.com/support of lees het ‘worldwide guarantee’- vouwblad. Garantiebeperkingen internationale garantie: Opzetborstels. reserveonderdelen. wijzigingen of ongeautoriseerde reparaties. UV-lamp. 35_020_9771_1_Book_Simp_A6_v1.indd 116 14/04/15 10:40...
-
Page 117: Português
PORTUGUÊS Introdução Parabéns pela sua compra e bem-vindo à Philips! Para tirar todo o www.philips.com/welcome. Importante Leia cuidadosamente este manual do utilizador antes de utilizar o aparelho e guarde-o para consultas futuras. Perigo - Mantenha o carregador e/ou o higienizador afastados da água. - Page 118 PORTUGUÊS - Não utilize o carregador e/ou o higienizador no exterior nem próximo de superfícies aquecidas. Não utilize o higienizador em locais onde sejam utilizados aerossóis (spray) nem onde seja administrado oxigénio. - Este aparelho é indicado para voltagens entre 100 e 240 volts.
- Page 119 PORTUGUÊS - Deixe de utilizar o Higienizador UV se a lâmpada UV permanecer acesa quando a porta está aberta. A luz UV pode ser prejudicial aos olhos e à pele. Mantenha sempre o Higienizador UV fora do alcance de crianças. Cuidado carregador e o higienizador na máquina de lavar a loiça.
- Page 120 PORTUGUÊS - Este aparelho destina-se unicamente à lavagem aparelho e contacte o seu médico caso sinta algum desconforto ou dor. - A escova Sonicare é um dispositivo de uso pacientes em consultórios ou clínicas dentárias. - Interrompa a utilização da cabeça da escova se esta apresentar cerdas esmagadas ou inclinadas.
- Page 121 - Se o higienizador for utilizado em 3 ciclos de 30 minutos antes de iniciar outro ciclo de limpeza por UV. Este aparelho Philips cumpre todas as normas e regulamentos aplicáveis relativos à exposição a campos electromagnéticos. 35_020_9771_1_Book_Simp_A6_v1.indd 121 14/04/15 10:40...
- Page 122 PORTUGUÊS Tampa de protecção Pega Botão ligar/desligar Indicador do nível de intensidade Botão do nível de intensidade (+ e -) Modos de escovagem Botão de modo Indicador do nível da bateria Não ilustrado: Lâmpada UV Não ilustrado: Tabuleiro do Higienizador UV Não ilustrado: Estrutura de protecção da lâmpada UV 12 Cobertura do carregador com suportes para as cabeças da escova 13 Carregador de viagem...
- Page 123 PORTUGUÊS Carregar o aparelho a ser carregada. Nota: A carga total da bateria demora cerca de 24 horas. Utilizar o aparelho Instruções de escovagem Aplique uma pequena quantidade de pasta de dentes nas cerdas. Nota: Mantenha sempre o centro da escova em contacto com os dentes. e para a frente para que as cerdas alcancem a zona entre os dentes Nota: As cerdas devem abrir-se ligeiramente.
- Page 124 PORTUGUÊS “Funções”). Pode utilizar a Sonicare de forma segura em: rapidamente quando utilizadas em aparelhos dentários). implantes). Limpar: Branquear: 2 minutos para eliminar as manchas de superfície e 30 segundos adicionais para branquear e polir os dentes da frente. Limpeza profunda: proporciona 3 minutos revigorantes com limpeza e massagem alternadas para proporcionar uma experiência de limpeza excepcional.
- Page 125 PORTUGUÊS entre os modos. Níveis de intensidade por modo Baixo: 1 indicador LED. : 2 indicadores LED. Alto: 3 indicadores LED. Nota: para ajustar o nível de intensidade para o próximo nível superior ou inferior, pode premir o botão + para aumentar a intensidade ou o botão - para diminuir a intensidade a qualquer altura durante o ciclo de escovagem.
- Page 126 PORTUGUÊS Funções Sensor de pressão Este tipo de Sonicare é fornecido com a função do sensor de pressão activada. O sensor de pressão funciona nos 3 modos e nos 3 níveis de intensidade. Para desactivar ou reactivar a função do sensor de pressão: ligado ou no higienizador.
- Page 127 PORTUGUÊS Smartimer de 2 minutos por dia. Easy-start A função Easy-start aumenta suavemente a potência ao longo das primeiras 14 escovagens para se habituar lentamente à experiência Sonicare. A função Easy-start funciona apenas no modo Limpar e no nível da alta intensidade. Este tipo de Sonicare é...
- Page 128 PORTUGUÊS Desligue o higienizador, pare a sua utilização e ligue para o Apoio ao Cliente, se: a lâmpada UV permanecer acesa quando a porta está aberta. a janela estiver partida ou não se encontrar no higienizador. o higienizador libertar fumo ou um cheiro a queimado enquanto está em funcionamento.
- Page 129 PORTUGUÊS Limpeza Pega da escova de dentes Cabeça da escova corrente. germicida. Desligue o Higienizador UV da corrente. Puxe o tabuleiro de recolha para fora do higienizador. Passe-o por 35_020_9771_1_Book_Simp_A6_v1.indd 129 14/04/15 10:40...
- Page 130 Arrumação alimentação. Substituição Cabeça da escova Substitua as cabeças da escova Sonicare de 3 em 3 meses para obter os melhores resultados. Utilize apenas cabeças da escova de substituição genuínas da Philips Sonicare. 35_020_9771_1_Book_Simp_A6_v1.indd 130 14/04/15 10:40...
- Page 131 PORTUGUÊS Encomendar acessórios www.shop.philips.com/service ou vá ao seu revendedor Philips. Também pode contactar o centro de apoio ao cliente da Philips no seu país (consulte os detalhes de contacto no folheto da garantia mundial). Reciclagem recarregável incorporada abrangida pela directiva europeia com os resíduos domésticos comuns.
- Page 132 2,5 cm do rebordo inferior. Garantia e assistência www.philips.com/ support ou leia o folheto da garantia mundial em separado. As seguintes situações não estão abrangidas pelos regulamentos da garantia internacional: Cabeças de escova.
- Page 133 35_020_9771_1_Book_Simp_A6_v1.indd 133 14/04/15 10:40...
- Page 134 35_020_9771_1_Book_Simp_A6_v1.indd 134 14/04/15 10:40...
- Page 135 35_020_9771_1_Book_Simp_A6_v1.indd 135 14/04/15 10:40...
- Page 136 75% recycled paper Philips and the Philips shield are trademarks of KPNV. 75% papier recyclé Sonicare and the Sonicare logo are trademarks of Philips Oral Healthcare, LLC and/or KPNV. 4235.020.9771.2 35_020_9771_1_Book_Simp_A6_v1.indd 136 14/04/15 10:40...