
Related Manuals for Panasonic NN-K18JMM


Summary of Contents for Panasonic NN-K18JMM
-
Page 1: Operating Instructions
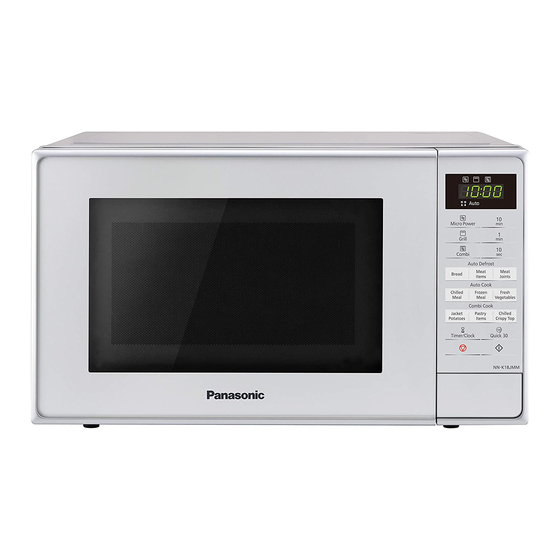
Operating Instructions Microwave/Grill Oven Household Use Only N N-K18JMM Model No. NN-K18JMM_BPQ.indd 2017/12/28 13:33:42... - Page 2 NN-K18JMM_BPQ.indd 2017/12/28 13:33:42...
- Page 3 Important safety instructions. Before „ operating this oven, please read these instructions and precautions carefully and keep for future reference. Warning! The appliance should be inspected „ for damage to the door seals and door seal areas and if these areas are damaged the appliance should not be operated until it has been repaired by a service technician trained by the manufacturer.
- Page 4 Warning! The contents of feeding bottles and „ baby food jars are to be stirred or shaken. The temperature has to be checked before consumption to avoid burns. Warning! The appliance and its accessible „ parts become hot during use. Care should be taken to avoid touching heating elements inside the oven.
- Page 5 This appliance can be used by children aged „ from 8 years and above and persons with reduced physical, sensory and mental capabilities or lack of experience and knowledge if they have been given supervision or instruction by a person responsible for their safety concerning the use of the appliance in a safe way and understand the hazards involved.
- Page 6 Oven must be placed on a flat, stable surface „ 85 cm above the floor, with rear of oven placed against a back wall. If one side of the oven is placed flush to a wall, the other side or top must not be blocked.
- Page 7 Clean the inside of the oven, door seals and „ door seal areas regularly. When food splatters or spilled liquids adhere to the oven walls, door seals and door seal areas wipe off with a damp cloth. Mild detergent may be used if they get very dirty.
- Page 8 This appliance is not intended to be operated „ by means of an external timer or separate remote-control system. Only use utensils that are suitable for use in „ microwave ovens. The microwave oven is intended for heating „ food and beverages only. Take care when heating foods low in moisture, e.g.
-
Page 9: Table Of Contents
Recipes................. 36 Questions and answers ..........47 Care of your oven ............48 Specifications ............... 49 Thank you for purchasing a Panasonic appliance. Panasonic Corporation Osaka, Japan Imported by: Panasonic Marketing Europe GmbH Panasonic Testing Centre, Winsbergring 15, 22525 Hamburg, Germany NN-K18JMM_BPQ.indd... -
Page 10: Installation And Connection
A replacement specified on the label on the oven. fuse cover can be purchased from If a higher voltage than specified is your local Panasonic Dealer. used, it may cause a fire or other HOW TO REPLACE THE FUSE damages. -
Page 11: Placement Of Your Oven
Placement of your oven This oven is intended for counter-top 7. This appliance is intended to be use only. It is not intended for built-in used in household and similar use or for use inside a cupboard. applications such as: - staff kitchen areas in shops, 1. -
Page 12: Important Safety Instructions
Important safety instructions 1. The door seals and seal areas 4. If the supply cord is damaged, it should be cleaned with a damp must be replaced by the cloth. The appliance should be manufacturer, its service agent inspected for damage to the or a similarly qualified person in door seals and door seal areas order to avoid a hazard. -
Page 13: Before Use
Before use Heater operation Before using COMBINATION or Caution! Hot surfaces GRILL for the first time, operate Exterior oven surfaces, including the oven without food and air vents on the cabinet and the accessories (including glass tray oven door will get hot during and roller ring) on GRILL 1 for COMBINATION and GRILLING, 5 minutes. -
Page 14: Cooking Time
Important safety instructions Accessories Cooking time The oven comes equipped with a The cooking time depends on the variety of accessories. Always condition, temperature, amount of follow the directions given for use food and on the type of cookware. of the accessories. Begin with the minimum cooking time to help prevent overcooking. -
Page 15: Meat Thermometer
Eggs Paper/plastic Do not cook eggs in their shells When heating food in plastic or and whole hard-boiled eggs by paper containers, keep an eye on MICROWAVE. Pressure may the oven as these types of build up and the eggs may containers ignite if overheated. -
Page 16: Parts Of Your Oven
Parts of your oven 1. Door Release Button 3. Air vents 4. Microwave feed guide Press to open the door. Opening (Do not remove.) the door during cooking will stop the cooking process without 5. External air vents cancelling the programme. Cooking 6. -
Page 17: Control Panel
Control panel 1 Display window 2 Micro Power pad 3 Grill pad 4 Combi pad 5 Time pads 6 Auto Defrost pads 7 Auto Cook pads 8 Combi Cook pads 9 Timer / Clock pad 10 Quick 30 pad 11 Stop / Reset pad: Before Cooking: One press clears your instructions. -
Page 18: Setting The Clock
Setting the clock When the oven is first plugged in, “88.88” appears in display. Example: To set 11:25am Press 11 times. Press 5 times. (to set hours) (to set 1 minute) Press twice. (to set 10 minutes) Press Timer/Clock Enter time of day. Press Timer/Clock. -
Page 19: Microwave Cooking And Defrosting
Microwave cooking and defrosting The glass tray must always be in position when using the oven. Press Micro Power Set the cooking time. Press Start. to select the desired Your oven can be The time power level. programmed for up to counts down 99 minutes 50 seconds in in the display. -
Page 20: Grilling
Grilling GRILL is particularly useful for thin slices of meat, steaks chops, kebabs, sausages or pieces of chicken. It is also suitable for hot sandwiches and all gratin dishes. Set the cooking time. Press Start. Press Grill to select the (up to 99 minutes The time desired level. -
Page 21: Combination Cooking
Combination cooking When cooking by COMBINATION, the MICROWAVE power cooks food quickly whilst the GRILL gives traditional browning and crisping. Press Combi to Set the cooking time. Press Start. select the (up to 99 minutes The time counts desired level. 50 seconds) down in the display. -
Page 22: Multi-Stage Cooking
Multi-stage cooking This feature allows you to programme up to 3 stages of cooking continuously. Example: To continually set 700 W (Medium) MICROWAVE power for 2 minutes, Combi 2 power for 3 minutes and Grill 1 power for 2 minutes. Press twice. -
Page 23: Quick 30 Feature
Quick 30 feature This feature allows you to set cooking time in 30 seconds increments up to 5 minutes at 800 W (High) MICROWAVE power. It is only available for MICROWAVE. Press Quick 30 to Press Start. set the desired The time counts cooking time. -
Page 24: Using The Timer
Using the timer This feature operates as a KITCHEN TIMER or allows you to programme the STANDING TIME/DELAY START. Kitchen timer Example: To count 5 minutes. Press 5 times. Press Timer/ Set the desired amount of Press Start. time. The time counts Clock. -
Page 25: Delay Start
Delay start Example: To start cooking at 700 W (Medium) MICROWAVE power for 3 minutes after 5 minutes of standing time. Press 5 times. Press Timer/ Set the desired amount of delay time. Clock. (up to 99 minutes 50 seconds) Press 3 times. -
Page 26: Auto Programmes
Auto programmes With this feature you can defrost/cook food according to the weight. Select the category and set the weight of the food. The weight is programmed in grams. The oven determines MICROWAVE power level, GRILL power, and/or COMBINATION setting, and then cooking time automatically. Do not include the weight of any added water or the container weight. -
Page 27: Defrosting Guidelines
Programme Instructions Weight: 600-1600 g Accessories: Whole chickens and meat joints will require shielding during defrosting especially if it is a particularly fatty piece. This is to prevent food starting to cook on the outside edges. Protect wings, breast and fat with smooth pieces of (Whole Chickens, aluminium foil secured with cocktail sticks. -
Page 28: Auto Cook/Combi Cook
Auto programmes Auto cook/combi cook Press a desired Auto Cook/ Press Start. Combi Cook pad several The time counts times until the appropriate down in the weight appears. display. „ Notes 1. Only use the accessories as indicated below. 2. Do NOT cover food when using the COMBI COOK programmes as it will prevent the food browning and the heat of the grill will melt any plastic covering. -
Page 29: Combi Cook
Programme Instructions Weight: 100-800 g Accessories: For cooking fresh vegetables like carrots, broccoli, cauliflower and green beans. Place prepared vegetables in a suitable sized container. Sprinkle with 1 tbsp water per 100 g vegetables. Cover with cling film. Pierce cling film with a knife once in the centre and 4 times around the edge. -
Page 30: Defrosting Charts
Defrosting charts The time given below is a guideline only. Always check the progress of the food by opening the oven door and then re-starting. For larger quantities adjust the time accordingly. Food should not be covered during defrosting. [Microwave power level: 270 W (Defrost)] Defrosting Standing Meat... -
Page 31: Reheating Charts
Reheating charts The time given in the charts below is a guideline only, and will vary depending on STARTING temperature, dish size etc. HEATING CATEGORY Your oven is Heating Category E and The IEC (60705) this is displayed on your oven. The power output (watts) information on this label will assist you The heating... - Page 32 Reheating charts Weight/ Power Cooking Time Food Instructions Quantity Level (approx.) DRINKS – COFFEE 1 mug 235 ml 800 W 2 mins. Place in a microwave safe mug on glass tray. Stir, before, 3 mins. 2 mugs 470 ml 800 W during and after reheating.
- Page 33 Weight/ Power Cooking Time Food Instructions Quantity Level (approx.) PUDDINGS & DESSERTS N.B. Transfer food from foil containers to a similar sized microwave safe dish 800 W 10-15 secs. or Combi 2 40-50 secs. Fruit Pie, Place in a microwave safe individual 800 W ⁄...
-
Page 34: Cooking Charts
Cooking charts Weight/ Power Cooking Time Food Instructions Quantity Level (approx.) BACON – from raw ⁄ mins. Place on microwave safe Rashers 130 g (4) 800 W (or 50-60 secs rack or plate on glass tray. per rasher) BEANS & PULSES – should be pre-soaked (except lentils) 800 W ⁄... - Page 35 Weight/ Power Cooking Time Food Instructions Quantity Level (approx.) EGGS – Poached. • Place water in a small bowl Water 45 ml 800 W 50 secs. and heat for 1st cooking + 800 W 50 secs. time. • Add egg (medium sized). 1 min.
- Page 36 Cooking charts Weight/ Power Cooking Time Food Instructions Quantity Level (approx.) LAMB – from raw – CAUTION: Hot Fat! Remove dish with care. Place on upturned saucer in 800 W 4-5 mins. microwave safe dish or rack. per 450 g Joints Cover.
- Page 37 Weight/ Power Cooking Time Food Instructions Quantity Level (approx.) SAUSAGES from raw – CAUTION: HOT FAT! Remove dish with care. Place on microwave safe 800 W ⁄ mins. plate or microwave rack. Cover. Place on glass tray. Thick 240 g (4) Place on wire rack with or Combi 2 14-15 mins.
-
Page 38: Recipes
Recipes Soup and Snacks Cream of Mushroom Soup Serves 4 Dish: large bowl Ingredients 25 g (1 oz) butter 1. Place the butter and chopped onion in a 1 small onion, chopped large bowl. Cover and cook on 800 W (High) 600 ml (1 pt) hot chicken stock power for 3 mins or until soft. -
Page 39: Meat And Poultry
Lentil Biryani Serves 2 Dish: large casserole Ingredients 50 g (2 oz) green lentils 1. Soak the lentils in cold water for 1 hour then 10 ml (2 tsp) oil, 1 small onion, drain. sliced 2. Place the oil and onion in a large bowl. 3 ml ( ⁄... - Page 40 Recipes Chicken Casserole Serves 4 Dish: 3 litre (6 pt) casserole Ingredients 25 g (1 oz) butter 1. Place vegetables and butter in dish. Cover 2 medium onions, sliced and cook on 800 W (High) power for 2 sticks celery, trimmed and 2-4 mins.
- Page 41 Savoury Mince Serves 2 Dish: 1.5 litre (3 pt) casserole dish Ingredients 1 small onion, diced 1. Place onion, garlic and oil in casserole, 1 clove garlic, crushed cover and cook on 800 W (High) power for 5 ml (1 tsp) oil 2 mins.
-
Page 42: Fish Curry
Recipes Fish Arranging Liquid Noise Thin fillets of fish i.e. Fresh fish should always During cooking, popping plaice, should be rolled up be sprinkled with 30 ml sounds may be heard. prior to cooking to avoid (2 tbsp) of water, lemon This is due to moisture overcooking on the thinner juice or white wine. - Page 43 Family Fish Pie Serves 4 Dish: large casserole Ingredients 450 g (1 lb) smoked haddock 1. Arrange fish in a shallow dish. Add lemon 30 ml (2 tbsp) lemon juice juice, cover and cook on 800 W (High) 15 ml (1 tbsp) oil power for 3 mins.
- Page 44 Recipes Vegetable Curry Serves 2 Dish: 3 litre (6 pt) casserole Ingredients 1 medium aubergine, diced 1. Sprinkle the aubergine liberally with salt in a salt, 15 ml (1 tbsp) oil colander. Stand for 30 mins. to remove bitter 1 clove of garlic, chopped juices.
- Page 45 Desserts / Cakes Steamed Suet Sponge Pudding Serves 4 Dish: 1 litre (2 pt) pudding basin Ingredients 150 g (5 oz) self-raising flour 1. In a mixing bowl, sift together the flour and pinch of salt salt. Stir in the sugar and suet. 50 g (2 oz) caster sugar 2.
- Page 46 Recipes Date Puddings and Butterscotch Sauce Serves 6 Dish: Large microwave pudding bowl Ingredients 200 g (7 oz) fresh dates, stoned 1. Pour 175 ml (6 fl. oz) boiling water over the and finely chopped chopped dates and set aside to cool. 175 g (6 oz) self-raising flour 2.
- Page 47 Boston Brownies Ingredients Dish: 20 cm (8) square dish lined with 100 g (4 oz) plain chocolate greaseproof 100 g (4 oz) butter 1. Place chocolate and butter in a bowl and 100 g (4 oz) soft dark brown cook on 800 W (High) power for 1 min. or sugar until chocolate has melted.
- Page 48 Recipes Soft Fruit Jam Makes approx. 1 ⁄ lbs jam Dish: large bowl Ingredients 450 g (1 lb) soft fruit, washed 1. Place all ingredients in a large bowl and stir. 450 g (1 lb) caster sugar Cook on 800 W (High) power for 5 mins. 30 ml (2 tbsp) lemon juice (10-15 mins.
-
Page 49: Questions And Answers
Questions and answers Q: Why won’t my oven turn on? Q: Sometimes warm air comes from the oven vents. Why? A: When the oven does not turn on, check the following: A: The heat given off from the cooking 1. Is the oven plugged in securely? food warms the air in the oven Remove the plug from the outlet, cavity. -
Page 50: Care Of Your Oven
Care of your oven 1. The oven should be unplugged 8. The roller ring and oven cavity floor should be cleaned regularly to before cleaning. avoid excessive noise. Simply wipe 2. Clean the inside of the oven, door the bottom surface of the oven with seals and door seal areas regularly. -
Page 51: Specifications
Specifications For proper treatment, recovery and 230-240 V, 50 Hz Power Source: recycling, please take these products Power Consumption: to designated collection points, where Maximum; 1250 W they will be accepted on a free of Microwave; 1250 W charge basis. Grill;... - Page 52 PHONE OUR CUSTOMER COMMUNICATIONS CENTRE 0344 844 3899 For service or spares. Or order spares direct on line at www.panasonic.co.uk Panasonic Corporation Website: http://www.panasonic.com F1217-0 © Panasonic Corporation 2018 Printed in P.R.C. NN-K18JMM_BPQ.indd 2017/12/28 13:33:47...