
Related Manuals for Philips PPX1430/EU


Summary of Contents for Philips PPX1430/EU
- Page 1 Register your product and get support at www.philips.com/welcome PPX1430 User Manual...
-
Page 2: Overview
These dam- ages can result from improper handling. Danger to Persons! DANGER! Danger to Persons! This symbol gives warning of danger to per- sons. Physical injury or damage can result from improper handling. Philips · PPX1430... -
Page 3: Table Of Contents
Table of Contents Overview ... 2 Dear Customer ... 2 Packing Contents ... 2 About this User Manual ... 2 1 General Safety Information ... 4 Setting Up the Device ... 4 Repairs ... 4 Power Supply ... 4 2 Overview... 5 Remote Control ... -
Page 4: General Safety Information
DANGER! High Power LED This device is equipped with an high power LED (Light Emitting Diode), which emits very bright light. Do not stare directly into the pro- jector lens to avoid eye irritation or injury. Philips · PPX1430... -
Page 5: Overview
2 Overview Remote Control Remote P3 ZOOM Overview ¾—Magnify still. Pan using the navigation keys (¡/ ¢, À/Á). ¿—One menu step back, one directory level back; select memory (USB medium, SD card, internal mem- ory) in the main menu / cancelling a function ‚... -
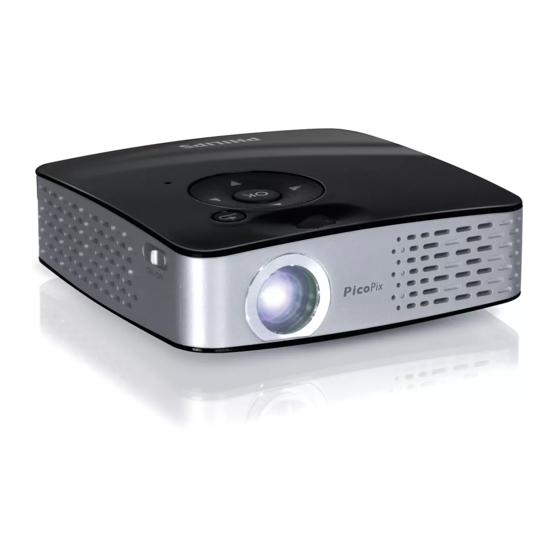
Page 6: Top Of The Device
(YUV/YPbPr) output or a computer (VGA audio) for image playback ÷ Ï—Audio output – headphone connection or con- nection for external speakers PicoPix P3 top Bottom of the Device ‚ Tripod socket ƒ Fold-out base PicoPix P3 Bottom Philips · PPX1430... -
Page 7: Overview Of The Menu Functions
Overview of the Menu Functions 1 After switching on the device the main menu appears. 2 Select the desired menu using the navigation keys ¡/¢, À/Á. 3 Confirm with à. 4 By pressing the ¿ key several times you will return to the main menu. -
Page 8: Initial Operation
(‚) and slide out the battery compartment (ƒ). 2 Insert the new batteries into the battery compart- ment with the positive and negative poles as shown on the back of the remote control. Make sure the polarities(+ and -) are aligned correctly. Philips · PPX1430... -
Page 9: Using The Remote Control
3 Push the battery compartment back into the remote control until the locking mechanism engages. Notice Normally the batteries will last for around one year. If the remote control stops working, please replace the batteries. If the device is not used for a long time, take out the batter- ies. -
Page 10: Connect To The Playback Device
One is for the right audio signal and the other for the V/Pr element of the compo- nent video signal. If these two connectors are inserted incorrectly, the projected image appears green and the audio signal for the right speaker will not work. Philips · PPX1430... -
Page 11: Connecting To A Computer (Vga)
Connecting to mobile multimedia devices Connecting to mobile multimedia devices Some video devices (e.g.: pocket multimedia players, ...) require specific connection cables. There are either supplied with the device or acquired from the manufac- turer of the multimedia device. Please note that only the original cables from the device manufacturer may func- tion. -
Page 12: Memory Card / Usb Storage Medium
Ensure, that the adapter cable is connected to the projector and not to the USB stor- age medium. The signal is switched cor- rectly between the computer connection and the USB storage medium only when using the adapter cable. Philips · PPX1430... -
Page 13: Photo Playback
6 Photo Playback 1 Switch the device on using the on/off switch on the side. 2 After the initial screen the main menu appears. 3 Select the internal memory, the USB storage medium or the memory card using the keys ¿. The chosen storage appears highlighted in white. -
Page 14: Video Playback
Most often, this option is labeled "TV out" or "TV Output" in the corresponding menu. 3 Start the video playback on the external device. 4 Modify the volume with N / O. Philips · PPX1430... - Page 15 Modify settings during playback 1 Press the ¡ or ¢ key. 2 Use the ¡/¢ keys to choose from the following settings: Brightness: Adjust brightness Contrast: Adjust contrast Saturation: Adjust colour saturation Smart Settings: Select predefined settings for brightness / contrast / colour saturation Volume: Adjust volume level 3 Modify the setting using À/Á.
-
Page 16: Music Playback
¿ key, the image reappears and the fan starts again. Remote and device volume During playback you can adjust the volume using N/ O on the remote control. Press « or N repeatedly to shut off the volume completely. Philips · PPX1430... -
Page 17: Managing Files
9 Managing files Copy Files You can copy files back and forth from the internal memory to the connected USB storage medium or memory card. 1 Switch the device on using the on/off switch on the side. 2 After the initial screen the main menu appears. 3 Select the internal memory, the USB storage medium or the memory card using the keys ¿. -
Page 18: Connect To A Computer (Usb)
Dig- ital cameras sometimes store additional information in specific folders, including previews and orientation information. For this reason, only delete the photos using the digital camera. Philips · PPX1430... -
Page 19: Settings
10 Settings 1 Switch the device on using the on/off switch on the side. 2 After the initial screen the main menu appears. 3 Use the navigation keys to select Settings. 4 Confirm with à. 5 Use ¡/¢ to choose from the following settings. 6 Confirm with à. -
Page 20: Service
Use a brush or lens cleaning paper for cleaning the lens of the projektor. DANGER! Do not use any liquid cleaning agents Do not use any liquid cleaning agents for cleaning the lens, to avoid damaging the coat- ing film on the lens. Philips · PPX1430... -
Page 21: Troubleshooting
Troubleshooting Power Cycling If a problem occurs that cannot be corrected with the instructions in this user manual (see also the help below), follow the steps given here. Problems The Pocket Projector cannot be switched on No sound No sound from the external connected device Bad sound quality with your computer connection Only the initial screen appears and not the image from the external device... -
Page 22: Appendix
The paper and cardboard packaging used can be dis- posed of as recyclable paper. Have the plastic wrapping and Styrofoam packaging recycled or dispose of it in the non-recyclable waste, depending on the requirements in your country. Philips · PPX1430... - Page 23 Sagemcom shall not be liable for any damages or prob- lems arising from the use of any options or any consum- able materials other than those designated as original Sagemcom / PHILIPS products or Sagemcom / PHILIPS approved products. Sagemcom shall not be held liable for any damage result-...
- Page 24 PHILIPS and the PHILIPS’ Shield Emblem are registered trademarks of Koninklijke Philips Electronics N.V. and are used by Sagemcom under license from Koninklijke Philips Electronics N.V. È 2010 Sagemcom Austria GmbH All rights reserved Sagemcom Documents SAS Documents Business Unit Headquarters : 250, route de l’Empereur...