Table of Contents
Advertisement
Advertisement
Table of Contents
Troubleshooting

Related Manuals for Philips FWD17/21M


Summary of Contents for Philips FWD17/21M
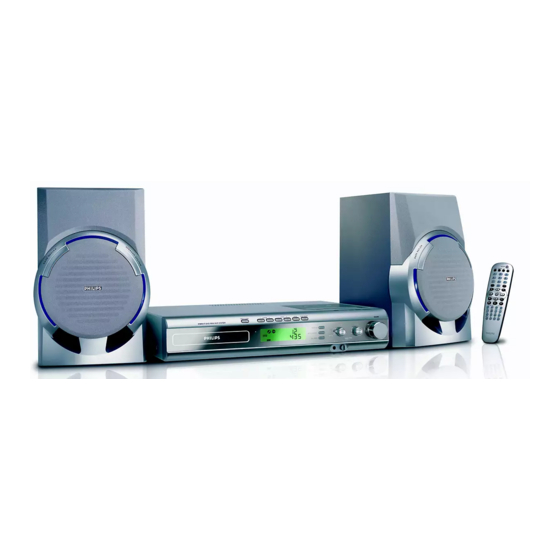
- Page 1 DVD Mini Hi-Fi System FWD17...
- Page 2 País de Origen: China Nº de Serie: LEA CUIDADOSAMENTE ESTE INSTRUCTIVO AVISO IMPORTANTE Philips Mexicana, S.A. de C.V. no se hace responsable por daños o desperfectos causados por: – Maltrato, descuido o mal uso, presencia de insectos o roedores (cucarachas, ratones etc.).
- Page 3 ON/OFF...
- Page 4 • ≥ £ ≤ ª & ™ § ∞...
- Page 5 Manufactured under license from Dolby Laboratories. “Dolby”, “Pro-logic” and the double-D symbol are trade- marks of dolby Laboratories. MANUFACTURED UNDER LICENSE FROM DIGITAL THEATER SYSTEMS, INC. US PAT. NO 5,451,942, 5,956,674, 5,974,380, 5,978,762 AND OTHER WORLD- WIDE PATENTS ISSUED AND PENDING. “DTS” AND “DTS DIGITAL SURROUND”...
-
Page 6: Table Of Contents
Contents General Information Features ... 7 Discs for playback ... 7 Supplied accessories ... 7 Environmental information ... 8 Care and safety information ... 8 Connections Rear connections ... 9 Placing speakers ... 10 Connecting speakers ... 10 Connecting TV set ... 11 Connecting Digital out ... -
Page 7: General Information
IMPORTANT! PLEASE NOTE THAT THE VOLTAGE SELECTOR LOCATED AT THE REAR OF THIS SYSTEM IS PRESET AT 220V FROM THE FACTORY. FOR COUNTRIES THAT OPERATE AT 110V-127V, PLEASE ADJUST TO 110V-127V BEFORE YOU SWITCH ON THE SYSTEM. Features Your DVD Mini System with 2-channel full digital amplifier creates the same dynamic sound qualities that you find in full-fledged cinemas and incorporates some of the best features in home... -
Page 8: Environmental Information
Cleaning the disc lens ● After prolonged use, dir t or dust may accumulate at the disc lens. To ensure good playback quality, clean the disc lens with Philips CD Lens Cleaner or any commercially available cleaner. Follow the instructions supplied with cleaner. -
Page 9: Connections
Television FM wire antenna Rear connections The type plate is located at the rear of the system. Power Before connecting the AC power cord to the wall outlet, ensure that the following are done; – If your system is equipped with a Voltage Selector, set the VOLTAGE SELECTOR to the local power line voltage. -
Page 10: Placing Speakers
Placing speakers Front speaker ( left ) VIEWING AREA Place the front left and right speakers at equal distances from the TV set and at an angle of approximately 45 degrees from the listening position. Notes: – To avoid magnetic interference, do not position the front speakers too close to your TV set. -
Page 11: Connecting Tv Set
Connecting TV set IMPORTANT! – You only need to make one video connection from the following options, according to the capabilities of your TV system. – Component Video connection provides higher picture quality. These options must be available on your TV set. –... -
Page 12: Connecting Digital Out
Connections IMPORTANT! – If the picture is distorted, check the Video Output setting. Make sure it is set to ‘S-Video’. (See Setting video preference). Using S-Video In jack ● Use the S-Video cable (not supplied) to connect the system’s S-VIDEO OUT jack to the S- Video input jack (or labeled as Y/C or S-VHS) on the TV set. -
Page 13: Connecting The Power Cord
Connecting the power cord COMPONENT VIDEO IN S-VIDEO Pr/Cr AUDIO ~ AC MAINS Pb/Cb VIDEO IN IMPORTANT! Never make or change any connection with the power switched on. After everything is connected properly, plug in the AC power cord to the power outlet. Power Outlet Connections... -
Page 14: Controls
Controls Controls on the system Display screen – to view the current status of the system. iR sensor – infrared sensor for remote control. SOURCE – to select the respective sound source : DISC (*AUX), FM, MW or TAPE. TUNING –... - Page 15 0 STOP9 – In DISC mode, to stop playback or to clear a program. PLAY 2 – to start playback in the stop mode. PAUSE ; – to pause playback temporarily/start frame-by- frame playback. SLOW 1/2/ALBUM -/+ for MP3/Picture-CD to select previous/next album (folder).
-
Page 16: Preparations
Preparations IMPORTANT! – Make sure to complete the preparation procedures before operating the system. Step 1: Inserting batteries into the remote control Open the battery compartment. Place two batteries (Type R06 or AA) in the compartment with the correct polarity as indicated by “+”... -
Page 17: Step 3: Setting Video Preference
IMPORTANT! – Make sure you have completed all the necessary connections. (See Connections – Connecting TV set) Step 3: Setting video preference Turn on the TV set and set it to the correct Video-In channel. ➜ You may go to channel 1 on your TV set, then press the channel button repeatedly until you see the Video In channel. - Page 18 Preparations – Setting TV System Allows you to select the color system matching the connected TV set. NTSC – If the connected TV is NTSC system, select this mode. It will change the video signal of a PAL disc and output in NTSC format. –...
-
Page 19: Disc Operations
SOURCE control knob to select DISC. Power on the TV system. ➜ You should see the blue Philips DVD background screen on the TV. Press OPEN•CLOSE ç (or EJECT on the remote) to open the disc tray. -
Page 20: Repeat Play Mode
Disc Operations Playback starts automatically. In shuffle playback mode: ● Press TITLE + ë to select another track in a shuffle order. STOP9 Press to stop shuffle playback. To cancel Shuffle mode: ● Press SHUFFLE repeatedly to select SHUFFLE OFF. Notes: –... -
Page 21: Fast Search
Fast search Press ALBUM -/+ to fast reverse or forward the disc. ● For MP3-CD, press and hold ALBUM -/+ on the set for a while or press the remote to fast reverse or forward the disc . For DVD/VCD (reverse): 22 X2 p 22 X4 p 22 X8 p 22 X20 p PLAY (forward): 33X2 p 33X4 p 33X8 p... -
Page 22: Zooming In
Disc Operations Zooming in Press ZOOM on the remote control to change the following zooming scale: For DVD/VCD: X1 pX2 pOFF For picture disc: X1 pX2 pX3pOFF To pan through the enlarged image, press 1/2/ 5/4 buttons to move the zoomed picture left, right, up or down. -
Page 23: Dvd Menu Operations
Using the system menu To enter the system menu, you should stop playback first. In stop mode, press SET UP. ➜ The menu bar will appear across the top of the TV set screen. Video Language Audio OSD Menu English Subtitle English English... -
Page 24: Setting Audio
DVD Menu Operations Setting audio To set Priority, please see details. To set Digital Out and PCM 48 KHz Language Video Audio Digital Out PCM 48KHz Priority Night Mode In stop mode, select Audio from the menu bar, and then press OK. Press 2 and 4 to select PCM or ALL. - Page 25 Press SET UP again to cancel the menu. Rating explanations 8 ADULT – material for adults only; viewed only by adults due to graphic sexual scenes, violence, or language. 7 NC-17 – No children under age 17; not recommended for children under age 17. 6 R - Restricted.
-
Page 26: Mp3 / Picture Disc Operations
MP3 / Picture Disc Operations Playing MP3 / picture disc (Kodak, JPEG) IMPORTANT! – You have to turn on your TV set and set to the correct Video In channel. MP3 / picture disc Load an MP3/Picture disc. Playback will start automatically. ➜... -
Page 27: Other Functions
Radio reception Turn the SOURCE control knob to select FM or MW source. Turn the TUNING control knob to tune to a desired radio frequency. Tape playback Turn the SOURCE control knob to select TAPE source. ç on the top of the Press STOP•OPEN DVD player to open the tape door. -
Page 28: Sound And Volume Controls
Sound and Volume Controls Sound control Adjusting volume and sound (on the set only) Turn the VOLUME -/+ control knob to decrease or increase volume on the system. Press down DBB ON/OFF to switch bass enhancement on or press it again to release it and switch bass enhancement off. -
Page 29: Specifications
... 4 Hz - 22 kHz (48kHz) ... 4 Hz - 44 kHz (96kHz) Digital Output ..SPDIF (Sony Philips digital interface) Coaxial Number of programmable tracks ... 20 Signal-to-noise ratio ... ≥ 50 dBA Channel separation ... ≥ 40 dB (1 kHz) Total harmonic distortion ... -
Page 30: Troubleshooting
Do not open the system as there is a risk of electric shock. If a fault occurs, first check the points listed below before taking the system for repair. If you are unable to remedy a problem by following these hints, consult your dealer or Philips for help. Problem No power. -
Page 31: Troubleshooting
Problem The language for the sound or subtitle cannot be changed when playing a DVD. No image is output when a function is selected. Sound cannot be heard or is of poor quality Poor radio reception. Recording or playback cannot be made Left and right sound outputs are reversed. -
Page 32: Glossary
Glossary Analog: Sound that has not been turned into numbers. Analog sound varies, while digital sound has specific numerical values. These jacks send audio through two channels, the left and right. Aspect ratio: The ratio of vertical and horizontal sizes of a displayed image. The horizontal vs.