Table of Contents
Advertisement
Advertisement
Table of Contents

Related Manuals for Zanussi ZOHNX3K1


Summary of Contents for Zanussi ZOHNX3K1
- Page 1 User Manual GETTING STARTED? EASY. ZOHNX3K1 ZOHNX3W1 ZOHNX3X1 EN User Manual Oven...
-
Page 2: Safety Information
VISIT OUR WEBSITE FOR: Get usage advice, brochures, trouble shoot- er, service and repair information: www.zanussi.com/support SAFETY INFORMATION Before the installation and use of the appliance, carefully read the supplied instructions. The manufacturer is not responsible for any injuries or damage that are the result of incorrect installation or usage. -
Page 3: Safety Instructions
WARNING: The appliance and its accessible parts become hot • during use. Care should be taken to avoid touching heating elements. Always use oven gloves to remove or put in accessories or • ovenware. Before carrying out any maintenance, disconnect the appliance •... -
Page 4: Electrical Connection
removed from the holder), earth leakage trips Height of the back of 571 mm and contactors. the appliance • The electrical installation must have an isolation device which lets you disconnect the appliance Width of the front of 595 mm from the mains at all poles. -
Page 5: Internal Lighting
• Do not put flammable products or items that are • Make sure the appliance is cold. There is the wet with flammable products in, near or on the risk that the glass panels can break. appliance. • Replace immediately the door glass panels when they are damaged. -
Page 6: Securing The Oven To The Cabinet
BUILDING IN min. 550 min. 560 ±1 min. 550 min. 560 ±1 SECURING THE OVEN TO THE CABINET... -
Page 7: Product Description
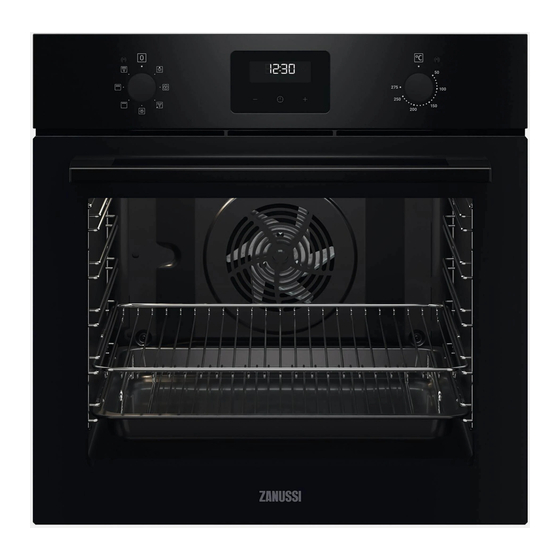
PRODUCT DESCRIPTION GENERAL OVERVIEW Control panel Knob for the heating functions Power lamp / symbol Display Control knob (for the temperature) Temperature indicator / symbol Heating element Lamp Shelf support, removable Shelf positions ACCESSORIES For roasting and grilling. • Wire shelf Use the trivet only with the Grill- / For cookware, cake tins, roasts. -
Page 8: Before First Use
BEFORE FIRST USE Set the time before you use the oven. WARNING! Refer to Safety chapters. INITIAL CLEANING Step 1 Step 2 Step 3 Remove all accessories and re- Clean the oven and the acces- Place the accessories and the movable shelf supports from sories with a soft cloth, warm removable shelf supports in... -
Page 9: Clock Functions
Oven function Application Oven function Application This function is designed to To roast large meat joints save energy during cook- or poultry with bones on ing. When you use this one shelf position. To make Moist Fan Bak- Turbo Grilling function, the temperature in gratins and to brown. - Page 10 HOW TO SET: CLOCK FUNCTIONS How to change: Time of Day - flashes when you connect the oven to the electrical supply, when there was a power cut or when the timer is not set. Step 1 - press repeatedly. - starts to flash.
-
Page 11: Using The Accessories
How to set: Time Delay Step 3 - press to set the time for: Duration. Step 4 Press: Step 5 - press to set the time for: End Time. Step 6 Press: At the set time the signal sounds and the oven turns off. Step 7 Press any button to stop the signal. -
Page 12: Trivet And Grill- / Roasting Pan
Wire shelf: Push the shelf between the guide bars of the shelf support and make sure that the feet point down. Deep pan: Push the deep pan between the guide bars of the shelf support. Wire shelf and deep pan together: Push the deep pan between the guide bars of the shelf support and the wire shelf on the guide bars above. -
Page 13: Additional Functions
You can use the trivet to grill thin pieces of food in large quantities and to toast them. Step 1 Put the trivet into a deep pan. Make sure the supports of the wire shelf point up. Step 2 Put the deep pan on the recom- mended shelf position. - Page 14 CAKES (°C) (min) Whisked recipes 3 (2 and 45 - Cake mould Shortbread dough 3 (2 and 20 - Cake mould Buttermilk cheesecake 60 - Cake mould, Ø 26 cm Strudel 60 - Baking tray Jam tart 30 - Cake mould, Ø 26 cm Christmas cake, preheat the 90 - Cake mould, Ø...
- Page 15 BREAD AND PIZZA (°C) (min) White bread, 1 - 2 pieces, 0.5 kg each 60 - Rye bread, preheating is not needed 30 - Bread tin Bread rolls, 6 - 8 rolls 2 (2 and 25 - Baking tray Pizza 230 - 10 - Baking tray /...
- Page 16 MEAT MEAT (°C) (min) (°C) (min) Pork shoulder, with rind Rabbit, cut in pieces 60 - Pork shin, 2 pieces Hare, cut in pieces Leg of lamb Whole pheasant 90 - Whole chicken 70 - Use the second shelf position. Set the temperature to 175 °C.
-
Page 17: Turbo Grilling
GRILL (min) (min) (kg) 1st side 2nd side Burgers, 6 20 - 30 Fish fillet, 4 pieces 12 - 14 10 - 12 Toasted sandwiches, 4 - 6 5 - 7 Toast, 4 - 6 2 - 4 2 - 3 TURBO GRILLING Preheat the empty oven. - Page 18 FISH POULTRY (°C) (min) (STEAMED) (°C) (min) Goose, 3.5 - 5 kg 160 - 120 - Whole fish, 1 - 1.5 210 - 40 - 60 Turkey, 2.5 - 3.5 160 - 120 - Turkey, 4 - 6 kg 140 - 150 - DEFROST Defrosting time...
-
Page 19: Moist Fan Baking - Recommended Accessories
VEGETABLES FRUIT (°C) Mushrooms 50 - 60 6 - 8 Apricots 8 - 10 Herbs 40 - 50 2 - 3 Apple slices 6 - 8 Pears 6 - 9 Set the temperature to 60 - 70 °C. MOIST FAN BAKING - RECOMMENDED ACCESSORIES Use the dark and non-reflective tins and containers. -
Page 20: Information For Test Institutes
(°C) (min) Brownie baking tray or dripping 45 - 50 Soufflè, 6 pieces ceramic ramekins on wire 45 - 55 shelf Sponge flan base flan base tin on wire shelf 35 - 45 Victoria sandwich baking dish on wire shelf 35 - 50 Poached fish, 0.3 baking tray or dripping... - Page 21 (°C) (min) Small True Fan Baking 150 - 20 - 35 cakes, Cooking tray 20 per tray Small True Fan Baking 150 - 20 - 35 cakes, Cooking tray 20 per tray Apple True Fan Wire 70 - 90 pie, 2 Cooking shelf tins Ø20...
-
Page 22: Care And Cleaning
CARE AND CLEANING WARNING! Refer to Safety chapters. NOTES ON CLEANING Clean the front of the oven with a soft cloth with warm water and a mild detergent. Clean and check the door gasket around the frame of the cavity. Use a cleaning solution to clean metal surfaces. -
Page 23: Removing And Installing Door
REMOVING AND INSTALLING DOOR The oven door has two glass panels. You can remove the oven door and the internal glass panel to clean it. Read the whole "Removing and installing door" instruction before you remove the glass panels. The oven door may close if you try to remove the internal glass panel before you remove the oven door. -
Page 24: Troubleshooting
Before you replace the lamp: Step 1 Step 2 Step 3 Turn off the oven. Wait until the Disconnect the oven from the Put a cloth on the bottom of oven is cold. mains. the cavity. Back lamp Step 1 Turn the glass cover to remove it. -
Page 25: Service Data
Product number (PNC) ......... Serial number (S.N.) ......... ENERGY EFFICIENCY PRODUCT INFORMATION AND PRODUCT INFORMATION SHEET* Supplier's name Zanussi ZOHNX3K1 949496254 Model identification ZOHNX3W1 949496253 ZOHNX3X1 949496255 Energy Efficiency Index 95.3 Energy efficiency class Energy consumption with a standard load, fan-forced mode 0.81 kWh/cycle... -
Page 26: Energy Saving
Heat source Electricity Volume 72 l Type of oven Built-In Oven ZOHNX3K1 27.2 kg Mass ZOHNX3W1 27.2 kg ZOHNX3X1 27.2 kg * For European Union according to EU Regulations 65/2014 and 66/2014. For Republic of Belarus according to STB 2478-2017, Appendix G; STB 2477-2017, Annexes A and For Ukraine according to 568/32020. - Page 28 WWW.ZANUSSI.COM/SHOP...