Table of Contents
Advertisement
Advertisement
Table of Contents

Related Manuals for ABB EC Titanium Series


Summary of Contents for ABB EC Titanium Series
- Page 1 — EC Titanium™ Manual User’s guide May 2020...
- Page 2 Declaration of Conformity and other collateral material may contain the company name of Baldor Electric Company and the brand names of Baldor-Dodge and Baldor-Reliance as well as the company name of ABB until such time as all materials have been updated to reflect our new corporate identity of ABB.
-
Page 3: Table Of Contents
Getting Assistance from ABB ........ - Page 4 Chapter 5 Control Wiring & Keypad Interface Control Terminal Connections ..........Control Terminal Wiring .
- Page 5 Motor Setup Parameters with ABB Drives ........
- Page 6 Chapter 13 Troubleshooting 13.1 Fault Codes ..............13-1 13.2 Periodic Inspection .
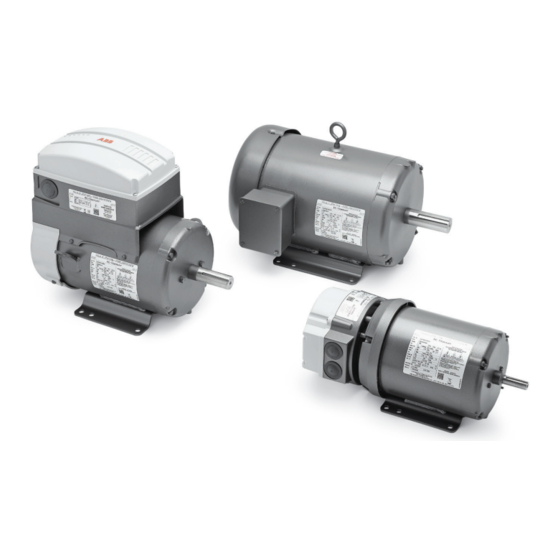
- Page 7 Chapter 1 Introduction The EC Titanium Series of Motors & Integrated Motor Drives (IMDs) are highly efficient, non-rare earth motors with Ferrite Assisted Synchronous Reluctance rotors. The IMD Versions provide an integrated drive which simplifies installation and wiring, reduces cost, and saves valuable panel space. Focused on Variable Torque / Pump, Fan, and Compressor Applications.
- Page 8 WARNING: Ignoring the following instructions can cause physical injury or death, or damage to the equipment. • The drive is not field repairable. Never attempt to repair a malfunctioning drive; contact your local ABB representative or Authorized Service Centre for replacement.
-
Page 9: Introduction
90 degrees. Ensure that all terminals are tightened to the appropriate torque setting Do not attempt to carry out any repair of the IMD. In the case of suspected fault or malfunction, contact your local ABB representative for further assistance. - Page 10 1-4 Introduction MN448...
-
Page 11: General Information And Ratings
Chapter 2 General Information and Ratings This chapter contains information about the EC Titanium integrated motor and drive including how to identify the product, general information and ratings. 2.1 Type Designation Key The type designation contains information on the specifications and configuration of the motor or the drive and motor integrated unit. - Page 12 ELECTRONICALLY PROTECTED MOTOR QR Code for motor information FOR INDUSTRIAL USE EN/IEC60034-1;-5 ABB MOTOR AND MECHANICAL INC., FORT SMITH, AR. MFG. IN U.S.A. CE Marking UL Agency Listing 2.2.2 Motor Setup Parameters The following motor values shown on the nameplate and utilized for proper control and setup of a drive used to run the EC Titanium motor.
- Page 13 Nominal ratings, see ratings 4.5A with ext. choke 910161 table on page xxx 48...62Hz 3 ~ 0-500 V ABB MRP code of the drive 4.2 A (150% 1/5 min) 0-500Hz Drive Date Code* Read User Power down for AC Variable Speed Motors ABB Motor and Mechanical Inc.
- Page 14 If your need is for a rating not listed below, contact your local ABB representative for support. (Symbols are described below the table.) 2.3.1 Motor Model Numbers and Ratings The following section provides details on the EC Titanium Stand Alone Motor, rating information and motor data required to properly setup and control the motor from a drive (BEMF, R, Lq and Lq).
- Page 15 2.3.2 Integrated Motor / Drive Model Numbers and Ratings The following section provides details on the EC Titanium Integrated Motor and Drive. Voltage shown is at the input of the drive. All motors are either 3-phase 230V AC or 3-phase 460V AC. Table 2-3 Top Mount Motor and Drive Ratings Drive Motor...
- Page 16 Table 2-4 Axial Mount Motor and Drive Ratings Drive Drive Motor Motor Motor Drive Type Drive Size Input Output Frame Efficiency Amps Model Amps (I Amps (I 1-phase 100V…115V AC (+/-10%) - 3 Phase 230V Output ECS100A1H1DF4 89.3% ECI1A3P2 10.3 1-phase 200…240V AC (+/-10%) - 3 Phase 230V Output ECS100A8H1DF4 89.3%...
-
Page 17: Mechanical Information And Mounting
Chapter 3 Mechanical Information and Mounting This chapter provides information to be considered when planning EC Titanium installation site and provides mounting information and site requirements. If problems arise after installation, please refer to the Diagnostics and Troubleshooting section of this manual. 3.1 Receiving and Inspection The EC Titanium is thoroughly tested at the factory and carefully packaged for shipment. - Page 18 3.4.1 Motor Lifting Provisions The EC Titanium motors provided in 180 and 210 frames are provided with lifting provisions. Always lift the motor by the lifting bolt eye or lugs provided. 140 Frame Motors do not require lifting provisions and can be set in place manually. (2) Lifting Lugs are provided on Top Drive Units that are offset to balance the motor weight as shown below in Figure 3-1.
- Page 19 3.5 Removing Drive Cover To connect power and signal wiring, the cover must be removed as shown below. For first time setup prior to applying power, remove the four retaining screws and carefully place them aside, then remove the cover to allow access to wiring the drive modules.
- Page 20 3-4 Mechanical Information and Mounting MN448...
-
Page 21: Electrical Installation And Planning
Chapter 4 Electrical Installation and Planning This section outlines the basics of the power wiring for the Integrated EC Titanium Motor and Drive. Sample digital and analog control wiring diagrams are shown later in this guide. 4.1 Motor Connections The following warnings cover considerations when using a permanent magnet motor over an induction motor. Please review these warnings carefully before operating the permanent magnet motor. -
Page 22: Protective Ground (Pe) Connection
4.2 Protective Ground (PE) Connection To ensure a safe and trouble-free installation, the EC Titanium Integrated Motor and Drive must be properly grounded. Symmetrical voltage on all three phases relative to ground is optimum and thus it is recommended that the control be supplied from a 4-wire wye connected source. -
Page 23: Safety Ground
4.2.2 Safety Ground This is the safety ground for the drive that is required by code. One of these points must be connected to adjacent building steel (girder, joist), a floor ground rod, or bus bar. Grounding points must comply with national and local industrial safety regulations and/or electrical codes. -
Page 24: Fuse / Circut Breaker Selection
4.3.1 Fuse / Circuit Breaker Selection Suitable fuses to provide wiring protection of the input power cable should be installed in the incoming supply line, according to the data in Table 4-2 Electrical Ratings. The fuses must comply with any local codes or regulations in place. In general, type gG (IEC 60269) or UL type J fuses are suitable;... -
Page 25: Optional Input Choke
4.4 Optional Input Choke An optional Input Choke is recommended to be installed in the supply line for drives where any of the following conditions occur. In all other installations, an input choke is recommended to ensure protection of the drive against power supply faults. •... - Page 26 4-6 Electrical Installation and Planning MN448...
-
Page 27: Control Terminal Connections
Chapter 5 Control Wiring and Keypad Interface 5.1 Control Terminal Connections The figure below shows the I/O terminals. Figure 5-1 Input and Output Terminals Control Signal Description Terminal +24V User Output +24V, 100mA Digital Input 1 Positive logic “Logic 1” input voltage range: 8V … 30V DC Digital Input 2 “Logic 0”... -
Page 28: Remote Panel Interface
5.3 Remote Panel Interface The REMOTE PANEL uses a standard RJ45 6-Way connector as its electrical interface, which provides a simple solution for the user to setup their system using a standard RJ45 6-Way data cable. The signal layout of the connector is as follows: CAN - CAN + 0 Volts... -
Page 29: Hardware Connection
5.3.2 Hardware Connection The EC Titanium provides the power supply to the REMOTE PANEL via the RJ45 connection. Once the physical connection has been setup, the system is ready to operate. See picture blow: 5.3.3 System Setup Depending on the requirement of the application, the REMOTE PANEL can be used in different configurations outline below: (1) Remote Panel &... -
Page 30: To Setup The Communication Address
5.3.4 To setup the communication address SCAN On first power up, the REMOTE PANEL will communicate with network drive address 1 and initially display “ ..” indicating the REMOTE PANEL is searching for a drive with network address 1. Load “... -
Page 31: Motor Thermistor Connection
5.5 Motor Thermistor Connection When an externally mounted motor thermistor is to be used, connect as follows: Additional Information Control Terminal Strip • Compatible Thermistor: PTC Type • Trip Level: >=2.5 kΩ • Reset Level: =<1.9 kΩ • The thermistor input is monitored at all times and the drive may trip even if it is disabled. - Page 32 5-6 Control Pad Wiring and Keypad Interface MN448...
-
Page 33: User Interface
Chapter 6 Keypad Programming and Basic Operation The drive is configured and its operation monitored using a remote keypad and display or the PC Tools. Refer to Chapter 5 for proper electrical connection of the keypad to the drive. 6.1 User Interface Used to display real-time information, to access and exit parameter edit mode and to NAVIGATE... -
Page 34: To Vary The Speed In Real Time Keypad Control Mode
6.2.2 To vary the speed in real time keypad control mode Function Description Drive will ramp up to the preset speed set in the digital potentiometer (assuming parameter 1100 = 1) START Press the UP button to increase speed. The drive will run forward, increasing speed until the UP button is released. -
Page 35: Keypad Operation And Remote Monitoring Displays
6.3 Keypad Operation and Remote Monitoring Displays StoP , pressing the STOP key allows setting the preset speed shown on the display Prior to operation the keypad with show and while in operation the following displays can be accessed by briefly pressing the Navigate Key. Remote Keypad Monitoring Screens Display Description... - Page 36 6-4 Keypad Programming and Basic Operation MN448...
-
Page 37: Quick Startup Terminal Control
Chapter 7 Quick Startup Guide This chapter contains Quick Start information that allows first time users to quickly and easily configure the EC Titanium for operation in either Terminal (Hardwired) or Keypad Control. The step by step instructions will have the EC Titanium running in a matter of minutes. -
Page 38: Quick Start Motor Parameter Data
7.2 Quick Start Motor Parameter Data If a factory reset has been performed, the motor data will need to be re-entered into the appropriate parameters. Motor Data is available on the Motor Nameplate, see Figure 2.2 for detailed information. For detailed information on parameter navigation see Chapter 8 Parameter Navigation. -
Page 39: Quick Start Keypad Control
7.4 Quick Start Keypad Control When delivered, the EC Titanium software parameters are in the factory default state, except for the motor data which was pre-loaded at the factory with parameters that are optimum for the performance of the Motor. A full list of parameters & default values can be found in Chapter 10. - Page 40 Figure 7-1 Quick Startup Wiring Guide Motor Connection: U V W Factory wired do not disconnect Status LEDs A1: Red = Trip A2 A1 Green = Healthy Supply Voltage: A2: Yellow = Alarm - Single phase 115 or 230V - Three phase 230, 415, 460V - 50 / 60Hz Control Terminals - Use inputs L (L1) &...
-
Page 41: Parameter Structure
Chapter 8 Parameter Navigation and Groups This section provides an overview of how to access and change drive parameters. To monitor or change a parameter value in the EC Titanium requires either the Remote Keypad described in Chapter 6 or the PC Software Tools detailed in this section. - Page 42 Figure 8-1 Programming Navigation Remote Keypad “Status Mode” Press for >1s to enter “Short/Long Parameter Timeout (60s) group mode” Use arrows to select Group Parameters: Short Long Advanced Timeout (60s) “Parameter mode” (End number flashing) Press for >1s to return to Short Press to exit “Parameter edit status mode mode”...
- Page 43 Figure 8-2 Parameter Group Structure and Description >1s Parameter “Status Mode” Group Mode Use the Left/Right Arrows to select group Press to enter to access group parameter edit mode Press Enter on 0000 in the Par L Group to access Read Only Status Parameter 9902 Digital IN Function...
- Page 44 8-4 Parameter Navigation and Groups MN448...
- Page 45 Chapter 9 Control Modes The mode of operation can be easily selected by changing a couple of parameters. While starting up the drive, the user selects the operating mode best suited for their purpose with parameters 9902 DIGITAL INPUTS FUNCTION SELECT and 1103 PRIMARY COMMAND SOURCE MODE.
- Page 46 9902 Digital input 1 Digital Input 2 Digital Input 3 (An in 2) Digital input 4 (An in 1) Comments Closing digital inputs 1 and Open: Fwd. Stop Open: Reverse stop Preset speed select 0 Preset speed select 1 2 together carries out a Closed: Fwd.
-
Page 47: Control Modes 9.1
9.2.1 Terminal Control Mode 2-Wire Control Start / Stop Control with Forward / Reverse Default Configuration Terminal Control Mode (1103 = 0), Digital Input Function Select (9902 = 0) This is the default digital input configuration. It provides a general purpose I/O setup with a hard wired start / stop enable, forward / reverse input and a selection between an analog speed reference or preset speed input. - Page 48 9.2.2 Terminal Control Mode 3-Wire Control Start / Stop with Forward / Reverse Terminal Control Mode (1103 = 0), Digital Input Function Select (9902 = 11) This is the digital input configuration when the drive is controlled using momentary push-buttons. It provides a general purpose I/O setup with a momentary input for start, forward / reverse, stop interlock and an analog speed reference.
-
Page 49: Keypad Mode (1103 = 1 Or 2) Parameter 9902 Settings
9.3 Keypad Mode: (1103 = 1 or 2) Parameter 9902 Settings 9902 Digital input 1 Digital Input 2 Digital Input 3 (An in 2) Digital input 4 (An in 1) Comments Open: Disable Closed: remote UP push- Closed: remote DOWN push- Open: Forward Factory Default 9902 = 0 8...13... -
Page 50: Modbus Control Mode (1103 = 3 Or 4), Parameter 9902 Settings
9.4 Modbus control mode (1103 = 3 or 4), Parameter 9902 Settings 9902 Digital input 1 Digital Input 2 Digital Input 3 (An in 2) Digital input 4 (An in 1) Comments Digital input 1 must be closed for the 0, 2, 4, Open: Stop (disable) No effect... - Page 51 9-7 Control Modes MN448...
-
Page 52: Parameter Definitions
Chapter 10 Parameter Definitions The chapter describes the actual signals and parameters and it also contains a listing of the default parameter values. For a guide on selecting parameter groups see Chapter 8 Parameter Group Navigation. All parameters are presented in detail and sequential order in the Long Parameter Group. - Page 53 Parameters in the Short parameter mode Name/Value Description Default 11 REFERENCE SELECT Selects the reference input source for the drive 1103 PRIMARY COMMAND SOURCE See Chapter 9 Control Modes for 1103 parameter selection details MODE 0: TERMINAL CONTROL. The drive responds directly to signals applied to the control terminals. UNI-DIRECTIONAL KEYPAD The drive can be controlled in the forward direction only using an CONTROL...
- Page 54 Parameters in the Short parameter mode Name/Value Description Default 20 LIMITS Maximum frequency 2008 MAXIMUM FREQUENCY / Maximum output frequency or motor speed limit – Hz or rpm. 133 Hz SPEED LIMIT If parameter 9908 MOTOR RATED SPEED > 0, the value entered / displayed is in RPM 2007…133.0 Hz Maximum frequency...
-
Page 55: Long Parameter Group
10.2 Long Parameter Group PA- The following tables describes the parameters that are visible in the mode (Long Group Parameters) that contain a sequential listing of all available parameters. Parameters in the Long parameter mode Name/Value Description Default 0000 READ ONLY PARAMETERS 0000 Fault history Pressing the NAVIGATE key when the... - Page 56 Parameters in the Long parameter mode Name/Value Description Default 0000 READ ONLY PARAMETERS Continued Fault history (read-only) Displays the total operating time of the drive’s internal cooling fans. 0190 DRIVE INTERNAL COOLING FAN TOTAL OPERATING TIME The first value shown is the number of hours. Pressing the Up key will display the minutes and seconds.
- Page 57 Parameters in the Long parameter mode Name/Value Description Default REFERENCE SELECT The drive can accept a variety of references in addition to the conventional analog input, potentiometer and keypad signals. 1100 KEYPAD MODE RESTART This parameter is active only when operating in Keypad Control Mode FUNCTION (parameter 1103 PRIMARY COMMAND SOURCE MODE = 1 or 2).
- Page 58 Parameters in the Long parameter mode Name/Value Description Default CONSTANT SPEEDS Constant speeds. Constant speed activation overrides the external speed reference. Constant speed selections are ignored if the drive is in the local control mode. Preset Speeds / Frequencies selected by digital inputs depending on the setting of Parameter 9902 DIGITAL INPUTS FUNCTION SELECT.
- Page 59 Parameters in the Long parameter mode Name/Value Description Default 100.0 Scales the analog input by this factor, (as a % of the full scale range of this 1302 ANALOG IN 1 SCALING input). 0.0…2000.0 % Example: If parameter 1300 ANALOG INPUT 1 FORMAT is set for 0 – 10V, and the scaling factor is set to 200.0%, a 5 Volt input will result in the drive running at maximum speed as set in parameter 2008 MAX SPEED LIMIT ANALOG IN 2 FORMAT...
- Page 60 Parameters in the Long parameter mode Name/Value Description Default RELAY OUTPUTS Status information indicated through relay output and relay operating delays Selects the function assigned to the relay output. The relay has two output 1: Drive OUTPUT RELAY FUNCTION 1401 terminals, Logic 1 indicates the relay is active, and therefore terminals 10 READY SELECT...
- Page 61 Parameters in the Long parameter mode Name/Value Description Default ANALOG/DIGITAL OUTPUTS Analog output signal processing Selects the type of output signal information indicated from terminal 8. ANALOG OUTPUT 1501 Note: When using settings 0 - 7 the output is a digital format (Logic 1 = FUNCTION SELECT 24V).
- Page 62 Parameters in the Long parameter mode Name/Value Description Default START/STOP Start and Stop modes of the motor Starting the drive connected to a rotating motor. 2101 FLYING START Size 2 drives only, DC injection time on start for Size 1 drives DISABLED ENABLED When enabled, on start up the drive will attempt to determine if the motor is...
- Page 63 Parameters in the Long parameter mode Name/Value Description Default ACCEL/DECEL Acceleration and deceleration times Acceleration ramp time from 0 to base speed (Parameter 9907 MOTOR 30.0 s 2202 ACCELERATION RAMP TIME RATED FREQUENCY) in seconds. 0.00…600.0 s Time Deceleration ramp time from base frequency (Parameter 9907 MOTOR 30.0 s DECELERATION RAMP RATED FREQUENCY) to standstill in seconds.
- Page 64 Parameters in the Long parameter mode Name/Value Description Default V/F CHARACTERISTIC Used in conjunction with parameter 2611 V/F CHARACTERISTIC 2610 ADJUSTMENT VOLTAGE ADJUSTMENT FREQUENCY. 0 V…250/500 2611 V/F CHARACTERISTIC This parameter in conjunction with parameter 2610 V/F CHARACTERISTIC 0.0 Hz ADJUSTMENT FREQUENCY ADJUSTMENT VOLTAGE sets a frequency point at which the voltage set in parameter 2611 V/F CHARACTERISTIC ADJUSTMENT FREQUENCY...
- Page 65 Parameters in the Long parameter mode Name/Value Description Default SUPERVISION Signal supervision. The drive monitors whether certain user selectable variables are within the user-defined limits. The user may set limits for speed, current etc. Supervision status can be monitored with relay output. See parameter group 14 RELAY OUTPUTS.
- Page 66 Parameters in the Long parameter mode Name/Value Description Default 4016 PI FEEDBACK SIGNAL SOURCE SELECT Analog Input 2(Terminal 4) Analog Input 1(Terminal 6) Motor Current DC Bus voltage Analog 1- Analog 2 Largest (Analog 1, Analog 2) COMMUNICATION PARAMETERS 5302 SERIAL This parameter has three sub settings used to configure the Modbus RTU Address 1...
-
Page 67: Advanced Parameter Group
10.3 Advanced Parameter Group PA-A The following tables describes the parameters that are visible in the mode (Advanced Parameters). Parameters in the Long parameter mode Index Name/Selection Description Default 2017 Maximum Current Limit Defines the max current limit in vector control modes. 110 % 0.1…175.00 2105... - Page 68 Parameters in the Long parameter mode Index Name/Selection Description Default 11201 MOTOR STATOR Motor Stator Resistance – refer to motor nameplate for value. RESISTANCE (Rs) 11203 MOTOR STATOR Ld (mH) Motor Inductance (Lsd) value – refer to motor nameplate INDUCTANCE (Lsd) for value.
-
Page 69: Parameter Access Locking And Unlocking System
3. To disable this feature set parameter 1603 to zero and then parameter 1602 to zero. NOTE: In the event of losing the drive password, please contact ABB for support to be provided with an unlock code. The drive serial number (located on the drive nameplate) is required to be provided. -
Page 70: Standalone Motor & Abb Drive Setup
The Motor Inductive values and Back EMF Voltage are important values for setting a ABB drive with the EC Titanium to ensure the proper control and optimized performance of the system. Proper program settings are more relevant than with induction motors. -
Page 71: Identifying The Ec Titanium Motor Parameters
6205 SER# LISTED E46145 ELECTRONICALLY PROTECTED MOTOR FOR INDUSTRIAL USE EN/IEC60034-1;-5 ABB MOTOR AND MECHANICAL INC., FORT SMITH, AR. MFG. IN U.S.A. Zone Description Catalog Number General Motor Information Motor Rated Amps BEMF (Back EMF) Voltage Motor Stator Resistance (Rs) -
Page 72: Abb Drive Selection Guidelines
** Maximum current with 110% overload allowed for one minute every ten minutes Maximum current with 150% overload allowed for one minute every ten minutes. ABB drives can supply maximum output current I2max for 2 seconds at start. 11.4 Motor Setup Parameters with ABB Drives The following parameters should be set based on nameplate data of the EC Titanium™... -
Page 73: Setting Up Abb Drive Parameters
Note: with PMSM the ID run modes Advanced and Reduced will perform exactly the same ID run as Normal. Perform ID run. After performing the ID run, the drive stops and par 99.13 value reverts back to None. 11-4 Standalone Motor and ABB Drive Setup MN448... -
Page 74: Start Mode Selection With Fasr Motors
DC current ~50% Depends on the application and motor, but 50% is typically ok. reference 21.11 Post - Depends on the application and motor, but 2 s is typically ok. magnetization time MN448 Standalone Motor and ABB Drive Setup 11-5... - Page 75 Defines a minimum torque limit for the drive (in percent of nominal motor torque). Range: -1600.0 … 0.0% 30.20 Maximum torque 1 Defines a maximum torque limit for the drive (in percent of nominal motor torque). Range: 0.0 … 1600.00% 11-6 Standalone Motor and ABB Drive Setup MN448...
- Page 76 Auto-phasing current 0.25 Per unit auto-phasing current for rotor alignment prior to starting the motor. 25.21 Auto-phasing time Time in seconds auto-phase current is applied to motor for rotor alignment prior to starting. MN448 Standalone Motor and ABB Drive Setup 11-7...
- Page 77 11-8 Standalone Motor and ABB Drive Setup MN448...
-
Page 78: Environmental
Chapter 12 Technical Data This chapter contains the technical specifications of the drive, the ratings, sizes and technical requirements. 12.1 Environmental Motor Enclosure Rating TEFC/IP54 Motor with UL Drive Enclosure Rating Type 12/IP55 Drive Operational ambient temperature ranges: -10 … 50°C (frost and condensation free) Storage ambient temperature range: -40 …... -
Page 79: Digital & Analog I/O
12.5 Digital & Analog I/O Digital Inputs Specification Voltage Range 8 – 30 V dc, Internal or External supply, NPN (positive logic) Response Time < 8ms Analog Inputs Specification Range Current: 0-20mA, 4-20mA. 20mA max input current Voltage: -10-10V (Analog Input 1 Only), 0-10V, 0-5V, 0/24V, 30V max input Resolution Analog Input 1: 12-bit, <16ms response time (Uni-Polar) -
Page 80: Motor Overload Summary
12.7 Motor Overload Summary The EC Titanium Drive features both hardware and software protection of the output stage to prevent damage. In addition, an I x t system is used to monitor motor overload condition and prevent damage to the motor due to operation for prolonged periods at high load. -
Page 81: Dimensions Motor Only
12.9 Dimensions Motor Only NEMA Baldor Estimated frame Frame Weight 3514B 514, 520 = 12.29 TOP OF 528 = 13.29 NAMEPLATE 548 = 15.54 6.62 3.25 2.50 5.71 2.25 3520B .19 KEY 1.38 LONG 7.19 DIA. 6.81 .8750 .8745 3528B 3.50 + - .00 .06 DRAIN FITTING (EA. - Page 82 12.10 Dimensions Top Mount Drive and Motor NEMA Baldor Estimated frame Frame Weight LEAD HOLE PLUG 514,520 = 12.37 .88 DIA 7.16 528 = 13.37 3514B (EA. SIDE) 1.79 5.07 2.50 3520B 2.25 5.00 .19 KEY 1.38 LONG .8750 .8745 6.81 3.50 + - .00 .06 3528B...
- Page 83 12.11 Dimensions Axial Mounted Drive and Motor NEMA Baldor Estimated frame Frame Weight 8.06 3514B 514,520 = 16.71 Ø 6.61 528 = 17.71 2.50 TOP OF AUX. DRIVE NP @ 12:00 2.25 Ø 7.46 .19 KEY 1.38 LONG Ø .8750 .8745 6.81 3520B...
- Page 84 Chapter 13 Troubleshooting The EC Titanium constantly monitors its status and provides the following ways to determine the status of the drive and to troubleshoot problems that may occur: LED’s one the drive Table 13-1 Fault codes displayed remote keypad Table 13-2 Fault History Parameter 0401...
- Page 85 13.3 Drive Module Status LED’s Each control module features two status LED’s, labelled A1 and A2; these indicate the drive status. LED A1 (Green, Red and Yellow) Drive Status LED A2 (Green) Power On Condition A2 A1 Table 13-1 Drive Model LED Status LED Status Drive Status Green...
- Page 86 Under temperature must be raised over -10°C in order to start the drive. Faulty thermistor on 00 0x10 Refer to your local ABB representative heatsink. Drive internal temperature O-hEAt 0x17 Drive ambient temperature too high, check adequate cooling air is provided...
- Page 87 Spin start function failed to detect the motor speed. Parameters not saved, defaults reloaded. 00 0x11 Internal memory fault. Try again. If problem recurs, refer to your local ABB representative Analog input current out 000 0x12 Check input current in range defined by parameter 1300.
- Page 88 Appendix A Modbus-RTU Example Connection Overview This chapter gives specific details on how to use Modbus RTU as the communication protocol of the IMD. Below you will find register mapping, telegram structure, and connection details. ACS255 drives support Modbus RTU communication, allowing a network of drives to be controlled and monitored by any Modbus RTU capable PLC or control system.
- Page 89 A.5 RJ45 Data Connection Pin Configuration CAN+ 0 Volt Remote Keypad / PC Connection - Remote Keypat / PD Connection + +24 Volt Remote Keypad Power Supply RS 485- Modbus RTU RS 485+ Modbus RTU Data Format is Fixed at: 1 start bit, 8 data bits 1 Stop bit, No parity Baud rate and address set in 5302...
- Page 90 A.6 Modbus Register Map Table A-1 Control and status registers NOTE: All registers are Holding Registers Register Parameter Upper Byte Lower Byte Format Command Type Scaling Number Number Control Word WORD 03,06 See Below Frequency Setpoint -5000 5000 03,06 1dp, e.g. 100 = 10.0Hz Reserved 03,06 No function...
- Page 91 A.7 Control and Status Register Descriptions Read-Write Registers Register 1: Drive Control Word High byte Low byte Bit 0: Run/Stop command: Set to 1 to enable the drive. Set to 0 to stop the drive. Bit 1: Bit 2: User must clear this bit when drive is under normal condition to prevent un-expected reset. Bit 3: For normal operation, Bit 3 has the highest priority, bit 0 has the lowest priority (bit 3>bit 1>bit 0).
- Page 92 Register Parameter Description Format Data format / scaling 0: Terminal Control 1: Keypad forward only 2: Keypad forward and reverse 3: Modbus control mode 1103 Control mode 4: Modbus control with ramp control 5: PID control PID control with analog speed sum CAN Open 1202...
- Page 93 Register Parameter Description Format Data format / scaling 2007 Min speed limit 2008 Internal value (3000 = 50.0Hz) 2008 Max speed limit 5*9907 Internal value (3000 = 50.0Hz) 2020 Brake circuit See user guide for function enable details 2101 Spin Start Enable See user guide for function details 0: Ramp to stop + Mains Loss...
- Page 94 Register Parameter Description Format Data format / scaling 4002 User PI I time 1dp, e.g. 10 = 1.0s constant 4005 User PI mode See user guide for more select information 4010 User PI reference See user guide for more select information 4011 User PI digital...
- Page 95 A.9 Additional Information Register 149: DC Injection Configuration The parameter value is stored as a combined 16 bit word which is constructed as follows: High byte Low byte DC Injection Mode DC Injection Duration : 1dp, e.g. 0 – 250 = 0.0 – 25.0s DC Injection on Start DC Injection on Stop DC Injection on Start &...
- Page 96 Register 163: Display Scaling The parameter value is stored as a combined 16 bit word which is constructed as follows: High byte Low byte Display Scaling Source Display Scaling Factor : 3dp, e.g. 0 – 16000 = 0.000 – 16.000 Motor Speed Motor Current Analog Input 2 Signal...
- Page 97 A.12 Drive Fault Code and Information Error Codes may be returned in the High Byte of Register 6 as below. Fault Fault Description Description Corrective Action Corrective Action Code Code 0x00 Drive is READY and in a stopped condition. The motor is not energized. No enable signal is present to start the drive StStop Factory Default parameters have been loaded Press the STOP key, drive is ready to configure for particular...
- Page 98 0x0F Internal memory fault. Parameters not saved, defaults reloaded. 00 0x11 Try again. If problem recurs, refer to your local ABB representative Analog input current out of range Check input current in range defined by parameter 1300. 000 0x12 Internal drive Fault Refer to your local ABB representative 00...
- Page 99 A-12 Modbus-RTU Example Connection MN448...
- Page 100 Chapter B Options and Kits Overview This appendix gives details on the option kits and accessories available for the EC Titanium. B.1 Remote Keypad ECS100L The REMOTE PANEL is designed for programming and control of the EC Titanium. Reference MN449 Remote Keypad Manual for detailed information on mounting, wiring and installation of the remote keypad.
- Page 101 B.2 Remote Keypad ECS100B The COPYSTICK2 is used for fast and accurate repeat drive programming. Reverence MN450 User Guide for detailed information on operation. Part Number Description ECS100B COPYSTICK2 MN450 ECS100B Instruction Manual B.3 USB PC Connection Kit ECS100U The USB PC Connection Kit connects between the RJ45 port on the EC Titanium and a USB PC Port. This kit is used when programming the drive with the PC Software Tools.
- Page 103 Any reproduc- tion, disclosure to third parties or *448-0520* utilization of its contents – in whole or in parts – is forbidden without prior written consent of ABB. © Copyright 2020 ABB. All rights reserved. Specifications subject to change without notice.