LG 27CN650N Owner's Manual
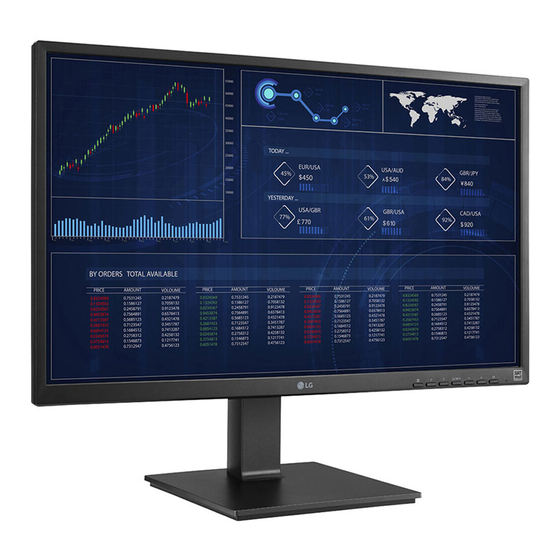
All-in-one cloud device
Hide thumbs
Also See for 27CN650N:
- Owner's manual (100 pages) ,
- Manual (24 pages) ,
- Owner's manual (104 pages)
Table of Contents
Advertisement
Quick Links
Advertisement
Table of Contents

Related Manuals for LG 27CN650N


Summary of Contents for LG 27CN650N
- Page 1 Owner’s Manual Please read this manual carefully before operating your set and retain it for future reference. 27CN650N 27CN650W 34CN650N 34CN650W 27CN651N 27CN651W 34CN651N 34CN651W www.lg.com Copyright © 2019 LG Electronics Inc. All Rights Reserved.
-
Page 2: Table Of Contents
TABLE OF CONTENTS LICENSE ............3 IMPORTANT PRECAUTIONS ......3 OPEN SOURCE SOFTWARE NOTICE INFORMATION ..........9 BEFORE READING THE OWNER’S MANUAL ..9 IMPORTANT NOTES ON INSTALLING AN OPERATING SYSTEM ........10 ASSEMBLING AND PREPARING ....10 USING THE MONITOR ........20 USER SETTINGS ...........23 TROUBLESHOOTING ........27 PRODUCT SPECIFICATION ......29... -
Page 3: License
The warranty does not cover any damage resulting from reckless use or use in undesirable environments. • LG Electronics Inc. does not provide warranty for data loss. In order to minimize damage from data loss, please make backup copies of important data. - Page 4 On Safety Do not Open the Display: • There are no user serviceable components inside. • Use only the power cord supplied with the unit. In case you use another power cord, make sure that it is • There are Dangerous High Voltages inside, even when the power is OFF. certified by the applicable national standards if not being provided by the supplier.
- Page 5 On Installation To Prevent Fire or Hazards: • Always turn the display OFF if you leave the room for more than a short period of time. Never leave the • Do not allow anything to rest upon or roll over the power cord, and do not place the display where the power display ON when leaving the house.
- Page 6 - This may damage the product and cause it to fall. • Be sure to use power cords and AC adapters provided or approved by LG Electronics, Inc. • For displays with glossy bezels the user should consider the placement of the display as the bezel may cause disturbing reflections from surrounding light and bright surfaces.
- Page 7 Precautions in Using • Be careful not to step or place heavy objects (electronic appliances, clothing, etc.) on the power cord or AC adapter. Be careful not to damage the power cord or AC adapter with sharp objects. • Do not store or use the product near a magnetic object (i.e. a bag with a magnetic object, a diary, a wallet, a - Damaged power cords may cause a fire or electric shock.
- Page 8 - There is a risk of electric shock or fire and the product may be damaged. • • Please use parts certified by LG Electronics, Inc. Do not disassemble or modify the product arbitrarily. - Otherwise, a fire or product damage may occur.
-
Page 9: Open Source Software Notice
Do not clean with a wet cloth or spray water or other liquids directly onto the product. An electric shock may LG Electronics will also provide open source code to you on CD-ROM for a charge covering the cost of performing occur. -
Page 10: Important Notes On Installing An
It is recommended that use the supplied components. • If you use generic cables not certified by LG, the screen may not display or there may be image noises. • Illustrations in this document represent typical procedures, so they may look different from the actual... - Page 11 Product and Button Description • Do not apply foreign substances (oils, lubricants, etc.) to the screw parts when assembling the product. (Doing so may damage the product.) • Applying excessive force when tightening screws may cause damage to the monitor. Damage caused in this way will not be covered by the product warranty.
- Page 12 Front Adjust Button Functions Information Button Description (Menu) If the menu is inactive Activates the main menu. Webcam activity status indicator Power Button If the menu is active Exits the OSD menu when the button is pressed. Webcam Power Indicator If the menu is inactive Adjusts the volume level of the monitor.
- Page 13 Moving and Lifting the Monitor Connectors When moving or lifting the monitor, follow these instructions to prevent the monitor from being scratched or damaged and to ensure safe transportation, regardless of its shape or size. • Place the monitor in the original box or packing material before attempting to move it. •...
- Page 14 Lift the monitor and place it on the table in an upright position. Place the monitor at least 100 mm away from Place the monitor mounted on the stand base in an upright position. the wall to ensure sufficient ventilation. Handle the monitor with both hands for safety. 27CN650N, 27CN651N, 27CN650W, 27CN651W Max. 130 mm 34CN650N, 34CN651N, 34CN650W, 34CN651W Max. 110 mm A: 100 mm...
- Page 15 Swivel stand The angle of the screen can be adjusted forward or backward from -5 ° to 35 ° (27CN650W), -5 ° to 15 ° 27CN650N, 27CN651N, 27CN650W, 27CN651W (34CN650W) for a comfortable viewing experience. Swivel 355 degrees and adjust the angle of the Monitor set to suit your view.
- Page 16 Pivot Feature Raise the monitor up to the maximum height. 27CN650N, 27CN651N, 27CN650W, 27CN651W The pivot feature allows the monitor to rotate 90 degrees clockwise or counter-clockwise. Head Adjust the angle of the monitor in the direction of the arrow as shown in the figure.
- Page 17 Rotate the monitor clockwise or counter-clockwise as shown in the figure. NOTE • Auto Pivot feature of the display is not supported. • The screen can be rotated easily using the screen pivot shortcut key provided with your Windows operating system.
- Page 18 Using the Kensington Lock Installing on the Wall For more information on installation and usage, refer to the Kensington lock owner’ s manual or visit the website Install the monitor at least 100 mm away from the wall and leave about 100 mm of space at each side of the at http://www.kensington.com.
- Page 19 When measured from the back of the monitor, the length of each installed screw must be 8 mm or less. • A non-VESA standard screw may damage the product and cause the monitor to fall. LG Electronics is not liable for any accidents relating to the use of non-standard screws.
-
Page 20: Using The Monitor
USING THE MONITOR Connecting to a PC • This monitor supports the *Plug and Play feature. • Illustrations in this manual may differ from the actual product. * Plug and Play: A feature that allows you to add a device to your computer without having to reconfigure Press the ( ) button and then select the input option. - Page 21 Connecting AV Devices USB-C connection Transmits digital video and audio signals from your PC to the monitor. HDMI Connection NOTE HDMI transmits digital video and audio signals from your AV device to the monitor. • DP Alternate Mode(DP over USB-C) are supported via USB-C Port. •...
- Page 22 NOTE • It is recommended you install all Windows Updates to keep your Windows up-to-date before connecting to the product for use. • Peripheral devices are sold separately. • A keyboard, mouse, or USB device can be connected to the USB port. •...
-
Page 23: User Settings
USER SETTINGS Menu Settings To view the OSD menu, press the button and then enter the Settings. Use the to adjust the options. NOTE To return to the upper menu or set other menu items, press the or • Your monitor’ s OSD (On Screen Display) may differ slightly from that shown in this manual. If you want to exit the OSD menu, press the button. - Page 24 - [Original]: Displays video according to the aspect ratio of the video signal input. NOTE • The ratio is disabled in the interlaced signal. • The display may look the same for [Full Wide], [Original] options at the recommended resolution (27CN650N, 27CN651N, 27CN650W, 27CN651W: 1920 x 1080, 34CN650N, 34CN651N, 34CN650W, 34CN651W: 2560 x 1080).
- Page 25 [Picture] [Picture Adjust] [Picture] [Game Adjust] • • [Brightness]: Adjusts the brightness of the screen. [Response Time]: Sets a response time for displayed pictures based on the speed of the screen. For a normal environment, it is recommended that you use [Fast]. For a fast-moving picture, it is recommended that you •...
- Page 26 [Sound] [Picture] [Color Adjust] • [Gamma]: [Sound] - [Mode 1], [Mode 2], [Mode 3]: The higher the gamma value, the darker the image becomes. Likewise, the • [MaxxAudio] lower the gamma value, the lighter the image becomes. - [On]: MaxxAudio ®...
-
Page 27: Troubleshooting
TROUBLESHOOTING [General] [Reset] • [Do you want to reset your settings?]: - [Yes]: Returns to the default settings. - [No]: Cancel the reset. Nothing is displayed on the screen. • Is the monitor's power cord plugged in? NOTE - Check if the power cord is correctly plugged into the power outlet. •... - Page 28 - The setting methods may be different depending on the computer or operating system, and some - Be sure to install the display driver from our web site: http://www.lg.com. resolutions may not be available depending on the performance of the graphics card. If this is the case, - Make sure to check if the graphics card supports Plug and Play function.
-
Page 29: Product Specification
PRODUCT SPECIFICATION Dimensions (without packaging): Monitor Size (Width x Height x Depth) 27CN650N, 27CN651N, 27CN650W, 27CN651W Specifications are subject to change without notice. • With Stand - 622.3 x 531.7 x 239.6 (mm) Color Depth: 8-bit color is supported. •... - Page 30 Wireless module (AC9560) Specifications Power Sources: 27CN650N, 27CN651N, 27CN650W, 27CN651W (Wi-Fi/Bluetooth supported models only.) • Power Rating: 19 V 4.0 A • Power Consumption: Wireless LAN (IEEE 802.11a/b/g/n/ac) - On Mode: 29 W (Typical) (Outgoing condition)* Frequency Range Output Power (Max.) - Sleep Mode: ≤...
- Page 31 Factory Support Mode (Preset Mode, HDMI) 27CN650N, 27CN651N, 27CN650W, 27CN651W Resolution Horizontal Frequency (kHz) Vertical Frequency (Hz) Polarity (H/V) Remarks 640 x 480 31.469 59.94 640 x 480 37.5 720 X 400 31.468 70.08 720 x 480 31.47 59.94 800 x 600 37.879...
- Page 32 34CN650N, 34CN651N, 34CN650W, 34CN651W Resolution Horizontal Frequency (kHz) Vertical Frequency (Hz) Polarity (H/V) Remarks 640 x 480 31.469 59.94 640 x 480 37.5 720 x 480 31.47 59.94 800 x 600 37.879 60.317 800 x 600 46.875 75.0 832 x 624 49.727 74.553 1024 x 768...
- Page 33 Input Timing (Video) Resolution Horizontal Frequency (kHz) Vertical Frequency (Hz) 640 x 480p 31.5 720 x 576p 31.25 1280 x 720p 37.5 1280 x 720p 1920 x 1080p 56.25 1920 x 1080p 67.50...
- Page 34 WARNING: This equipment is compliant with Class A of CISPR 32. In a residential environment this equipment may cause radio interference. 27CN650W, 27CN651W, 34CN650W, 34CN651W The model and serial number of the product are located on the back and on one side of the product. Record them below in case you ever need service.