Table of Contents
Advertisement
Quick Links
Model
EC-A1RAS
Reg. No. : I.31.STID2.00501.0516
EC-A1RA_Hyo_contens_A4 (ai sorted).indd
1
Cordless Vacuum Cleaner
Operation Manual
Penyedot Debu Nirkabel
Panduan Operasional
ร ค เ
ด ง อ
ฝ ด ู
ด น ุ
จ ม า
ร ไ บ ั
ม ู ค
ก อ ื
ใ ร า
ง ช
น า
Máy hút bụi không dây
Hướng dẫn sử dụng
Household
use
Penggunaan
Rumah Tangga
ย า ส
ส
ห ำ
บ ั ร
ช ใ
ภ
ย า
น ใ
ร ค
ร เ ว ั
น อ ื
Dùng cho
gia đình
2017/07/07
14:39:45
Advertisement
Table of Contents

Related Manuals for Sharp EC-A1RAS


Summary of Contents for Sharp EC-A1RAS
- Page 1 Model EC-A1RAS Household Cordless Vacuum Cleaner Operation Manual Penggunaan Penyedot Debu Nirkabel Rumah Tangga Panduan Operasional ร ค เ ด ง อ ฝ ด ู ด น ุ จ ม า ร ไ บ ั ย า ส ...
-
Page 2: Table Of Contents
CONTENTS Pages Pages SAFETY PRECAUTIONS EN-1 PART NAMES EN-5 PREPARATION EN-7 VACUUMING EN-9 EMPTYING THE DUST CUP EN-13 MAINTENANCE EN-15 STORAGE EN-19 SPECIFICATIONS EN-20 TROUBLESHOOTING EN-21 DAFTAR ISI Halaman TINDAK PENCEGAHAN UNTUK KESELAMATAN ID-1 NAMA-NAMA SUKU CADANG ID-5 PERSIAPAN ID-7 PROSES PENGHISAPAN ID-9 PENGOSONGAN WADAH... - Page 3 สารบั ญ หน า คำเตื อ นเร� อ งความปลอดภั ย TH-1 ส ว นต า งๆ ของตั ว เคร� อ ง TH-5 การเตรี ย มเคร� อ งก อ นการใช ง าน TH-7 การดู ด ฝุ น TH-9 การนำกระบอกเก็ บ ฝุ น ออกมาเททิ ้ ง TH-13 การบำรุ...
- Page 4 Remove the clogging dirt. insulation defects due to humidity and the like, which location with high Contact your nearest service center approved by SHARP if the product still stops during cleaning even can cause fire disaster.) temperature such as inside if the measures described above have been implemented.
- Page 5 If the Filter care lamp (red) and the Battery level indicator lamp (green) on the vacuum cleaner body are blinking Rotary simultaneously the product may be malfunctioning. Contact your nearest service center approved by SHARP . brush Charger...
-
Page 6: Safety Precautions
Back side Do not immerse or wet the product with water. Do not use any charger for a battery that is not specified by Sharp. (Risk of heating, smoke generation, bursting, ignition of fire or liquid leakage.) Holder Always use a battery that is specified by Sharp. - Page 7 This cordless vacuum cleaner is intended for Do not apply lubricant to the Rotary brush (Risk of Replace only with same SHARP Corporation type BY-5SB battery pack. household use and must not be used for commercial plastic parts cracking).
-
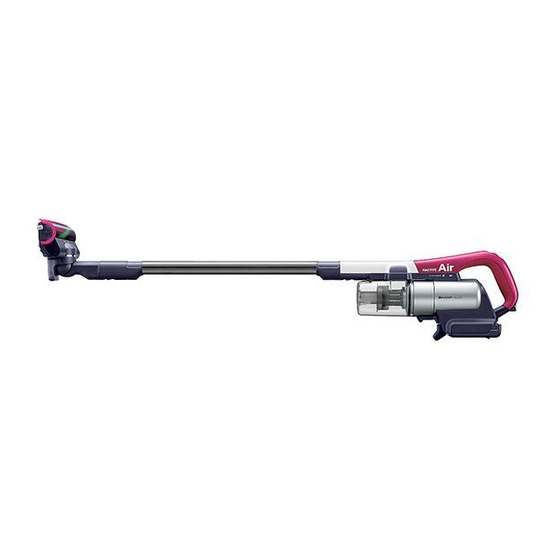
Page 8: Part Names
Charger (1 unit) EN-7 Battery (1 piece) Cleaning Brush (1 piece) the belt Gear SHARP. (Already attached to (Attached to vacuum cleaner body) Charger at shipping) Attach the brush in the direction Cord shown in the diagram after use. - Page 9 About 1,100 times of charge/discharge ◆ Click! According to tests conducted based on Sharp's standard Release for repeatedly charging and charge/discharge a battery. The life of a battery can vary depending on the conditions button of use and the environment.
-
Page 10: Preparation
MAINTENANCE PREPARATION EN-6 Dust cup assembly tips for making the battery last. Guide for cleaning Charging battery Removal Dispose of dirt and remove the dirt and The battery is not charged when the product is purchased, so the battery must be removed from Remove the Dust Cup. - Page 11 Properly remove moisture, gently wipe off moisture Protrusion or deterioration or malfunction of the battery. Contact your nearest service center approved by SHARP. with a towel or the like, dry in shade at a well ventilated location to thoroughly dry.[Risk of Each part must be assembled emission of odor or product malfunction.]...
- Page 12 VACUUMING EMPTYING THE DUST CUP Guide for disposing Removal Flow of cleaning process of dirt Removing the Dust cup assembly Start When the level of the accumulated Control The mode toggles between the "High mode" and the "Standard dirt reaches the "MAX" line. Cup release lever switch Pull the...
- Page 13 Mounting the Dust Tips for Vacuuming Emptying the Dust Cup Cup Assembly Remove the Dust Cup and dispose of Install the Dust cup assembly the dirt. on the vacuum cleaner body. Stick state Handy state Move the Suction head so that it moves Press the Dust disposal lightly and glides slowly.
-
Page 14: Vacuuming
VACUUMING Using accessory nozzles (Duster nozzle and Crevice nozzle) Duster nozzle The accessory may be used by attaching on the vacuum cleaner body or on a pipe. For cleaning high places, such as above furniture. Do not press the while operating when cleaning with the vacuum cleaner body facing up. - Page 15 Do not use the product to clean items that scratch easily, such as a piano. Using Accessory Suction Inlet (Duster nozzle and Crevice nozzle) Crevice nozzle The accessory may be used by attaching on the vacuum cleaner body or on a pipe. For cleaning gaps between furniture and sash on the windows.
-
Page 16: Emptying The Dust Cup
EMPTYING THE DUST CUP VACUUMING Guide for disposing Removal Flow of cleaning process of dirt Removing the Dust cup assembly Start When the level of the accumulated Control The mode toggles between the "High mode" and the "Standard dirt reaches the "MAX" line. Cup release lever switch Pull the... - Page 17 Mounting the Dust Tips for Vacuuming Emptying the Dust Cup Cup Assembly Remove the Dust Cup and dispose of Install the Dust cup assembly the dirt. on the vacuum cleaner body. Stick state Handy state Move the Suction head so that it moves Press the Dust disposal lightly and glides slowly.
- Page 18 MAINTENANCE PREPARATION EN-6 Dust cup assembly tips for making the battery last. Guide for cleaning Charging battery Removal Dispose of dirt and remove the dirt and The battery is not charged when the product is purchased, so the battery must be removed from Remove the Dust Cup.
- Page 19 Properly remove moisture, gently wipe off moisture Protrusion or deterioration or malfunction of the battery. Contact your nearest service center approved by SHARP. with a towel or the like, dry in shade at a well ventilated location to thoroughly dry.[Risk of Each part must be assembled emission of odor or product malfunction.]...
-
Page 20: Maintenance
Charger (1 unit) EN-7 Battery (1 piece) Cleaning Brush (1 piece) the belt Gear SHARP. (Already attached to (Attached to vacuum cleaner body) Charger at shipping) Attach the brush in the direction Cord shown in the diagram after use. - Page 21 About 1,100 times of charge/discharge ◆ Click! According to tests conducted based on Sharp's standard Release for repeatedly charging and charge/discharge a battery. The life of a battery can vary depending on the conditions button of use and the environment.
-
Page 22: Storage
Back side Do not immerse or wet the product with water. Do not use any charger for a battery that is not specified by Sharp. (Risk of heating, smoke generation, bursting, ignition of fire or liquid leakage.) Holder Always use a battery that is specified by Sharp. -
Page 23: Specifications
This cordless vacuum cleaner is intended for Do not apply lubricant to the Rotary brush (Risk of Replace only with same SHARP Corporation type BY-5SB battery pack. household use and must not be used for commercial plastic parts cracking). -
Page 24: Troubleshooting
Remove the clogging dirt. insulation defects due to humidity and the like, which location with high Contact your nearest service center approved by SHARP if the product still stops during cleaning even can cause fire disaster.) temperature such as inside if the measures described above have been implemented. - Page 25 If the Filter care lamp (red) and the Battery level indicator lamp (green) on the vacuum cleaner body are blinking Rotary simultaneously the product may be malfunctioning. Contact your nearest service center approved by SHARP . brush Charger...
- Page 26 โทรศั พ ท 0 2855 8899 แฟกซ 0 2855 8500 ศู น ย ล ู ก ค า สั ม พั น ธ 0 2855 8888 Vietnam Cty TNHH Điện Tử Sharp Việt Nam 9 Đinh Tiên Hoàng - Q.1 - Tp. Hồ Chí Minh ①...