Table of Contents
Advertisement
—
A B B M E A S U R E M E N T & A N A L Y T I C S | C O M M I S S I O N I N G I N S T R U C T I O N | C I / A C X - E N R E V . D
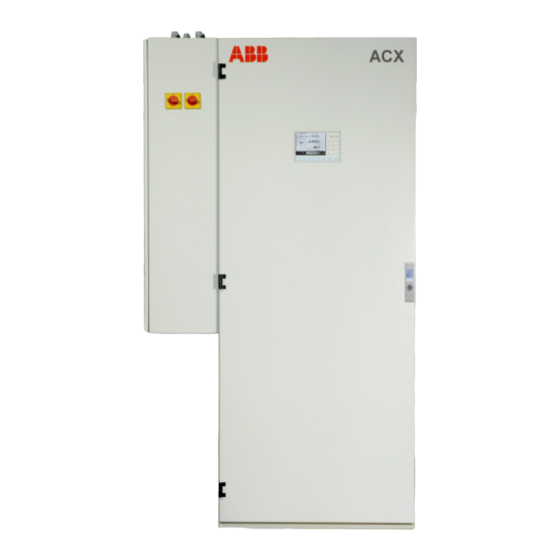
ACX
Advanced CGA Solutions
—
Introduction
ACX
ACX is a complete system solution for continuous
gas analysis.
The ACX system includes everything from probe,
heated lines, sample conditioning to reliable and
time-tested analyzers of the Advance Optima
series. It can be operated from the outside.
The system is available in various variants tailored
to your measuring tasks - emission monitoring,
cement applications and process gas
measurements.
It is especially designed for easy service and
maintenance.
Analyzer System for Emission
Monitoring, Cement Applications
and Process Measurement
Measurement made easy
Additional Information
Additional documentation on ACX is available for
download free of charge at www.abb.com/analytical.
Alternatively simply scan this code:
Advertisement
Table of Contents

Related Manuals for ABB ACX


Summary of Contents for ABB ACX
- Page 1 Process Measurement Measurement made easy — Introduction Additional Information ACX is a complete system solution for continuous Additional documentation on ACX is available for gas analysis. download free of charge at www.abb.com/analytical. Alternatively simply scan this code: The ACX system includes everything from probe,...
- Page 3 Advanced CGA Solutions Analyzer System for Emission Monitoring, Cement Applications and Process Measurement Commissioning Instruction Publication No. CI/ACX-EN Revision D Edition: February 2020 This operator’s manual is protected by copyright. The translation, duplication and distribution in any form, even in a...
-
Page 4: Table Of Contents
PFE2 Filter Unit: Gas Connection PFE3 Filter Unit: Installation PFE3 Filter Unit: Gas Connection Probe 2 Installation Sample Gas Line Installation Back-Purging Unit Installation Gas Sampling with Automatic Back-Purging In General Components for Automatic Back-Purging Procedure ACX Analyzer System Commissioning Instruction CI/ACX-EN Rev. D... - Page 5 Inhibit Operation Release of communication via port 8001/tcp Release of communication via Modbus® TCP/IP Inspection and Maintenance Safety Information Analyzer System Shut-Down Analyzer System Shut-Down Packing the Analyzer Cabinet or System Components CI/ACX-EN Rev. D ACX Analyzer System Commissioning Instruction...
- Page 6 Information on ABB Analytical products and services is available on the Internet at Internet “http://www.abb.com/analytical”. Service Contact If the information in this manual does not cover a particular situation, ABB Service is prepared to supply additional information as needed. Please contact your local service representative. For emergencies, please contact ABB Service Telephone: +49-(0)1805-222580, Telefax: +49-(0)621-38193129031, E-mail: automation.service@de.abb.com...
-
Page 7: Safety Information
To maintain this condition and to assure safe operation, read and follow the safety information identified with the safety symbols in this manual. Failure to do so can put persons at risk and can damage the analyzer system as well as other systems and instruments. CI/ACX-EN Rev. D ACX Analyzer System Commissioning Instruction... - Page 8 The possibility of safe operation is excluded: • if the analyzer system is visibly damaged, • if the analyzer system no longer operates, • after prolonged storage under adverse conditions, • after severe transport stresses. ACX Analyzer System Commissioning Instruction CI/ACX-EN Rev. D...
- Page 9 • Leakage in the combustion gas feed path inside the gas analyzer. This shut-off valve should be installed outside the analyzer house in the vicinity of the combustion gas supply (cylinder, line). CI/ACX-EN Rev. D ACX Analyzer System Commissioning Instruction...
- Page 10 A seal integrity check of the analyzer system has to be performed at regular intervals. The diluted exhaust gas must be drained out of the installation room of the analyzer cabinet. ACX Analyzer System Commissioning Instruction CI/ACX-EN Rev. D...
-
Page 11: Notes On Data Safety
/ or theft of data or information. ABB Automation Products GmbH and its affiliates are not liable for damages and / or losses related to such security breaches, any unauthorized access, interference, intrusion, leakage and / or theft of data or information. -
Page 12: Hydrogen Monitoring Of The Analyzer Cabinet" Option
If however a non potential-free external signal is fed in, the operator should make sure that if a gas alarm is triggered, it is activated via a cut-off relay, for example. ACX Analyzer System Commissioning Instruction CI/ACX-EN Rev. D... - Page 13 Operation of this safety device should be checked during commissioning and at regular intervals (min. 1 time a year). CI/ACX-EN Rev. D ACX Analyzer System Commissioning Instruction...
-
Page 14: Installing The Analyzer System
Installing the Analyzer System • We recommend having the analyzer system installed by ABB. • When installing the analyzer system, in addition to this manual, comply with the information contained in the drawings set. • If there is shipping damage which points to improper handling file a damage claim with the shipper (railway, mail or freight carrier) within seven days. -
Page 15: Choosing The Extraction Point, Wall Tube Installation
Welded-on rectangular block Sampling probe tube flange Minimum distance x of the mounting flange (wall tube flange) from the wall depending on mounting angle α: α 10° 15° 20° 25° 30° 35° / mm CI/ACX-EN Rev. D ACX Analyzer System Commissioning Instruction... -
Page 16: Analyzer System Installation Site Requirements
Relative Humidity Year-round average max. 75 %, short-term max. 95 %, occasional slight condensation is permitted Installation Site The maximum installation altitude is 2000 m above sea level. Altitude Continued on next page ACX Analyzer System Commissioning Instruction CI/ACX-EN Rev. D... -
Page 17: Sample Gas Inlet Conditions (At The Extraction Point)
(TLV) must be complied with. Specification Pressure p Flow Test gases 1, 2, 3 1000 ± 100 hPa Sample component or substitute gas 130 to 250 l/h (1.0 ± 0.1 bar) component in N or air CI/ACX-EN Rev. D ACX Analyzer System Commissioning Instruction... -
Page 18: Ao2000-Magnos27: Test Gas Inlet Conditions
Set the pressure relief valve to < 2 bar to securely limit the maximum supply pressure. Definition – p with p = positive pressure, p = absolute pressure, p = atmospheric pressure ACX Analyzer System Commissioning Instruction CI/ACX-EN Rev. D... -
Page 19: Back-Purging Unit: Installation Site And Air Supply Requirements
If the compressed air is not dry and clean, this will result in damage to the sample conditioning components (valves, filters, sample gas cooler, sample gas feed unit) as well as to the gas analyzer. CI/ACX-EN Rev. D ACX Analyzer System Commissioning Instruction... -
Page 20: Power Supply Requirements
230 V AC or 120 V AC, 48 to 62 Hz, max. 5 A. The service socket is located • in the cabinet light or • mounted on a top hat rail in the separate electrical distribution cabinet. Continued on next page ACX Analyzer System Commissioning Instruction CI/ACX-EN Rev. D... - Page 21 T 0,5 A -F19 Test gas valve 3 T 0,5 A -F22 Filter unit 2nd sampling point 10 A or 16 A -F23 Heated sample gas line 2nd sampling point 16 A CI/ACX-EN Rev. D ACX Analyzer System Commissioning Instruction...
-
Page 22: Weight, Sound Level
17 kg Back-purging unit 70 kg Sample gas line type TBL01-S or TBL01-C, heated 1 kg/m Sound Level Ventilation fan 50 Hz 59 dB(A) 60 Hz 61 dB(A) Cooling unit < 64 dB(A) ACX Analyzer System Commissioning Instruction CI/ACX-EN Rev. D... -
Page 23: Items Delivered
Contactor for disconnecting the UPS if the system is prepared for a UPS. Unipoint Multilingual Manual CD Sensepoint Manuals CD The gas sensor and the H safety valve are securely installed in or on the analyzer cabinet. CI/ACX-EN Rev. D ACX Analyzer System Commissioning Instruction... -
Page 24: Materials Needed For Installation (Not Supplied)
Screws and nuts (stud bolts if applicable) to secure the mounting plate and the electrical distribution cabinet to the wall For details regarding the size of the screws and nuts see the “Layout Plan” in the drawings set. ACX Analyzer System Commissioning Instruction CI/ACX-EN Rev. D... -
Page 25: Type 40 Probe Tube And Filter Unit Installation
Mount the heating sleeve or the ring heater on the filter unit. If applicable, install the compressed-air hoses between the filter unit and the back-purging unit (see page 39). CI/ACX-EN Rev. D ACX Analyzer System Commissioning Instruction... -
Page 26: Type 42 Probe Tube And Filter Unit Installation
Mount the heating sleeve on the filter unit. If applicable, install the compressed-air hoses between the filter unit and the back-purging unit (see page 39). ACX Analyzer System Commissioning Instruction CI/ACX-EN Rev. D... -
Page 27: Type 40W Probe Tube And Filter Unit Installation
Connect the cable of the probe tube heating (2 x 2.5 mm ) to the 26 VDC connection of the transformer in the back-purging unit. Continued on next page CI/ACX-EN Rev. D ACX Analyzer System Commissioning Instruction... - Page 28 Type 40W Probe Tube and Filter Unit Installation, continued Figure 3 Type 40W Probe Tube Installation in the Smoke Chamber ACX Analyzer System Commissioning Instruction CI/ACX-EN Rev. D...
-
Page 29: Pfe2 Filter Unit: Installation
Mounting of Probe Protective Case α Minimum distance x of the mounting flange (wall tube flange) from the wall depending on mounting angle α: α 10° 15° 20° 25° 30° 35° / mm CI/ACX-EN Rev. D ACX Analyzer System Commissioning Instruction... -
Page 30: Pfe2 Filter Unit: Gas Connection
Terminal Box Filter Unit Check Valve Back Purging Filter Inlet G 1/2″ Back Purging Filter Surface / Probe Tube Inlet G 1/2″ Sample Gas Outlet G 1/4″ Test Gas Inlet G 1/4″ ACX Analyzer System Commissioning Instruction CI/ACX-EN Rev. D... -
Page 31: Pfe3 Filter Unit: Installation
(Dimensions in mm) min. 150 25° Minimum distance x of the mounting flange (wall tube flange) from the wall depending on mounting angle α: α 10° 15° 20° 25° 30° 35° / mm CI/ACX-EN Rev. D ACX Analyzer System Commissioning Instruction... -
Page 32: Pfe3 Filter Unit: Gas Connection
B Back-purging of Filter (max. 6 bar), Bulkhead Fitting 18 mm C Back-purging of Filter Surface / Probe Tube (max. 6 bar), Bulkhead Fitting 18 mm D Sample gas connection, male fitting 6 mm ACX Analyzer System Commissioning Instruction CI/ACX-EN Rev. D... -
Page 33: Probe 2 Installation
4 has to be compressed by approx. 15 mm. Ceramic Inlet Filter Figure 8 Probe 2: Ceramic Inlet Filter Filter Element Sealing Gasket Bush Compression Spring Pressure Disk Bush Screw Continued on next page CI/ACX-EN Rev. D ACX Analyzer System Commissioning Instruction... - Page 34 Probe 2 Step Action Electrical Connection Connect the cables of the current lead to the connector as shown in the connector pin assignment. Connect the connector to the 3–6 not assigned power supply. ACX Analyzer System Commissioning Instruction CI/ACX-EN Rev. D...
-
Page 35: Sample Gas Line Installation
When laying the heated sample gas lines on exposed C-profiles with BBS cable clips: Do not overtighten the cable clips, in order to prevent damage to the sample gas line through crushing. Continued on next page CI/ACX-EN Rev. D ACX Analyzer System Commissioning Instruction... - Page 36 This results in error-free temperature points. Do not cover the area near the measurement. temperature sensor, otherwise the rest of the sample gas line will cool down. Continued on next page ACX Analyzer System Commissioning Instruction CI/ACX-EN Rev. D...
- Page 37 If you disregard the heated sample gas line. this, damage to the protective braiding and the heated sample gas line may occur. Continued on next page CI/ACX-EN Rev. D ACX Analyzer System Commissioning Instruction...
- Page 38 1) with “measuring point switch-over” option (2 measuring points): 230 / 400 V AC, only 1-phase allowed, length max. 35 m per measuring point 120 / 208 V AC, only 1-phase allowed, length max. 15 m per measuring point ACX Analyzer System Commissioning Instruction CI/ACX-EN Rev. D...
-
Page 39: Back-Purging Unit Installation
PFE3 Filter Unit Connecting the Com- Connect the compressed-air hose for purge air to one of the two gas ports at Probe 2 pressed-air Hose to (see Figure 9, page 34). Probe 2 CI/ACX-EN Rev. D ACX Analyzer System Commissioning Instruction... -
Page 40: In General
In General Filter Plugging During operation of the ACX analyzer system the dust which is contained in the sample gas will accumulate in the probe filter of the gas sampling system. This is uncritical if dust concentration is low and only requires a cleaning of the filter periodically in longer time intervals. - Page 41 The manual start of back-purging procedure can be executed locally by softkey “Start Start Purge” on the system’s display and control unit (see section “Control Panel Screen”, page 70) or remote-controlled via Modbus-DI or Profibus-DI. CI/ACX-EN Rev. D ACX Analyzer System Commissioning Instruction...
- Page 42 7) not in a system with Probe 2, Probe F 8) 3x interrupt 2 sec, 2x pressure impulse 2 sec 9) 3x interrupt 2 sec, 2x pressure impulse 2 sec, 1x pressure impulse 4 sec Continued on next page ACX Analyzer System Commissioning Instruction CI/ACX-EN Rev. D...
- Page 43 “Maintenance Mode” will vanish. 1) In system version with VOC analyzer AO2000-Fidas24, the sample gas path is blocked and unblocked with the valve -Y5 which is built-in in the PFE2 filter unit. CI/ACX-EN Rev. D ACX Analyzer System Commissioning Instruction...
- Page 44 Procedure by Filter beneath the admissible limit, an additional back-purging procedure is started as a Plugging result, and the probe filter is purged free in between. ACX Analyzer System Commissioning Instruction CI/ACX-EN Rev. D...
- Page 45 23 sec Example For an ACX analyzer system with filter unit PFE2 / PFE3 and 15 m sample gas line at 60 l/h sample gas flow the post-purge time is calculated as follows: Post-purge time = 45 sec + 23 sec + 1.5x 8 sec + 75 sec = 155 sec CI/ACX-EN Rev.
- Page 46 The window with indication of the Low time parameter is shown. Change the shown value (factory-set = 150 sec) to the new value required. Return to normal measuring operation using the key MEAS. ACX Analyzer System Commissioning Instruction CI/ACX-EN Rev. D...
- Page 47 Follow the “Layout Plan” in the drawings set. • Ground by means of the central grounding screw, route the grounding cable (≥ 10 mm / AWG 6) through the M16 cable gland. CI/ACX-EN Rev. D ACX Analyzer System Commissioning Instruction...
- Page 48 Open the sliding cable entry plate on the underside of the cabinet (knurled screws) • Insert the ready-made cables • Attach the cable connectors to the appropriate terminal strip as per the wiring diagram and • Close the cable entry plate ACX Analyzer System Commissioning Instruction CI/ACX-EN Rev. D...
- Page 49 0.1 bar) and purge the combustion gas line. Check seal integrity of the combustion gas line with a leak detector (measuring principle: thermal conductivity). Close combustion gas cylinder. Continued on next page CI/ACX-EN Rev. D ACX Analyzer System Commissioning Instruction...
- Page 50 Allow the exhaust air to pass freely and do not install reduction sections or shutoff valves. The diameter of the exhaust gas line should be widened at the shortest possible distance outside the cabinet to prevent any backpressure due to long line length. ACX Analyzer System Commissioning Instruction CI/ACX-EN Rev. D...
- Page 51 The required fittings and O-rings are supplied in the accessory kit. Figure 10 Sample Gas Line Connection on AO2000- Fidas24 Heated Sample Gas Port Heated Sample Gas Line (tube with 4/6-mm ID/OD) O-Ring 6.02 x 2.62 Fitting O-Ring 12.42 x 1.78 CI/ACX-EN Rev. D ACX Analyzer System Commissioning Instruction...
- Page 52 • the input wiring of the heated sample components (temperature-resistant as needed) • the Pt100 resistance thermometer leads • the input wiring of the back-purging unit (solenoid valves) to the terminal strips. ACX Analyzer System Commissioning Instruction CI/ACX-EN Rev. D...
- Page 53 Transportation see “Transportation Restraints Release” section, page 54 Restraints Release Reagent Fill see “Reagent Fill” section, page 55 Check Analyzer System see “Analyzer System: Seal Integrity Check” section, page 85 Seal Integrity CI/ACX-EN Rev. D ACX Analyzer System Commissioning Instruction...
- Page 54 Insert the hoses into the hose fittings as far as they will go and hand-tighten the nuts. Perform this step carefully in order to ensure leak-tightness of the hose connections. Figure 11 Transportation Restraints left: SCC-F Sample Gas Feed Unit right: SCC-C Sample Gas Cooler ACX Analyzer System Commissioning Instruction CI/ACX-EN Rev. D...
- Page 55 ½ liter phosphoric acid 1 liter hydrogen peroxide (in 10-liter bottle) 9½ liters water 9 liters water Solution sufficient for 2 fills 1 fill 1) e.g. distilled water or water from an ion exchanger CI/ACX-EN Rev. D ACX Analyzer System Commissioning Instruction...
- Page 56 Check and, if necessary, correct the date and time (for more information see “Setting the Time Zone, Date and Time”, page 74). GMT+1 The analyzer system is factory-set to the time zone. ACX Analyzer System Commissioning Instruction CI/ACX-EN Rev. D...
- Page 57 After the pressures are at the applicable set points, the associated solenoid valve in the analyzer module automatically starts the combustion gas supply. The combustion gas controller attempts to establish the set point pressure value. Continued on next page CI/ACX-EN Rev. D ACX Analyzer System Commissioning Instruction...
- Page 58 Combustion gas: Use the external pressure regulator to set the variable to approx. 35 % (max. 40 %). Variable too large ⇒ raise pressure. Variable too small ⇒ reduce pressure. Continued on next page ACX Analyzer System Commissioning Instruction CI/ACX-EN Rev. D...
- Page 59 Auxiliary raw values menu item; it must be at least 30 °C higher than the detector temperature. Actual start-up of the analyzer is complete when the flame ignites. Continued on next page CI/ACX-EN Rev. D ACX Analyzer System Commissioning Instruction...
- Page 60 Never pull the 115 / 230 VAC power supply plug connectors for the detector heater and the heated sample gas port while the power is on. CAUTION! The heated sample gas port cover is hot during operation. Its temperature is higher than 70 °C. ACX Analyzer System Commissioning Instruction CI/ACX-EN Rev. D...
- Page 61 At the end of the warm-up phase the analyzer system is ready for operation and Sample Gas Supply automatically activates the sample gas supply. Calibration Calibration should only be started after the warm-up phase (see “Analyzer System Calibration” chapter, page 80). CI/ACX-EN Rev. D ACX Analyzer System Commissioning Instruction...
- Page 62 • perform the seal integrity check for the analyzer system without the AO2000-Fidas24 according to the pressure-drop method described above. The sample gas path in the AO2000-Fidas24 cannot be checked for seal integrity. Continued on next page ACX Analyzer System Commissioning Instruction CI/ACX-EN Rev. D...
- Page 63 Close the water precipitator outlet (part of the pressure regulator combination). Connect instrument air with operating pressure = 6 bar to the back- purging unit inlet. Spray the complete compressed-air path with leak detection spray. CI/ACX-EN Rev. D ACX Analyzer System Commissioning Instruction...
- Page 64 13.04 26.54 1100 12.88 26.22 1200 12.72 25.91 1300 12.57 25.59 1400 12.42 25.28 1500 12.26 24.96 1600 12.11 24.65 1700 11.97 24.37 1800 11.82 24.06 1900 11.66 23.74 2000 11.50 23.43 ACX Analyzer System Commissioning Instruction CI/ACX-EN Rev. D...
- Page 65 If the pressure sensor is connected to the sample gas output line, the sample gas flow must be interrupted while calibrating the pressure sensor so that the sample gas pressure does not distort the measured pressure. CI/ACX-EN Rev. D ACX Analyzer System Commissioning Instruction...
- Page 66 ABB resulting in an increased availability of analyzer assets. Dynamic QR Code is compatible with the ABB application "my Installed Base" as well as with standard QR code scanner applications. Handling The QR code is selected in the gas analyzer's diagnosis menu and displayed on the gas analyzer's screen.
- Page 67 The QR code can also be selected in Remote HMI and scanned from the computer screen. Recommended QR code ABB recommends the use of the following QR code scanner applications (available free scanner applications of charge for iOS and Android): "my Installed Base"...
- Page 68 This key allows the operator to call up the status message log and view the status messages. The operator can also call up a detailed display for any message in the log. ACX Analyzer System Commissioning Instruction CI/ACX-EN Rev. D...
- Page 69 Values measured by the analyzer system are displayed on the “Measured Values” screen. Up to six measured values are displayed on one page. The actual number of pages depends on the number of measurement components configured in the analyzer system. CI/ACX-EN Rev. D ACX Analyzer System Commissioning Instruction...
- Page 70 Password Protection All control panel functions except the “Maintenance control” are password protected. Changing the password is described on page 76. Continued on next page ACX Analyzer System Commissioning Instruction CI/ACX-EN Rev. D...
- Page 71 Test gas supply at the probe CABINET Test gas supply at the analysis cabinet Test Gas Control TESTGAS Select test gas 1 TESTGAS Select test gas 2 TESTGAS Select test gas 3 CI/ACX-EN Rev. D ACX Analyzer System Commissioning Instruction...
- Page 72 Note: The “Change password” menu item is not assigned to a specific password level. To change a password the old password of the respective level must be entered (see “Changing the Password” section, page 76). Continued on next page ACX Analyzer System Commissioning Instruction CI/ACX-EN Rev. D...
- Page 73 _ Language _ Change password _ Setup system modules _ Save configuration _ Status signals _ Network _ Display ↓ CI/ACX-EN Rev. D ACX Analyzer System Commissioning Instruction...
- Page 74 / country / city list and not from the GMT values list. GMT+1 Factory Setting The analyzer system is factory-set to the time zone. Accept the SET TIME Press the softkey to accept the modified time settings. Time Settings ACX Analyzer System Commissioning Instruction CI/ACX-EN Rev. D...
- Page 75 Menu Path Language Selection The user interface languages English and German are factory-configured (per order) in Language the analyzer system. In the menu item the user can switch between these two languages. CI/ACX-EN Rev. D ACX Analyzer System Commissioning Instruction...
- Page 76 After entering the password for password level 3, you can access all of the function block applications. When configuring function blocks, existing applications with their configurations and links can be damaged or destroyed. ACX Analyzer System Commissioning Instruction CI/ACX-EN Rev. D...
- Page 77 Technical Bulletin “AO2000 Function Blocks – Descriptions and Configuration” (publication no. 30/24-200 EN) contains complete information on the “Function Block” concept as well as detailed descriptions of the individual function blocks. Continued on next page CI/ACX-EN Rev. D ACX Analyzer System Commissioning Instruction...
- Page 78 The change privilege thus refers to a temporary authorization to change menu items. In contrast, the access privilege refers to a fundamental and configurable authorization to change menu items at certain password levels. ACX Analyzer System Commissioning Instruction CI/ACX-EN Rev. D...
- Page 79 The level 3 password must be entered to configure the password protection. Procedure MENU ACCESS Press the softkey in the “Change password” menu item and set the password protection. CI/ACX-EN Rev. D ACX Analyzer System Commissioning Instruction...
- Page 80 In ACX, a proprietary protocol has been implemented on port 8001 for communication with remote clients: • In the ACX, communication is blocked on all Ethernet interfaces (X8 / X9) by default. When communication is blocked, a corresponding message is issued on the Remote HMI.
- Page 81 4. Confirm the information field by selecting <BACK>. • Communication via the proprietary protocol has now been released. The proprietary protocol via port 8001/tcp is an unsecured protocol (in the meaning of IT security or cybersecurity). CI/ACX-EN Rev. D ACX Analyzer System Commissioning Instruction...
- Page 82 Release of communication via Modbus® TCP/IP In the ACX, communication via Modbus® TCP/IP is blocked on all Ethernet interfaces (X8 / X9) by default. Release communication Implement the following steps to release communication via Modbus® TCP/IP: via Modbus® TCP/IP 1. With the Modbus card installed, select the ‘…\Configure\Network\Modbus’ menu.
- Page 83 The Modbus® protocol is an unsecured protocol (in the meaning of IT security or cybersecurity), as such the intended application should be assessed before implementation to make sure that the protocol is suited. CI/ACX-EN Rev. D ACX Analyzer System Commissioning Instruction...
- Page 84 The diluted exhaust gas must be drained out of the installation room of the analyzer cabinet. For detailed information on the maintenance of the device, consult the associated operating instructions (OI)! ACX Analyzer System Commissioning Instruction CI/ACX-EN Rev. D...
- Page 85 (noticeable resistance). Ambient Temperature During storage and transport: +2 to +60 °C After draining and drying parts in contact with condensate: –25 to +60 °C CI/ACX-EN Rev. D ACX Analyzer System Commissioning Instruction...
- Page 86 Mark the transport crate according to the regulations (in particular, “Fragile Goods”). Ambient Temperature During storage and transport: +2 to +60 °C After draining and drying parts in contact with condensate: –25 to +60 °C ACX Analyzer System Commissioning Instruction CI/ACX-EN Rev. D...
- Page 88 We reserve the right to make technical changes or modify the contents of this document without prior notice. With regard to purchase orders, the agreed particulars shall prevail. ABB does not accept any responsibility whatsoever for potential errors or possible lack of information in this document.