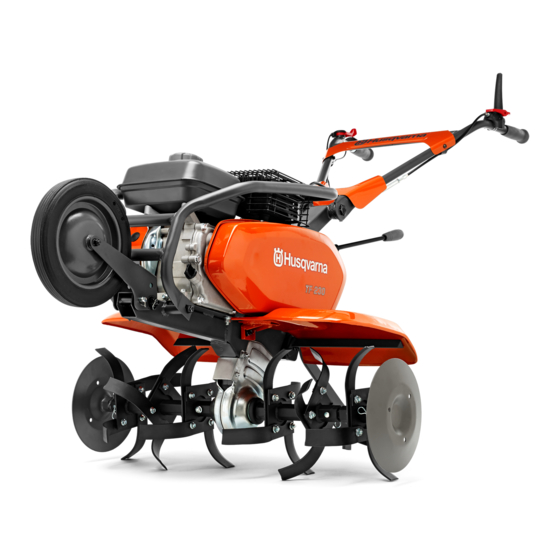
Husqvarna TF230 Workshop Manual
Hide thumbs
Also See for TF230:
- Operator's manual (80 pages) ,
- Operator's manual (16 pages) ,
- Operator's manual (56 pages)
Table of Contents
Advertisement
Advertisement
Table of Contents
Troubleshooting

Related Manuals for Husqvarna TF230


Summary of Contents for Husqvarna TF230
- Page 1 Workshop manual TF230/TF338 English...
-
Page 3: Table Of Contents
2.3.1 To adjust the clutch cable ............12 2.3.2 To adjust the throttle control and cable ........13 2.3.3 To adjust the stop switch ............13 2.4 Blade assembly TF230 ............14 2.4.1 To identify the blades ..............14 2.4.2 To assemble the main blades ............ 14 2.4.3 To assemble the sub-blades ............ -
Page 4: Introduction And Safety Regulations
Introduction and safety regulations 1 Introduction and safety regulations 1�1 General 1�4�1 General safety instructions The service center that repairs the product must have This workshop manual gives a full description of how to safety devices that comply with local regulations. do troubleshooting, repair and test of the product. -
Page 5: Delivery And Service
Delivery and service 2 Delivery and service 2�1 Service schedule Maintenance Care Chapter Daily Monthly or Every 3 Every 6 Yearly or after 20 h months or months or after 300 h operation after 100 h after 20 h operation operation operation Clean the machine. -
Page 6: Service Instructions
Delivery and service 2�2 Service instructions 2�2�1 To do a check of the bolts and nuts 1. Do a check of and tighten the bolts and nuts on the machine. 6 – English... -
Page 7: To Do A Check Of The Air Filter Oil Level
Delivery and service 2�2�2 To do a check of the air filter oil level 5. Remove the inner cover of the air filter (A). 1. Locate the air filter (A). Do a check that the oil is at the correct level (A). Remove the knob on the top of the air filter (A). -
Page 8: To Do A Check Of The Gearbox Oil
Delivery and service 2�2�5 To do a check for oil leaks 3. Attach the dipstick to the crankcase. 1. Do a visual check for any oil leaks. 2�2�4 To do a check of the gearbox oil 1. Remove the gearbox oil plug. 2. -
Page 9: To Change The Engine Oil
Delivery and service 2. Do a check of the fuel level. 5. Attach the drain bolt. 2�2�7 To change the engine oil 1. Locate the engine oil container. 6. Fill oil into the crankcase. 2. Take off the drain bolt and drain the oil. 7. -
Page 10: To Change The Gearbox Oil
Delivery and service 2�2�8 To change the gearbox oil 1. Locate gearbox plug (A) and the drain bolt (B). 6. Pour oil into the gearbox. 2. Remove the drain bolt and drain the oil out. 7. Attach the gearbox plug to the gearbox. 2�2�9 To clean the fuel filter 3. -
Page 11: To Do A Check Of The Spark Plug
Delivery and service 3. Clean the fuel filter and remove any blocking. 2. Make sure the exhaust valve clearance is 0.15mm. 2�2�10 To do a check of the spark plug 1. Locate the spark plug (A). 3� Make sure the inlet valve clearance is 0.1mm. 2. -
Page 12: To Do A Check Of The Fuel System
Delivery and service 3. Remove the dust from the piston. 3. Remove and clean the fuel filter. Remove any blocking. 4. Do a check of the fuel tube. Make sure there are no 4. Remove the carbon dust from the end of the spark block or damage. -
Page 13: To Adjust The Throttle Control And Cable
Delivery and service 2. Adjust the cable if it is too tight or loose. 3. Turn the throttle fully counter-clockwise to set the machine to idle speed (1380-1700 rpm/min) 2�3�2 To adjust the throttle control and cable 4. If the idle speed is not 1380-1700 rpm/min, loosen the the cable fitting bolt (A) and adjust the throttle 1. -
Page 14: Blade Assembly Tf230
3. Set the stop switch to off to stop the engine. 3. Attach two right blades (A) and two left blades (B) to the right main holder. 2�4 Blade assembly TF230 Attach two left blades (A) and two right blades (B) to WARNING: Use protective gloves� The tiller the left main holder. -
Page 15: To Attach The Main Blades To The Sub-Blades
Delivery and service 2�4�5 To attach the blades to the machine 3. Attach two right blades (A) and two left blades (B) to the right sub-holder. 1. Locate the round blades. 2�4�4 To attach the main blades to the sub- 2. -
Page 16: Blade Assembly Tf338
Delivery and service 5. Make sure the sharp side of the blades face the front side. Attach one right short blade (A) and two left blades (B) to the left main holder. 3. Attach one left short blade (A) and two right blades (B) to the right main holder. -
Page 17: To Assemble Each Sub-Blade
Delivery and service 2�5�4 To attach the main blades to the sub- 6. Attach one right blade (A) and two left blades (B) to the left main holder. blades 7. Attach one left blade (A) and two right blades (B) to 1. -
Page 18: To Attach The Blades To The Machine
Delivery and service 2�5�5 To attach the blades to the machine 1. Locate the machine blade holder (A) Attach the left and right asssembly to the sides of the machine blade holder. Lock each of them in place with a bolt and a pin. 18 –... -
Page 19: Appendices And Schedules
Appendices and schedules 3 Appendices and schedules 3�1 Troubleshooting schedule Fault Possible cause Steps Troubleshooting Action Fill fuel and start the Not enough fuel Do a fuel check machine If the spark plug is dry, do a check of the fuel filter and the fuel tube. -
Page 20: Troubleshooting Starting Problem
Appendices and schedules 3�2 Troubleshooting starting problem 3�2�2 To do a check of the spark plug 1. Locate the spark plug (A). 3�2�1 To do a check of the fuel level 1. Set the stop switch to “ON”. 2. If the spark plug is wet, dry it and start the machine. 2. -
Page 21: To Do A Check For Blocks In The Carburetor Or The Nozzle
Appendices and schedules 2. Locate the fuel filter (A). 2. Remove the fuel nozzle. Do a check of the fuel hole and fuel nozzle (A) that there is no blockage. 3. Turn the fuel filter and remove it.. Do a check that the filter is clean and that there is no blockage. -
Page 22: To Do A Check Of The Ignition System
Appendices and schedules 3. Attach the float valve and do a check that the float 3. Attach the spark plug (A) to the ignition tube (B). Set valve can be closed normally. the stop switch to on to start the engine. Put the spark plug end to the cylinder and pull the starter. -
Page 23: To Do A Check Of The Cylinder Pressure
Appendices and schedules 3�2�8 To do a check of the cylinder pressure 2. Do a check that distance between the push rod and the exhaust valve (A) is 0.15mm. 1. Remove the spark plug. Connect the pressure meter instead of the spark plug to the cylinder (A). 3. -
Page 24: To Do A Check Of The Cylinder Circles Of The Valve Seat
Appendices and schedules 3. Remove the carbon dust from the spark plug. 4. Make sure the cylinder circles are in good condition and that the valves match the cylinder heads. 3�2�11 To do a check of the cylinder circles 3�2�12 To do a check of the piston rings, of the valve seat piston and cylinder 1. -
Page 25: To Troubleshoot When The Clutch Control Does Not Disengage
Appendices and schedules 3�2�13 To troubleshoot when the clutch 4. Do not set the open side of the ring parallel with the pin. control does not disengage 1. The blade rotation will stop when the clutch control disengages. 5. Set the open side between the piston rings to mismatch at least 90 degrees. -
Page 26: To Do A Check Of And Adjust The Pulley Distance
Appendices and schedules 2. Adjust the clutch cable bolt, press force 15-25N. 3. Adjust the engine location if the clearance is not enough. Loosen the the bolt inside the belt compartment, then loosen the engine mounting bolt. Adjust the engine and tighten the bolts in reverse 15-25N order. -
Page 27: To Stop The Engine
Appendices and schedules 3�2�17 To stop the engine 3. Do a check of the joint of the ignition coil wire and make sure it is connected correctly. 1. Do a check of the machine if the engine does not stop when the stop switch is on OFF. 3�2�18 To troubleshoot the stop switch wire 1. -
Page 28: To Troubleshoot The Throttle Control
Appendices and schedules 3�2�19 To troubleshoot the throttle control 8. Turn the throttle control to minimum and tighten the bolts. If the engine speed does not change much when the throttle is turned to maximum, the throttle wire needs to be tightened. - Page 29 Technical specification Model TF 230 TF338 Engine Engine type Husqvarna engine Husqvarna engine Engine name Husqvarna engine Husqvarna engine Cylinder displacement 196 cm³ / 11.96 cu.inch 212 cm³ / 12.94 cu.inch Net power at preset rpm 3.45 kW @ 3100 rpm 3.6 kW @ 3100 rpm...
- Page 30 115 98 53-26 2018–01–12...