Sharp R-22AT Operation Manual
Commercial microwave oven
Hide thumbs
Also See for R-22AT:
- Service manual (44 pages) ,
- Service manual (56 pages) ,
- Operation manual (33 pages)
Table of Contents
Advertisement
Model
R-24AT
R-22AT
COMMERCIAL MICROWAVE OVEN
OPERATION MANUAL
OPERATION MANUAL
This operation manual contains important information which you should read corefully before using
your microwave oven.
IMPORTANT:There may be a serious risk to health if this operation manual is not followed or if the oven is
modified so that it operates with the door open.
Advertisement
Table of Contents

Related Manuals for Sharp R-22AT


Summary of Contents for Sharp R-22AT
- Page 1 Model R-24AT R-22AT COMMERCIAL MICROWAVE OVEN OPERATION MANUAL OPERATION MANUAL This operation manual contains important information which you should read corefully before using your microwave oven. IMPORTANT:There may be a serious risk to health if this operation manual is not followed or if the oven is...
-
Page 2: Oven Features With Control Panel
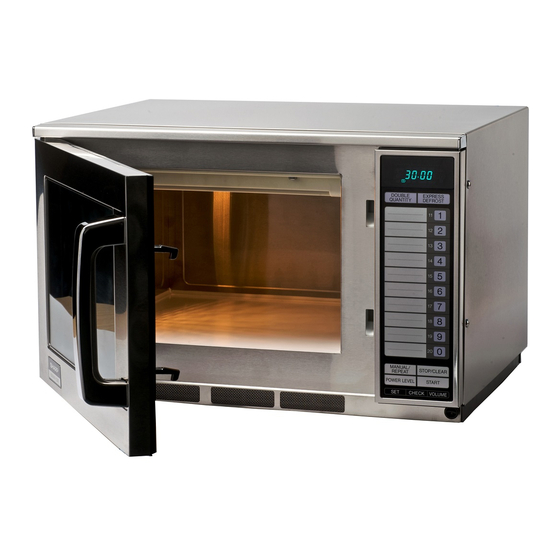
Door hinges Oven door with window Door handle Door safety latches Screw for mounting plate Power supply cord ACCESSORIES: Check to make sure the following accessories are supplied: • Operation manual • Menu Sticker Enter cooking times or dish menus in this sticker and attach to the control panel. •... - Page 3 ONTROL PANEL 3 4 5 CHECK POWER NUMBER DOUBLE FILTER 1 2 3 098 7 DOUBLE EXPRESS QUANTITY DEFROST MANUAL / STOP / CLEAR REPEAT POWER LEVEL START CHECK VOLUME DISPLAY AND INDICATORS 1 Heating indicator: This indicator shows heating in progress 2 Memory number indicator 3 TIME display 4 EXPRESS DEFROST indicator...
-
Page 4: Table Of Contents
ONTENTS Oven Features with Control Panel ... 1 - 2 Contents ... 3 Important Safety Instructions ... 4 Installation ... 4 - 5 Before Operation ... 6 How to Operate the Oven: Memory Cooking ... 6 Note for memory cooking ... 6 Memory programme entry ... -
Page 5: Important Safety Instructions
5 Make sure the power supply cord is undamaged (See Installation next page) and that it does not run under the oven or over any hot or sharp surfaces. - Page 6 B, as shown in the figure A. WARNING: It is hazardous for anyone other than a Service Tech- nician, approved by SHARP to carry out any service or repair operation which involves the removal of a cover which gives protection against exposure to mi- crowave energy.
-
Page 7: Before Operation
EFORE OPERATION • When you first connect the microwave oven to an elec- trical socket, the digital display will show • You can input the pads only when the door is closed. • Oven lamp and fan motor work for 1minute whenever the door is opened or after cooking. -
Page 8: Memory Programme Entry
MEMORY PROGRAMME ENTRY You can change memory programmes for 20 memory banks. One, two or three sequences can be programmed. See cooking sequence chart on top of page 11 for time maximums. MEMORIZING TIME AND POWER LEVEL * Example : If you want to set 4 minutes at 60% as the 1st sequence and 2 minutes at 30% as the 2nd sequence for 1 serving in the memory 1. -
Page 9: Cooking With Memory
CHANGING THE TIMING REQUIRED BY THE MAGNIFICATION FACTOR FOR DOUBLE QUANTITY The magnification factor for double quantity is preset 1.8 times the single quantity cooking time, but you can alter this constant to suit your needs if the food needs more or less cooking time. * Example: If you want to change the magnification factor to 1.67 in memory 1. -
Page 10: Memory Check
MEMORY CHECK You can check the information programmed into the memory. CHECKING TIME AND POWER LEVEL * Example: If you want to know the information that you have programmed into memory 1, this memory has been programmed for 4 minutes at 60% as the 1st sequence and 2 minutes at 30% as the 2nd sequence. Step Action Select check mode. -
Page 11: Manual Cooking
MANUAL COOKING Your oven can be programmed for up to 3 cooking sequences and has 11 preset microwave power levels. COOKING TIME Cooking Microwave power level Sequence that can be used. 1 Stage only 0-100% 0-40% all stages 2 or 3 Stages 50-100% Note: If the oven is used with the power level above 40% on any stage, the maximum cooking time is 30 minutes in total. -
Page 12: Multiple Sequence Cooking
Select the food from the chart and then calculate total defrosting time from the chart. Then enter the time you have calculated and start the oven. * Example: To defrost 450g (1lb.) beef steak for 3 minutes in the R-22AT, (2 minutes 30 seconds in the R-24AT). Step 1... -
Page 13: Other Convenient Features
OTHER CONVENIENT FEATURES COUNTER CHECK Set counter to "0" before using oven for the first time. See page 13. With this feature you can check how many times the oven was used. * Example: Suppose you want to know the total operated times and the number operated by each memory/ function. -
Page 14: Counter Clear
COUNTER CLEAR Each number of times can be cleared. * Suppose you want to clear the times of memory 1. Step Action Select check mode. Press NUMBER pad Press SET pad. Cancel check mode. Note: 1. To clear times of manual cooking, press MANUAL/REPEAT pad at Step 2 instead of NUMBER pad. To clear times of EXPRESS DEFROST cooking, press EXPRESS DEFROST pad at Step 2 instead of NUMBER pad. -
Page 15: Cooking Advice
OOKING ADVICE WARNING - Always attend the oven when in use. Carefully follow the SHARP Operation Manual at all times. If you exceed recommended cooking times and/or use power levels that are too high, food may overheat, burn, and in extreme circumstances, catch fire and damage the oven. -
Page 16: Food Handling & Preparation
Face & Hands: Always use oven gloves to remove food or cookware from the oven. Stand back when opening the oven door to allow heat or steam to disperse. When removing covers (such as cling-film), opening roasting bags or popcorn packaging, direct steam away from face and hands. Check the temperature of food and drink and stir (before serving). -
Page 17: Advice For Defrosting
ADVICE FOR DEFROSTING Meat joints Poultry Steak, Chops & Chicken Portions Cubed & Minced Meat Whole fish & Fillets Prepacked Frozen Foods NOTES: • To defrost food, use either 30% or 10% microwave power. • Shield warm areas with small pieces of foil if necessary. •... -
Page 18: Advice For Reheating
ADVICE FOR REHEATING WARNINGS: Oil & Fat: Never heat oil or fat for deep frying as this may lead to overheating and fire. Stand back when opening the oven door to allow heat or steam to disperse. When removing covers (such as cling-film), opening roasting bags or popcorn packaging, direct steam away from face and hands. -
Page 19: Defrosting Chart
EFROSTING CHART MANUAL DEFROSTING DEFROSTING FOOD TIME R-24AT R-22AT Beef, Lamb & 8 mins 13-14 mins Pork Joints /450g (1lb) (uncooked) 6-7 mins 13 mins Whole /450g (1lb) Poultry (uncooked) Minced Beef 3-4 mins 5-6 mins /450g (1lb) (uncooked) Sausages... -
Page 20: Defrosting Chart
EFROSTING CHART DEFROSTING FOOD TIME R-22AT R-24AT Bread Sliced 2-3 mins 3-4 mins /800g (1 lb) loaf Bread Buns 1-2 mins 2-3 mins for 6 buns Rice (cooked) mins 4-5 mins /450g (1lb) NOTES: ¤ Prior to defrosting, food is frozen approx. -18 ¤... -
Page 21: Cooking Chart
OOKING CHART COOKING FOOD TIME R-24AT R-22AT Beef: Medium 7-8 mins 9-10 mins (Topside, /450g (1lb) Silverside) Chilled (5 Lamb, medium 7-8 mins 9-10 mins /450g (1lb) (fillet, shoulder, leg) Chilled (5 Pork (loin, leg) 7-8 mins 12-13 mins Chilled (5... - Page 22 OOKING CHART COOKING FOOD TIME R-22AT R-24AT Fish Fillet/ 3 mins 4-5 mins Steaks /450g (1lb) Chilled (5 Trout 3 mins 4-5 mins /450g (1lb) (whole) Chilled (5 Rice/Pasta 6-7 mins 9-10 mins for 200g (70oz) Room (20 Jacket 4-5 mins...
-
Page 23: Cooking Chart
The cooking times given above are provided as a guide only. Cooking times will vary according to food weight, quality and initial temperature. Please ensure that food is thoroughly cooked before serving. MICROWAVE POWERLEVEL R-22AT HIGH 1. Place in a dish, add 30ml (2tbsp) water. 2. Cover with microwave cling film and pierce in 4-5 (100%) 3. -
Page 24: Reheating Chart
300g (11oz) As above 300g (11oz) As above 400g (14oz) As above REHEATING TIME ON HIGH (100%) R-24AT R-22AT 35 sec 1 min 30 sec 50 sec 50 sec 1 min 20 sec 25 sec 45 sec 35 sec 55 sec... - Page 25 2. Stand for 2-3 minutes 1. Place on a plate, uncovered 540g (1lb 4oz) 2. Stand for 3-4 minutes REHEATING TIME ON HIGH (100%) R-22AT R-24AT 1 min 15 sec 2 mins 15 sec 3 mins 15 sec 4 mins 1 min 15 sec...
- Page 26 125g (5oz) 200g (7oz) Place on a plate, uncovered 100g (4oz) Place on a plate, uncovered REHEATING TIME ON HIGH (100%) R-22AT R-24AT 35 sec 55 sec 1 min 10 sec 1 min 50 sec 15 sec 30 sec 25 sec...
- Page 27 1(200g)(7oz) Place on a plate, cover with cling film 1(200g)(7oz) Place on a plate, cover with cling film REHEATING TIME ON HIGH (100%) R-22AT R-24AT 1 min 1 min 45 sec 1 min 1 min 45 sec 30 sec 40 sec...
-
Page 28: Reheating Chart
275g (10oz) Place in a bowl, uncovered 125g (5oz) Place on a plate, uncovered C, Chilled , approx. 5 REHEATING TIME ON HIGH (100%) R-22AT R-24AT 35 sec 45 sec 1 min 1 min 30 sec 35 sec 45 sec... -
Page 29: Cleaning & Maintenance
LEANING & MAINTENANCE WARNING • Do not allow grease or dirt to build up on the door seals and adjacent parts as this may prevent the door from closing correctly and may cause a leak- age of microwaves. To clean use a mild detergent solution on a soft damp cloth. -
Page 30: Troubleshooting
WARNINGS: YES/NO • Never adjust, repair or modify the oven yourself, or allow anyone other than a Service Technician, appointed by SHARP to carry out the service. YES/NO • The door seal stops microwave leakage during oven YES/NO operation, but does not form an airtight seal. It is nor- mal to see drops of water, light or feel warm air around the oven door. -
Page 31: To Replace The Mains Plug
230-240 Volt, 50Hz alternating cur- rent supply. If you do not make the proper electrical connections you might damage the oven or injure yourself. Neither SHARP nor the supplier will be liable if this happens. ALLING FOR SERVICE •... -
Page 32: Specifications
If the product is used for business purposes and you want to discard it: Please contact your SHARP dealer who will inform you about the take-back of the product. You might be charged for the costs arising from take-back and recycling. Small products (and small amounts) might be taken back by your local collection facilities.