Table of Contents
Advertisement
Advertisement
Table of Contents

Related Manuals for Beko ARI 7757186301


Summary of Contents for Beko ARI 7757186301
-
Page 1: Book Cover
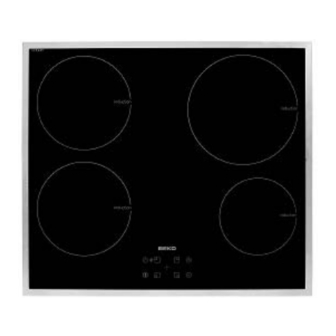
ARI Enductıon Hob Servıce Manual ARI BUILT IN INDUCTION HOB SERVICE MANUAL... -
Page 2: Table Of Contents
INDEX 1.BOOK COVER..………………………………………………………………………………...1 2.INDEX………..………………………..…………………………………………………………2 3. SERVICE WARNINGS ......................5 3.1. Symbols and Explanations ..................5 4. TECHNICAL SPECIFATIONS ....................6 5. PRODUCT ASSEMBLY / ASSEMBLY RULES / SETTINGS ............8 5.1. Before Installation ....................8 5.2Installation ........................ 8 5.3. Electric Connection ....................9 5.4 Connection of the Electric Cable ................. - Page 3 6.5.21. Precise power setting ..................21 6.5.23. Operating noise ....................21 7. PRODUCT ACCESSORIES ....................22 7.1. Saucepan Recognition System ..................22 8. INDUCTION WORKING PRINCIBLE ..................23 8.1 INDUCTION CONTROL SYSTEM: ..................23 8.2 How to use the hob ....................25 8.3 Graphics of induction hob..................25 9.
- Page 4 13. PROGRAM WORKFLOW ....................49 14.ASSEMBLING-DISASSEMBLING EQUIPMENT / APPARATUS LIST ..........50 15. COMPONENT ASSEMBLY / DISASSEMBLY ................51 15.1 Vitroceramic plate replacement ................51 15.2. Changing Touch Electronic Board ................52 15.3. Heater plates/ changing coils ..................55 15.4. Changing Mainboard ....................57 15.5. Changing cooling fan ....................60 15.6.
-
Page 5: Service Warnings
3. SERVICE WARNINGS 3.1. Symbols and Explanations Important information’s or useful hints about usage Warning against a dangerous condition in terms of lives and property Warning against electric shock Warning against fire Warning against hot surface Electric connection should be interrupted during the installation, maintenance, cleaning and repair process. -
Page 6: Technical Specifations
4. TECHNICAL SPECIFATIONS Voltage/frequency 220-240 V~/380-415 V 2N ~ 50 Hz Total electric consumption max. 7200 W Fuse min. 16 A x 2 / 32 A Cable type/intersection H05RR-F5 x 1,5 mm / 3 x 2,5 mm Cable length max. 2 m External 55mm/580 mm/510 mm dimensions(height/width/depth) - Page 7 declared values on the product labels or other printed documents are obtained under laboratory conditions according to relevant standards. This values can change according to products operational and environmental conditions. TR | 7...
-
Page 8: Product Assembly / Assembly Rules / Settings
5. PRODUCT ASSEMBLY / ASSEMBLY RULES / SETTINGS 5.1. Before Installation While installing the product, obey the local electric standards The Product is designed according to commercially available kitchen counters. There should be a safe distance between kitchen walls and furniture. Look at the picture for appropriate space (values in mm). -
Page 9: Electric Connection
The installer should obey the local electricty standarts. 5.3. Electric Connection Connect the product to the mains supply protected by a fuse, in accordance with the ‘’Technical Features’’ table. • Electric cable damage can cause electric shock, short circuit or fire hazard. •... - Page 10 • Brown cable=L(phase) • Blue cable=N(neutral) • Green/Yellow cable=E(ground) Connect the cables for the two phase: • Brown cable=L1(Phase1) • Black cable=L2(phase2) • Blue cable=N(neutral) • Green/Yellow cable=(E) TR | 10...
-
Page 11: Mounting The Product To Place
5.5. Mounting the Product to Place If the product is mounted on the top of a drawer, bottom side must be protected by furniture as seen below. min. 25 mm While mounting the built in hob above a cabinet, please refer to the picture below.. If the built in hob bottom;... - Page 12 1. Prepare the surface of the bench as shown in the figure. 2. The sealing gasket is given with the product, paste it between built in hob and bench as shown in the figure. 3. Center the product in the bench. 4.
-
Page 13: Last Check
Connection of the different holes can damage gas and electric system so it is undesirable in terms of security. 6.1. Last Check 1. Apply power to the appliance. 2. Control the functions. 6.2. Tips About Glass Ceramic Hobs Glass ceramic surface is heatproof and is not affected by big temperature differences. •... -
Page 14: Saucepan Selection
6.3. Saucepan Selection For induction hobs, use only vessels suitable for induction cooking. Saucepan test Use following methods to test whether your saucepan is compatible with the induction hob or not. 1. Your saucepan is compatible if its bottom holds magnet. 2. -
Page 15: Specifications
6.5.1. Specifications This product is controlled with a touch control panel. Each operation done on the touch control panel will be confirmed by an audible signal. Always keep the control panel clean and dry. Having damp and soiled surface may cause problems in the functions. -
Page 16: Turning On The Cooking Zones
"H" symbol that appears on the cooking zone display indicates that the hob is still hot and may be used to keep a small amount of food warm. This symbol will soon turn to "h" which means ‘still hot’.. When power is cut off, residual heat indicator will not light up and does not warn the user against hot cooking zones. -
Page 17: Turning Off High Power (Booster)
For rapid heating, you can use booster function “P”. However, this function is not recommended for cooking a long time. Booster function may not be available in all cooking zones. Turning on High Power (Booster) : 1. Touch "" key to turn on the hob. 2. -
Page 18: Deactivating The Keylock
Keylock will be activated and the dot on the symbol "" will light up. If you turn the hob off when the keys are locked, the keylock will be activated next time you turn the hob on again. Key lock must be deactivated in order to be able to operate the hob. 6.5.11. -
Page 19: Activating The Timer
6.5.16. Activating the timer 1. Touch "" key to turn on the hob. 2. Select the desired cooking zone by touching the cooking zone selection keys. 3. Touch "" or "" keys to set the desired temperature level. 4. Touch "" key to turn the timer on. "00"... -
Page 20: Operation Time Constraints
If you turn off the timer earlier, the hob will carry on operating at the set temperature until it is turned off. 1. Select the cooking zone you want to turn off. 2. Touch "" key to turn the timer on. 3. -
Page 21: Overheating Protection
20 minutes P (Booster) 5 minutes (*) (*) The hob will drop to level 9 after 5 minutes 6.5.19. Overheating protection Your hob is equipped with sensors ensuring protection against overheating. In case of overheating active cooking zone may be turned off. 6.5.20. -
Page 22: Product Accessories
7. PRODUCT ACCESSORIES 7.1. Saucepan Recognition System In induction cooking, only the area covered by the vessel on the relevant cooking zone is energized. Vessel's bottom is recognized by the system and only this area is heated automatically. Cooking stops if the cooking vessel is lifted from the cooking zone during cooking. -
Page 23: Induction Working Princible
8. INDUCTION WORKING PRINCIBLE Operating principles: Induction hob heats directly the cooking vessel as a feature of its operating principles. Therefore, it has various advantages when compared to other hob types. It operates more efficiently and the hob surface does not heat up. Advantages of Induction Cooking Fast cooking: Heat is generated directly in the vessel thanks to the induction technology. - Page 24 Figure1: Induction control system Resonance converter: Aim of the resonance converter design is making switching at no voltage and no current. Sharing energy between capacity and inductance provides power adjusting. Maximum power is transfered at resonance frequency. There are three types of converter: serial, paralel and serial-paralel..
-
Page 25: How To Use The Hob
Figure3:Single switch parallel resonance converter Power circuit is supplied with rectified DC voltage. According to CFILTER value, characteristic of supply voltage is defined. Every switching cycle, amplitute and shape of current which flows over IGBT and coil is defined by supply voltage. 8.2 How to use the hob There are 9 levels and boost level in this induction cooker model. - Page 26 145mm zone at level 9 with Paksan marked vessel 145mm zone at level 9 with Silargan marked vessel TR | 26...
- Page 27 180mm left front zone at level 9 with Paksan marked vessel 180mm left front zone at level 9 with Silargan marked vessel TR | 27...
- Page 28 210mm zone at level 9 with Paksan marked vessel 180mm left front zone at level 9 with Silargan marked vessel High-Speed Heating The most important side of induction heating is transferring heat to heated material with high speed and precision. Heating Without Loss The major part of the heat is transferred to the pot through magnetic field directly with induction heating.
- Page 29 environment. It is certain that the heated pot and food will radiate and heat the environment as well. The induction heating method will increase the temperature of the environment less as compared with other gas and electric heating methods. Safe Heating Induction heating, pursuant to its working principle, heats only the ferromagnetic materials.
-
Page 30: Component List
9. COMPONENT LIST Arı induction hob consists of following parts. Cover plate Main board (Induction generator) Filter board Cooling fan Touch control board Coils Vitroceramic glass Figure1: layout of Induction hob TR | 30... -
Page 31: Main Board (Induction Generator)
9.1 Main board (Induction Generator) Figure 2:Main board Function of main board -Rectify mains -Induction generator. High frequency AC current is generated. -Microcontoller control block -12V and 5V DC voltage Specifications Main board consists of IGBT, electronic components, heatsink. There are two microcontrollers. -
Page 32: Filter Board
9.2 Filter Board: Figurel 3: Filter board Function of filter board Protect induction system from voltage change at Mains and protect mains from induction noise Specifications It consists of filter components. TR | 32... -
Page 33: Touch Control Board
9.3 Touch Control board Figure 4 Touch Control board Function of touch control board This board is used by user in order to adjust cooking level and timer. Specifications This board consists of capasitive sensors, display and buzzer. 9.4 Cooling fan Function of cooling fan It is for cooling electronic components Specifications... -
Page 34: Function Of Induction Coil
Function of induction coil Induction coil under vitroceramic glass is used for generating magnetic field. There are different sizes of coils according to zone diameter (145mm,180mm, 210mm). Induction coil consists of a magnetic core, a mica sheet for isolation, copper windings, silicon spacer for air gap, and mica sheet again. -
Page 35: Service Function Test
10. SERVICE FUNCTION TEST 10.1 Electronic control board instructions WARNING: Before making any controls disconnect hob from electricity. Controlling the switching components on the electronic board shown in figure 1 Figure1: Switching components Resistance value of switching components between first leg at left and third leg are measured by using multimeter at ohm position. - Page 36 Figure 2: Checking switching components Resistance value between two legs should be around 9 kΩ-10kΩ.(See Figure 3). Otherwise the switching element has been short circuited and main board must be changed with new one according to the instructions. Figure 3 Resistance value Any main board failure may cause malfunction at the fuse through filter board.
-
Page 37: Entry Service Mode
Figure 5: Short circuit test with multimeter 10.2 Entry Service Mode: For accessing the service mode energise the appliance and immediately type in the following sequence: Minus key (keep pressed) Button one (buzzer sounds) Button two (buzzer sounds) Button three. Picture 1: Key combinations for entering service mode TR | 37... -
Page 38: Service Mode Control Stages
10.3 Service Mode Control Stages 1) Verification of the diameter of the heater coils After entering the service mode, which induction coils are supported by main board is checked first. As seen in picture 2 left hand side zones’s diameter are 180mm.It is understood by the way of middle number of coil diameter. - Page 39 Picture 4:Main board left hand side sorfware version Picture 5:Main board right hand side software version 3) Checking error messages After pressing minus(-) button if any error is not found at hob, a single line will be seen on display as seen at Picture 6. If an error occurs, error code will be displayed on related displays.
- Page 40 Table 1:Error codes 4) Checking zone surface temperature After pressing the minus(-) button, temperature information menu appears (see Picture 7). In order to check surface temperature of cooking zone touch related cooking zone button (see Picture 8). Picture7: Reading surface temperature of cooking zones TR | 40...
- Page 41 Picture 8: Reading surface temperature of related cooking zone 5) Checking software version of touch control board After pressing minus(-) button the touch control’s software version is displayed as shown in picture 9. At picture the version number is 2028 (This is just for example). Picture 9: Software version of touch control board TR | 41...
-
Page 42: Control Panel
11. CONTROL PANEL 11.1 PROPERTIES 11.2 Cooking Zone Display Setting zone (temperature level and timer settings) the light that shows that related button is running On/Off button Keylock button Activating timer/ deactivating timer button Plus button Minus button 11.3 Switching on the hob TR | 42... -
Page 43: Turning Off The Hob
Touch button on control panel. Light of button turn on. Hob is ready for run. When hob is turned on, pot detector process automaticly. If there is a pot, electing lights of cooking zone where the pot is on turn on for 10 second. 11.4 Turning Off The Hob Residual Heat Indicator If "H"... -
Page 44: Child Safety Lock
Touch the button and operate the hob. Touch the selection button which part of you want to run. Set heat level between 1 and 9 using buttons. 11.6 Child safety lock When cooktop is off, child safety lock can ben used for preventing childrens operating the appliance. -
Page 45: The Keypad Lock
For deactivating child safety lock first touch on/off button. After the ”beep” tune is heard touch(-) button. Child safety lock is then deactivated.”L” symbol disappears. Child safety lock is automatically deactivated during power cut. 11.7 The keypad lock While cooktop is running, key lock can be activated for preventing changing functions. When the hob is on, press clock and back left buttons both so key lock is activated. - Page 46 This function makes cooking easier.. The selected cooking zone of the hob is turned off automatically at the end time. Activating timer: Cooking zone is selected, time is adjusted. Timer is activated by touching button. ”00” is appears on timer screen and the dot of selected timer zone disappears. Screen of Front right and back left cooking zones run as timer screen, when timer is activated.
- Page 47 TR | 47...
-
Page 48: Probable Failures And Remedies
12. Probable failures and remedies Electronic boards are faulty Check their sockets or replace if Connection cables are faulty necessary Hob is not working Check filter board fuses Check swithing components at main Open circuit at filter board board. If there is a problem, replace main board and filter board. -
Page 49: Program Workflow
13. PROGRAM WORKFLOW TR | 49... -
Page 50: Assembling-Disassembling Equipment / Apparatus List
14.ASSEMBLING-DISASSEMBLING EQUIPMENT / APPARATUS LIST Standart Star type screwdriver (small,medium, large) TR | 50... -
Page 51: Component Assembly / Disassembly
COMPONENT ASSEMBLY / DISASSEMBLY 15.1 Vitroceramic plate replacement Firstly disconnect the appliance from mains. Then dismount the unit and put it on a workbench. Then hob glass screws must be removed with the help of a screwdriver. TR | 51... -
Page 52: Changing Touch Electronic Board
After removing the screws lift the plate as seen in the picture. 15.2. Changing Touch Electronic Board First remove the vitroceramic plate. Then connector cable should be removed as seen in the picture below. TR | 52... - Page 53 Sheet metal holding the PCB can be dismounted from the lower housing with the help of a screwdriver. Disassembled card and sheet metal group is removed from the built in hob by pulling it upward. TR | 53...
- Page 54 Four screws at the bottom of the PCB holder are removed using a fine tip screwdriver. Plastic feet under touch control card are removed. Replace the touch control PCB TR | 54...
-
Page 55: Heater Plates/ Changing Coils
15.3. Heater plates/ changing coils To change heater plates, first remove the vitroceramic plate and PCB. Then coils and mainboard should be removed with the help of star tipped screwdriver. TR | 55... - Page 56 Wiring of the mainboard are disconnected by pulling them from the terminals. Replace the coil TR | 56...
-
Page 57: Changing Mainboard
15.4. Changing Mainboard To change the products mainboard, first remove the vitroceramic plate and PCB. Then connectors and cables on the mainboard should be removed. TR | 57... - Page 58 After pulling out the cables, screws should be removed from the mainboard with the help of a star tip screwdriver. TR | 58...
- Page 59 By pressing the plastic tags PCB can be taken from its place. Card is removed carefully from the plastic casing pulling upward. TR | 59...
-
Page 60: Changing Cooling Fan
15.5. Changing cooling fan The cooling fan on the plastic housing can replaced using a star tip screwdriver. 15.6. Changing Filter Board Terminals on filter board can be replaced by pulling upward slightly. TR | 60... -
Page 61: Changing Plastic Housing
15.7. Changing plastic housing Before changing plastic housing, all the components on the housing should be removed. Then the screws on the plastic housing should be removed using a star tip screwdriver. Screws on the reverse side should be taken, too. TR | 61... -
Page 62: Changing Plastic Housing Top Springs
15.8. Changing Plastic Housing Top Springs Springs on the plastic housing can be removed from the housing by pulling slightly upwards. 15.9. Changing mains cable Before changing mains cable, clamp screws on the plastic housing should be loosened with the help of star tip screwdriver. TR | 62... -
Page 63: Exploded View
Then the filter board terminals should be pulled out for replacing the component. 17. EXPLODED VIEW You can see product service exploded view on manusoft system. 18. SERVICE PART LIST You can check the part list on manusoft system. REVISION DATE COMMENT JULY/2011...