
Related Manuals for LG SHD3689BD


Summary of Contents for LG SHD3689BD
- Page 1 Internal Use Only Hood SERVICE MANUAL MODEL: SHD3689BD LSHD3089BD LSHD3680ST LSHD3080ST CAUTION BEFORE SERVICING THE UNIT, READ THE SAFETY PRECAUTIONS IN THIS MANUAL. August, 2017 P/NO : MFL70192302 Printed in Korea...
-
Page 2: Table Of Contents
TABLE OF CONTENTS GENERAL - - - - - - - - - - - - - - - - - - - - - - - - - - - - - - - - - - - - - - - - - - - - - - - - - - - - - - - - - - - - - - - - - - - - - - - - - - - - - - - - - - - - - - - - - - - - - - - - - - - - - - 5 ~ 6 •... - Page 3 • DC7700BL / DC9700BL Switch Assembly Removal - - - - - - - - - - - - - - - - - - - - - - - - - - - - - - - - - - - - - - - - - - - - - - - - - - - - - - - - - - - - 31 ~ 32 •...
-
Page 4: General
GENERAL TO REDUCE THE RISK OF FIRE OR ELECTRIC SHOCK, DO NOT USE WARNING THIS FAN WITH ANY SOLID-STATE CONTROL DEVICE. TO REDUCE THE RISK OF FIRE ELECTRIC SHOCK, OR INJURY TO WARNING PERSONS, OBSERVE THE FOLLOWING: a. Use this unit only in the manner intended by the manufacturer, if you have questions, contact the manufacturer. -
Page 5: General Safety Precautions
GENERAL WARNING TO REDUCE THE RISK OF FIRE, ELECTRIC SHOCK OR INJURY TO PERSONS, OBSERVE THE FOLLOWING: a. Installation work and electrical wiring must be done by qualified person(s) in accordance with all applicable codes and standards. b. Sufficient air is needed for power combustion and exhausting of gases through the flue(chimney) of fuel burming equipment to prevent back-drafting. - Page 6 GENERAL WARNING TO REDUCE THE RISK OF FIRE, USE ONLY METAL DUCTWORK. To reduce risk of fire and to properly exhaust air outside - Do not vent CAUTION exhaust air into spaces within walls, ceilings, attics, crawl spaces or garages. No for use over an outdoor grill.
-
Page 7: Product Specifications
PRODUCT SPECIFICATIONS General Specifications All Models Fan Speeds Filters Decorative Aluminum Mesh type, dishwasher safe Exhaust Vertical 6-inch Exhaust Horizontal Total Connect Load 120 Vac, 60 Hz, 4 Amp. maximum Lights 12 Vac, 9 W LED Model Specific Model Number DC7700 / DC9700 Lights Filters... -
Page 8: Dimensions
PRODUCT SPECIFICATIONS Top Dimensions 38.1cm [15"] Model LSHD3089BD 76 cm (30") 68.5 cm (26 15/16" 56 cm(22 1/6") LSHD3080ST LSHD3989BD 90 cm (36") 68.5 cm (26 15/16" 56 cm(22 1/6") LSHD3980ST... -
Page 9: Planning The Installation
PLANNING THE INSTALLATION Planning the Installation ALWAYS, when possible, reduce the number of Cabinet Layout transitions and turns. If a long duct run is required, increase duct size from 6” to 7” or 8”. If turns or transitions are required: Install as far away from duct opening and as far apart between the two transitions as possible. - Page 10 PLANNING THE INSTALLATION Equivalent Equivalent number number Duct pieces Total Duct pieces Total length x used = length x used = 3- 1/ 4” x 10” 1 Ft. Ft.. 3- 1/ 4” x 10” 5 Ft. Ft.. Rect. to Rect., 6”...
-
Page 11: Warning Fire Hazard
PLANNING THE INSTALLATION WARNING FIRE HAZARD NEVER exhaust air or terminate duct work into spaces between walls, crawl spaces, ceiling, attics or garages. All exhaust must be ducted to the outside, unless using the recirculating option. Use single wall rigid metal ductwork only. Fasten all connections w/ sheet metal screws and tape all joints with Silver Tape or Duct Tape. -
Page 12: Electrical
PLANNING THE INSTALLATION ELECTRICAL WARNING All Electrical work must by performed by qualified electrician or person with similar technical know how and background. For personal safety, remove house fuse or open circuit breaker before beginning installation. Do not use extension cord or adapter plug with this appliance. - Page 13 PLANNING THE INSTALLATION CAUTION At least two installers are required due to the weight and size of the hood. 1. Measure from range top to desired hood bottom and mark line A. (26" minimum from range top). 2. Plum and mark center line. ”...
-
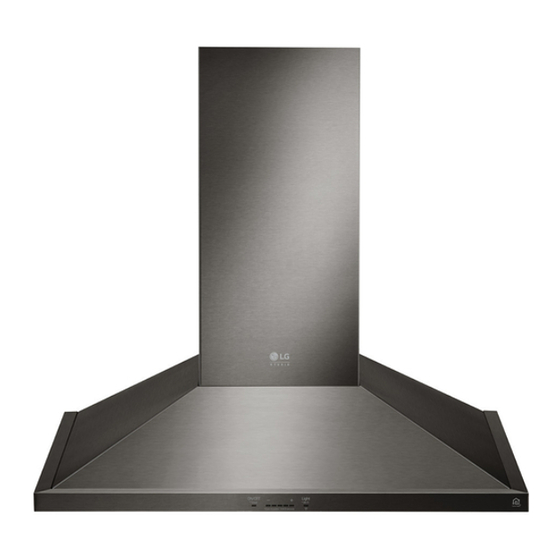
Page 14: Parts Of The Range Hood
PARTS OF THE RANGE HOOD PARTS OF THE RANGE HOOD Hood ICON Touch Control Panel LED Strip Light Mesh Filter Side Panel (Only for DC9700BL) -14-... -
Page 15: Product Overview
PARTS OF THE RANGE HOOD PRODUCT OVERVIEW Parts List Ma nua l Hood Duct cover bracket Manual Duct cover Hardware package Content of Hardware package M6 x 1" (4) M6 x 1-1/2" (4) M4 x 8 (2) Wire Caps (3) -15-... -
Page 16: Touch Controls & Features
PARTS OF THE RANGE HOOD TOUCH CONTROLS & FEATURES 1. POWER / DELAY OFF BUTTON 2. SPEED SELECTION BUTTON Fan Speed Decrease Button Power Button Function • • Press this button to decrease fan speed. 5, 4, 3, 2, Button will turn power on and off for entire hood (fan and lights). -
Page 17: Lights Button
PARTS OF THE RANGE HOOD will blink two times confirming the Charcoal Filter 3 LIGHTS BUTTON Replace Reminder is disabled. • The light has two levels: High and Low. • To disable Charcoal Filter Replacement Reminder: • From off, press one time for High. Press again for With hood off, hold button and button... -
Page 18: Wiring Diagram
PARTS OF THE RANGE HOOD WIRING DIAGRAm Models Volts MAX Amps LSHD3689BD/LSHD3089BD Single Motor 4 LSHD3680ST/LSHD3080ST REMARKS:CONDENSER 12.5+12.5uF 250VAC FIT AC120V 60Hz Wiring Diagram - Single Blower Models -18-... -
Page 19: Component Locations
COmPONENT LOCATIONS COmPONENT LOCATIONS LED Strip ICON Touch Control Hood Baffle Filter Power Cord Collar, Damper -19-... -
Page 20: Component Replacement
COmPONENT REPLACEmENT DC7700BL / DC9700BL BLOWER REmOVAL Step 1. Loosen ten screws by taking out the electronic bracket and blower cover. Step 2. Loosen the four screws to remove the main PCB box cover. -20-... - Page 21 COmPONENT REPLACEmENT Step 3. Disassemble the blower wire from main PCB. Step 4. Loosen the four screws on the blower brackets. -21-...
- Page 22 COmPONENT REPLACEmENT Step 5. Loosen the four screws on the blower housing. Step 6. Take out the blower. * Follow these steps in reverse to reassemble the part. -22-...
-
Page 23: Dc7700Bl / Dc9700Bl Damper Removal
COmPONENT REPLACEmENT DC7700BL / DC9700BL DAmPER REmOVAL Step 1. Follow the below arrow direction to take out the brackets and damper. * Follow these steps in reverse to reassemble the part. -23-... -
Page 24: Dc7700Bl / Dc9700Bl Duct Cover Bracket Removal
COmPONENT REPLACEmENT DC7700BL / DC9700BL DUCT COVER BRACkET REmOVAL Step 1. Remove the screws for securing the duct cover_upper. Step 2. Slide the duct cover_upper towards ground. -24-... - Page 25 COmPONENT REPLACEmENT Step 3. Take out the duct covers and loosen the screws for securing the duct cover bracket to remove the duct cover bracket. * Follow these steps in reverse to reassemble the part. -25-...
-
Page 26: Dc7700Bl / Dc9700Bl Filter Removal
COmPONENT REPLACEmENT DC7700BL / DC9700BL FILTER REmOVAL Step 1. Follow the below arrows direction to push in on filter handle. Step 2. Follow the below arrow direction to remove filter by pulling away from hood. * Follow these steps in reverse to reassemble the part. -26-... -
Page 27: Dc7700Bl / Dc9700Bl Led Strip Removal
COmPONENT REPLACEmENT DC7700BL / DC9700BL LED STRIP REmOVAL Step 1. Remove the mesh filter and light panel. Step 2. Follow the below arrow direction to take out the cap of LED strip and push the LED strip toward inside of light panel. * Follow these steps in reverse to reassemble the part. -
Page 28: Dc7700Bl / Dc9700Bl Light Panel Removal
COmPONENT REPLACEmENT DC7700BL / DC9700BL LIGHT PANEL REmOVAL Step 1. Remove the mesh filters. Step 2. Loose four screws for securing left side panel and right side panel. (Only for DC9700BL, two screws for each side.) Step 3. Follow the below arrow direction to take out the light panel. * Follow these steps in reverse to reassemble the part. -
Page 29: Dc7700Bl / Dc9700Bl Main Pcb Removal
COmPONENT REPLACEmENT DC7700BL / DC9700BL mAIN PCB REmOVAL Step 1. Take out the electronic bracket. Step 2. Loose the four screws for main PCB box. Electronic Bracket Step 3. Loose the four screws for main PCB. -29-... - Page 30 COmPONENT REPLACEmENT Step 4. Take out the main PCB. * Follow these steps in reverse to reassemble the part. -30-...
- Page 31 COmPONENT REPLACEmENT DC7700BL / DC9700BL SWITCH ASSEmBLy REmOVAL Step 1. Remove the two screws for switch assembly. Step 2. Slider the switch assembly to left. -31-...
- Page 32 COmPONENT REPLACEmENT Step 3. Turn and make the switch surface face toward ground. Step 4. Turn the wire and lie down the switch assembly, then take out the switch assembly. * Follow these steps in reverse to reassemble the part. -32-...
- Page 33 COmPONENT REPLACEmENT DC7700BL / DC9700BL WIFI INTERFACE PCB REmOVAL Step 1. Remove the mesh filters. Step 2. Take out the WiFi cover by loosening two screws Step 3. Remove the wires on the WiFi interface PCB. Step 4. Follow the below arrow direction to take out the WiFi interface PCB. * Follow these steps in reverse to reassemble the part.
- Page 34 #EV# EXPLODED VIEW MODEL: Customer Model Product Code SVC Model...