
Related Manuals for D-Link EXO AX DIR-X1870


Summary of Contents for D-Link EXO AX DIR-X1870
- Page 1 N E X T G E N E R A T I O N A X 1 8 0 0 M e s h W i - F i 6 R o u t e r DIR-X1870 User Manual...
- Page 2 Trademarks D-Link and the D-Link logo are trademarks or registered trademarks of D-Link Corporation or its subsidiaries in the United States or other countries. All other company or product names mentioned herein are trademarks or registered trademarks of their respective companies.
-
Page 3: Table Of Contents
DIR-X1870 LED Indicator ............ 5 QoS Engine................49 DIR-X1870 Rear ..............6 Firewall ...................51 Hardware Setup ................7 IPv4/IPv6 Rules ...............53 Using The D-Link Wi-Fi App ..........7 Port Forwarding ..............54 Web Based Installation ............10 Port Forwarding .............54 Virtual Server ..............55 Configuration ..............11 Static Routes .................56... - Page 4 Table of Contents Registering a D-Link Cloud Service Account ....71 Voice Assistants ................74 Amazon Alexa Setup ............75 Amazon Alexa Voice Commands ........79 The Google Assistant Setup ..........80 The Google Assistant Voice Commands .....83 Connect to a Wireless Client ...........84 WPS Button ...................84 Wireless Basics ..............85...
-
Page 5: Package Contents
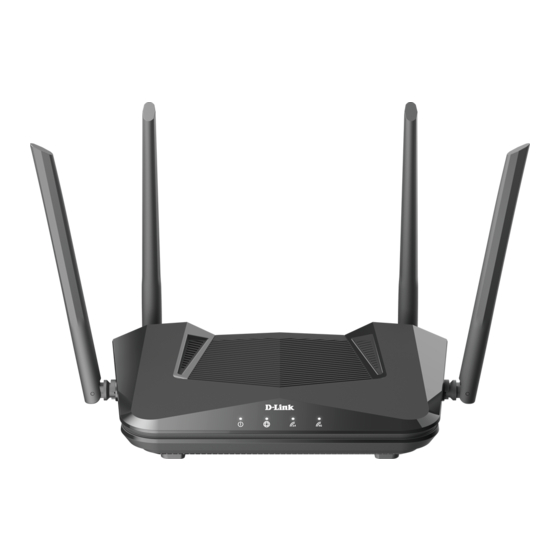
Section 1 - Product Overview Package Contents DIR-X1870 Power adapter Ethernet Cable Quick Installation Card Quick Installation Guide If any of the above items are missing or damaged, please contact your local reseller. D-Link DIR-X1870... -
Page 6: System Requirements
Requirements • Firefox 28 or higher • Safari 6 or higher • Chrome 28 or higher D-Link Wi-Fi App • iOS® or Android™ device (Please refer to the app's store page to Requirements check whether your device is compatible.) D-Link DIR-X1870... -
Page 7: Introduction
Internet as it utilizes a 10/100/1000 Mbps Gigabit Ethernet WAN port. The built-in Quality of Service (QoS) engine allows you to prioritize traffic to your preferred client, ensuring that your favorite devices are receiving optimal bandwidth. D-Link DIR-X1870... - Page 8 Easy to Setup and Manage Sharing your Internet connection doesn’t have to be a complicated process; just download the free D-Link Wi-Fi app for your compatible iOS or Android device and follow the on-screen step-by-step instructions to set up your DIR-X1870. You also have the option to use a web browser to access the setup wizard and manage your router.
-
Page 9: Hardware Overview
Solid White The 2.4 GHz wireless band is enabled. 3 Wireless (2.4 GHz) Blinking White The device is processing WPS. Solid White The 5 GHz wireless band is enabled. Wireless (5 GHz) Blinking White The device is processing WPS. D-Link DIR-X1870... -
Page 10: Dir-X1870 Rear
Press this button to establish an instant connection to a wireless client using Wi-Fi Protected Setup (WPS). Power Button Press the power button to power the device on or off. Reset Press and hold to perform a factory reset. Power Connector Connect the included power adapter here to power on the device. D-Link DIR-X1870... -
Page 11: Hardware Setup
The D-Link Wi-Fi app allows you to install and configure your device from a compatible Android or iOS device. Note: The screenshots may be different depending on your mobile device’s OS version. The following steps show the iOS interface of the D-Link Wi-Fi app. - Page 12 Section 2 - Installation Step 4 Tap Yes to scan the setup QR code located in the Quick Install Card and proceed to step 6. Alternatively, you can tap No to proceed to step 5. D-Link DIR-X1870...
- Page 13 Section 2 - Installation Step 5 Select your device and tap Next to continue. You will now be guided through a step-by-step process for setting up your product. Simply follow the on-screen instructions to complete the installation and the configuration process. D-Link DIR-X1870...
-
Page 14: Web Based Installation
Section 2 - Installation Web Based Installation If you do not wish to use the D-Link Wi-Fi app, you can manually set up your device and configure your Wi-Fi network using the web-based user interface. Step 1 Position the DIR-X1870 close to your Internet-connected modem and... -
Page 15: Configuration
• If this is the first logging in, the password is "password" • If you have previously configured the device with the Setup Wizard, use the password you created during initial setup 4. Click Log In. Note: The system will automatically log out after a period of inactivity. D-Link DIR-X1870... -
Page 16: Home
The menu bar at the top of the page will allow you to quickly navigate to other pages. Refer to the following pages for a description of each section. D-Link DIR-X1870... -
Page 17: Internet
Address. Click Pause Internet Access for clients to temporarily disconnect the Internet connection, alternatively click Resume Internet Access to resume the Internet access if previously paused. To reconfigure the Internet settings, click Go to settings at the bottom-right. D-Link DIR-X1870... -
Page 18: Dir-X1870
Click on the DIR-X1870 icon to view details about the DIR-X1870's wireless and local network settings. This includes IPv4 and IPv6 local networks, and Wi- Fi information. This overview is only informational. To configure these sections, refer to the corresponding configuration sections in this manual. D-Link DIR-X1870... -
Page 19: Connected Clients
The schedule may be set to Always Off, or you can create your own schedules in the Schedule section. Refer to Schedule on page 62 for more information. Click Save when you are done. D-Link DIR-X1870... -
Page 20: Extenders
Mesh Wi-Fi network, click the settings icon in the bottom-right of the extenders's box and click Remove. Name: Enter a name for the DIR-X1870. MAC Address: Displays the MAC address of the DIR-X1870. Click Save when you are done. D-Link DIR-X1870... -
Page 21: Mesh Network
To reboot an extender, click the settings icon in the bottom-right of the extenders's box and click Reboot. To remove an extender from your Mesh Wi-Fi network, click the settings icon in the bottom-right of the extenders's box and click Remove. D-Link DIR-X1870... -
Page 22: Settings
This is the same wizard that appears when you set up the device using the web-user interface for the first time. This Wizard will also launch when clicking the Click to Repair button when no Internet connection is detected. D-Link DIR-X1870... -
Page 23: Internet
For PPPoE refer to PPPoE on page 22. For PPTP refer to PPTP on page 24. For L2TP refer to L2TP on page 26. For DS-Lite refer to DS-Lite on page 28. IPv6 link. Refer to page To configure an IPv6 connection, click the D-Link DIR-X1870... - Page 24 The default MAC address is set to the physical interface MAC address Clone: of port 1 on the device. You can use the drop-down menu to replace the Internet port’s MAC address with the MAC address of a connected client. Click Save when you are done. D-Link DIR-X1870...
- Page 25 The default MAC address is set to the physical interface MAC address Clone: of port 1 on the device. You can use the drop-down menu to replace the Internet port’s MAC address with the MAC address of a connected client. Click Save when you are done. D-Link DIR-X1870...
- Page 26 Enter the secondary DNS server IP address assigned by your ISP. This Server: address is usually obtained automatically from your ISP. MTU: Maximum Transmission Unit - you may need to change the MTU for optimal performance with your ISP. D-Link DIR-X1870...
- Page 27 The default MAC address is set to the physical interface MAC address Clone: of port 1 on the device. You can use the drop-down menu to replace the Internet port’s MAC address with the MAC address of a connected client. Click Save when you are done. D-Link DIR-X1870...
- Page 28 Enter the secondary DNS server IP address assigned by your ISP. This Server: address is usually obtained automatically from your ISP. MTU: Maximum Transmission Unit - you may need to change the MTU for optimal performance with your ISP. D-Link DIR-X1870...
- Page 29 Secondary DNS Enter the secondary DNS server IP address assigned by your ISP. Server: MTU: Maximum Transmission Unit - you may need to change the MTU for optimal performance with your ISP. Click Save when you are done. D-Link DIR-X1870...
- Page 30 Enter the secondary DNS server IP address assigned by your ISP. This Server: address is usually obtained automatically from your ISP. MTU: Maximum Transmission Unit - you may need to change the MTU for optimal performance with your ISP. D-Link DIR-X1870...
- Page 31 Secondary DNS Enter the secondary DNS server IP address assigned by your ISP. Server: MTU: Maximum Transmission Unit - you may need to change the MTU for optimal performance with your ISP. Click Save when you are done. D-Link DIR-X1870...
- Page 32 Enter the B4 IPv4 address value used here. WAN IPv6 Once connected, the WAN IPv6 address will be displayed here. Address: IPv6 WAN Default Once connected, the IPv6 WAN default gateway address will be Gateway: displayed here. Click Save when you are done. D-Link DIR-X1870...
-
Page 33: Ipv6
Click Advanced Settings... to expand the list and see all of the options. For Static IPv6 refer to page 30. For Auto Configuration (SLAAC/DHCPv6) refer to page 32. For PPPoE refer to page 34. For 6rd refer to page 37. For Local Connectivity Only refer to page 39. D-Link DIR-X1870... - Page 34 Enter the primary DNS server address. Server: Secondary DNS Enter the secondary DNS server address. Server: LAN IPv6 Address Settings LAN IPv6 Address: Enter the LAN (local) IPv6 address for the device. LAN IPv6 Link- Displays the DIR-X1870's LAN link-local address. Local Address: D-Link DIR-X1870...
- Page 35 Enter the starting IPv6 address for the DHCP server’s IPv6 assignment. Range (Start): IPv6 Address Enter the ending IPv6 address for the DHCP server’s IPv6 assignment. Range (End): IPv6 Address Enter the IPv6 address lifetime (in minutes). Lifetime: Click Save when you are done. D-Link DIR-X1870...
- Page 36 Displays the DIR-X1870's LAN link-local address. Local Address: If Enable DHCP-PD is disabled, these additional parameters are available for configuration: LAN IPv6 Address: Enter a valid LAN IPv6 address. LAN IPv6 Link- Displays the device's LAN link-local address. Local Address: D-Link DIR-X1870...
- Page 37 Range (Start): IPv6 Address Enter the ending IPv6 address for the DHCP server’s IPv6 assignment. Range (End): IPv6 Address If Enable DHCP-PD is disabled, enter the IPv6 address lifetime (in Lifetime: minutes). Click Save when you are done. D-Link DIR-X1870...
- Page 38 ISP. Service Name: Enter the ISP service name (optional). Reconnect Mode: Select either Always On or Manual. MTU: Maximum Transmission Unit - you may need to change the MTU for optimal performance with your ISP. D-Link DIR-X1870...
- Page 39 Displays the device's LAN link-local address. Local Address: If Enable DHCP-PD is disabled, these additional parameters are available for configuration: LAN IPv6 Address: Enter a valid LAN IPv6 address. LAN IPv6 Link- Displays the device's LAN link-local address. Local Address: D-Link DIR-X1870...
- Page 40 Range (Start): IPv6 Address Enter the ending IPv6 address for the DHCP server’s IPv6 assignment. Range (End): IPv6 Address If Enable DHCP-PD is disabled, enter the IPv6 address lifetime (in Lifetime: minutes). Click Save when you are done. D-Link DIR-X1870...
- Page 41 Enter the 6rd border relay IPv4 address settings supplied by your ISP. IPv4 Address: LAN IPv6 Address Settings LAN IPv6 Address: Displays the device's LAN IPv6 Address link-local address. LAN IPv6 Link- Displays the device's LAN link-local address. Local Address: D-Link DIR-X1870...
- Page 42 Enter the starting IPv6 address for the DHCP server’s IPv6 assignment. Range (Start): IPv6 Address Enter the ending IPv6 address for the DHCP server’s IPv6 assignment. Range (End): IPv6 Address Enter the IPv6 address lifetime (in minutes). Lifetime: Click Save when you are done. D-Link DIR-X1870...
- Page 43 If you selected Enable ULA and disabled Default ULA Prefix: ULA Prefix: Enter your own ULA prefix. Current IPv6 ULA Settings Current ULA Displays the current ULA prefix. Prefix: LAN IPv6 ULA: Displays the LAN's IPv6 ULA. Click Save when you are done. D-Link DIR-X1870...
-
Page 44: Wireless
Advanced Settings - Wireless Security Mode: Choose None, WPA2/WPA3-Personal or WPA/WPA2. Transmission Select the desired wireless transmission power. Power: Wi-Fi Protected Setup The easiest way to connect your wireless devices to your DIR-X1870 is with Wi-Fi Protected Setup (WPS). D-Link DIR-X1870... - Page 45 Wi-Fi (Continued) WPS-PBC Status: Enable or disable WPS Push Button Configuration (PBC) functionality. Enabling this feature allows wireless clients to connect to the Wi-Fi through an encrypted connection by using the WPS button. Click Save when you are done. D-Link DIR-X1870...
-
Page 46: Guest Zone
Enable or disable the Guest Wi-Fi network. Wi-Fi Name (SSID): Enter a name for your guest wireless network. Password: Create a password for your guest Wi-Fi network. Wireless clients will need to enter this password to successfully connect to the network. D-Link DIR-X1870... -
Page 47: Network
UI. Local Domain Enter the domain name (optional). Name: Enable DNS Relay: Disable to transfer the DNS server information from your ISP to your computers. If enabled, your computers will use the device for a DNS server. D-Link DIR-X1870... - Page 48 Enable to allow IPv4 multicast traffic to pass through the device from Streams: the Internet. IPv6 Multicast Enable to allow IPv6 multicast traffic to pass through the device from Streams: the Internet. Click Save when you are done. D-Link DIR-X1870...
-
Page 49: D-Link Cloud
D-Link Cloud In the Settings menu on the bar at the top of the page, click D-Link Cloud to see your D-Link Cloud Service details. This page lists whether you are registered with D-Link Cloud Service and email address associated with the account. Use the D- Link Wi-Fi app to find out more about D-Link Cloud's features. -
Page 50: Operation Mode
Click Save at any time to save the changes you have made on this page. Operation Mode Settings Router Mode Select Router Mode to run this device as a router. Extender Mode Select Extender Mode to run this device as an extender D-Link DIR-X1870... -
Page 51: Features
Set a time period for the device to be allowed Internet access. Schedule when you want to be online) Bedtime Schedule Set a time period for the device to be denied Internet access. (Set a bedtime for time away from the internet) D-Link DIR-X1870... - Page 52 Enter a Website name that you wish to deny access to. URL Keyword Enter a URL Keyword name that you wish to deny access to. Device Click the Add Device button to select the devices that you wish to add to the schedule D-Link DIR-X1870...
-
Page 53: Qos Engine
Enter the maximum upload speed (in Mbps) for all connected clients (Mbps): combined. If QoS is enabled, once this threshold is reached, traffic of clients with higher priority will be processed first, while traffic of lower priority clients will wait until enough bandwidth becomes available. D-Link DIR-X1870... - Page 54 If you want to remove a priority assignment from a device and return it to the Connected Clients list, click the close button (x) in the top right of the device card. Click Save when you are done. D-Link DIR-X1870...