
Related Manuals for Sony MAV-555A


Summary of Contents for Sony MAV-555A
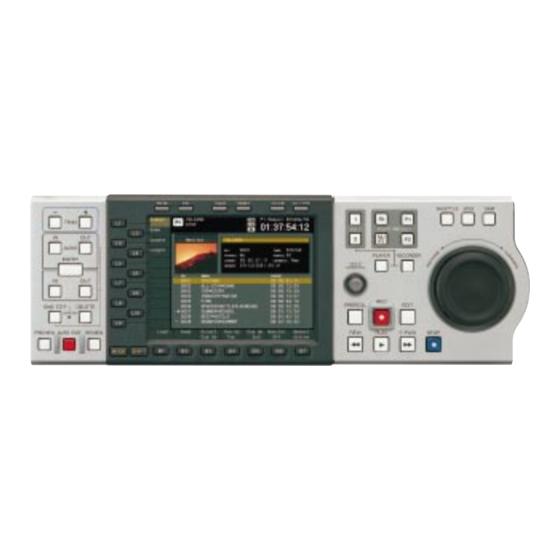
- Page 1 MULTI ACCESS VIDEO DISK RECORDER MAV-555A AD/DA CONVERTER BOARD BKMA-513 ASYNCHRONOUS NETWORK BOARD BKMA-550 MAINTENANCE MANUAL 1st Edition (Revised 1)
- Page 2 électrique, d’incendie ou de blessure n’effectuer que les réparations indiquées dans le mode d’emploi à moins d’être qualifié pour en effectuer d’autres. Pour toute réparation faire appel à une personne compétente uniquement. MAV-555A (SY) Serial No. 10001 and Higher BKMA-513 (SY) Serial No.
- Page 3 Gebrauchsdauer der Batterien Brukt batteri returneres “nicht mehr einwandfrei funktioniert”. Um apparatleverandøren. sicherzugehen, kleben Sie die Batteriepole z.B. mit einem Klebestreifen ab oder geben Sie die Batterien einzeln in einen Plastikbeutel. 1 (P) MAV-555A...
-
Page 5: Table Of Contents
Error Indication ..............1-2 (E) 1-2. Acquiring the Logs ................1-3 (E) 1-2-1. How to Aquire the Logs of the MAV-555A ......1-3 (E) 1-2-2. How to Acquire the Logs of the BKMA-550 ....... 1-6 (E) 1-3. Backing Up and Restoring the Contents of Memory (FM-81 board) ..1-10 (E) 1-4. - Page 6 A/D Manual Video Level Adjustment ....... 4-19 (E) 4-5-10. A/D Video Adjustment 2 ........... 4-19 (E) 4-5-11. Setting upon Completion of Adjustment ......4-19 (E) 5. Circuit Description 5-1. MAV-555A ................... 5-1 (E) 5-2. BKMA-550 ................... 5-4 (E) 2 (E) MAV-555A...
- Page 7 6-1. Notes on Repair Parts .................. 6-1 6-2. Exploded Views ..................6-2 6-3. Electrical Parts List ................... 6-13 6-3-1. MAV-555A ................6-13 6-3-2. BKMA-513 ................6-14 6-3-3. BKMA-550 ................6-14 7. Block Diagrams and Frame Wiring Overall ........................7-3 ADA-61A/61B (BKMA-513) ................7-4 DM-127 ........................
-
Page 9: Manual Structure
Manual Structure Purpose of this manual This manual is the maintenance manual of the MAV-555A Multi Access Video Disk Recorder. This manual is intended for use by trained system and service engineers, and describes the information that premise the service based on components replacement... -
Page 10: Contents
Trademarks and registered trademarks used in this manual are follows. . Ethernet is a registered trademark of Xerox Corporation. . IBM is a registered trademark of International Business Machines Corporation. . Windows is a registered trademark of Microsoft Corporation. 6 (E) MAV-555A... -
Page 11: Error Message/Maintenance Functions
: ROM version : COMPILE (higher two digits) “02” : COPY : ROM version (lower two digits) “20” : Calendar year (higher two digits) “20” : Calendar year (lower two digits) “01” : Month: “12” : Day: “25” 1-1 (E) MAV-555A... -
Page 12: Error Indication
If an error is detected during boot-up, the error message “EM Board Not Respond” appears on the front panel. If this message appears, reboot the MAV-555A. If the same error message appears again, check the 8-bit LED on the following boards. -
Page 13: Acquiring The Logs
Enter key Space equivalent to a character 1-2-1. How to Aquire the Logs of the MAV-555A This section describes how to acquire the logs using the macro function of Tera Term. . Before starting to acquire the logs, set all ports to the stop mode. - Page 14 Connect the Ethernet terminal of the rear panel to a personal computer using an Ethernet cross cable. Preparation 1. Set the IP address and the sub-net mask of the MAV-555A to the factory settings. . The IP address and sub-net mask can be confirmed in set-up menu No. 220.
- Page 15 LogPuV_2001-12-24 : Log of PU-121 board and video (downloaded on December 24, 2001) Acquiring the same log twice or more on the same day rewrites the file because the file name is the same as the previous one. 6. Quit Tera Term. 1-5 (E) MAV-555A...
-
Page 16: How To Acquire The Logs Of The Bkma-550
FreeBSD’s directory layout, please refer to the hier(7) man page. If you are not familiar with man pages, type “man man”. You may also use ‘/stand/sysinstall’ to re-enter the installation and configuration utility. Edit /etc/motd to change this login announcement. Password: setup" 1-6 (E) MAV-555A... - Page 17 >> 4. Press the [ENTER] key. 5. Press the [*] key to select [Cancel] and press the [ENTER] key. Repeat selecting the [Cancel] and pressing the [ENTER] key three times to quit the menu. 1-7 (E) MAV-555A...
- Page 18 150 Opening ASCII mode data connection for ‘file list’. g2xlog-20021022-0.tgz 226 Transfer complete. ftp: 184 bytes received in 0.01Seconds 18.40Kbytes/sec. ftp> 6. Enter [bin] to select the binary mode. ftp> bin" 200 Type set to I. ftp> 1-8 (E) MAV-555A...
- Page 19 (Enter the log filename that is saved by the menu in the underlined characters.) ftp> get\g2xlog-20021022-0.tgz" 200 PORT command successful. 150 Opening BINARY mode data connection for ‘g2xlog-20021022-0.tgz’ (214593 bytes). 226 Transfer complete. ftp: 214593 bytes received in 1.58Seconds 135.65Kbytes/sec. ftp> 1-9 (E) MAV-555A...
-
Page 20: Backing Up And Restoring The Contents Of Memory (Fm-81 Board)
Connect the Ether terminal of the rear panel to a personal computer using an Ethernet cross cable. Preparation 1. Set the IP address of the MAV-555A to the factory setting. . The IP address and sub-net mask can be confirmed in set-up menu No. 220. - Page 21 220 PORT Command Successful 150 Opening data connection for. 226 Transfer complete. Please login with USER and PASS. 8388608 bytes sent in 17.08 seconds (491.14 Kbytes/sec) ftp> bye 221 Good Bye See You The password is not displayed. 1-11 (E) MAV-555A...
- Page 22 (Input the new backup file name in the underlined characters.) 8. Input [bye], press the [ENTER] key, and release the FTP connection. 9. Turn off the main power of the MAV-555A. To restart quickly, execute [027-FAST REBOOT] of the set-up menu.
-
Page 23: Upgrading The Software
If not, change the setting and restart the MAV-555A. 2. Set all ports to the unload. 3. Set the IP address and the sub-net mask of the MAV-555A to the factory settings. . The IP address and sub-net mask can be confirmed in set-up menu No. 220. - Page 24 3. Select [Information] _ [Target Version] from the top menu. 4. Click the Version button of each board and confirm the current version. 5. Press the Close button. 6. Click the check box of the board to be downloaded. 1-14 (E) MAV-555A...
- Page 25 8. Perform steps 6 and 7 for all boards to be upgraded. 9. Select [Download] _ [Start] from the top menu and click the OK button of the pop-up window. 10. Confirm that the download is completed and the MAV-555A is restarted automatically. 11. Perform steps 1 to 3.
-
Page 26: How To Upgrading The Bkma-550 Software Version
4. Enter [cd pkg] to move to the /pkg directory. 230 User setup logged in, access restrictions apply. ftp> cd\pkg" 250 CWD command successful. ftp> 5. Enter [bin] to select the binary mode. ftp> bin" 200 Type set to I. ftp> 1-16 (E) MAV-555A... - Page 27 3 Monitor : monitor IO status 4 Admin : administrator control 5 Install : software installation (version up) R Reboot : system reboot S Shutdown : system shutdown e Exit : exit setup [ OK ] Cancel 1-17 (E) MAV-555A...
- Page 28 8. Press the [*] key to select [Cancel] and press the [ENTER] key. 9. Select [R Reboot] from the menu and press the [ENTER] key. #Do you want really reboot (y or [n])? 10. Press the [Y] key to reboot the gateway PC. 1-18 (E) MAV-555A...
- Page 29 3 Monitor : monitor IO status 4 Admin : administrator control 5 Install : software installation (version up) R Reboot : system reboot S Shutdown : system shutdown e Exit : exit setup [ OK ] Cancel 1-19 (E) MAV-555A...
- Page 30 9. Press the [*] key to select [Cancel] and press the [ENTER] key. 10. Select [R Reboot] from the menu and press the [ENTER] key. #Do you want really reboot (y or [n])? 11. Press the [Y] key to reboot the gateway PC. 1-20 (E) MAV-555A...
- Page 31 Do you want to install from CDROM (y or [n])? y" Please insert CDROM, and hit return to continue >> Jan 17 11:47:41 gw176 /kernel: cd9660: Joliet Extensiton Available packages: /cdrom/g2x-1_10-02011700.tgz Please input pkg name (e: exit) >> 1-21 (E) MAV-555A...
- Page 32 3 Monitor : monitor IO status 4 Admin : administrator control 5 Install : software installation (version up) R Reboot : system reboot S Shutdown : system shutdown e Exit : exit setup [ OK ] Cancel 1-22 (E) MAV-555A...
- Page 33 G2x 1.10 vfs.gfs.build: 2011700 vfs.gfs.releasedesc: mk release version (/Jan/17/02(Thu)) vfs.gfs.pgifversion: 0.0.1. vfs.gfs.pgifhardrevision: PCI:0 TLK:0 CPU:3 SDRAM:3 DPATH_MSB:2 DPATH_LSB:2 vfs.gfs.mavSysInfo: MAV-555A HDDx7 vfs.gfs.mavConf0: NTSC, LTC internal, DF vfs.gfs.mavConf1: Audio, 4chan, 16bit vfs.gfs.g2xBoardName: BKMA-550/MAV-555A(HD7) vfs.gfs.g2xBoardType: 0 vfs.gfs.g2xConfMode: 3 vfs.gfs.g2xVaId: 8 vfs.gfs.msgLevel: 268435459 vfs.gfs.traceLevel: 1048576...
-
Page 34: Upgrading The Pld Version
PLD version, write the data and confirm that is correctly written. For details of the operation, refer to the Operation Manual of the PLD Download Tool. 2. Upon completion of downloading, turn off the main power of the MAV-555A once. 1-24 (E) -
Page 35: Service Overview
When the board is replaced, set S503 (battery switch) to ON position. Precautions when replacing board When replacing the board, contents of the RAMs are erased. Erasing the HDD error information may prevent the HDD from being read or written normally. 2-1 (E) MAV-555A... -
Page 37: Parts And Board Replacement
Cautions when an Error Appears in HDD . Treat the MAV-555A conform to the above cautions, even when an error appeared. . Keep the MAV-555A in the condition in which the error appeared, and write down the details of the error. -
Page 38: Removing The Cabinet
Remove the ornamental plate by moving it in the direction of the arrow. Ornamental plate RK4 x 10 Ornamental washers Ornamental RK4 x 10 plate Ornamental RK4 x 10 plate Ornamental washers Ornamental plate RK4 x 10 3-2 (E) MAV-555A... - Page 39 Adjusting the force to open and close the blank panel 1. Raise the blank panel. (Refer to the “Ornamental The blank panel of the MAV-555A is equipped with the plate”.) adjustment screws in its right end and left end that deter- 2.
-
Page 40: Removing The Top Plate And Rear Panel
2. Loosen the two screws (with drop-safe) and remove the top plate (B) in the direction of the arrow. Top plate (A) Screws (with drop-safe) B3 x 6 B3 x 6 B3 x 6 Ornamental panel B3 x 6 Screws (with drop-safe) Top plate (B) 3-4 (E) MAV-555A... - Page 41 3. Remove the 10 screws and remove the rear panel in the direction of the arrow in the way as if disengaging claws from the holes. Cable ([BLU]) Cable ([GRN]) Rear panel BNC connectors BVTT3 x 8 Claw Claw Hole BVTT3 x 8 BVTT3 x 8 3-5 (E) MAV-555A...
-
Page 42: Main Parts And Board Layout Diagram
3-3. Main Parts and Board Layout Diagram 3-3. Main Parts and Board Layout Diagram DPR-189B ADA-61B (BKMA-513) DM-127 ADA-61A (BKMA-513) PU-121 DPR-189A SWC-39 EM-3 HP-96 FM-81 MB-944 CN-2242 SWC-38 SDI-68 CN-1830 CN-2180 CN-2179 CN-2178 MB-947 IF-837 CN-2187 FP-128 3-6 (E) MAV-555A... -
Page 43: Replacing The Main Parts
FRONT/ REAR indication. Some power supplies do not have the FRONT/REAR indication. In such a case, align the direction of the power supply connector with the direction of the connector of the MAV-555A main unit. 3-7 (E) MAV-555A... -
Page 44: Filter
Fan (a) Raise the filter (A) up. Harness clamp Installation Install the new filter (A) by reversing the steps of removal. Harness Fan bracket Wire clamps Harnesses Wire clamp Harness Fan (a) Fan (b) Fan (c) Fan bracket 3-8 (E) MAV-555A... -
Page 45: Backup Battery
PWB main clamp. PWB main clamp Screw (with drop-safe) Screw (with drop-safe) 4. Remove the lithium battery (CR2450). FM-81 board : BT400 PU-121 board : BT501 Installation Install the new lithium battery by reversing the steps of removal. 3-9 (E) MAV-555A... -
Page 46: Hdd Unit
Lock lever HDD unit Released . Do not install the HDD unit with the WARRANTY label facing to the right when viewed from the front. . Be careful not to give mechanical shock to the HDD unit. 3-10 (E) MAV-555A... -
Page 47: Fl Display Tube (Indicator Tube)
9. Remove the four screws and remove the indicator module case (A) assembly. 3 x 8 Indicator module case (A) assembly Connector 3 x 8 Installation Install the new indicator module case (A) assembly by reversing the steps of removal. 3-11 (E) MAV-555A... -
Page 48: Replacing The Boards
Install the new CN-2180 board by reversing the steps of reversing the steps of the removal. removal. When the CN-2180 board is installed, confirm that the pins of the CN-2180 board are securely inserted to the holes of the SDI-68 board without bending. 3-12 (E) MAV-555A... -
Page 49: Cn-2178 Board
(A) Hole Rear panel Hole BVTP3 x 8 Screws securing Screws securing connectors connectors 4. Remove the two screws and remove the CN-2178 board from the bracket (A). Bracket (A) CN-2178 board PSW3 x 6 3-13 (E) MAV-555A... -
Page 50: Cn-2179 Board
(PSW3 x 6) that are removed in step 4. 2. Align the dowel of the bracket (B) with the hole on the 4 x 16 rear panel. Then install the new CN-2179 board by reversing the steps of the removal procedure. Rack angle (R) 3-14 (E) MAV-555A... - Page 51 B3 x 6 B3 x 6 Slider guide B3 x 6 B3 x 6 BVTT3 x 8 Slot assembly B3 x 6 B3 x 6 B3 x 6 Front frame lower B3 x 6 assembly Slider guide 3-15 (E) MAV-555A...
- Page 52 . The slots 3, 5, 7 and 9 are equipped with the dust cover. When removing the CN-1830 board from these slots, remove the dust cover first. Bracket Bracket MB-947 assembly Screwdriver Hole MB-947 assembly Hole Screwdriver 3-16 (E) MAV-555A...
-
Page 53: Board
BVTT3 x 8 board from the bracket. B2.6 x 6 Bracket Hole Dowel MB-947 assembly BVTT3 x 8 Hole MB-947 board Slot assembly Dowel PSW3 x 6 Installation Install the new MB-947 board by reversing the steps of removal. 3-17 (E) MAV-555A... -
Page 55: Electrical Adjustment
Font and style of letters Display example Reference for distinction Times font UTY> Automatically displayed message by a program Helvetica regular SDC-UTY Characters to be entered (Italic) " Symbols Enter key Space equivalent to a character 4-1 (E) MAV-555A... -
Page 56: Board Adjustment
4-2. EM-3 Board Adjustment 4-2. EM-3 Board Adjustment 4-2-1. Video Monitor Out Level Adjustment Turn on the main power of the MAV-555A and measuring equipment. Wait for at least 30 minutes before starting any adjustments. Adjustment Procedure 1. Connect the 75% color bar signal to the SDI IN-1 connector. -
Page 57: Board Adjustment
4-3. SDI-68 Board Adjustment Adjustment Procedure 1. Equipment : Frequency counter, oscilloscope Turn on the main power of the MAV-555A and measuring Test point : TP101 (D-3)/SDI-68 board equipment. Wait for at least 30 minutes before starting any Adj. point : 1RV101 (D-3)/SDI-68 board 27.00 ±... -
Page 58: Board Adjustment
4-4. FM-81 Board Adjustment Adjustment Procedure 1. Set up the measurement equipment as follows : Turn on the main power of the MAV-555A and measuring . Vectormonitor : equipment. Wait for at least 30 minutes before starting any SCH mode, INPUT : CH-B, EXT REF adjustments. - Page 59 0d (3). The vectormonitor waveform at the moment when the oscilloscope CH-1 waveform appears in field 1, is defined as the wave- form D. 14. Confirm that [c = d]. FM-81 board (A side) 4-5 (E) MAV-555A...
-
Page 60: Sch Det Adjustment (625/50 Mode)
ERENCE IN connector on the rear panel. . Set the setup menu “010-525/625” to “625/50”. Synchronization : GEN LOCK Refer to the MAV-555A Installation Manual for the 2. Adjust the PHASE knob of a vectormonitor to adjust operating procedures. the sync phase to 0d. - Page 61 13. Turn the SC PHASE knob of a signal generator SG2 slowly in the direction of 0d (3). The vectormonitor waveform at the moment when the oscilloscope CH-1 waveform appears in field 1, is defined as the wave- form D. 14. Confirm that [c = d]. 4-7 (E) MAV-555A...
-
Page 62: Board (Bkma-513) Adjustment
FS at frequency : 1 kHz. (When emphasis has been set, set Emphasis OFF.) Turn on the main power of the MAV-555A and measuring 2. Press the R1 button of the PORT SELECT block on equipment. Wait for at least 30 minutes before starting any the meter panel. - Page 63 High Pass Filter : 10 Hz Low Pass Filter : 80 kHz 7. Set the R1 port P1 (or P2 or P3) of the MAV-555A to the STOP mode. 8. Return the AUDIO LEVEL CONTROLs of the respective channels on the meter panel, to the original positions before adjustment.
-
Page 64: Analog Audio Input Adjustment
5. Equipment : Analog audio measuring equipment RV401 RV400 Test point : OUTPUT-1 (CH4)/BKMA-570 RV351 RV350 Adj. point : 1RV451 (A-3) /ADA-61 board TP350 +4.0 ± 0.1 dBm (600 Z load) RV301 Spec. : RV300 TP300 ADA-61 board (A side) 4-10 (E) MAV-555A... -
Page 65: Distortion Adjustment
Adj. point : 1RV302 (B-5) /ADA-61 board RV452 Spec. : Minimum (0.10% or less is acceptable) RV402 Setting after Adjustment RV352 RV302 Return all the switches and setup menu to the original setting before starting the adjustment. ADA-61 board (A side) 4-11 (E) MAV-555A... -
Page 66: Preparation Before Video Adjustment
Notes Check the following setup menus before starting adjustment. . Check the NTSC/PAL setup. (Refer to menu No. 010 of the MAV-555A Installation Manual.) . Check the network setup. (Refer to menu No. 220 of the MAV-555A Installation Manual.) Connection... - Page 67 11. Enter “ping 192.168.0.1” on the MS-DOS prompt line. (The underlined number is the IP address of the MAV-555A.) The IP address of the MAV-555A is the value set for No. 220 of the setup menu. Microsoft(R) Windows 95 (C)Copyright Microsoft Corp 1981-1995.
- Page 68 15. Enter the IP address of the MAV-555A and click “OK”. The IP address of the MAV-555A is the value set for No. 220 of the setup menu. 16. Select “R1/P1 port” or “R2/P2 port” or “P3 port” of the ADjuster2 in accordance with the port to be adjusted.
-
Page 69: D/A Video Level Adjustment
4-5. ADA-61 Board (BKMA-513) Adjustment 4-5-5. D/A Video Level Adjustment Turn on the main power of the MAV-555A and measuring equipment. Wait for at least 30 minutes before starting any adjustments. 1. Select “D/A : Video Level” of the ADjuster2. -
Page 70: Setting Upon Completion Of Adjustment
8. Save the set value by clicking “Write to EEPROM” of the ADjuster2. 4-5-6. Setting upon Completion of Adjustment 1. Set the R1 port and P1 (or P2, P3) port of the MAV-555A to the STOP mode. 2. Select “File” _ “Disconnect” on the top menu of the ADjuster2. -
Page 71: A/D Pedestal Video Level Adjustment
4-5. ADA-61 Board (BKMA-513) Adjustment 4-5-7. A/D Pedestal Video Level Adjustment Turn on the main power of the MAV-555A and measuring equipment. Wait for at least 30 minutes before starting any adjustments. 1. Set the setup menu “42-PORT CONFIG” to “2in2out”. -
Page 72: A/D Agc Video Level Adjustment
4-5-8. A/D AGC Video Level Adjustment Preparations . Turn on the main power of the MAV-555A and measuring equipment. Wait for at least 30 minutes before starting any adjustments. . Measure the output level of signal generator and check that the signal level stays within the specifica- tions. -
Page 73: A/D Manual Video Level Adjustment
4-5-9. A/D Manual Video Level Adjustment Preparations . Turn on the main power of the MAV-555A and measuring equipment. Wait for at least 30 minutes before starting any adjustments. . Measure the output level of signal generator and check that the signal level stays within the specifica- tions. -
Page 75: Circuit Description
Section 5 Circuit Description 5-1. MAV-555A In this case, the information on which area of HDD the data should be written, is obtained from the file system that 1. Reference Block is memorized in the FM-81 board (FM block), when the... - Page 76 5-1. MAV-555A 3. Audio Block 4. Raid Block An audio signal is input from the SDI (COMPONENT) IN The raid block consists of a PU-121 board, IF-837 board, terminal or AES/EBU terminal of either R1 port or R2 port and HDDs (7). A data bus is connected from the DM-127 or R3 port (selectable).
- Page 77 5-1. MAV-555A 5. Control Block 6. Meter Panel (Top Panel on the Front Panel) The MAV-555A uses MPC860 as CPU. One MPC860 is The fluorescent (FL) display tube, buttons, switches, and each mounted for the EM-3, PU-121, and DM-127 boards.
-
Page 78: Bkma-550
PLDs are connected to the SDRAM via FIFO that is built in the PLDs. Flow control of the video and audio data is performed by the CPU that is built in the PLD. Program for the flow control is also stored inside the PLD. 5-4 (E) MAV-555A... -
Page 79: Spare Parts
Therefore, specified parts should be used in the case of replacement. 2. Standardization of Parts Some repair parts supplied by Sony differ from those used for the unit. These are because of parts common- ality and improvement. Parts list has the present standardized repair parts. -
Page 80: Exploded Views
B4 x 8 B4 x 8 B4 x 8 B3 x 6 B3 x 6 B3 x 6 B4 x 8 B3 x 6 B3 x 6 B3 x 6 B4 x 8 B4 x 8 B3 x 6 MAV-555A... - Page 81 7-682-547-04 s SCREW +B3X6 7-682-547-09 s SCREW +B3X6 7-682-561-04 s SCREW +B4X8 7-682-947-01 s SCREW +PSW 3X6 Be sure to exchange the entire FOOT BRACKET ASSY. Do not exchange the screw (that connects the rubber foot with bracket) with other screw. MAV-555A...
- Page 82 Printed Circuit Board SPRING PIN 3 x 8 SPRING PIN 3 x 8 B3 x 6 B3 x 6 PSW3 x 6 MAV-555A...
- Page 83 3-622-176-03 o GUIDE 2 3-622-177-03 o GUIDE 1 3-624-325-01 o ESCUCHEON,PW SWITCH 3-636-753-01 o COVER,DUST 3-636-754-01 o EGR-0105,SHIELD 3-636-754-11 o EGR-0105,SHIELD 3-636-760-01 o SHEET,BLANK 3-636-763-01 o EGR-0406,SHIELD Screws/Washers 7-626-320-11 s SPRING PIN,3X8 7-682-547-09 s SCREW +B3X6 7-682-947-01 s SCREW +PSW 3X6 MAV-555A...
- Page 84 3-180-822-22 s KEY TOP 6X6, USE 3-611-769-01 s SPRING,COMPRESSION 3-622-181-03 o ESCUTCHEON(C) 3-622-183-01 o PLATE,INDICATION FRONT PANEL 3-622-184-03 o ESCUTCHEON(A) 3-622-186-04 o ESCUTCHEON(B) 3-622-190-01 o COVER(A),LAMP 3-622-199-02 o ESCUTCHEON(D) 3-696-774-02 o TOP KEY 6X6 3-696-774-22 o TOP KEY 6X6 Screws/Washers 7-682-547-09 s SCREW +B3X6 MAV-555A...
- Page 85 3-622-201-04 o KNOB 3-622-203-08 o FRAME 3-622-670-02 s FILTER(A) 3-623-284-01 o HOLDER,LED 3-636-747-01 o BAR, ORNAMENTAL 3-636-748-01 o PLATE, ORNAMENTAL 3-703-225-01 s WASHER (4 DIA.),ORNAMENTAL Screws/Washers 7-682-362-04 s SCREW +RK 4X10 7-682-547-09 s SCREW +B3X6 7-682-948-01 s SCREW +PSW 3X8 MAV-555A...
- Page 86 3-622-675-01 o PLATE(B),GROUND 3-622-835-01 o GUIDE,SLIDER 3-622-836-01 o NUT, PLATE 3-636-755-01 o EGR-0606,SHIELD 4-605-804-11 o CUSHION Screws/Washers 7-621-772-10 s SCREW +B2X4 7-682-545-09 s SCREW +B3X4 7-682-547-09 s SCREW +B3X6 7-682-646-01 s SCREW +PS 3X5 7-682-947-01 s SCREW +PSW 3X6 MAV-555A...
- Page 87 3-636-749-01 o PANEL,BLANK 3-636-754-11 o EGR-0105,SHIELD 3-673-910-31 s SCREW, CONNECTOR 3-703-150-11 o CLAMP Screws/Washers 7-621-773-95 s SCREW +B2.6X6 7-682-547-09 s SCREW +B3X6 7-682-569-04 s SCREW +B4X35 7-682-947-01 s SCREW +PSW 3X6 7-685-646-19 s SCREW +BVTP 3X8 7-685-872-09 s SCREW +BVTT 3X8(S) MAV-555A...
- Page 88 3 x 8 BVTT3 x 8 BVTT3 x 8 BVTT 3 x 8 PSW3 x 6 BVTT 3 x 8 BVTT3 x 8 BVTT BVTT3 x 8 3 x 8 SPRING PIN 3 x 8 SPRING PIN 3 x 8 6-10 MAV-555A...
- Page 89 3-974-010-01 s SCREW (M3), STEP Screws/Washers 7-621-773-95 s SCREW +B2.6X6 7-626-320-11 s PIN, SPRING 3X8 7-682-549-09 s SCREW +B 3X10 7-682-660-09 s SCREW +PS 4X6 7-682-947-01 s SCREW +PSW 3X6 7-685-872-09 s SCREW +BVTT 3X8 (S) 7-688-004-01 s WASHER W4 SMALL 6-11 MAV-555A...
- Page 90 3-166-184-01 o LEVER, PC BOARD Screws/Washers 7-626-320-11 s PIN, SPRING 3X8 7-682-947-01 s SCREW +PSW 3X6 The repair part of the ADA-61A board and that of the ADA-61B board are the common board under the common part number A-8328-526-A. 6-12 MAV-555A...
-
Page 91: Electrical Parts List
6-3. Electrical Parts List ---------------------- MOUNTED CIRCUIT BOARDS ---------------------- 6-3-1. MAV-555A Part No. SP Description ----- FRAME A-8321-865-A o MOUNTED CIRCUIT BOARD,CN-1830 ----- A-8328-757-A s SWC-38 ASSY Ref. No. A-8321-871-A o MOUNTED CIRCUIT BOARD,SWC-39 or Q’ty Part No. SP Description... -
Page 92: Bkma-513
A-8344-087-A s MOUNTED CIRCUIT BOARD, PG-40A ------------------------------------------ PACKING MATERIALS AND SUPPLIED ACCESSORIES ------------------------------------------ Ref. No. or Q’ty Part No. SP Description 2pcs 1-774-157-11 s CONVERTER, COAXIAL CONNECTOR 3-206-553-01 s MANUAL, OPERATION 3-206-554-02 s MANUAL, INSTALLATION 3pcs 7-682-547-09 s SCREW +B3X6 6-14 MAV-555A... - Page 93 Digital video & audio processor (input/output) EM-3 Effect & monitor control 7-12 FP-128 Front panel 7-13 FM-81 File management & Timing control 7-14 IF-837 HDD interface 7-16 IF-860/PG-40A (BKMA-550) Ethernet interface 7-17 PU-121 RAID control 7-19 Frame Wiring 7-20 MAV-555A...
- Page 94 MAV-555A...
-
Page 95: Overall
AUDIO SDI OUT P1 MANAGER TIMING CONTROL PROCESSOR CONTROL PANEL FP-128 (1/2) HDD_1 IF-837 PU-121 HDD_2 CARD HDD_3 STRIPING SCSI HDD_4 CONTROL CONTROL 10 BASE-T (FRONT) HDD_5 HDD_6 FILE MANAGER RAID I/F HDD IF FRONT PANEL PROCESSOR Overall HDD_7 MAV-555A... -
Page 96: Ada-61A/61B (Bkma-513) (1/2
CN1301 D0-9,HV,VD,CF,PR BUFF- DA CLK,RF,CF,HD,VD A8,9,21,22,E23 DPR-189 PEDESTAL IC522 CLUMP PULSE GEN IC516 X500,501 8FSC IC519 IC514 CN1300 IC509,511,513 CN-2178 COMPOSITE B OUT1 DRIVER CHAR1 SIG SIF TRE CHARACTER SIF CS,CMD,CK,HSYNC,CSYNC,RESET,EVEN,13.5MCLK GENERATOR CHAR1 FRAME AD/DA converter ADA-61A/61B (BKMA-513) (1/2) MAV-555A... - Page 97 CH3 Y OUT2 AD AUD 3/4 Q1050 IC1061 IC1058 IC1055 IC1053 IC1052 RY1050 CN1300 OUTPUT LEVEL HR SEL BAL←UNBAL UNBAL←BAL CONTROL AMP EMPHASIS CONVERTER CN-2179 CH4 X OUT2 MUTE CH4 Y OUT2 AUDIO MUTE AD/DA converter ADA-61A/61B (BKMA-513) (2/2) MAV-555A...
- Page 98 SBXOUT V16-31 20A-5A PU-121,FM-81 A-D-A24-31 SBX OUT V16-31 OE CTL from FPGA *IC5,7 DMR2 D0-7 BUFF- DMR3 D0-7 * : This device hasn’t been used with MAV-555A. (MAV-777 or, it is used at the time of MAV-555SS.) Data control DM-127 (1/2) MAV-555A...
- Page 99 BANK C B-CTL x 31 B-CTL x 31 B-CPU-CTL x 4 B-CPU-CTL x 4 B-D-D0-7 B-D-A24-31 * : This device hasn’t been used with MAV-555A. (MAV-777 or, it is used at the time of MAV-555SS.) Data control DM-127 (2/2) MAV-555A...
-
Page 100: Dpr-189A/189B
DPR-189A/189B (1/4) DPR-189A/189B (1/4) MAV-555A (SY) : S/N 10001 and Higher IC21 IC12 (1/4) IC533, 534 CN103 INPUT TIMING GEN AND DATA PACK 1P_AUDIO OUT_DATA 1P_EME OUT_DATA EDOXD9 - 0, BUFFER EM-3 FROM AUDIO EDOXVD/HD/CFI IC539, 540 DECODER CN103 IC20 (1/2) - Page 101 DPR-189A/189B (2/4) DPR-189A/189B (2/4) MAV-555A (SY) : S/N 10001 and Higher IC251 IC17 (2/4) IC544, 545 CN103 CXD9140GF (SUM) INPUT TIMING GEN AND DATA PACK 2P_AUDIO OUT_DATA 2P_EME OUT_DATA EDOYD9 - 0, BUFFER EM-3 FROM AUDIO EDOYVD/HD/CFI IC550, 511 DECODER...
- Page 102 DPR-189A/189B (3/4) DPR-189A/189B (3/4) MAV-555A (SY) : S/N 10001 and Higher IC12, 17 (3/4) IC606 IC10, 11 CN100 AUDIO INPUT SELECT AND PACK 1P_SDIAUD_IN IC625, 670 CXD9140GF (SUM) SDI-68 BUFFER SDIXD7 - 0 IC629 PKFIFO1_DT 245K 1P_AUD OUT_DATA BUFFER FIFO...
- Page 103 DPR-189A/189B (4/4) DPR-189A/189B (4/4) MAV-555A (SY) : S/N 10001 and Higher IC910, 911 IC908 CN102 ADA-61 STD-A15 - 0 BUFFER BUFFER ED_ADRS DM-127 IC912, 915 IC913, 916 CN101, 102 ADA-61 OPT-A15 - 0 BUFFER BUFFER AUD_ADRS DM-127 IC900 IC902 CN102...
- Page 104 EM-3 EM-3 MAV-555A (SY) : S/N 10001 and Higher IC201,202 IC301 IC401 CN105 VIENC DPR—189—A 16E—25E AEO D0—9 BUFFER D301 CN105 DPR—189—A 22D—25D AEOVD HD CEPR IC203,204 YCDATA Q401,402 FL401 IC405 IC408 IC409 CN105 DPR—189—A 16B—25B ADO D0—9 BUFFER VIDEC...
- Page 105 FP-128 FP-128 MAV-555A (SY) : S/N 10001 and Higher IC204 CN204 IC105 CH14_LED SWC-38, 600-19 S102 IC107 BUFFER CN202 CH58_LED SWC-38, 600-41 RESET D0-7 D0-7 FM-81 ALL-RESET P. FLASH SETUP BANK A0-19 A0-18 S103 CHAR IC204 IC106 CN204 S104 D0-7...
- Page 106 FM-81 (1/2) FM-81 (1/2) MAV-555A (SY) : S/N 10001 and Higher IC300 IC421 IC756 SDET ALLRESET EM-3, etc. CN-2178 SBXINSYNC BUFFER BUFFER 525/625 EM-3, etc. IC425–428 IC422–424,429 PU-121, DM-127 20E–5E SBXIN V0–31 SBXOUT V0–31 20B–5A PU-121, DM-127 BUFFER BUFFER CN-2178 FAN1 TS0–IN...
- Page 107 FM-81 (2/2) FM-81 (2/2) MAV-555A (SY) : S/N 10001 and Higher IC829 IC789–801 IC909 L900,902 IC914 CLK27-DM DM-127 IC902,906,913,920 SYNC SYNCD2-9 8 BIT D/A HIGH SPEED CLK27-EM EM-3 SYNC L.P.F. CN-2178 REFVIDEO BURST CLK27-DPRA CONVERTER VOLTAGE COMP. X901 IC923 IC926,927...
- Page 108 IF-837 IF-837 MAV-555A (SY) : S/N 10001 and Higher IF_BLOCK_1 IC3104,IC3105 CN102 CN102 IF_BLOCK_0 17A-24A AUDIO PU-121 W DW D-ADX DOWN DATA XDB-SC2 HDD2 17B-24B BUFFER 19-25 CN103 CPU ADDRESS CN102 IC3106,IC3107 CPU DATA XDB-SC1 4-16 HDD1 CN102 AUDIO 17D-24D...
-
Page 109: If-860/Pg-40A (Bkma-550)
SBX IN 1-5 F101 D401-405, BUFFER DATA PATH SDRAM SBX OUT 1-5 D407,409,411 D401-408 ND401 IC1201-1208, 3.3V 1401-1408, F102 1601-1608 IC1901,1902 F201 DUAL PORT NO MOUNT 3.3V F202 MAV-555A SIDE GATEWAY PC SIDE Ethernet interface IF-860, PG-40A (BKMA-550) 7-17 7-17 MAV-555A... - Page 111 PU-121 PU-121 MAV-555A (SY) : S/N 10001 and Higher IC1301 IC1303 X_PS1-CONFIG CK27DW IC412 CN102 IC201 IC301,302 CN105 FM-81 SBXDW-AD0-8 SPWDWD-AD0-15 CN102 IF-837 DM-127 WDWD-AD0-15 SBXOUTA0-7 BUFFER LATCH MB-944 TEMP-DM CK27DW-A IC414 CN102 IC601 IC204,205 IC305,306 CN104 FM-81 CN1101 SBXDW-VD0-15...
-
Page 112: Frame Wiring
CN201 CN101 CN1033 CN102 CN1073 DM-127 DPR-189A CN1103 CN103 PU-121 CN1034 CN101 CN1074 CN1104 CN102 CN1035 CN100 CN1075 CN-1830 CN1105 CN101 HDD_7 CN101 CN201 CN311 MB-944 CN001 AC SWITCH AC INLET HN004 HN003 HARNESS HARNESS (FG) (ACSW) 7-20 7-20 MAV-555A... - Page 113 TIME CODE IN REFERENCE AUDIO_IN2-4_X SYSTEM AUDIO_IN2-3_X AUDIO_IN2-2_X AUDIO_IN2-1_X TIME CODE OUT AUDIO_IN1-4_X AUDIO_IN1-3_X AUDIO_IN1-2_X AUDIO_IN1-1_X 10 BASE-T CONT3 CONT4 CN91 MB-944 SWITCHING REGULATOR REMOTE REMOTE SPARE VIDEO FAN 1 FAN 2 FAN 3 Frame Wiring CONTROL 7-21 7-21 MAV-555A...
- Page 115 : The material contained in this manual consists of information that is the property of Sony Corporation. Check the metal trim, “metallized” knobs, screws, Sony Corporation expressly prohibits the duplication of...
- Page 116 Printed in Japan Sony Corporation MAV-555A (SY) J, E 2003. 4 16 B&P Company 9-955-314-02 ©2002...