Advertisement
Quick Links
Advertisement

Related Manuals for Bosch NDA-FMT-DOME


Summary of Contents for Bosch NDA-FMT-DOME
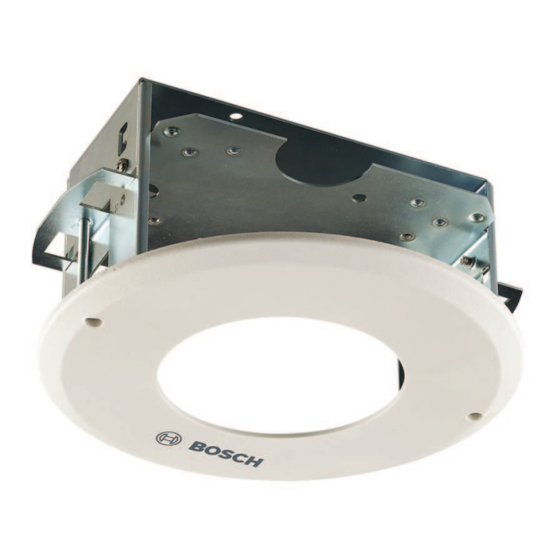
- Page 1 In-ceiling mount NDA-FMT-DOME Installation manual...
-
Page 3: Table Of Contents
Table of Contents | en Table of contents Safety Safety message explanation Installation Overview Installing a Recessed Mount Overview Installing the Recessed Mount Installing the Camera to the Recess Mount Technical data Bosch Security Systems 2014.08 | v1.0 | AM18-Q0679... -
Page 4: Safety Message Explanation
Caution! Installation should only be performed by qualified service personnel in accordance with the National Electrical Code (NEC 800 CEC Section 60) or applicable local codes. 2014.08 | v1.0 | AM18-Q0679 Bosch Security Systems... -
Page 5: Installation Overview
Verify that all parts are included. If any items are missing, notify your Bosch Security Systems Sales or Customer Service Representative. The original packaging is the safest container in which to transport the unit and can be used if returning the unit for service. -
Page 6: Installing A Recessed Mount
To mount to a recess mount, do the following: Determine a secure location for the recessed mount. 194 (7.64) Figure 3.1: Recess Mount Dimensions Drill or cut a 7 in. hole with a tolerance of ±1/8 in. (177.8 ±2.2 mm). 2014.08 | v1.0 | AM18-Q0679 Bosch Security Systems... - Page 7 41.7 mm (1.64 in.) maximum ceiling thickness and 9.7 mm (0.38 in.) minimum ceiling thickness). Bosch Security Systems 2014.08 | v1.0 | AM18-Q0679...
- Page 8 | Installing a Recessed Mount In-ceiling mount Figure 3.3: Attach Recess Mount to Ceiling Figure 3.4: Clamp Recess Mount Tighten both clamps to the ceiling using supplied screws and a #2 Phillips screwdriver. 2014.08 | v1.0 | AM18-Q0679 Bosch Security Systems...
- Page 9 Over tightening the ceiling clamps can damage the clamp or ceiling. Only tighten the clamp until it contacts the ceiling and you start to feel some resistance. If using a power screwdriver, set the torque level to the lowest setting. Bosch Security Systems 2014.08 | v1.0 | AM18-Q0679...
-
Page 10: Installing The Camera To The Recess Mount
Align the mounting screws of the trim ring with the mounting holes in the recess mount. Use the supplied T-10 Torx wrench to secure the trim ring’s safety locking screws to the mounting bracket. 2014.08 | v1.0 | AM18-Q0679 Bosch Security Systems... -
Page 11: Technical Data
In-ceiling mount Technical data | en Technical data 119.42 37.38 99.22 17.19 Bosch Security Systems 2014.08 | v1.0 | AM18-Q0679... - Page 14 Bosch Security Systems B.V. Torenallee 49 5617 BA Eindhoven The Netherlands www.boschsecurity.com © Bosch Security Systems B.V., 2014...