Siemens SINAMICS G120 Operating Instructions Manual
Hide thumbs
Also See for SINAMICS G120:
- List manual (1256 pages) ,
- Manual (732 pages) ,
- Operating instructions manual (550 pages)
Table of Contents
Advertisement
Quick Links
Advertisement
Table of Contents

Related Manuals for Siemens SINAMICS G120


Summary of Contents for Siemens SINAMICS G120
- Page 3 Preface Fundamental safety instructions SINAMICS Product overview Installing SINAMICS G120 Smart Access Accessing the Web pages Standard Web pages Operating Instructions Upgrading Further information 12/2020 A5E43332487-004...
- Page 4 Note the following: WARNING Siemens products may only be used for the applications described in the catalog and in the relevant technical documentation. If products and components from other manufacturers are used, these must be recommended or approved by Siemens. Proper transport, storage, installation, assembly, commissioning, operation and maintenance are required to ensure that the products operate safely and without any problems.
-
Page 5: Preface
Siemens does not accept any warranty for the properties of third-party products. Compliance with the General Data Protection Regulation Siemens respects the principles of data protection, in particular the data minimization rules (privacy by design). For this product, this means: The product does not process neither store any person-related data, only technical function data (e.g. - Page 6 Preface SINAMICS G120 Smart Access Operating Instructions, 12/2020, A5E43332487-004...
-
Page 7: Table Of Contents
5.2.5 Viewing additional information ..................30 5.2.6 Configuring communication protocol ................. 31 5.2.7 Restarting the SINAMICS G120 Smart Access ..............32 5.2.8 Selecting quick setup mode (G120X/G120XA converters only) ..........33 Converter identification ..................... 34 Quick setup ........................35 5.4.1 Classic quick setup (not for G120 CU250S-2/G115D) ............ - Page 8 Support ..........................99 Upgrading ............................101 Further information ........................... 105 Reference materials ......................105 Product support ....................... 106 Technical specifications ....................107 Directives and standards ....................108 SAM interface kit ......................111 SINAMICS G120 Smart Access Operating Instructions, 12/2020, A5E43332487-004...
-
Page 9: Fundamental Safety Instructions
As the user you yourself are responsible for ensuring that the products described are operated correctly. Application examples do not relieve you of your responsibility for safe handling when using, installing, operating and maintaining the equipment. SINAMICS G120 Smart Access Operating Instructions, 12/2020, A5E43332487-004... -
Page 10: Security Information
Siemens’ products and solutions undergo continuous development to make them more secure. Siemens strongly recommends that product updates are applied as soon as they are available and that the latest product versions are used. Use of product versions that are no longer supported, and failure to apply the latest updates may increase customer’s exposure to... -
Page 11: Product Overview
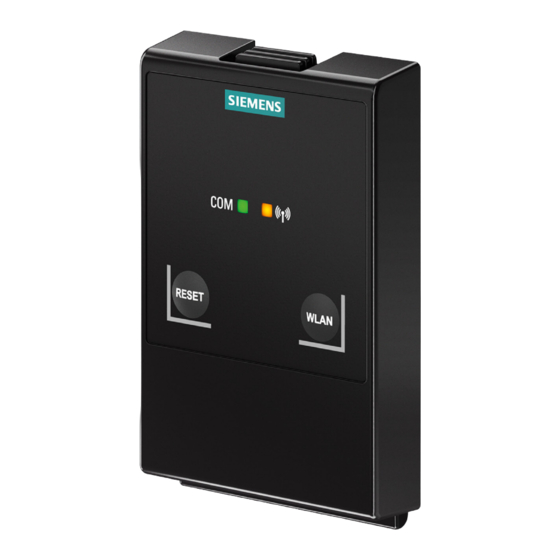
Product overview Introduction The SINAMICS G120 Smart Access is a Wi-Fi based Web server module and an engineering tool. It has been designed for quick setup, parameterization, and diagnostics of the supported SINAMICS G120 converter or SINAMICS G115D converter. The SINAMICS G120 Smart Access can be mounted to the supported converter, thus realizing Web-based access to the converter from a connected device (a conventional PC with a wireless network adapter installed, a tablet, a laptop, or a smart phone). - Page 12 Supported minimum resolution The SINAMICS G120 Smart Access displays the pages in a format and size compatible with the device you use to access the Web pages. It supports a minimum resolution of 360 x 640 pixels (on PCs)/dip (on smart phones/tablets).
-
Page 13: Layout And Functions
Function Reset • Holding down the button for more than three seconds when the SINAMICS G120 Smart Access is in pow- er-on state resets the Wi-Fi configuration of the SINAMICS G120 Smart Access to factory defaults. • Holding down the button when the SINAMICS G120 Smart Access is in power-off state and powering on the module enters basic upgrading mode. -
Page 14: Scope Of Delivery
Product overview 2.3 Scope of delivery Scope of delivery The delivery includes at least the following components: • A SINAMICS G120 Smart Access with loaded firmware (article number: 6SL3255-0AA00- 5AA0) • Product Information in Chinese and English Rating plate example ①... - Page 15 Product overview 2.3 Scope of delivery Serial number explanation (example) SINAMICS G120 Smart Access Operating Instructions, 12/2020, A5E43332487-004...
-
Page 16: Device Disposal
For environmentally-friendly recycling and disposal of your old device, please contact a company certified for the disposal of waste electrical and electronic equipment, and dispose of the old device as prescribed in the respective country of use. SINAMICS G120 Smart Access Operating Instructions, 12/2020, A5E43332487-004... -
Page 17: Installing
The SINAMICS G120 Smart Access has no internal power supply and derives its power directly from the converter through the RS232 interface. Any configuration data stored on the SINAMICS G120 Smart Access is saved to its memory which does not require power to retain the data. - Page 18 Fitting the SINAMICS G120 Smart Access to the G120 converter Fitting the SINAMICS G120 Smart Access to the G115D converter To fit the SINAMICS G120 Smart Access to the G115D converter, you must use an optional interface kit. For more information, see Section "SAM interface kit (Page 111)".
-
Page 19: Accessing The Web Pages
Accessing the Web pages You can access the SINAMICS G120 Web pages from a PC or a mobile device that connects to the SINAMICS G120 Smart Access. Establishing the wireless network connection NOTICE Equipment malfunctions as a result of unauthorized access to the converter Hacker attack can result in unauthorized access to the converter through the SINAMICS G120 Smart Access. - Page 20 Web browser to open the SINAMICS G120 Web page. Note When you use https:// to access the SINAMICS G120 Web page, if you see an error message prompting that your connection is not private because the security certificate is not trusted by your device's operating system, ignore it and proceed with the Web page access.
- Page 21 After your confirmation of the new password entry, the module restarts automatically. 7. Select the wireless network SSID of the SINAMICS G120 Smart Access and then enter the new Wi-Fi password to launch the connection.
- Page 22 4.1 Establishing the wireless network connection Installing SSL certificates (only for access with https://) To access the SINAMICS G120 Web pages with https:// from a Windows 10-based PC or iOS- based mobile devices, you need to install SSL certificates. Installing on Windows 10-based PCs 1.
- Page 23 4. Select "Settings > General > About > Certificate Trust Settings" to enable full trust for the root certificate "G120 Smart Access 2018". Now you are able to access the SINAMICS G120 Web pages via the SINAMICS G120 Smart Access.
-
Page 24: Accessing The Web
• The standard Web pages use JavaScript. If your Web browser settings have disabled JavaScript, enable them first. • When accessing the SINAMICS G120 Web pages from a mobile device, do not use the landscape mode. SINAMICS G120 Smart Access... -
Page 25: Standard Web
⑦ Parameter settings (Page 71) ⑭ Support information (Page 99) The menu is unavailable and the icon appears dimmed if you have connected a SINAMICS G120 CU250S-2 to the G120 Smart Access. SINAMICS G120 Smart Access Operating Instructions, 12/2020, A5E43332487-004... -
Page 26: Viewing Connection Status
Converter is ready for switching on • Converter switching-on is inhibited • Converter is initializing • Converter is waiting for booting/partial booting Disconnected Communication between the PC/mobile device and the converter is not estab- lished. SINAMICS G120 Smart Access Operating Instructions, 12/2020, A5E43332487-004... -
Page 27: Optional Settings Page
• Viewing additional information (Page 30) • Configuring communication protocol (Page 31) • Restarting the SINAMICS G120 Smart Access (Page 32) • Selecting quick setup mode (G120X/G120XA converters only) (Page 33) This setting is displayed only when G120X/G120XA converter is connected. -
Page 28: Configuring Wi-Fi
If you do not want to use the factory default Wi-Fi settings, you can change Wi-Fi configuration in the following dialog box: The new Wi-Fi configuration takes effect only after the SINAMICS G120 Smart Access is restarted. Wi-Fi SSID (Service Set Identifier) Default SSID: G120 smart access_xxxxxx ("xxxxxx"... - Page 29 You can select a desired strength with the slider. Resetting Wi-Fi configuration When the SINAMICS G120 Smart Access is in power-on state, holding down the reset button for more than three seconds resets the Wi-Fi configuration of the SINAMICS G120 Smart Access to factory defaults.
-
Page 30: Changing The Display Language
5.2 Optional settings page 5.2.2 Changing the display language The SINAMICS G120 Web pages support the following user interface languages: English (default), Chinese, German, Italian, Spanish, French, and Turkish. Proceed as follows to select the desired language: SINAMICS G120 Smart Access... -
Page 31: Synchronizing The Time
PC/mobile device to record the occurrence time of converter faults/alarms. After you enable synchronization, the converter receives the time of the day from the connected PC/mobile device. Note Only SINAMICS G120 CU230P-2, SINAMICS G120X and SINAMICS G120XA support this function. SINAMICS G120 Smart Access Operating Instructions, 12/2020, A5E43332487-004... -
Page 32: Upgrading The Firmware Version
Upgrading the firmware version includes conventional upgrading and basic upgrading. For detailed information, see Section "Upgrading (Page 101)". 5.2.5 Viewing additional information The following window provides additional information about the SINAMICS G120 Smart Access: SINAMICS G120 Smart Access Operating Instructions, 12/2020, A5E43332487-004... -
Page 33: Configuring Communication Protocol
Note Installing SSL certificates To access the SINAMICS G120 Web pages with https:// from a Windows 10-based PC or iOS- based mobile devices, you must install SSL certificates. For more information about how to install SSL certificates, see Section "Establishing the wireless network connection (Page 17)". -
Page 34: Restarting The Sinamics G120 Smart Access
5.2 Optional settings page 5.2.7 Restarting the SINAMICS G120 Smart Access You can use this function to restart the SINAMICS G120 Smart Access. After the SINAMICS G120 Smart Access is restarted, reconnect your PC/mobile device to the module and refresh the Web application. -
Page 35: Selecting Quick Setup Mode (G120X/G120Xa Converters Only)
5.2.8 Selecting quick setup mode (G120X/G120XA converters only) This option is visible only when your SINAMICS G120 Smart Access is connected to G120X/G120XA converter. Two quick setup modes are available for choice: • Quick setup for G120X/G120XA (Page 42): used only for the G120X/G120XA converter •... -
Page 36: Converter Identification
Control Unit article number and the Control Unit serial number, but the Control Unit OA version instead. Note For G120C converters, the converter identification Web page will not display information about Power Module. SINAMICS G120 Smart Access Operating Instructions, 12/2020, A5E43332487-004... -
Page 37: Quick Setup
For more information, see Section "Overview of the Web pages (Page 23)". Note The quick setup function is not supported on SINAMICS G120 converter with CU250S-2 Control Unit due to the internal encoder in the Control Unit. 5.4.1... - Page 38 Completed step Current step To-be-completed step • Go back to a completed step. Once you open a completed step, all the changes done in subsequent steps become invalid and require new settings. SINAMICS G120 Smart Access Operating Instructions, 12/2020, A5E43332487-004...
- Page 39 3. Select an application class according to the particular converter connected. If required, click relevant application class to expand the detailed description. If "Expert" is selected, you can select your control mode of the converter. SINAMICS G120 Smart Access Operating Instructions, 12/2020, A5E43332487-004...
- Page 40 5.4 Quick setup 4. Set the required motor data. For Siemens motors, enter only the motor data as shown in ④ and the SINAMICS G120 Smart Access will automatically identify the rest of the motor data. 5. Select the factory interface settings for the converter based on your particular application.
- Page 41 – OFF3 ramp-down time sets the ramp-down time from the maximum speed down to zero speed for the OFF3 command. SINAMICS G120 Smart Access Operating Instructions, 12/2020, A5E43332487-004...
- Page 42 Standard Web pages 5.4 Quick setup 7. Select the desired technological application. Depending on the selected application class, the available technological applications may vary. SINAMICS G120 Smart Access Operating Instructions, 12/2020, A5E43332487-004...
- Page 43 If you choose to identify the motor data, go to the JOG page after you have finished classic quick setup. For information about motor identification, see Section "JOG (Page 78)". 9. Complete quick setup. You can select to go to the JOG page immediately or later. SINAMICS G120 Smart Access Operating Instructions, 12/2020, A5E43332487-004...
-
Page 44: Setup (G120X/G120Xa Converters Only)
Quick setup The quick setup Web page allows you to set the following data for the connected G120X/G120XA converter: • Application • Motor data • I/O configuration • Important parameters • Motor identification SINAMICS G120 Smart Access Operating Instructions, 12/2020, A5E43332487-004... - Page 45 Completed step Current step To-be-completed step • Go back to a completed step. Once you open a completed step, all the changes done in subsequent steps become invalid and require new settings. SINAMICS G120 Smart Access Operating Instructions, 12/2020, A5E43332487-004...
- Page 46 After you confirm that the factory resetting is successfully complete, the Web page advances to the application selection subpage automatically. – If you select to modify the existing configuration, the Web page directly advances to the motor data subpage. SINAMICS G120 Smart Access Operating Instructions, 12/2020, A5E43332487-004...
- Page 47 I/O configuration Web page. 5. Set the required motor data. For Siemens motors, enter only the motor data as shown in ⑥ and the SINAMICS G120 Smart Access will automatically identify the rest of the motor data.
- Page 48 Standard Web pages 5.4 Quick setup 6. Select the factory interface settings for the converter based on your particular application. Note that the factory interface settings vary depending on the connected converter. SINAMICS G120 Smart Access Operating Instructions, 12/2020, A5E43332487-004...
- Page 49 Note that in the editing page, the numbers below the DI, AI, or Fieldbus refer to terminals on the Control Unit. I/O terminals marked with superscript "ext" represent the terminals on the I/O Extension Module. SINAMICS G120 Smart Access Operating Instructions, 12/2020, A5E43332487-004...
- Page 50 Fieldbus interface BACnet COV P2026 settings/BACnet setting increment Fieldbus interface BACnet P2027 Fieldbus interface MODBUS P2031 language selection parity Fieldbus interface BACnet P7610 PN IP address P8921 device name PN Subnet Mask P8923 SINAMICS G120 Smart Access Operating Instructions, 12/2020, A5E43332487-004...
- Page 51 If you choose to identify the motor data, go to the JOG page after you have finished quick setup. For information about motor identification, see Section "JOG (Page 78)". 9. Complete quick setup. SINAMICS G120 Smart Access Operating Instructions, 12/2020, A5E43332487-004...
-
Page 52: Application Setup
2. Open the application setup Web page by selecting the application setup icon. 3. Set the desired application as the example shown below. If necessary, repeat this step to set other applications. SINAMICS G120 Smart Access Operating Instructions, 12/2020, A5E43332487-004... -
Page 53: Free Function Blocks (For Converter Fw 1.03 Or Later)
1. Open the setup Web page by selecting the setup icon from either the home page or the navigation sidebar. 2. Open the free function block Web page by selecting the free function block icon. SINAMICS G120 Smart Access Operating Instructions, 12/2020, A5E43332487-004... - Page 54 4. Select a target free function block to start editing. If any of the currently selected function blocks is not the required block, click the reselect button on the lower left to go back to the previous Web page for reselection of the required function blocks. SINAMICS G120 Smart Access Operating Instructions, 12/2020, A5E43332487-004...
- Page 55 To edit an input, click the pen symbol next to the input name. To edit the interconnected free function block, directly click the underscored function block name. To reset the free function block settings to the factory settings, click the reset button on the lower left. SINAMICS G120 Smart Access Operating Instructions, 12/2020, A5E43332487-004...
- Page 56 If you interconnect an output of the current function block to multiple parameters or function blocks, a drop-down arrow appears next to the output. Clicking the drop- down arrow allows you to view all the configured parameters or free function blocks (see the example below). SINAMICS G120 Smart Access Operating Instructions, 12/2020, A5E43332487-004...
- Page 57 7. Follow the instructions from Step 4 to Step 6 to complete editing of other target free function blocks. Further information For more information about the free function blocks, see the SINAMICS G120X/XA Operating Instructions (Page 105). SINAMICS G120 Smart Access Operating Instructions, 12/2020, A5E43332487-004...
-
Page 58: Setup (G115D Converters Only)
The quick setup Web page allows you to set the following data for the connected G115D converter: • Control mode • Motor data • I/O configuration • Important parameters • Motor identification SINAMICS G120 Smart Access Operating Instructions, 12/2020, A5E43332487-004... - Page 59 Completed step Current step To-be-completed step • Go back to a completed step. Once you open a completed step, all the changes done in subsequent steps become invalid and require new settings. SINAMICS G120 Smart Access Operating Instructions, 12/2020, A5E43332487-004...
- Page 60 After you confirm that the factory resetting is successfully completed, the Web page advances to the control mode subpage automatically. – If you select to modify the existing configuration, the Web page directly advances to the control mode subpage. SINAMICS G120 Smart Access Operating Instructions, 12/2020, A5E43332487-004...
- Page 61 4. Select the control mode according to the specific applications. 5. Set the required drive and motor data. For Siemens motors, enter only the data as shown in ① and the SINAMICS G120 Smart Access will automatically identify the rest of the data.
- Page 62 6. Select the factory interface settings for the converter based on your particular application. Note that the factory interface layouts vary depending on the variant of the connected converter. The illustration below takes a SINAMICS G115D PROFINET variant as an example: Glanded variant Connector variant SINAMICS G120 Smart Access Operating Instructions, 12/2020, A5E43332487-004...
- Page 63 Section "Parameters (Page 71)". G115D P0728 Signal Signal name DI24 DO24 DI25 DO25 Edit the selected factory interface settings, if desired. See the editing example below: SINAMICS G120 Smart Access Operating Instructions, 12/2020, A5E43332487-004...
- Page 64 Minimum speed P1080 Maximum speed P1082 Ramp-up time P1120 Ramp-down time P1121 OFF3 ramp-down time P1135 Communication parameters Telegram P0922 PN IP address P8921 Speed setpoint selection P1000 PN subnet mask P8923 SINAMICS G120 Smart Access Operating Instructions, 12/2020, A5E43332487-004...
- Page 65 If you choose to identify the motor data, go to the JOG page after you have finished quick setup. For more information about motor identification, see Section "JOG (Page 78)". 9. Complete quick setup. SINAMICS G120 Smart Access Operating Instructions, 12/2020, A5E43332487-004...
-
Page 66: Application Setup (For G115D Profinet And As-I Variants Only)
1. Open the setup Web page by selecting the setup icon from either the home page or the navigation sidebar. 2. Open the application setup Web page by selecting the application setup icon. SINAMICS G120 Smart Access Operating Instructions, 12/2020, A5E43332487-004... - Page 67 P3391 BI: Stop/low speed sensor bypass Sets the signal source for bypassing the stop and manual operation signal source low speed sensors in the "manual operation" mode. Factory setting: 8559.4 SINAMICS G120 Smart Access Operating Instructions, 12/2020, A5E43332487-004...
- Page 68 CI: Low speed setpoint signal Sets the signal source of the low speed setpoint. source The connector input can be interconnected with a fixed setpoint (p1001 and following) or potenti- ometer (r0752). Factory setting: 0 SINAMICS G120 Smart Access Operating Instructions, 12/2020, A5E43332487-004...
-
Page 69: Safety Setup
1. Open the setup Web page by selecting the setup icon from either the home page or the navigation sidebar. 2. Open the safety setup Web page by selecting the safety setup icon. SINAMICS G120 Smart Access Operating Instructions, 12/2020, A5E43332487-004... - Page 70 Standard Web pages 5.4 Quick setup 3. Proceed as follows to start commissioning of the basic safety function STO. Note that the default password is 0. SINAMICS G120 Smart Access Operating Instructions, 12/2020, A5E43332487-004...
- Page 71 CO/BO: SI status (pro- Signals for the higher-level control cessor 1 + processor system. Bit 31: Test stop is required for STO * Not available when selecting the control type "via terminals" SINAMICS G120 Smart Access Operating Instructions, 12/2020, A5E43332487-004...
- Page 72 For more information about the acceptance test of STO function, see the SINAMICS G115D Operating Instructions (Page 105). Further information For more information about the safety function, see the "Safety Integrated" Function Manual (Page 105). SINAMICS G120 Smart Access Operating Instructions, 12/2020, A5E43332487-004...
-
Page 73: Parameters
Filtering parameters by group ⑤ Resetting parameters ③ Editing "My parameters" ⑥ Saving parameters After successfully modifying parameters, a red point appears on ⑥ reminding you to save the changed parameters to non-volatile memory. SINAMICS G120 Smart Access Operating Instructions, 12/2020, A5E43332487-004... - Page 74 The figure below shows different methods for modifying parameters. Note that when modifying a BICO parameter (example: P0810), you can use the on-screen numeric keypad or your native keyboard to quickly navigate to the parameter values that start with the number(s) you enter. SINAMICS G120 Smart Access Operating Instructions, 12/2020, A5E43332487-004...
- Page 75 Filtering parameters You can view and set parameters in the target parameter group. ① Complete list of all visible parameters ③ User-defined parameters ② List of all modified parameters ④ Other parameter groups SINAMICS G120 Smart Access Operating Instructions, 12/2020, A5E43332487-004...
- Page 76 "My parameters" (My parameters2 is selected in the example): • Deleting "My parameters" If you desire to delete any parameters under "My parameters", deselect the checkbox before the parameter and confirm with "OK". SINAMICS G120 Smart Access Operating Instructions, 12/2020, A5E43332487-004...
- Page 77 You have navigated to the desired parameter group under "My parameters" shown as the image above. The softkeys "Import" and "Export" are not available if you are under the state of "Editing my parameters". • Importing "My parameters" SINAMICS G120 Smart Access Operating Instructions, 12/2020, A5E43332487-004...
- Page 78 The exporting process completes with a .xml file saved under your specified path. You can open the file to view the exported parameters. Note that the exported .xml file only shows the parameter numbers. The corresponding parameter values are not shown. SINAMICS G120 Smart Access Operating Instructions, 12/2020, A5E43332487-004...
- Page 79 You can select to reset all parameters to either user default settings or factory settings. Saving parameters to non-volatile memory You can select to save all parameter settings to the non-volatile memory as either standard parameter set or user default settings. SINAMICS G120 Smart Access Operating Instructions, 12/2020, A5E43332487-004...
-
Page 80: Jog
You use this Web page to start the motor test run in JOG or HAND mode. Operating sequence Open the JOG Web page by selecting the JOG icon from either the home page or the navigation sidebar. Proceed as follows to get control of the motor. SINAMICS G120 Smart Access Operating Instructions, 12/2020, A5E43332487-004... - Page 81 • P1900 = 1: Measure the motor data at standstill and with the motor rotating. You must do motor data identification twice (See A). • P1900 = 2: Measure the motor data at standstill. You must do motor data identification only once (See B). SINAMICS G120 Smart Access Operating Instructions, 12/2020, A5E43332487-004...
- Page 82 ("①"). The page shows the currently selected rotation direction ("②"). • Press the desired button ("①") to run the motor in JOG mode: • Proceed as follows to run the motor in HAND mode: SINAMICS G120 Smart Access Operating Instructions, 12/2020, A5E43332487-004...
- Page 83 Before relinquishing the control, make sure that there is no converter output and the motor has stopped. If the motor is still running, the following message appears: Note If the Wi-Fi connection is lost during motor test run, you must re-establish the wireless network connection. SINAMICS G120 Smart Access Operating Instructions, 12/2020, A5E43332487-004...
-
Page 84: Monitoring
Standard Web pages 5.7 Monitoring Monitoring You can open the converter status monitoring Web page by selecting the monitoring icon from either the home page or the navigation sidebar. SINAMICS G120 Smart Access Operating Instructions, 12/2020, A5E43332487-004... -
Page 85: Diagnostics
• Hold down the left mouse button and move the pointer left or right over the page header or footer until a different subpage appears Meaning of fault/alarm icons Fault and alarm icons are shown in the upper-right corner of the SINAMICS G120 Web page. See the following example for possible icon display: Fault icons ①... - Page 86 Displays the active faults and alarms only Displays all faults and alarms Note: SINAMICS G120 Smart Access does not read the updates of active faults or alarms from the converter until you collapse the currently expanded fault/alarm. For more information about the maximum number of faults/alarms that can be recorded, see r0947/r2110.
- Page 87 CO/BO: CU digital output status r0752[0...n] Actual analog input value [V] or [mA] r0774[0...n] Actual analog output value [V] or [mA] P0756[0...n] Type of analog input P0776[0...n] Type of analog output SINAMICS G120 Smart Access Operating Instructions, 12/2020, A5E43332487-004...
- Page 88 Standard Web pages 5.8 Diagnostics Status bit This subpage displays the detailed status bit information. Parameters Parameter Function r0052.0...15 CO / BO: Active status word 1 r0053.0...11 CO / BO: Active status word 2 SINAMICS G120 Smart Access Operating Instructions, 12/2020, A5E43332487-004...
- Page 89 This subpage displays the detailed DIP switch status information. Parameters Parameter Function P0601 Temperature sensor P0300 Motor type P1215 Motor holding brake P1820 Motor direction reversal P1120 Ramp-up time P1121 Ramp-down time P1800 Pulse frequency SINAMICS G120 Smart Access Operating Instructions, 12/2020, A5E43332487-004...
-
Page 90: Backup And Restore
• Click the circle icon at the bottom • Hold down the left mouse button and move the pointer left or right over the page header or footer until a different subpage appears SINAMICS G120 Smart Access Operating Instructions, 12/2020, A5E43332487-004... -
Page 91: Backing Up
5.9 Backup and restore 5.9.1 Backing up You can use the backup Web page to back up parameters to SINAMICS G120 Smart Access and download the backup file (*.bin file) to your local drive (recommended on PC). Note The backup process backs up all the changed parameters and allows you to back up a maximum of 20 files to SINAMICS G120 Smart Access. - Page 92 Backup files must be protected against unauthorized operation, e.g. by implementing access control. Note When transferring important files (e.g. backup files and/or upgrade files) through email, email must be encrypted or signed. SINAMICS G120 Smart Access Operating Instructions, 12/2020, A5E43332487-004...
-
Page 93: Restoring
You can use the restore Web page to upload, download, delete, and/or restore the selected file (*.bin file). Uploading an existing file (recommended on PC) Downloading an existing file (recommended on PC) SINAMICS G120 Smart Access Operating Instructions, 12/2020, A5E43332487-004... - Page 94 Make sure that the selected file for restoring is specific to the connected converter. Note After restoring the parameters, an acceptance test is required to check whether the safety- relevant functions in the plant or machine function correctly. SINAMICS G120 Smart Access Operating Instructions, 12/2020, A5E43332487-004...
- Page 95 The restoring process completes when the following window appears. If the Web page indicates that the restoring fails, you can select to restore again. If required, proceed as follows to save the parameter settings to the non-volatile memory: SINAMICS G120 Smart Access Operating Instructions, 12/2020, A5E43332487-004...
-
Page 96: Saving As Xml
The saving process saves all parameters of access levels up to 3 and allows you to save a maximum of 20 files to SINAMICS G120 Smart Access. In case of any further saving attempt, a message appears prompting you to delete some of the existing XML files. - Page 97 Note that you can select to download the file to your local drive (recommended on PC). Downloading an existing file (recommended on PC) SINAMICS G120 Smart Access Operating Instructions, 12/2020, A5E43332487-004...
-
Page 98: Transferring
The SD card file transfer function is available only when an applicable SD card is inserted into the converter. Before data transfer, make sure that parameter settings are saved to the non-volatile memory as standard parameter set. For detailed information about saving parameters, see Section "Parameters (Page 71)". SINAMICS G120 Smart Access Operating Instructions, 12/2020, A5E43332487-004... - Page 99 Proceed as follows to transfer the standard parameter sets to the SD card. The transferring process completes when the following window appears. If the Web page indicates that the transfer fails, you can select to transfer again. SINAMICS G120 Smart Access Operating Instructions, 12/2020, A5E43332487-004...
- Page 100 Note To safely remove the SD card, click "safely remove" on the transfer Web page after the transferring process has completed. SINAMICS G120 Smart Access Operating Instructions, 12/2020, A5E43332487-004...
-
Page 101: Support
• Telephone number - left blank at the factory and can be edited by the OEM user • E-mail address - left blank at the factory and can be edited by the OEM user • Web site for Siemens Industry Online Support Viewing the support information... - Page 102 Standard Web pages 5.10 Support SINAMICS G120 Smart Access Operating Instructions, 12/2020, A5E43332487-004...
-
Page 103: Upgrading
Upgrading Upgrading on the SINAMICS G120 Web page upgrades the firmware version of the SINAMICS G120 Smart Access. Two upgrading methods are available: • Conventional upgrading • Basic upgrading (applicable when conventional upgrading fails) Note The SINAMICS G120 Smart Access firmware upgrading takes around 30 minutes. To ensure the stability of the upgrading process, we recommend you to perform the upgrading on PCs. - Page 104 The upgrading process completes when the following window appears. If the Web page indicates that the upgrading fails, you can select to upgrade again. Restart the SINAMICS G120 Smart Access. Note that if you do not click "Restart G120 Smart Access now", the SINAMICS G120 Smart Access will restart automatically after the 10-second countdown time has elapsed.
- Page 105 "Format web" is optional. If you click "Format web", the base version and all the bin files and xml files you have backed up will be deleted. Restart the SINAMICS G120 Smart Access. Clear the browser cache. Refresh your Web application.
- Page 106 Upgrading SINAMICS G120 Smart Access Operating Instructions, 12/2020, A5E43332487-004...
-
Page 107: Further Information
Reference materials User documentation • SINAMICS G120 Smart Access Operating Instructions (https://support.industry.siemens.com/cs/ww/en/ps/13225/man) Commissioning, parameterizing, and maintaining the converter with SINAMICS G120 Smart Access (this manual) • SINAMICS G120 Smart Access Product Information (https://support.industry.siemens.com/cs/ww/en/ps/13225/man) Basic information about SINAMICS G120 Smart Access •... -
Page 108: Product Support
Further information 7.2 Product support Additional resources • SINAMICS G120 Smart Access Video Tutorial (www.siemens.com/sinamics-accessories) Video tutorial that helps you understand how to operate the SINAMCS G120 Smart Access Readme file Third-party software - Licensing terms and copyright information You can view the Readme file from the following Web sites: •... -
Page 109: Technical Specifications
1M2 according to EN 60721-3-1: 1997 Transport in the transport packaging according to Class 2M3 ac- cording to EN 60721-3-2: 1997 Vibration in operation according to Class 3M1 according to EN 60721-3-3: 1995 SINAMICS G120 Smart Access Operating Instructions, 12/2020, A5E43332487-004... -
Page 110: Directives And Standards
(2) This device must accept any interference received, including interference that may cause undesired operation. Changes or modifications made to this device not expressly approved by SIEMENS may void the FCC authorization to operate this device. This equipment has been tested and found to comply with the limits for a Class B digital device, pursuant to part 15 of the FCC Rules. - Page 111 이 컴퓨터는 전자파 적합성평가(인증)를 받은 내장구성품을 사용하여 조립한것으로 완성품에 대한 전자파 적합성평가는 받지 않은 제품입니다. SINAMICS G120 Smart Access fulfills the requirements for KVALITET. Australia and New Zealand (RCM formerly C-Tick) SINAMICS G120 Smart Access fulfills the requirements for RCM.
- Page 112 SINAMICS G120 Smart Access fulfills the requirements for SUBTEL. SUPERTEL SINAMICS G120 Smart Access fulfills the requirements for SUPERTEL. FAC + CU SINAMICS G120 Smart Access fulfills the requirements for FAC and CU. SDPPI SINAMICS G120 Smart Access fulfills the requirements for SDPPI. SINAMICS G120 Smart Access...
-
Page 113: Sam Interface Kit
7.5 SAM interface kit SAM interface kit The SAM interface kit (also known as SINAMICS G120 Smart Access interface kit) is used to connect the SINAMICS G120 Smart Access to the SINAMICS G115D converter, thus realizing Web-based access to the converter from a device connected to the G120 Smart Access. - Page 114 1) Dimensions with SINAMICS G120 Smart Access (article number: 6SL3255-0AA00-5AA0) Installing 1. Mount the interface kit to the SINAMICS G120 Smart Access and fix the two tightening screws to the prescribed torque (0.8 Nm, 0.6 lbf.in) by using a slot screwdriver or a crosstip screwdriver.
- Page 115 – Method 2 (applicable only to the mounting position with the heatsink facing upwards) Snap the rubber support of the interface kit onto the converter heatsink and then connect the interface kit cable to the USB interface on the converter. SINAMICS G120 Smart Access Operating Instructions, 12/2020, A5E43332487-004...
- Page 116 USB interface on the converter. For more information about converter commissioning with SINAMICS G120 Smart Access, see Section "Setup (G115D converters only) (Page 56)". SINAMICS G120 Smart Access...