LG 42LV5500 Training Presentation
42" class 1080p 120hz led tv smarttv (42" diagonally)
Hide thumbs
Also See for 42LV5500:
- Specifications (2 pages) ,
- Owner's manual (246 pages) ,
- Manual del usuario (140 pages)

Related Manuals for LG 42LV5500


Summary of Contents for LG 42LV5500
- Page 1 1080P Direct View LCD 42LV5500 42LV5500 Training LED Backlights LCD-DV Troubleshooting 42" Class 1080P 120Hz LED TV SmartTV (42" diagonally) Published May 12 , 201 1...
- Page 2 Disassembly Section: Removal of Circuit Boards Troubleshooting Section: Board Operation Troubleshooting of : • Switch Mode Power Supply with LED Backlight Driver • Main Board • T-CON (TFT Panel Driver Board) • Front IR/Intelligent/Soft Touch Key Board • Speaker May 201 1 LCD TV 42LV5500...
- Page 3 Layout of the LCD Display Panel. At the end of this Section the Technician should be able to Identify the Circuit Boards and have the ability and knowledge necessary to safely remove and replace any Circuit Board or Assembly. May 201 1 LCD TV 42LV5500...
- Page 4 When servicing this product, under no circumstances should the original design be modified or altered without permission from LG Electronics. Unauthorized modifications will not only void the warranty, but may lead to property damage or user injury If wires screws clips straps nuts or washers used to complete a ground path are removed for user injury.
- Page 5 Increase the separation between the equipment and the receiver; Connect the equipment to an outlet on a different circuit than that to which the receiver is connected; or consult the dealer or an experienced radio/TV technician for help. May 201 1 LCD TV 42LV5500...
- Page 6 Also available on the Plasma Page: PDP Panel Alignment Handbook, Plasma Control Board ROM Update (Jig required) Published May 2011 by LG Technical Support and Training LG Electronics Alabama, Inc. 201 James Record Road, Huntsville, AL, 35813. May 201 1 LCD TV 42LV5500...
- Page 7 2. Check the model label. Verify model names and board model matches. Check the model label Verify model names and board model matches 3. Check details of defective condition and history. Example: Oscillator failure dead set, etc… May 201 1 LCD TV 42LV5500...
- Page 8 DC Supplies for proper levels. Make all necessary adjustments and lastly always perform a Safety AC Leakage Test before returning the product back to the Customer perform a Safety AC Leakage Test before returning the product back to the Customer. May 201 1 LCD TV 42LV5500...
- Page 9 42LV5500 PRODUCT INFORMATION SECTION This section of the manual will discuss the specifications of the 42LV5500 LCD Direct View Display May 201 1 LCD TV 42LV5500...
- Page 10 Wired Remote cable between the TV and Dongle for Control Functions. Media Box Wired Remote to control the Media Box TV A/V Inputs Wi l Wireless Receiver/Transmitter “Dongle” Attaches via Velcro to the back of the set HDMI HDMI May 201 1 LCD TV 42LV5500...
- Page 11 Wireless Network Adaptor (AN-WF100) Wireless Network Adaptor Sold Separately Using the LG Wireless LAN for Broadband Adaptor, which is sold separately, allows the TV to connect to a wireless LAN network. The Wireless Network adaptor attaches to the Television via either of the two USB connections:...
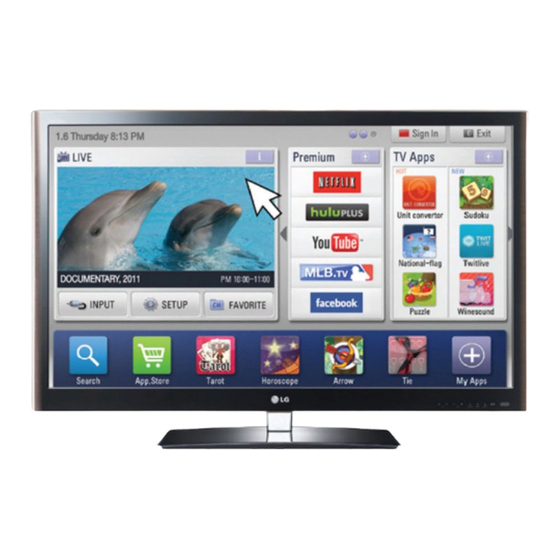
- Page 12 LG Smart TV enabled TVs and a separate purchase maybe required. The Hulu Plus service is projected to be available via a firmware update in June 2011. The LG web browser does not support Flash 10 or HTML 5, therefore, access to certain web content may be limited or unavailable.
- Page 13 TruMotion 120Hz See sports, video games and high-speed action with virtually no motion blur and in crystal clarity with LG’s TruMotion 120Hz technology. Now your TV can keep up with the fastest moving scenes. ith th f...
- Page 14 HDTV. You’ll see details and colors like never before. WiFi Ready: Getting your LG TV connected to NetCast™ Entertainment Access and other online content is easy when you are WiFi™ Ready. If you have existing wireless broadband, setting it up is simple and you don't need to worry about messy wires.
- Page 15 TAKE IT TO THE EDGE is a true multimedia TV with an AV Mode which allows you to choose from 4 different modes of Cinema, Sports and Game by a single click of a remote control. May 201 1 LCD TV 42LV5500...
- Page 16 42LV5500 Remote Control p/n AKB72914042 BOTTOM PORTION TOP PORTION May 201 1 LCD TV 42LV5500...
- Page 17 Sid I /O t Side In/Out USB 2 USB 1 Wireless Media Box Remote Jack HDMI 4 HDMI 4 AV/Component HDMI 3 AV/Component AV/Component HDMI 2 RS232 Antenna HDMI 1 Optical Optical Head Head Audio Phones May 201 1 LCD TV 42LV5500...
- Page 18 Cursor right to highlight “Software Update”, Press “ENTER” on Remote Remote Highlight “Check Update Version” to see if an update is available. Scroll up to highlight “ON” and cursor right to turn off automatic Software Update. May 201 1 LCD TV 42LV5500...
- Page 19 1) Download the Software File. Jump Drive Directory Software File LG_DTV Sub-Directory 2) Copy new software (xxx epk) to "LG DTV" 2) Copy new software (xxx.epk) to LG_DTV Currently Installed Version Currently Installed Version folder. Make sure to have correct software file.
- Page 20 Use extreme Caution when using the Manual “Forced” Download Menu. Any file can be downloaded when selected and may cause the Main board to become inoperative if the d d h th M i b d t b if th incorrect file was selected. May 201 1 LCD TV 42LV5500...
- Page 21 (SUPPORT). (SETUP). Press “ENTER” on the Remote. Cursor right and scroll down to highlight highlight “Product/Service Info”, Press “ENTER” on Remote 3) Information for Customer Support appears. Note: Model Number does not include suffix. May 201 1 LCD TV 42LV5500...
- Page 22 “Setup”. Press “Enter” on the remote. 5) Press the (1) Key 5 to 8 times. The Host Diagnostics screen appears. The Host Diagnostics screen appears. 3) The “Setup” Menu appears. See next page for more details. May 201 1 LCD TV 42LV5500...
- Page 23 Channel Blocked or Current Channel (Main) Host Information Selected Not Blocked Model Name : 42LV5500-UA (Liquid Crystal Display) Channel Info : Digital 19-1 Memory Parental Control : Channel is not blocked FLASH : 524288 KB DVI/HDMI Status DRAM : 524288 KB Can’t display this information now...
- Page 24 2) Press “In-Start” 3) A Password screen appears. 4) Enter the Password. Note: A Password is required to enter the Service Menu. Enter; 0000 Note: If 0000 does not work use 0413. 105-201M MKJ39170828 May 201 1 LCD TV 42LV5500...
- Page 25 42LV5500 Service Menu First Page Bring up the Service Menu using the Service Remote And pressing “In-Start” enter password 0413. Model and S/N Country Group IN SART Adjust Check SW Version Model Name: 42LV5500-UA 1. Adjust Check 1. Country Group...
- Page 26 42LV5500 Model Number Download Screen Bring up the Service Menu using the Service Remote. When the Main Board is replaced, the Model Number and Scroll down to item 6. Model Number D/L to highlight. Serial Number must be corrected. Follow these instructions Press “ENTER”...
- Page 27 42LV5500 UTT Reset (IN START) Screen IN SART SYSTEM 1 Model Name: 42LV5500-UA 1. Adjust Check 0. Baudrate 9600 2. ADC Data Serial Number: 101RMSS6B702 1. 2 Hours Off (On Timer) : 03.01.15.01 3. Power Off Status S/W Version: 2. 2 Hours Off (Screen Mute) : 3.21.6...
- Page 28 Service Menu: Downloading EDID Data Pg 1 of 2 1) Press “ADJ” key. 2) Select menu, Either “PCM EDID D/L” or AC3 EDID D/L May 201 1 LCD TV 42LV5500...
- Page 29 This means that when PCM is OK, PCM audio is priority and when AC3 is OK, AC3 audio is th t h PCM i OK PCM di i i it AC3 i OK AC3 di i priority. May 201 1 LCD TV 42LV5500...
- Page 30 42LV5500 Product Dimensions There must be at least 4 inches of Clearance on all sides Wattage 1-1/2" Typical: 125W 38.1mm 39-13/16" Full White: 155W 1010.92mm 19-7/8" Stand By: <0.1W Center 505.46mm 3-3/4" 12-1/16" 15-3/4" 96mm 306mm 400mm Model No. 15-3/4"...
- Page 31 Disassembly: This section of the manual will discuss Disassembly, Layout (Circuit Board Identification) of the 42LV5500 LCD Direct View Television. Upon completion of this section the Technician will have a better Upon completion of this section the Technician will have a better understanding of the disassembly procedures, the layout of the printed circuit boards and be able to identify each board.
- Page 32 Putting in an improper screw when reassembling may Cause damage. The AC Cord unplugs under cover. Remove plastic cover. The Stand has to be removed before removing the back. May 201 1 LCD TV 42LV5500...
- Page 33 To LEDs have sharp edges Power Supply (SMPS) Main Board LVDS Cables T-CON Panel Connection a e Co ect o Points IR/LED and SOFT Invisible Invisible Motion Speaker Right Speaker Left Remote TOUCH KEY Board May 201 1 LCD TV 42LV5500...
- Page 34 42LV5500 Connector Identification Diagram TFT PANEL p/n: EAJ61749101 If the Panel is replaced, reset the UTTTime. To LEDs Service Menu, System 1 Item 12 P203 P202 Black White Plug Plug P1601 POWER P101 P701 n/c P502 SUPPLY P102 P832 P1702...
- Page 35 Note: This screw AC In SK100 Is a different size Is a different size SK100 fits very snug into it’s connector. with washer. Press in on the two tabs to release lock May 201 1 LCD TV 42LV5500...
- Page 36 Main board holding the Metal Remove the board. Then P901 plate in place. Remove the wrap around decorative Metal piece. P1302 Note: It is one piece. Screw removed with Back May 201 1 LCD TV 42LV5500...
- Page 37 See next page for removing Connectors. Disconnect CN1, CN2, CN4 and CN5. Return Screws if testing board. Return Screws if testing board. Flip up the unlocking tabs. Flip up the unlocking tabs. May 201 1 LCD TV 42LV5500...
- Page 38 Pull Out Pull Out Press In Press In Press In (CN2) LVDS (CN1) LVDS Removing Ribbons To the Panel (Bottom of the board) Flip the locking tabs upward and pull out the ribbon cables. May 201 1 LCD TV 42LV5500...
- Page 39 Panel by removing the screws around the perimeter of the panel. Lift the Panel up and out. The Front Frame / key board is attached to the Front Frame. It must be removed to be replaced. Part number: EBR72671001 May 201 1 LCD TV 42LV5500...
- Page 40 This section of the manual will discuss troubleshooting. Upon completion of this section the Technician will have Upon completion of this section the Technician will have a better understanding of how to diagnosis and resolve problems. May 201 1 LCD TV 42LV5500...
- Page 41 24V (24V) output P201 pins 2, 3 and 4. P832 Connector: (To the Main Board) This connector receives the Local Dimming signals. P202 Connector: (To Panel LEDs) 45V output P202 pins 1 and 12. t P202 i d 12 May 201 1 LCD TV 42LV5500...
- Page 42 42LV5500 Power Supply Drawing P203 P202 P201 Connector "SMPS Board" To P502 "MAIN Board" L601 Label STBY Test1 Diode ERROR 2.03V C257 C256 BD101 VC_3B D253 VC_2C Cold (Chassis) 3.52V 0.2V~3.3V Gnd side VC_3A 0.48V Q251 VC_2D P701 Q602 0.48V DRV-ON 3.26V...
- Page 43 42LV5500 Power Supply Start Up Sequence POWER SUPPLY (SMPS) POWER SUPPLY (SMPS) AC In Primary side fuses: P202 BACKLIGHTS Stand-By 7.6V Run 396V (Hot Gnd) To Panel Backlights L601 Relays Bridge 120Hz D253 On Board Local and No AC Manipulates Backlight T510 &...
- Page 44 42LV5500 Television Turn On Commands Circuit Drawing +12V 11.97V Q507 R555 22KΩ L511 R558 10KΩ To DC to DC Conv R553 Panel_Vcc (12V) Q506 Q505 T-CON R559 1.8K 11.94V 1.8V 0.68V R605 L507 L509 11.96V 100Ω +12V +3.3V_Normal SMPS MAIN IC505 3.47V...
- Page 45 • P201 (24V pins 2, 3 and 4) Pin 1 is the • P202 (36V pins 1 and 12) AND P203 (pins 1 and 13) Brown Wire (2) Remove AC power No Backlights during this test May 201 1 LCD TV 42LV5500...
- Page 46 Note: If either P202 or P203 is disconnected, the backlights will come on, The Error line will go high, then the backlights shut off in 4~6 seconds. Pin 1 is the Brown Wire Brown Wire REMOVE AC POWER: May 201 1 LCD TV 42LV5500...
- Page 47 42LV5500 2 Sided Edge Lit Panel (V6) 2011 42LV5500 2 Sided Edge Lit Panel (V6) 2011 LEDs TWO SIDED EDGE 2011 (Rear View) Block: VC-2D (EL69 Rivet) P203 pin 11 Block: VC-3A (EL70 Rivet) P202 pin 3 Block: VC-2C (EL68 Rivet) P203 pin 10...
- Page 48 Note: When the PWR_ON command Arrives, this voltage will read 36V. When the DRV_ON command arrives This voltage will rise to 65V the fall quickly Down to 45V. D253 Location: Top Center of the SMPS May 201 1 LCD TV 42LV5500...
- Page 49 EL71 VC-1C EL64 VC-3C EL72 EL71 VC-1D EL65 VC-3D EL73 EL68 VC-4A EL74 VC-2A EL66 VC-4B EL75 EL70 VC-2B EL67 VC-4C EL76 VC-2C EL68 VC-4D EL77 EL69 VC-2D EL69 LED+ C256+ LED+ C256+ P832 May 201 1 LCD TV 42LV5500...
- Page 50 *The drive signal changes due to the brightness level of the backlights. Low indicates “Bright”. High indicates “Dim”. kli ht L i di “B i ht” Hi h i di “Di ” Diode Mode values taken with all Connectors Removed May 201 1 LCD TV 42LV5500...
- Page 51 L/DIM0_SCLK P832 Pin 3 SCL 3.2V p/p P832 Pin 2 SDA 3.3V p/p Reverse 2mSec/div 2mSec/div P832 Pin 4 SIN 3.35V p/p P832 Pin 6 SCLK 3.3V p/p P832 Pin 1 VSYNC 3.5V p/p May 201 1 LCD TV 42LV5500...
- Page 52 P832 Voltages and Diode Checks P832 "SMPS" to P1601 "MAIN Board" P832 Connector Label STBY Diode Check Reverse 1.91V L/DIM0_SCLK 0.1V 0.18V 3 25V 3.25V 3.25V VSYNC Diode Mode values taken with all Connectors Removed May 201 1 LCD TV 42LV5500...
- Page 53 OSD Backlight setting and then Intelligent Sensor (room light condition) Output from the Video Processor IC900. Range 0.37V to 3.3V. P-DIM1 3 66V p/p 50IRE 3.66V p/p 50IRE Diode Mode values taken with all Connectors Removed May 201 1 LCD TV 42LV5500...
- Page 54 Pins 1 and 2 for STBY and RUN. F100 Diode Mode values taken with all Connectors Removed F100 (Diode Check) F100 (Diode Check) Red or Black Lead on Fuse (Open) Other Lead on Hot Ground Bottom Left of SMPS SK100 May 201 1 LCD TV 42LV5500...
- Page 55 F101 and F501 F501 Power Supply Voltage Checks Power Supply Voltage Checks F101 F501 3.15A/250V 1.6A/250V From Hot Gnd From Hot Gnd STBY 399V STBY 397V Run 398.5V Run 398.5V Run 396.5V Run 396.5V May 201 1 LCD TV 42LV5500...
- Page 56 • 3.3V_AU_AVDD (Made from 3.3V_Normal). HDMI SELECTOR VOLTAGES (IC701) • 3.3V_DVDD (Made from 3.3V_Normal). • 3.3V_HDMI • 1.8V (Made from 3.3V Normal). 1.8V (Made from 3.3V_Normal). (From 3.3V_Normal through L701) • 24V (Direct from SMPS through L504). May 201 1 LCD TV 42LV5500...
- Page 57 HDMI 3 P901 To Ft. IR Component 1 HDMI 2 Composite 1 P1302 To Motion Remote HDMI 1 Tuner TU2101 Headphones Component In Optical Component 2 These connectors are Audio Mini plug type Composite 2 May 201 1 LCD TV 42LV5500...
- Page 58 42LV5500 Main Board (Front and Back Side) Component Layout P1601 RL_ON Drivers P101 P502 Q502 Q501 Power Det (24V) IC502 P201 "SMPS Board" To P502 "MAIN Board" P102 0.9V FET Switch Q504 Power Det (12V) 5V_Normal IC503 3.3V_ L505 Label...
- Page 59 42LV5500 Main Board (Front) Component Layout P1601 P101 Q502 Q501 P502 P102 L505 L1704 Q503 IC507 IC505 L1703 IC501 IC506 Q508 IC1702 12.2V Each Pin L1708 P1702 L1707 IC1203 IC102 P1502 IC103 IC401 IC101 IC1204 IC402 IC508 IC701 P1501 IC804...
- Page 60 42LV5500 Main (Front Side) Component Voltages IC103 NVRAM IC506 Switched IC801 IC803 RS232 IC2103 (+1.26V_TU) for USB 5V for USB 2 Data Buffer Routing Regulator [1] n/c [1] 0V (Gnd) [1] 1.81V [1] 3.5V [1] 0V (Gnd) [2] 0V [2] 11.98V (In) [2] 1.81V...
- Page 61 42LV5500 Main Board (Back Side) Component Layout IC502 Power Det (24V) Q504 Power Det (12V) IC503 INV_CTL Q1701 Driver MAIN BOARD Amp_Mute p/n: EBR71850702 p/n: EBR73146501 p/n: EBR71850705 RGB_DDC_SCL Q102 RGB_DDC_SDA Q101 Q710 Panel Vcc Q505 Q801 Drivers Q506 Side HP Mute...
- Page 62 42LV5500 Main (Back Side) Component Voltages IC502 Power Det Gen Q102 RGB_DDC_SCL Q710 CEC Remote Q2104 Tuner SIF (For +12V) FET Buffer HDMI CEC (Sound) Buffer [1] 0V (Gnd) [B] 0V (Gnd) [B] 3.47V B 0.23V [2] 3.8V (In) [G] 3.3V [G] 3.51V...
- Page 63 IC601 Micro Crystal 32.768KHz 1.57V Either leg 2.31V p/p No Signal 1.18V Runs all The time 3.3V p/p 3.51V p/p 2.09V Bottom leg Bottom leg 10Mhz Runs all The time MAIN Board X601 X602 May 201 1 LCD TV 42LV5500...
- Page 64 24V pin 40, 41 (R+) Left Channel: 24V pin 44, 45 (L-) 24V pin 2, 3 (L+) Q1701 Back side of the board is (Mute) Active Low. Amp _Reset pin 25 3.3V_ST Collector to AMP_MUTE_PDN Pin 19 May 201 1 LCD TV 42LV5500...
- Page 65 P1702 Connector Main To Speakers P1702 P1702 Label Diode Check SPK-R(-) 12.2V Open SPK R( ) SPK-R(+) 12 2V 12.2V Open SPK-L(-) 12.2V Open SPK-L(+) 12.2V Open Diode Mode values taken with all Connectors Removed May 201 1 LCD TV 42LV5500...
- Page 66 PDIM Pin 22 can vary according to incoming video IRE level, OSD Backlight setting and Intelligent Sensor (room light condition). Range 0.2V to 3.3V. P DIM1 P-DIM1 3.66V p/p 50IRE Diode Mode values taken with all Connectors Removed May 201 1 LCD TV 42LV5500...
- Page 67 0 94V 0.94V TXB3N 1.34V 0.94V TXACLKN 1.16V 0.94V TXB3P 1.07V 0.94V TXACLKP 1.23V 0.94V TXB4N 1.41V 0.94V There are no Stand-By Voltages for the Connector Diode Mode values taken with all Connectors Removed May 201 1 LCD TV 42LV5500...
- Page 68 There are no Stand-By TXCCLKN 1.17V 0.94V TXD3P 1.07V 0.94V Voltages for the TXCCLKP 1.23V 0.94V TXD4N 1.39V 0.94V Connector TXD4P 1.02V 0.94V Diode Mode values taken TXC3N 1.31V 0.94V with all Connectors with all Connectors Removed May 201 1 LCD TV 42LV5500...
- Page 69 Clock & Data pulses only present when Intelligent Sensor is turned on. (3.6V p/p) IR pulses (2V p/p) Clock & Data pulses only present when Set is turned on or Off. (3.9V p/p) Diode Mode values taken with all Connectors Removed May 201 1 LCD TV 42LV5500...
- Page 70 0.35V 3.33V M_Remote_TX 0.35V 3.33V Reset 0 35V 0.35V 3 33V 3.33V 2 41V 2.41V DC_MRemote 0.35V 3.33V 2.38V DD_MRemote 0.35V 3.33V GPI0-O GPI0-1 GPI0-2 GPI0-3 Diode Mode values taken with all Connectors Removed May 201 1 LCD TV 42LV5500...
- Page 71 *24.5V Switched from Q1002 Drain front side of the board. Q1002 turned on by Q1001 front side of the board Q1002 turned on by Q1001 front side of the board. Q1001 turned on by Microprocessor pin 38. May 201 1 LCD TV 42LV5500...
- Page 72 16.74V, 3.3V, -5V and 28V. These voltages can be read at the ribbon connector or at test d 28V Th d t th locations on the board which are identified on the following pages. Stand Bracket T-CON May 201 1 LCD TV 42LV5500...
- Page 73 The two screws shown in the picture are for the Service Position. They would have been removed when removing the shield. Be sure to reinstall them if servicing the T-CON board. t ll th th T CON b May 201 1 LCD TV 42LV5500...
- Page 74 42LV5500 T-CON (TFT Drive) with (Shield Removed) Components Identified PANEL TEST To run the T-CON “Panel Test”, remove the LVDS cables. Jump 12V To Main to the 12V fuse. LVDS LVDS 5) Gnd 4) 3.31V Jump VCC 3.3V to pin 44 on CN1.
- Page 75 LVDS Cables LVDS Cables Jump 3.3V from the VCC TP to pin 44 of CN1 Apply AC to the Power Supply and Toggling patterns of White, Red, Blue, Green should appear on the screen May 201 1 LCD TV 42LV5500...
- Page 76 Except 48~51 which are 12V TXA1P 1.14V TXBCLKN 1.16V TXA2N 1.27V TXBCLKP 1.23V TXA2P 1.13V TXB3N TXB3N 1.34V 1.34V TXACLKN 1.16V TXB3P 1.07V TXACLKP 1.23V TXB4N 1.41V Diode Mode values taken with all Connectors Removed May 201 1 LCD TV 42LV5500...
- Page 77 TXC1P 1.13V TXDCLKN 1.17V video TXC2N 1.29V TXDCLKP 1.23V signals. TXC2P 1.11V TXD3N 1.31V TXCCLKN 1.17V TXD3P 1.07V TXCCLKP 1.23V TXD4N 1.39V TXD4P 1.02V TXC3N 1.31V Diode Mode values taken with all Connectors Removed May 201 1 LCD TV 42LV5500...
- Page 78 EEPROM_SCL and EEPROM_SDA arriving on connector P901 pins 1 and 2 on the Main board. The Intelligent Sensor circuit receives it’s operational voltage when the set turns on via pin 11 (3.3V_Normal). Front IR and Soft Touch Key Board p/n EBR72671001 To Main Board May 201 1 LCD TV 42LV5500...
- Page 79 Slide Right Power Power LEDs Infrared Key Board Light Guide Receiver Decoder for Power LEDs Output: 1.54V Ground Input Voltage 3 57V Input Voltage 3.57V May 201 1 LCD TV 42LV5500...
- Page 80 Clock & Data pulses only present when Intelligent Sensor is turned on. (3.6V p/p) IR pulses (2V p/p) Clock & Data pulses only present when Set is turned on or Off. (3.9V p/p) Diode Mode values taken with all Connectors Removed May 201 1 LCD TV 42LV5500...
- Page 81 Pin 5 measured from Gnd CH (Up) 15.9M Ohms CH (Up) 1.56V CH (Dn) 9.8M Ohms CH (Dn) 0.98V Power 5.7M Ohms Power 0.53V Input 1.19M Ohms Input 0.12V Diode Mode values taken with all Connectors Removed May 201 1 LCD TV 42LV5500...
- Page 82 How to Re-register the Magic Motion Remote Control after Registration Failure. Reset the remote control by pressing and holding both the ENTER and MUTE buttons for 5 seconds. An LED will blink 3 times indicating the remote is ready for registering. Motion Remote “Magic Remote” AKB73295502 May 201 1 LCD TV 42LV5500...
- Page 83 3 33V 3.33V 2 22V 2.22V Reset 0.35V 3.33V 2.41V DC_MRemote 0.35V 3.33V 2.22V DD_MRemote 0.35V 3.33V 2.22V GPI0-O 2.13V GPI0-1 2.16V GPI0-2 2.18V GPI0-3 2.22V Diode Mode values taken with all Connectors Removed May 201 1 LCD TV 42LV5500...
- Page 84 INVISIBLE SPEAKER SECTION The 42LV5500 contains the Invisible Speaker system. The 42LV5500 contains the Invisible Speaker system. The Full Range Speakers point downward, so there is no front viewable speaker grill or air ports. Back View Front View Speaker p/n EAB62088401...
- Page 85 INTERCONNECT DIAGRAM (11 X 17 FOLDOUT SECTION) This section shows the 1 1X17 foldout that’s available in the Paper and Adobe version of the Training Manual. When printing, us 1 1X17 paper for best results. May 201 1 LCD TV 42LV5500...
- Page 86 42LV5500 INTERCONNECT DIAGRAM P201 "SMPS Board" To P502 "MAIN Board" P1302 "MAIN Board" To "Motion Remote" Note: If a particular area is exhibiting a dimmer backlight level than other areas or P832 "SMPS" to P1601 "MAIN Board" PWM Pin 22 can vary according to...
- Page 87 42LV5500 MAIN (FRONT SIDE) SIMICONDUCTORS IC103 NVRAM IC505 (+3.3V_NORMAL) IC508 (+1.5V_DDR) IC801 Q1001 Wireless Vcc IC1203 EDID Data Q502 PWR_ON for USB Regulator Regulator Data Buffer Driver Switch [1] n/c [1] 0V (Gnd) [1] 3.46V [1] 1.81V B 0.02V [1] 0V (Gnd) [1] 3.5V (In)
- Page 88 42LV5500 42LV5500 Conclusion Direct View LCD Page This concludes the l d th 42LV5500 training session session.