Advertisement
Quick Links
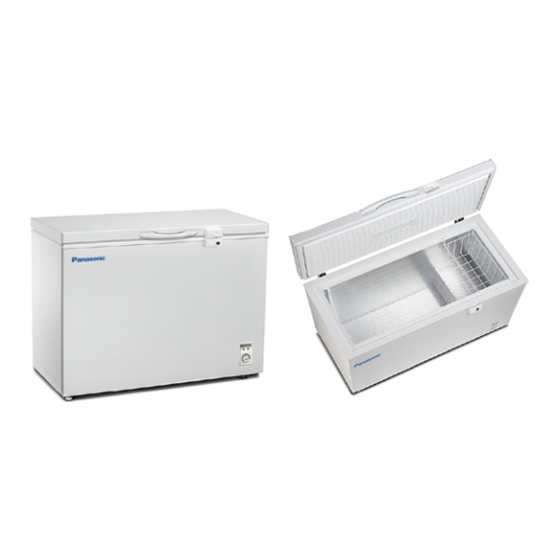
Picture is only for illustration
This service information is designed for experienced repair technicians only and is not designed for use by the general public.
It does not contain warning or cautions to advice non-technical individuals of potential dangers in attempting to service a product.
Products powered by electricity should be serviced or repaired only by experienced professional technicians. Any attempt to service
or repair the product of products dealt with in this service information by anyone else could result in serious injury or death.
These are special components used in this equipment which are important for safety. These points are marked byin the Schematic
Diagrams, Circuit Board Diagrams, Exploded Views and Replacement Parts List. It is essential that these critical parts should be replaced
with manufacture's specified parts to prevent shock, fire or other hazards. Do not modify the original design without permission of
manufacturer.
TABLE OF CONTENTS
1.Safety Cautions for Repairing
2.Specification and Components
3.Product Dimension
4.Installation Instructions
5.Operating Instructions
6.Schematic Diagram
WARNING
INPORTANT SAFETY NOTICE
7.Care and Maintenance
8.Troubleshooting Guide
9.Compressor Troubleshooting
10.Parts Exploded and Replacement Parts List
Order Number Meiling/DF/Eng
SCR-CH100/150/200/300H*
Product Specification
© Panasonic Corporation 2012 Unauthorized
copying and distribution is a violation of law.
Deep Freezer
Colour :White
Category :Hard Top
Destination
India
Oman
Kuwait
UAE
KSA
South Africa
Nigeria
Qatar
Advertisement

Related Manuals for Panasonic SCR-CH100H


Summary of Contents for Panasonic SCR-CH100H
- Page 1 1.Safety Cautions for Repairing 7.Care and Maintenance 2.Specification and Components 8.Troubleshooting Guide 3.Product Dimension 9.Compressor Troubleshooting 4.Installation Instructions 10.Parts Exploded and Replacement Parts List 5.Operating Instructions 6.Schematic Diagram © Panasonic Corporation 2012 Unauthorized copying and distribution is a violation of law.
- Page 2 1. SAFETY CAUTIONS FOR REPAIRING When you repair the deep freezer, please kindly take care for the following cautions. 1.1. Warning Before repairing unit, unplug supply cord ・ Before you repair the deep freezer, please unplug the supply cord. Use authentic parts when repairing ・...
- Page 3 2. SPECIFICATION AND COMPONENTS SCR-CH100H* SCR-CH150H* SCR-CH200H* SCR-CH300H* Model Color code White White White White AC 220~240 V , 3PIN AC 220~240 V , Power source ( AC ), Plug AC 220~240 V , 3PIN PLUG AC 220~240 V , 3PIN PLUG...
- Page 4 3. PRODUCT DIMENSION...
- Page 5 4. INSTALLATION INSTRUCTION This section explains how to install your appliance for the most energy-efficient, safe and quiet operation. If possible avoid placing the appliance near cookers, radiators or in direct sunlight as this will cause the compressor to run for long periods. If installed next to a source of heat or refrigerator, maintain the following minimum side clearances: From Cookers...
- Page 6 5. OPERATING INSTRUCTION Electrical Supply Connection ・ Deep Freezer should be connected with AC220 ~ 240 V 50Hz single phase. ・ Use of extension cord is not recommended. ・ A separate circuit should be drawn from the mains to minimize the voltage drop. WARNING: ・...
- Page 7 6. CARE AND MAINTENANCE Before you start to use the freezer, please check that: The interior is dry and air can circulate freely at the rear. Clean the interior as recommended under "CLEANING AND CARE" Insert the plug into the wall socket and switch on the electricity supply, then the Red light is On. Avoid accidental disconnection by taping over the switch.
- Page 8 6.1 CARE AND MAINTENANCE Cleaning and Care We recommend that you Switch OFF the freezer at the socket outlet and pull out the mains plug before cleaning. Never use any sharp abrasive instrument, soap, household cleaner, detergent and wax polish for cleaning. Use lukewarm water to clean the cabinet of the freezer with a cloth and wipe it dry.
- Page 9 7.Temperature Control Note : Picture is for illustration only, can vary from actual product Temperature adjustment The temperature of the freezer is adjusted by means of the knob assembled on the thermostat. “1,2,3,4,5” do not represent a specific temperature. The smaller the No. the higher the temperature, whereas. So, position “5” is being the lowest temperature.
- Page 10 7.1Storing Frozen Food Prepackaged commercially frozen food should be stored in accordance with the frozen food manufacturer’s instructions for a freezer compartment. To ensure that the high quality achieved by the frozen food manufacturer and the food retailer is maintained the following should be remembered: 1 ....
- Page 11 8.Defrosting Defrost twice a year or when a frost layer of around 7 mm (1/4”) has formed. Alternatively you may Switch OFF the freezer at the socket outlet and pull out the mains plug. Extract the water conduit and put in a water container. 6 hours before the defrosting, please set the thermostat knob at “MAX”...
- Page 12 9. Do’s & Don’t Do’s and Don’ts Do – Defrost food from the freezer thoroughly in a fridge or in a microwave oven following Defrosting and cooking instructions. Do – Ensure that deep freezer lid is completely closed after each use. Do – Defrost frozen meat completely before cooking. Do –...
- Page 13 10. SCHEMATIC DIAGRAM Model : SCR-CH100H/150H/200H/300H 220~240 V AC / 50 Hz Without Lamp Model * With Lamp Model *...
- Page 14 11. COMPRESSOR TROUBLESHOOTING REASONS RECTIFICATION INSTRUMENT DEFECTS When the winding insulation of the 1.Multimeter For any compressor defects first you compressor motor gets damaged 2.Megger have to check the “continuity” or punctured then the current flow Body Short. 3.Continuity between the terminals and through the shell and gets Tester.
- Page 15 Turned OFF. The temperature control has been set correctly. New plug is wired correctly if you have changed the fitted molded plug. If the appliance is still not operating after the above checks, please contact nearest Panasonic Authorized dealer.
- Page 16 13. Exploded View and Replacement Parts List Handle Assy. Parts List Important safety notice: Components identified by markare special characteristics important to safety. When replacing any of these components, use only manufacturer’s specified parts.
- Page 17 13.1. Exploded View and Replacement Parts List Unit Parts List - SCR-CH300H NAME CODE QUANTITY NAME CODE QUANTITY Cabinet G1241.1.1 Thermostat cover G1009.4.1-2 Screw GB/T6560 Thermostat G1011.4.1-1 BCD-248W.1.1.1- Screw indicate light G1001.4.1-3 Ventilated mask G1008.1-1 indicate light G1001.4.1-3/HR Injection hole cover G1001.1-3 Injection hole cover...
- Page 18 13.2. Exploded View and Replacement Parts List Unit Parts List SCR-CH200H NAME CODE QUANTITY NAME CODE QUANTITY Cabinet G1244.1.1 Thermostat cover G1009.4.1-2 Screw GB/T6560 Thermostat G1011.4.1-1 BCD-248W.1.1.1- Screw indicate light G1001.4.1-3 Ventilated mask G1001.1-2 indicate light G1001.4.1-3/HR Injection hole cover G1001.1-3 Injection hole cover G1001.20-2...
- Page 19 13.3. Exploded View and Replacement Parts List Unit Parts SCR-CH150H NAME CODE QUANTITY NAME CODE QUANTITY Cabinet G1101.1.1 Thermostat knob G1001.4-5 Screw GB/T6560 Thermostat wire G1001.4.1-1/AE4FV Screw 248W.1.1.1-11 Thermostat cover G1009.4.1-1 Ventilated mask G1001.1-2 Thermostat G1011.4.1-1 Injection hole cover G1001.1-3 indicate light G1001.4.1-3 Cover...
- Page 20 13.4. Exploded View and Replacement Parts List Unit Parts List - SCR-CH100H NAME CODE QUANTITY NAME CODE QUANTITY Cabinet G1242.1.1 Thermostat knob G1001.4-5 Screw GB/T6560 Thermostat wire G1001.4.1-1/AE4FV Screw 248W.1.1.1-11 Thermostat cover G1009.4.1-2 Ventilated mask G1001.1-2 Thermostat G1011.4.1-1 Injection hole G1001.1-3...
- Page 21 13.5. Exploded View and Replacement Parts List Packing Exploded View...