Table of Contents
Advertisement
Quick Links
Advertisement
Table of Contents

Related Manuals for Fujitsu ETERNUS LT160


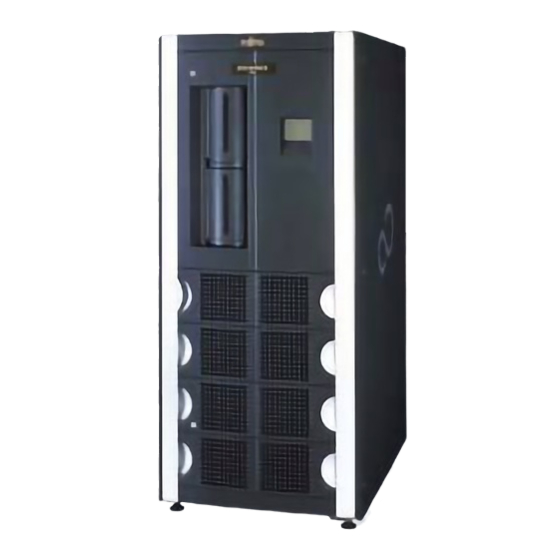
Summary of Contents for Fujitsu ETERNUS LT160
- Page 1 C144-E073-01EN Tape Library Setup Guide...
- Page 3 OPERATION" Use the product according to the instructions and information available in this manual. Keep this manual handy for further reference. Fujitsu makes every effort to prevent users and bystanders from being injured or damage to their property. Use the product according to this manual.
- Page 4 EN60825-1 (+A11). The certificate of conformance is affixed to the module. The contents of this manual shall not be disclosed in any way or reproduced in any media without the express written permission of Fujitsu Limited. All Rights Reserved, Copyright FUJITSU LIMITED 2002 C144-E073-01EN...
- Page 5 Revision History (1/1) Edition Date Revised location (type) (*1) Revision October 15, 2002 *1 Items in the "Revised location" column refer to the latest edition unless the item is marked with an asterisk. An asterisk indicates an item in an older edition. C144-E073-01EN...
-
Page 7: Preface
Preface This manual describes the LT160 magnetic tape library. This manual first provides an overview of the tape library and then detailed information about the tape library. The detailed information includes specifications, installation requirements and procedures for incorporating the tape library into a system, and information about how to clean the tape library. - Page 8 Preface Chapter 7 Troubleshooting Chapter 7 provides troubleshooting information and contact information for users with questions about the tape library. Notation In this manual, buttons and menus are indicated in brackets (for example, [OK]). For the readers If you find any errors in this manual, please fill in the "Reader's Comment Form" sheet at the back of this manual and forward it to the address described on the sheet.
-
Page 9: Important Information On Handling
Important Information on Handling Maintenance Users must not attempt to repair the LT160 by themselves. Ask Fujitsu to dispatch one of its engineers or an engineer authorized by Fujitsu for maintenance work. Disposal of the LT160 and Packing Materials If you need to dispose of the LT160, follow the instructions provided by maintenance personnel. -
Page 11: Manual Organization
Manual Organization Magnetic Tape Library User's Overview Guide (C144-E072) Introducing and Preparing the Library Library Operation Operator Panel Operation Remote Panel Operation Troubleshooting Cartridge Media and Bar Code Label Specifications Magnetic Tape Library Setup Overview Guide (C144-E073) Setting Up the Tape Library (This Manual) Setting the Fibre Channel Interface Setting the Operating System... -
Page 13: Table Of Contents
Contents Preface........................i Important Information on Handling ................ iii Manual Organization....................v Chapter 1 Overview .................... 1-1 1.1 Operating Environment.................. 1-1 1.1.1 PRIMEPOWER and GP7000F ............1-1 1.1.2 S-Series and GP7000S................ 1-1 1.1.3 PRIMERGY..................1-1 1.1.4 NR1000F .................... 1-1 1.2 Location of Information ................. 1-2 1.3 Notes on Use .................... - Page 14 Contents Chapter 4 Setting the Operating System............4-1 4.1 Setting Solaris....................4-1 4.1.1 Direct connection to the server............4-2 4.1.2 Connection of tape library to the server via a switch ......4-3 4.2 Setting Windows NT 4.0/Windows 2000 ............ 4-13 4.2.1 In Windows NT 4.0................
- Page 15 Contents Illustrations Figure Figure 2.1 E-mail function setting window............2-4 Figure 3.1 Example of direct connection (two drives) ........3-2 Figure 3.2 Example of connection to a single server (four drives, connected via a switch) ..........3-3 Figure 3.3 Example of connection to multiple servers (tape library shared, drives not shared, connection via a switch) ..
- Page 16 Contents Table Table 3.1 Cross-references between Loop IDs and ALPAs ......3-10 C144-E073-01EN...
-
Page 17: Chapter 1 Overview
OS: Windows NT 4.0 Service Pack 6a or later, Windows 2000 Service Pack 2 or later • Backup software: VERITAS NetBackup DataCenter 3.4 or later • Fibre Channel adapter: Fujitsu PG-FC102 1.1.4 NR1000F For connection to an NR1000F, refer to the NR1000F manual "NR1000 Series Network Connection Type Disk Array Software Installation Guide."... -
Page 18: Location Of Information
Overview Location of Information The procedure for setting up the tape library and the system depends on the combination of server OS to which the tape library is connected and the Fibre Channel connection method. The following summarizes the setting procedures for specific combinations and the locations in this manual where the corresponding settings are detailed. -
Page 19: Notes On Use
1.3 Notes on Use • Server OS is Windows NT 4.0 or Windows 2000 and Fibre Channel connection mode is switch Step Operation Windows NT 4.0 Windows 2000 Setting up the tape library Chapter 2 Setting the Fibre Channel interface Sections Zoning Section... -
Page 20: Turning On The Server
Overview 1.3.4 Turning on the server • If the server is turned on while the LT160 is being powered on, the LT160 may not be correctly recognized by the server. In such cases, power on the server after the initialization of the LT160 is completed. •... -
Page 21: Chapter 2 Setting Up The Tape Library
Chapter 2 Setting Up the Tape Library Setting the Clock Setting the Screen Saver Setting the Tape Library Operating Mode Setting Network Information Setting the E-mail Function Setting the Clock When the tape library is initially set up, its clock must be set from the operator panel or remote panel. -
Page 22: Setting The Tape Library Operating Mode
In addition, the cleaning function of the backup software uses general cells for cleaning tapes, reducing the cells available for data cartridges. To avoid this problem, Fujitsu recommends enabling of the automatic cleaning function for automatic cleaning under control of the tape library. -
Page 23: Setting Network Information
2.4 Setting Network Information Fast Load Specify when the Move Medium command should issue a completion report: When mounting on (insertion into) the drive is complete or when the drive is ready. NetWorker does not support the Fast Load function. Be sure to specify Disable (default). -
Page 24: Setting The E-Mail Function
Setting Up the Tape Library 4) A processing-in-progress message appears in the window. The setting is complete when the message changes to an end message. Note: Restart the tape library, by turning off the power and turning it on again, to have the settings take effect. - Page 25 2.5 Setting the E-mail Function 2) Set data for each item. Destination Address Up to five mail addresses to which mail should be sent can be (To) defined. Although up to 64 characters can be specified in each text area, only one mail address can be set in the text area. Characters that can be specified for addresses are en-size alphanumeric characters and symbols (- _ .
-
Page 27: Chapter 3 Setting The Fibre Channel Interface
Chapter 3 Setting the Fibre Channel Interface Types of Connection Setting for Fibre Channel Connection Zoning This chapter provides examples of Fibre Channel interface connections and explains how to set the host interface and drive interface required for Fibre Channel connection. The chapter also explains how to zone the Fibre Channel switch. -
Page 28: Direct Connection To A Server
Setting the Fibre Channel Interface 3.1.1 Direct connection to a server This section provides an example of direct connection between the tape library and the server. Server (PRIMEPOWER, GP7000F/S PRIMERGY) FC Adapter Controller LT160 Note: : FC Cable Figure 3.1 Example of direct connection (two drives) C144-E073-01EN... -
Page 29: Connection To A Server Via A Switch
3.1 Types of Connection 3.1.2 Connection to a server via a switch If the tape library is connected to a server via a switch, the switch must be zoned. See Section 3.3 for information about zoning. Notes: The zoning range depends on the type of connection. If the zoning is invalid, the server cannot correctly recognize the tape library and drives. -
Page 30: 3.1.2.2 Connection To Multiple Servers
Setting the Fibre Channel Interface 3.1.2.2 Connection to multiple servers (1) Tape library shared but not drives The following is an example of the LT160 shared by two servers. The drives are not shared and belong to specific servers. Server A Server B (PRIMEPOWER, GP7000F/S, (PRIMEPOWER, GP7000F/S,... - Page 31 3.1 Types of Connection (2) Tape library and drives shared The following is an example of the LT160 shared by two servers. The drives are also shared by the servers. Note, however, that only one server controls the LT160 controller. Server A Server B (PRIMEPOWER, GP7000F/S,...
-
Page 32: Figure 3.5 Example Of Connection To A Cluster System
Setting the Fibre Channel Interface (3) Cluster system The following is an example of connecting the LT160 to a cluster system (standby configuration). Both servers recognize the LT160 controller and drives as the same configuration. Server A (current) Server B (standby) (PRIMEPOWER, GP7000F/S, (PRIMEPOWER,GP7000F/S, PRIMERGY) -
Page 33: Settings For Fibre Channel Connection
3.2 Settings for Fibre Channel Connection Settings for Fibre Channel Connection The settings for Fibre Channel connection include the settings of the host interface and drive interface. 3.2.1 Setting the host interface Information about the tape library host interface and operating mode must be set. Specifically, set the Target ID (Loop ID) of the tape library and WWPN of the host that is permitted to access the tape library, and a WWPN list of the hosts permitted to access the tape library. -
Page 34: 3.2.1.1 Setting The Tape Library Target Id For Each Adapter
Setting the Fibre Channel Interface 3.2.1.1 Setting the tape library Target ID for each adapter 1) Click the [Target ID] button. 2) Select the adapter number button for the connected adapter. SETUP menu -Host I/F -Target ID +Adapter#0 +Adapter#1 (a) Setting the topology, addressing mode, and Loop ID for Fibre Channel connection 3) Select the topology. - Page 35 3.2 Settings for Fibre Channel Connection 4) If direct connection is selected, specify the addressing mode. Note: If fabric connection is selected, the addressing mode is automatically set. To directly specify the Loop ID, click the [Hard Address] button. SETUP menu -Host I/F -Target ID -Adapter#2...
- Page 36 Setting the Fibre Channel Interface The relationships between Loop IDs and ALPAs are given in the following table. Table 3.1 Cross-references between Loop IDs and ALPAs ID [ALPA] ID [ALPA] ID [ALPA] ID [ALPA] ID [ALPA] ID [ALPA] ID [ALPA] 000 [EFh] 020 [C9h] 040 [A7h]...
- Page 37 3.2 Settings for Fibre Channel Connection 5) If Hard Address is selected, specify the Loop ID. Click the numeric keypad icon and use the numeric keypad to enter data. The Loop ID can be specified in the following range: Loop ID: 1 to 125 (decimal notation) After entering data, click the [OK] button.
-
Page 38: 3.2.1.2 Setting The Host Wwpn Enabled For Each Adapter
Setting the Fibre Channel Interface 3.2.1.2 Setting the host WWPN enabled for each adapter Set the host WWPN that will be allowed to access an adapter port. (*1) Up to eight hosts can be set for each adapter. *1 If a host WWPN is not set, access to every host is enabled. If a host WWPN is set, only the relevant host can access the corresponding adapter. -
Page 39: Figure 3.6 Host Wwpn Setting Window
3.2 Settings for Fibre Channel Connection List button used to select a Numeric keypad used to host WWPN from the list enter data directly Figure 3.6 Host WWPN setting window • Deleting a currently set host WWPN Select the numeric keypad icon for the WWPN to be deleted. Click the [AC] button to reset the item and then click the [OK] button. -
Page 40: 3.2.1.3 Registering Host Wwpns In A List
Setting the Fibre Channel Interface 3.2.1.3 Registering host WWPNs in a list Up to 16 WWPNs of hosts permitted access can be registered in the host WWPN list. 1) Click the [WWPN List] button. INFORMATION menu -Host I/F +WWPN List 2) Addition to or removal from the host WWPN list •... -
Page 41: Setting The Drive Interface
3.2 Settings for Fibre Channel Connection 3.2.2 Setting the drive interface Set the Target ID of each drive. Click the [Drive] button on the SETUP menu. Specify a drive using the [Drive Number] button. SETUP menu -Drive +DRV#00 +DRV#01 (1) Setting the Loop ID for Fibre Channel connection When a Fibre Channel connection is used, the Loop ID must be set. -
Page 42: Zoning
Setting the Fibre Channel Interface 2) If Hard Address is selected, specify the Loop ID. Click the numeric keypad icon and use the numeric keypad to enter data. The Loop ID can be specified in the following range: Loop ID: 0 to 125 (decimal notation) After entering data, click the [OK] button. -
Page 43: Concept Of Zoning
3.3 Zoning 3.3.1 Concept of zoning Switch zoning is basically performed for each FC path between the port connected to a server HBA and the port connected to the LT160 controller or a drive. This section shows how zoning is done in each configuration. 3.3.1.1 Connection to a single server This section provides an example of zoning when the tape library is connected to a single server. -
Page 44: 3.3.1.2 Connection To Multiple Servers
Setting the Fibre Channel Interface 3.3.1.2 Connection to multiple servers (1) Tape library shared but not the drives The following is an example of zoning when the LT160 is shared by two servers. The drives are not shared and belong to specific servers. Server A Server B (PRIMEPOWER, GP7000F/S,... -
Page 45: Figure 3.10 Example Of Zoning For Connection To Multiple Servers (Drives Shared)
3.3 Zoning (2) Tape library and drives shared The following is an example of zoning when the LT160 is shared by two servers. The drives are also shared by the servers. Note, however, that only one server controls the LT160 controller. Server A Server B (PRIMEPOWER, GP7000F/S,... -
Page 46: Figure 3.11 Example Of Zoning For Connection To A Cluster System
Setting the Fibre Channel Interface (3) Cluster system The following is an example of zoning when the LT160 is connected to a cluster system (standby configuration). Both servers recognize the LT160 controller and drives as the same configuration. Server A (current) Server B (standby) (PRIMEPOWER, GP7000F/S, (PRIMEPOWER, GP7000F/S,... -
Page 47: Zoning Procedure
3.4 Zoning Procedure Zoning Procedure This section explains the zoning procedure for an example of a type of connection that permits all servers to recognize all drives in the tape library. Server A Server B (PRIMEPOWER, GP7000F/S (PRIMEPOWER, GP7000F/S PRIMERGY) PRIMERGY) FC HBA FC HBA... - Page 48 Setting the Fibre Channel Interface 1) Create a table such as the one shown below to examine the zoning configuration. Server connection port Switch Enter the numbers (SN200) Port# of the ports to which the servers Port# ZoneAlias HOST_A0 HOST_B0 are connected.
- Page 49 3.4 Zoning Procedure 4) Use the zoneCreate command to define the aliases for a zone so that the corresponding ports can be incorporated into the zone. zoneCreate "zone-name", "zone-alias-name; ..." The zone name must be specified only with alphanumeric characters (A to Z, a to z, 0 to 9) and the underscore (_).
-
Page 51: Chapter 4 Setting The Operating System
Section 5.3.2 when Legato NetWorker is used). Notes: Refer to the "Fujitsu PCI Fibre Channel Installation Guide" for information about installing the fjpfca driver. Be sure to use version 2.2 or later of the fjpfca driver. Execute the pkginfo-l FJSVpfca command to check the version. Also confirm that patch 910936-06 or later has been applied. -
Page 52: Direct Connection To The Server
Setting the Operating System Next, set the st driver. Add the following device configuration information to the /kernel/drv/st.conf file. # Copyright (c) 1995, by Sun Microsystems, Inc. # All rights reserved. #pragma ident "@(#)st.conf 1.21 98/03/25 SMI" Insert a line feed at the end of From here <... -
Page 53: Connection Of Tape Library To The Server Via A Switch
3;50:05:07:63:00:40:9b:3e;50:05:07:63:00:00:9b:3e; na FC4s: FCP [IBM ULTRIUM-TD1 22U0] Fabric Port Name: 20:05:00:60:69:20:5d:5a 021600; 3;21:00:00:00:0e:da:07:89;20:00:00:00:0e:da:07:89; na FC4s: FCP [FUJITSU NML9A 0001] Fabric Port Name: 20:06:00:60:69:20:5d:5a Topology Port-ID WWPN (World Wide Port Name) WWNN (World Wide Node Name) The Port ID has the following format:... - Page 54 Setting the Operating System • AA = domain ID set for switch • B = switch specification. 1 for the SN200. • C = number of port to which a device is connected. The port number of the switch is indicated here. •...
- Page 55 4.1 Setting Solaris c) Confirmation using the LT160 remote panel The remote panel allows the user to check the LT160 settings and device state from a Web browser via the LAN. Use this function to check the WWPN of the LT160.
- Page 56 Setting the Operating System • For drives Type "http://<IP address of LT160>/" in the Web browser as the URL to connect to the LT160. Next, use a general account (user) to log in, and click [Drive] under the [Information] icon. You can then check the WWPN. Note: Refer to the "LT160 User's Guide"...
- Page 57 4.1 Setting Solaris 2) Check the instance name and physical slot position of the Fibre Channel adapter (GP7B8FC1). • Checking instance names Use the following command to check the name of the instance assigned to the Fibre Channel adapter. /usr/sbin/FJSVpfca/fc_info adapter=fjpfca#0 wwn=100000000e248c57 link_status=up...
- Page 58 Setting the Operating System 3) Edit the /kernel/drv/fjpfca.conf file. Three items need to be edited: the alias definition, port definition, and fcp-bind-target definition. a) Alias definition Define an alias name for the WWPN of the tape library. This definition makes possible settings that use the alias name instead of the WWPN.
- Page 59 4.1 Setting Solaris b) Port definition Use an instance (for each adapter) to define the type of connection topology. # Port type definition # The port type definition sets the port mode for a specific instance. # If the "port" property is not defined, the fjpfca driver # will determine the port mode automatically during the initialization.
- Page 60 Setting the Operating System c) fcp-bind-target definition Associate a target ID and WWPN as shown below. # Target binding definition # fcp-bind-target binds a specific instance to a target ID. # You can use defined alias in "alias" property for the WWN. # SYNOPSIS: fcp-bind-target="[target-name:[wwn|alias-name]", ...;...
- Page 61 4.1 Setting Solaris 5) Edit /kernel/drv/st.conf. Assign a target ID and LUN to each Fibre Channel adapter in fcp-bind-target in the /kernel/drv/fjpfca.conf file. The LUN definition for each target Fibre Channel adapter is shown below. name="st" class="scsi" target=0 lun=0; name="st" class="scsi"...
- Page 62 Setting the Operating System 1) Execute the ls -l command to display a list of device files. # cd /dev/rmt/ # ls -l lrwxrwxrwx 1 root other 48 Sep 10 20:10 0 -> ../../devices/pci@17,2000/fibre-channel@1/st@0,0: lrwxrwxrwx 1 root other 48 Sep 10 20:10 1 -> ../../devices/pci@16,2000/fibre-channel@1/st@1,0: 2) Check the symbolic link destination of the displayed device file.
-
Page 63: Setting Windows Nt 4.0/Windows 2000
2) Open [SCSI Adapters]. 3) Check the name of each device connected to [Adapters] on the [Devices] page. • "FUJITSU NML9A" indicates the tape library controller. • "IBM ULTRIUM-TD1" indicates a drive (*1). *1 If more than one drive is connected, "IBM ULTRIUM-TD1" is displayed for each of the drives. - Page 64 Setting the Operating System 5) Confirm that "IBM ULTRIUM-TD1 SCSI Sequential Device" and " Unknown Medium Changer Device" are displayed under the FC adapter to which devices are connected. 6) Display the properties of "IBM ULTRIUM-TD1 SCSI Sequential Device" (drive). If more than one drive is connected, display the properties of each drive.
- Page 65 4.2 Setting Windows NT 4.0/Windows 2000 7) Display the properties for "Unknown Medium Changer Device." If a switch is connected, Target IDs are displayed in ascending order by port number (0, 1, 2 ...). 8) This finishes the connection check. If the information above cannot be checked, make sure again that the HBA has been installed correctly.
-
Page 67: Chapter 5 Setting Backup Software
Chapter 5 Setting Backup Software Setting VERITAS NetBackup (Solaris) Setting VERITAS NetBackup (Windows NT 4.0/Windows 2000) Setting Legato NetWorker This chapter explains how to set backup software that is required to use the tape library. Notes: Refer to the manual supplied with each type of backup software for information about standard settings and operating procedures for that backup software. -
Page 68: Setting A Robot Type And Drive Type
Setting Backup Software cd /usr/openv/volmgr/bin/driver /usr/openv/volmgr/bin/sg.build sg.conf -mt N -sc ./sg.conf 3) Execute the sg.build command to add the target settings to the /usr/openv/volmgr/bin/driver/sg.conf file. Use the -mt option to specify the maximum values for the target IDs of the LT160 controller and drive. 4) Execute the sg.install command to install the sg driver on the server. -
Page 69: Setting The Media Mount Timeout Value
5.1 Setting VERITAS NetBackup (Solaris) 5.1.4 Setting the media mount timeout value When the tape library is used, specify at least 20 minutes for a value for the media mount timeout. Specify the value in the NetBackup System Configuration window in the Configure menu on the NetBackup Administration - Java window. -
Page 70: System Parameter Settings
Setting Backup Software 5.1.5 System parameter settings When NetBackup from VERITAS is installed on a Solaris server, system IPC resources must be added for NetBackup interprocess communication. While referring to the recommended minimum settings for the NetBackup system parameters listed below, specify additional entries in the /etc/system file on the NetBackup master server and each media server. -
Page 71: Notes On Operation
5.1 Setting VERITAS NetBackup (Solaris) • Under Solaris 8, the following three parameters are not used; therefore, the settings are not required. msgsys:msginfo_msgssz msgsys:msginfo_msgmap msgsys:msginfo_msgseg • If another application such as Oracle runs on the system, the setting value may need to be incremented. -
Page 72: Setting Veritas Netbackup (Windows Nt 4.0/ Windows 2000)
Setting Backup Software Setting VERITAS NetBackup (Windows NT 4.0/ Windows 2000) 5.2.1 Applying patches The VERITAS NetBackup patches that must be applied to use the tape library are as follows: [English version] • J0850645 • NB_341_3A or later • NB_JAV_341_3 or later [Japanese version] •... -
Page 73: Setting The Media Mount Timeout Value
5.2 Setting VERITAS NetBackup (Windows NT 4.0/ Windows 2000) 2) Set a robot type and drive type as follows: • Robot type: TLD • Drive type: hcart 5.2.4 Setting the media mount timeout value When the tape library is used, specify at least 20 minutes for a value for the media mount timeout. -
Page 74: Notes On Operation
Setting Backup Software 5.2.5 Notes on operation (1) If backup and restore are executed simultaneously, either backup or restore may not end normally. Execute restore after backup is completed. If either backup or restore did not end normally, take the following actions: 1) Kill the job for which backup or restore did not end normally from the Activity monitor of NetBackup. -
Page 75: Setting Legato Networker
5.3 Setting Legato NetWorker Setting Legato NetWorker 5.3.1 Setting a tape library type and drive type The jbconfig command must be used to set the tape library type. Set the tape library type and drive type as follows: • Tape library type: Install an Autodetected SCSI Jukebox •... -
Page 76: Notes On Operation
Setting Backup Software 5.3.3 Notes on operation (1) If backup and recovery are executed simultaneously, either backup or recovery may not end normally. Execute recovery after backup is completed. If either backup or recovery did not end normally, take the following actions: 1) Use the ps command to check the process number of the recovery processing that did not terminate normally. -
Page 77: Chapter 6 Tuning Backup Performance
Chapter 6 Tuning Backup Performance Tuning VERITAS NetBackup (Solaris) Tuning VERITAS NetBackup (Windows NT 4.0/Windows 2000) Tuning Legato NetWorker This chapter explains tuning that makes the tape library easier to use. Notes: Performance depends on the system environment in which the tape library is used. Refer to the applicable manual for information about operation. -
Page 78: Tuning Shared Memory
Tuning Backup Performance 6.1.2 Tuning shared memory If a buffer size is set, the shared memory size of the server must be set. The following explanation uses an example in which the buffer size is set to 256 kilobytes, the number of LT160 drives is set to 4, and the job concurrency level is set to 1. 1) Edit the /etc/system file to set the shared memory size. - Page 79 6.3 Tuning Legato NetWorker 1) Edit the /etc/rc2.d/S95 Legato NetWorker file to set the block size. #!/bin/sh # installed by postinstall on Thu Apr 26 14:40:24 JST 2001 NSR_DEV_BLOCK_SIZE_LTO_ULTRIUM=256 export NSR_DEV_BLOCK_SIZE_LTO_ULTRIUM 2) Reboot the server to update the buffer size set on the server. # /usr/sbin/shutdown -y -i6 -g0 Notes: Setting the NSR_DEV_BLOCK_SIZE_LTO_ULTRIUM environment variable...
-
Page 81: Chapter 7 Troubleshooting
If the tape library does not operate properly, see Chapter 6, "Troubleshooting," in the User's Guide (CD-ROM supplied with the tape library). Questions about the LT160 Call your SE or sales engineer if you have questions about the LT160. Note: The latest product information can be obtained from http://storage-system.fujitsu.com. C144-E073-01EN... - Page 83 Your comments or suggestions on this document are cordially solicited. For any comments and suggestions you may have, please complete and submit this form to your FUJITSU representative. The comments and suggestions will be used in planning future editions. Thank you for your cooperation.