
Related Manuals for Electrolux EGG7537K


Summary of Contents for Electrolux EGG7537K
- Page 1 EGG7537K EGG7537M EGG7537W User Manual Piano cottura Istruzioni per l’uso...
-
Page 2: Table Of Contents
10. ENERGY EFFICIENCY.................. 17 WE’RE THINKING OF YOU Thank you for purchasing an Electrolux appliance. You’ve chosen a product that brings with it decades of professional experience and innovation. Ingenious and stylish, it has been designed with you in mind. So whenever you use it, you can be safe in the knowledge that you’ll get great results every time. - Page 3 ENGLISH instructions in a safe and accessible location for future reference. 1.1 Children and vulnerable people safety This appliance can be used by children aged from 8 • years and above and persons with reduced physical, sensory or mental capabilities or lack of experience and knowledge if they have been given supervision or instruction concerning the use of the appliance in a safe way and understand the hazards involved.
- Page 4 CAUTION: The cooking process has to be supervised. • A short term cooking process has to be supervised continuously. WARNING: Danger of fire: Do not store items on the •...
-
Page 5: Safety Instructions
ENGLISH temperatures of more than 50°C above room temperature. WARNING: Use only hob guards designed by the • manufacturer of the cooking appliance or indicated by the manufacturer of the appliance in the instructions for use as suitable or hob guards incorporated in the appliance. - Page 6 Contact our Authorised • This appliance is for household use Service Centre or an electrician to only. change a damaged mains cable. • Do not change the specification of this • The shock protection of live and appliance.
-
Page 7: Installation
ENGLISH objects up when you have to move • Clean the appliance regularly to them on the cooking surface. prevent the deterioration of the • Use only stable cookware with the surface material. correct shape and diameter larger • Deactivate the appliance and let it than the dimensions of the burners. - Page 8 3.1 Before the installation Before you install the hob, write down the information below from the rating plate. The rating plate is on the bottom of the hob. Model ........PNC ......... Serial number ......3.2 Gas Connection A. End of shaft with nut B.
- Page 9 ENGLISH 1. Light the burner. • Do not let the power cable to heat up 2. Turn the knob on the minimum to a temperature higher than 90° C. position. To prevent contact between the cable 3. Remove the knob. and the appliance below the hob use the 4.
- Page 10 3.7 Assembly A) supplied seal B) supplied brackets min. min. 650 mm 150 mm min. 55 mm 30 mm CAUTION! 480 mm 560 mm Install the appliance only on a worktop with flat surface. 3.8 Installing hob under the...
-
Page 11: Product Description
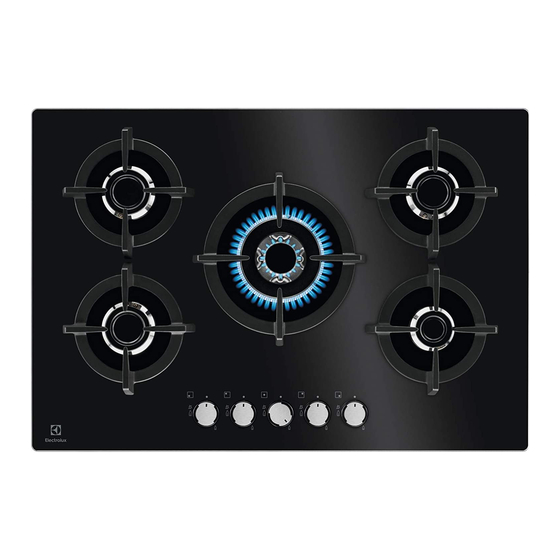
ENGLISH Kitchen unit with door A. Removable panel B. Space for connections 30 mm Kitchen unit with oven The electrical connection of the hob and the oven must be installed separately for min 20 mm safety reasons and to let easy remove (max 150 mm) 60 mm oven from the unit. - Page 12 5.1 Burner overview 1. Push the control knob down and turn it counterclockwise to the maximum gas supply position ( ). 2. Keep the control knob pushed for equal or less than 10 seconds. This lets the thermocouple warm up. If not, the gas supply is interrupted.
-
Page 13: Hints And Tips
ENGLISH 5.3 Turning the burner off WARNING! Always turn the flame down To put the flame out, turn the knob to the or switch it off before you off position remove the pans from the burner. 6. HINTS AND TIPS WARNING! CAUTION! Refer to Safety chapters. -
Page 14: Troubleshooting
7.2 Pan supports 7.4 Cleaning the hob • Remove immediately: melted plastic, The pan supports are not plastic foil, sugar and food with sugar, resistant to washing in a otherwise, the dirt can cause damage dishwasher. They must be to the hob. - Page 15 ENGLISH 8.1 What to do if... Problem Possible cause Remedy There is no spark when The hob is not connected Check if the hob is correct‐ you try to activate the to an electrical supply or it ly connected to the electri‐ spark generator.
-
Page 16: Technical Data
8.3 Labels supplied with the accessories bag Stick the adhesive labels as indicated below: MOD. MOD. MOD. TYPE PROD.NO. IP20 PROD.NO. PROD.NO. SER.NO. 0049 SER.NO SER.NO 03 IT DATA DATA MADE IN ITALY A. Stick it on Guarantee Card and send C. -
Page 17: Energy Efficiency
NOMINAL GAS FLOW g/h POWER POWER MARK G30 28-30 G31 37 mbar mbar Multi Crown 3,55 Semi-rapid Auxiliary 0,33 10. ENERGY EFFICIENCY 10.1 Product information according to EU 66/2014 Model identification EGG7537K, EGG7537M, EGG7537W Type of hob Built-in hob Number of gas burners... - Page 18 Put the packaging in relevant containers contact your municipal office. to recycle it. Help protect the environment and human health by Electrolux Appliances AB - Contact recycling waste of electrical and Address: Al. Powstańców Śląskich 26, electronic appliances. Do not dispose of 30-570 Kraków, Poland...
-
Page 19: Informazioni Di Sicurezza
10. EFFICIENZA ENERGETICA................35 PENSIAMO A TE Grazie per aver acquistato un elettrodomestico Electrolux. Hai scelto un prodotto che ha alle spalle decenni di esperienza professionale e innovazione. Ingegnoso ed elegante, è stato progettato pensando a te. Quindi, in qualsiasi momento lo utilizzi, avrai la certezza di ottenere sempre i migliori risultati. - Page 20 Conservare sempre le istruzioni in un luogo sicuro e accessibile per poterle consultare in futuro. 1.1 Sicurezza dei bambini e delle persone vulnerabili Quest’apparecchiatura può essere usata da bambini a • partire da 8 anni di età e da adulti con capacità fisiche, sensoriali o mentali limitate o con scarsa esperienza e conoscenza sull’uso dell’apparecchiatura, solamente...
- Page 21 ITALIANO Non tentare MAI di spegnere un incendio con • dell'acqua; spegnere l'apparecchiatura e coprire le fiamme ad es. con un coperchio o una coperta di protezione dal fuoco. ATTENZIONE: L'apparecchiatura non deve essere • alimentata tramite dispositivi esterni, ad esempio timer, o collegata a un circuito regolarmente acceso e spento da un'azienda.
-
Page 22: Istruzioni Di Sicurezza
Quando l'apparecchiatura è collegata direttamente • all'alimentazione elettrica, è necessario un interruttore isolante onnipolare. È necessario che l’apparecchiatura si scolleghi completamente dalla rete conformemente alle condizioni della categoria III relativa alla sovratensione. Il cavo di terra è escluso. Quando si collega il cavo di alimentazione, assicurarsi •... - Page 23 ITALIANO 2.2 Collegamento elettrico • Nel caso in cui la spina di corrente sia allentata, non collegarla alla presa. AVVERTENZA! • Non tirare il cavo di alimentazione per Rischio di incendio e scossa scollegare l’apparecchiatura. Tirare elettrica. sempre dalla spina. •...
- Page 24 • Questa apparecchiatura è stata • Non lasciare mai un bruciatore prevista unicamente per un uso acceso con o senza tegami vuoti domestico. sopra. • Non modificare le specifiche tecniche • Non appoggiare la pellicola di dell'apparecchiatura. alluminio direttamente •...
-
Page 25: Installazione
ITALIANO 2.5 Manutenzione e pulizia abrasivi, spugnette abrasive, solventi od oggetti metallici. AVVERTENZA! • Non pulire i bruciatori in lavastoviglie. Non togliere pulsanti, 2.6 Assistenza manopole o guarnizioni dal pannello dei comandi. • Per far riparare l'apparecchiatura, L'acqua potrebbe penetrare rivolgersi a un Centro di Assistenza nell'apparecchiatura e Autorizzato. - Page 26 Accertarsi che la pressione utilizzato (vedere la tabella della del gas di alimentazione sezione "Dati tecnici"). dell'apparecchiatura sia 4. Rimontare i componenti, seguendo la conforme ai valori consigliati. stessa procedura in senso inverso.
- Page 27 ITALIANO 3.5 Collegamento elettrico Accertarsi che il cavo sia di sezione idonea alla tensione e alla temperatura di • Verificare che la tensione nominale e esercizio. Il cavo di terra giallo/verde il tipo di corrente della rete di deve essere circa 2 cm più lungo del distribuzione corrispondano ai valori cavo di fase marrone (o nero).
- Page 28 B) staffe in dotazione ATTENZIONE! Installare l'apparecchiatura esclusivamente su un piano min. min. 650 mm 150 mm di lavoro dalla superficie min. piatta. 55 mm 30 mm 3.8 Installazione del piano di 480 mm 560 mm cottura sotto la cappa da cucina...
-
Page 29: Descrizione Del Prodotto
ITALIANO Mobile da incasso con forno oltre che per consentire una facile Il collegamento elettrico del piano di rimozione del forno dall'unità. cottura e del forno deve essere eseguito separatamente per questioni di sicurezza 4. DESCRIZIONE DEL PRODOTTO 4.1 Disposizione della superficie di cottura Bruciatore semirapido Bruciatore multi corona Bruciatore ausiliario... - Page 30 AVVERTENZA! Non tenere la manopola di regolazione premuta per oltre 15 secondi. Se il bruciatore non si accende dopo 15 secondi, rilasciare la manopola di regolazione, ruotarla in posizione di spento e attendere almeno 1 minuto prima di tentare di riaccendere il bruciatore.
-
Page 31: Consigli E Suggerimenti Utili
ITALIANO AVVERTENZA! Ridurre o spegnere sempre la fiamma prima di rimuovere le pentole dal bruciatore. 6. CONSIGLI E SUGGERIMENTI UTILI AVVERTENZA! ATTENZIONE! Fare riferimento ai capitoli Assicurarsi che le pentole sulla sicurezza. siano ben centrate sul bruciatore per ottenere la 6.1 Pentole massima stabilità... - Page 32 In questo modo, il supporto pentole sarà AVVERTENZA! fisso e stabile. Non usare coltelli, raschietti o strumenti simili per pulire la superficie del vetro o tra i bordi del bruciatore e del telaio (se pertinente). • Lavare le parti in acciaio inox con acqua e asciugarle con un panno morbido.
-
Page 33: Risoluzione Dei Problemi
ITALIANO 8. RISOLUZIONE DEI PROBLEMI AVVERTENZA! Fare riferimento ai capitoli sulla sicurezza. 8.1 Cosa fare se... Problema Causa possibile Rimedio Il gas non si accende Il piano di cottura non è Accertarsi che il piano di quando si preme il pulsan‐ collegato a una fonte di ali‐... -
Page 34: Dati Tecnici
8.3 Etichette fornite con il sacchetto degli accessori Attaccare le etichette adesive come indicato di seguito: MOD. MOD. MOD. TYPE PROD.NO. IP20 PROD.NO. PROD.NO. SER.NO. 0049 SER.NO SER.NO 03 IT DATA DATA MADE IN ITALY A. Attaccarla sul Foglietto di garanzia C. -
Page 35: Efficienza Energetica
POTENZA POTENZA SEGNO PORTATA NOMINALE GAS TORE NORMALE MINIMA INIETTORE G30 28-30 G31 37 mbar mbar Multi corona 3,55 Semi rapido 1,9 Ausiliario 0,33 10. EFFICIENZA ENERGETICA 10.1 Informazioni prodotto conformi alla norma UE 66/2014 Identificativo modello EGG7537K, EGG7537M, EGG7537W... - Page 36 Aiutare a residenza. proteggere l’ambiente e la salute umana e a riciclare rifiuti derivanti da Electrolux Appliances AB - Contact apparecchiature elettriche ed Address: Al. Powstańców Śląskich 26, elettroniche. Non smaltire le 30-570 Kraków, Poland...
- Page 40 www.electrolux.com/shop...