Toshiba RAV-SM1603AT-E Installation Manual
Hide thumbs
Also See for RAV-SM1603AT-E:
- Installation manual (50 pages) ,
- Service manual (157 pages) ,
- Installation manual (240 pages)

Related Manuals for Toshiba RAV-SM1603AT-E


Summary of Contents for Toshiba RAV-SM1603AT-E
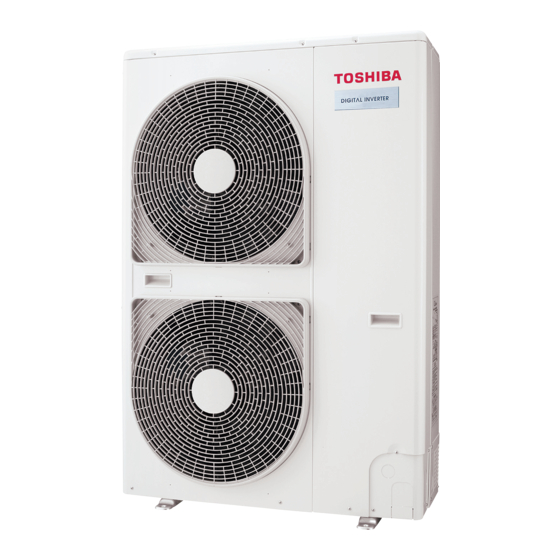
- Page 1 AIR CONDITIONER (SPLIT TYPE) Installation manual Outdoor Unit For commercial use Model name: RAV-SM1603AT-E RAV-SM1603ATZ-E RAV-SM1603ATZG-E English...
-
Page 2: Table Of Contents
• The qualified installer is a person who installs, maintains, relocates and removes the air installer conditioners made by Toshiba Carrier Corporation. He or she has been trained to install, maintain, relocate and remove the air conditioners made by Toshiba Carrier Corporation or,... - Page 3 (50 cm or more) work on the air conditioners made by Toshiba Carrier Corporation or, alternatively, he or she Transportation of Shoes with additional protective toe cap...
-
Page 4: Precautions For Safety
- 3 - PRECAUTIONS FOR SAFETY Warning Indications on the Air Conditioner Unit Warning indication Description The manufacturer shall not assume any liability for the damage caused by not observing the description of this manual. WARNING WARNING WARNING ELECTRICAL SHOCK HAZARD ELECTRICAL SHOCK HAZARD Disconnect all remote Disconnect all remote electric power supplies before... - Page 5 Selection of installation location Electrical wiring • If you install the unit in a small room, take appropriate measures to prevent the refrigerant from exceeding the limit • Only a qualified installer(*1) or qualified service person(*1) is allowed to carry out the electrical work of the air concentration even if it leaks.
-
Page 6: Accessory Parts And Refrigerant
- 5 - ACCESSORY PARTS AND REFRIGERANT Explanations given to user • Upon completion of the installation work, tell the user where the circuit breaker is located. If the user does not know where the circuit breaker is, he or she will not be able to turn it off in the event that trouble has occurred in the air conditioner. -
Page 7: Installation Of New Refrigerant Air Conditioner
INSTALLATION OF NEW REFRIGERANT AIR Pipe cutter Cutting pipes R22 (Conventional tools) CONDITIONER Welding machine and nitrogen Welding pipes R22 (Conventional tools) cylinder Refrigerant charging measure Charging refrigerant R22 (Conventional tools) • The R410A refrigerant is more susceptible to impurities such as water, oxide membranes, oils, and fats. With the adoption of the new refrigerant, the refrigerating oil has also been changed. -
Page 8: Installation Conditions
- 7 - INSTALLATION CONDITIONS Installation Location Install the outdoor unit in a location where the discharge air is not blocked. When an outdoor unit is installed in a location that is CAUTION always exposed to strong winds like a coast or on the high stories of a building, secure normal fan Before installation Air purge... - Page 9 • When using an air conditioner under low outside Obstacles on both right and left sides Serial installation of two or more units Serial installation in front and rear temperature conditions (Outside temp: -5 °C or Open above and to the right and left of the unit. The height of the lower) in COOL mode, prepare a duct or wind The height of an obstacle in both the front and rear of the...
-
Page 10: Refrigerant Piping
- 9 - REFRIGERANT PIPING • When collectively draining discharged water GOOD completely, use a drain pan. Absorb vibration with vibration-proof Knockout of Pipe Cover • After punching out the knockout hole, remove burrs Fixing leg rubber pads from the hole and then install the supplied protective bush and guard material around the passage hole to Waterproof rubber cap Foundation... - Page 11 Optional Installation Parts Flaring Tightening of Connecting Part CAUTION (Locally procured) Cut the pipe with a pipe cutter. Align the centers of the connecting pipes and fully Be sure to remove burrs that may cause a gas leak. tighten the flare nut with your fingers. Then fix the Insert a flare nut into the pipe, and then flare the Do not put the crescent wrench on the cap or cover.
-
Page 12: Air Purging
- 11 - AIR PURGING Refrigerant Pipe Length Single Airtight test Vacuum pump Allowable pipe length (m) Height difference (Indoor-outdoor H) (m) Before starting an airtight test, further tighten the spindle Total length L Indoor unit: Upper Outdoor unit: Lower valves on the gas side and liquid side. -
Page 13: Electrical Work
ELECTRICAL WORK Use the vacuum pump, vacuum pump adapter, and gauge Valve handling precautions manifold correctly referring to the manuals supplied with • Open the valve stem until it strikes the stopper. each tool before using them. It is unnecessary to apply further force. Check that the vacuum pump oil is filled up to the specified •... - Page 14 - 13 - Wiring between Indoor Unit and Outdoor Unit How to wire Electric parts box Remove the front panel (two screws). The dashed lines show on-site wiring. Connect the connecting wire to the terminal as identified with their respective numbers on the Pipe valve Outdoor unit Indoor unit...
- Page 15 Wiring diagram Single system Stripping length power cord and connecting wire * For details on the remote controller wiring/installation, refer to the Installation Manual enclosed with the remote To Indoor unit Power supply 1 2 3 controller. terminal block terminal block Single system Simultaneous twin system Remote...
-
Page 16: Earthing
- 15 - * Clamp the indoor/outdoor connecting wire c, earth EARTHING <1. Attaching the ferrite core> wire, and ferrite core with the supplied banding band. To Indoor unit Power supply terminal block terminal block Stripping length power cord and connecting wire Connect the earth line properly following applicable technical standards. -
Page 17: Functions To Be Implemented Locally
FUNCTIONS TO BE IMPLEMENTED LOCALLY Recovering Refrigerant • Use refrigerant recovery switch SW802 on the P.C. board of the outdoor unit to recover refrigerant when the indoor or outdoor unit is moved. Handling Existing Pipe Procedure When using the existing pipe, carefully check for the following: •... -
Page 18: Troubleshooting
- 17 - TROUBLESHOOTING APPENDIX You can perform fault diagnosis of the outdoor unit with the LEDs on the P.C. board of the outdoor unit in addition to Work instructions * Pipe diameter and thickness (mm) using the check codes displayed on the wired remote controller of the indoor unit. The existing R22 and R407C piping can be reused for Pipe outer diameter Ø6.4 Ø9.5 Ø12.7 Ø15.9 Ø19.0... - Page 19 Clean the pipes or use new pipes. deteriorates, the color of the oil changes to a muddy or black color.) • In the concurrent twin system, when TOSHIBA has specified that branching pipe is to be used, it can be reused.
-
Page 20: Specifications
Weight (kg) Cooling Heating RAV-SM1603AT(Z)(ZG)-E Authorized Nick Ball Representative/ Toshiba EMEA Engineering Director TCF holder: Toshiba Carrier UK Ltd. Porsham Close, Belliver Industrial Estate, PLYMOUTH, Devon, PL6 7DB. United Kingdom Hereby declares that the machinery described below: Generic Denomination: Air Conditioner... - Page 21 This product contains fluorinated greenhouse gases covered by the Kyoto Protocol Chemical Name of Gas R410A Global Warming Potential (GWP) of Gas 1 975 CAUTION Paste the enclosed refrigerant label adjacent to the charging and/or recovering location. Clearly write the charged refrigerant quantity on the refrigerant label using indelible ink. Then, place the included transparent protective sheet over the label to prevent the writing from rubbing off.
- Page 22 - 21 - WARNINGS ON REFRIGERANT LEAKAGE Important Check of Concentration Limit NOTE 2 The standards for minimum room volume are as follows. The room in which the air conditioner is to be installed requires a design that in the event of (1) No partition (shaded portion) refrigerant gas leaking out, its concentration will not exceed a set limit.