Table of Contents
Advertisement
Quick Links
Advertisement
Table of Contents

Related Manuals for Bosch HGK90VQ50


Summary of Contents for Bosch HGK90VQ50
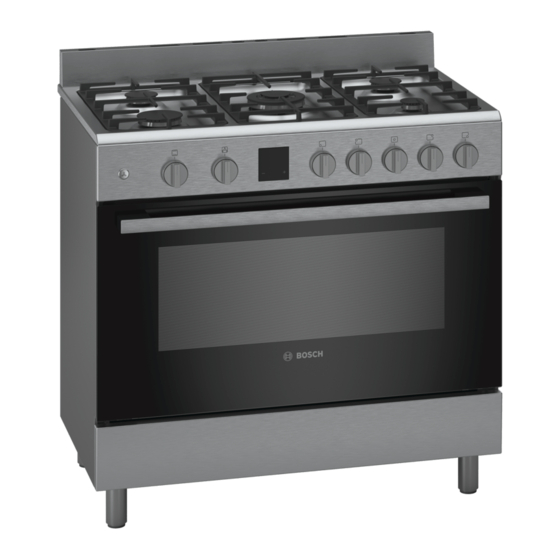
- Page 1 Free standing cooker HGK90VQ50...
-
Page 3: Table Of Contents
Additional information on products, accessories, replacement Important safety information.............4 parts and services can be found at www.bosch-home.com and Causes of damage..............7 in the online shop www.bosch-eshop.com Hob ......................7 Damage to the oven................7 Storage compartment ................7 Measures to be noted during transport ........7 If the original packaging is no longer available ......7... -
Page 4: Important Safety Information
: Important safety information Read these instructions carefully. Only then This appliance is not designed for operation will you be able to operate your appliance with an external timer or by remote control. safely and correctly. Retain the instruction Do not use inappropriate child safety manual and installation instructions for shields or hob guards. - Page 5 Hot oil and fat can ignite very quickly. Alcoholic vapours may catch fire in the hot ■ ■ Never leave hot fat or oil unattended. cooking compartment. Never prepare food Never use water to put out burning oil or containing large quantities of drinks with a fat.
- Page 6 Risk of injury! Risk of tipping! Scratched glass in the appliance door ■ may develop into a crack. Do not use a glass scraper, sharp or abrasive cleaning aids or detergents. Incorrect repairs are dangerous. Repairs Risk of injury! ■ may only be carried out, and damaged power and gas lines replaced, by an after- sales engineer trained by us.
-
Page 7: Causes Of Damage
Causes of damage C a u s e s o f d a m a g e Water in a hot cooking compartment: do not pour water into ■ the cooking compartment when it is hot. This will cause Caution! steam. -
Page 8: Installation
Installation Splatter guard This appliance is supplied with a set of adjustable feet and a splatter guard. Open the packaging of the splatter guard and remove the protective film. Fitting the adjustable feet Position the holes and place the splatter guard in them. Remove all parts that are not permanently fixed. -
Page 9: Gas Connection
Gas connection Flexible hoses Installation must only be performed by an approved expert or a licensed after-sales service engineer in accordance with the For flexible hoses, observe the following points: instructions specified under "Gas connection and conversion to a different gas type". Do not pinch or squeeze hoses. -
Page 10: Electrical Connection
Electrical connection The appliance must only be connected to the mains electricity Explanatory notes supply by specialist personnel. The appliance must be installed in accordance with the most recent IEE guidelines (Institute of Brown Electrical Engineers). The appliance may be damaged if it is not Green and yellow connected correctly. -
Page 11: Your New Appliance
Your new appliance Get to know your appliance. You will find information about the Description control panel and hob, as well as the oven, types of heating and accessories. Splatter guard There may be some differences, depending on the type of Hotplate appliance. -
Page 12: The Electronic Clock
The electronic clock Precautions for use The following advice is intended to help you save energy and With the electronic clock, you can set a cooking time. prevent pan damage: An audible signal sounds once the cooking time has elapsed. Use pans which are the right Function buttons for the electronic clock size for each burner. -
Page 13: Oven
Oven The cooking compartment The oven light is located in the cooking compartment. Steam outlet The hot air from the cooking compartment escapes at the rear of the hob. Caution: do not cover the ventilation slots. Otherwise the oven will overheat. Cooling fan The hot air escapes via the ventilation opening. -
Page 14: Accessories
Accessories A c c e s s o r i e s Your appliance is accompanied by a range of accessories. The baking tray and the baking and roasting shelf can be Here, you can find an overview of the accessories included and moved into five different heights within the cooking information on how to use them correctly. -
Page 15: Operating The Appliance
Operating the appliance O p e r a t i n g t h e a p p l i a n c e You have already learnt about the controls and how they work. Operating modes Now we will explain how to set your appliance. You will learn The following operating modes are available: about what happens when you switch the appliance on and off, and how to select the operating mode. -
Page 16: Rotary Spit
Inserting the rotisserie spit Risk of fire! If the flame goes out, gas will escape. Never leave the gas Risk of burns! burner unattended during operation. Ensure that there are no Never touch the hot surfaces of the cooking compartment or draughts. -
Page 17: Time-Setting Options
Pull the rotisserie spit rack out of the oven as far as possible. Removing the rotisserie spit Hold the rotisserie spit on the right-hand side with a pot Risk of burns! holder and screw the grill onto the rotisserie spit. Never touch the hot surfaces of the cooking compartment or the heating elements. -
Page 18: Care And Cleaning
Care and cleaning With attentive care and cleaning, your hob and oven will retain Zone Cleaning agent its looks and remain in good working order for a long time. We Enamel, painted, Hot soapy water: will explain here how you should care for and clean them plastic and screen- Clean with a dish cloth and dry with a correctly. - Page 19 Zone Cleaning agent Zone Cleaning agent Ceramic hob* Care: Protective/care products for Shelf Hot soapy water: ceramics Clean with a dish cloth or a brush. (depending on Cleaning: Cleaning agents suitable for appliance model) You can remove the shelves for cleaning. ceramics.
-
Page 20: Surfaces In The Cooking Compartment
Surfaces in the cooking compartment Unhooking the rails The back wall and side parts in the cooking compartment are Hold the bottom of the rail and pull it towards you a little. Pull self-cleaning. You can tell this from the rough surface. the extension pins at the bottom of the rail out of the fastening openings (figure A). -
Page 21: Trouble Shooting
Fold back both locking levers (figure C). Close the oven Attaching the door door. Reattach the oven door in the reverse sequence to removal. When attaching the oven door, ensure that both hinges are inserted straight into the opening (figure A). The notch on the hinge must engage on both sides (figure B). -
Page 22: Replacing The Oven Light Bulb
Replacing the oven light bulb Remove the glass cover for the defective oven light in the cooking compartment. If the bulb in the oven light fails, it must be replaced. Replacement heat-resistant bulbs can be obtained from the after-sales service or from specialist retailers. Please supply your appliance's E number and FD number. - Page 24 Robert Bosch Hausgeräte GmbH Carl-Wery-Straße 34 81739 München Germany www.bosch-home.com *9001266712* 231296 9001266712...