Dell PowerVault MD1000 Hardware Owner's Manual
Dell powervault md1000: owners manual
Hide thumbs
Also See for PowerVault MD1000:
- Installation manual (92 pages) ,
- Information update (42 pages) ,
- Reference manual (35 pages)

Related Manuals for Dell PowerVault MD1000


Summary of Contents for Dell PowerVault MD1000
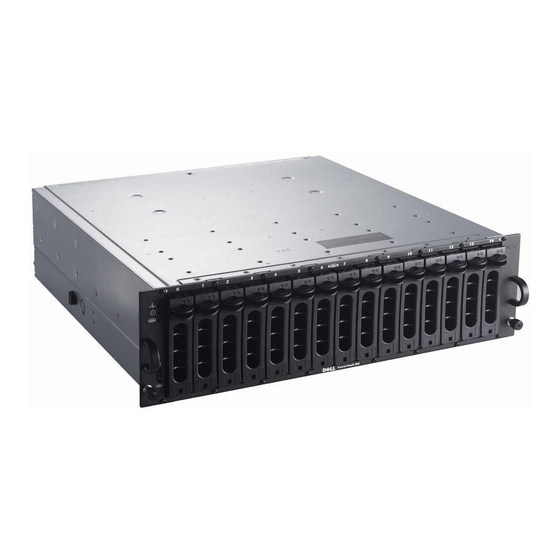
- Page 1 Dell™ PowerVault™ MD1000 Storage Enclosure Hardware Owner’s Manual w w w . d e l l . c o m | s u p p o r t . d e l l . c o m...
- Page 2 Reproduction in any manner whatsoever without the written permission of Dell Inc. is strictly forbidden. Trademarks used in this text: Dell, the DELL logo, PowerEdge, PowerVault, and Dell OpenManage are trademarks of Dell Inc.; Microsoft, Windows, and MS-DOS are registered trademarks of Microsoft Corporation; UNIX is a registered trademark of The Open Group in the United States and other countries;...
-
Page 3: Table Of Contents
Contents About Your System Other Information You May Need Indicators on the Enclosure Bezel Front-Panel Indicators and Features Drive Carrier LED Indicators Back-Panel Indicators and Features Enclosure Management Module (EMM) Enclosure Failover When Two EMMs are Installed EMM Thermal Shutdown Power Supply and Cooling Fan Features Enclosure Alarms . - Page 4 Removing and Installing Drives Removing Drives from the Enclosure Installing SAS Drives in the Enclosure Installing SATA Drives in the Enclosure Removing and Installing an EMM Removing an EMM Installing an EMM Installing an EMM Module Cover in an Empty Bay Installing and Removing an EMM Module Cover Removing and Installing the Power Supply/Cooling Fan Module Removing a Power Supply/Cooling Fan Module...
- Page 5 Automated Order-Status Service Technical Support Service Dell Enterprise Training and Certification Problems With Your Order ......
- Page 6 Contents...
-
Page 7: About Your System
Updates are sometimes included with the enclosure to describe changes to the enclosure, software, and/or documentation. NOTE: Always check for updates on support.dell.com and read the updates first because they often supersede information in other documents. • Release notes or readme files may be included to provide last-minute updates to the enclosure or documentation, or provide advanced technical reference material intended for experienced users. -
Page 8: Indicators On The Enclosure Bezel
Indicators on the Enclosure Bezel An optional locking bezel can be installed on the front of the enclosure to limit access. Figure 1-1 illustrates the indicators and components on the bezel. Table 1-1 lists conditions indicated by the lights on the bezel. -
Page 9: Front-Panel Indicators And Features
Front-Panel Indicators and Features Figure 1-2 shows the LED indicators and components on the enclosure’s front panel (optional locking bezel not shown). Table 1-2 lists the conditions and functions indicated by each. Figure 1-2. Front-Panel Features enclosure status LED drive activity LED drive status LED Table 1-2. -
Page 10: Drive Carrier Led Indicators
Table 1-2. Front-Panel Components (continued) Component Icon Power LED (green) Split mode LED (green) Enclosure mode switch Drive Carrier LED Indicators Each drive carrier in your enclosure has two LEDs: an activity LED (green) and a bi-color (green/amber) status LED (see Figure 1-3). The activity LED flashes whenever the drive is accessed. Table 1-3 lists the flash patterns for the status LED. -
Page 11: Back-Panel Indicators And Features
Table 1-3. Drive Carrier Status LEDs Steady green Green flashing (250 milliseconds [ms]) Green flashing On 400 ms Off 100 ms Amber flashing (125 ms) Green/amber flashing Green On 500 ms Amber On 500 ms Off 1000 ms Green/amber flashing Green On 3000 ms Off 3000 ms Amber On 3000 ms... -
Page 12: Enclosure Management Module (Emm)
Figure 1-5 shows a single EMM as it appears from the rear of the enclosure. The EMM connects to the enclosure via the enclosure midplane (see "Removing and Installing an EMM"). EMM connectors and components are shown in Figure 1-5 and include: • Debug port (Dell use only) • SAS port connector (In) •... - Page 13 Out Port Link Status LED (green/amber) Function Dell factory use only. Provide SAS connection for cabling to host or next upchain expansion enclosure (unified mode only). Green: All links into the port are connected. Amber: One or more links into the port are not connected.
- Page 14 Table 1-4. EMM Component Functions (continued) Item Component Icon EMM Status LED (green/amber) Unified Mode and Split Mode The enclosure can run in one of two modes: • Unified • Split In unified mode, a SAS host can communicate with up to 15 drives in the enclosure via a single EMM, or up to 45 drives in three enclosures daisy chained together.
- Page 15 Figure 1-6. Drive Slot Distribution in Split Mode vs. Unified Mode EMM Control in Split Mode EMM Control in Unified Mode About Your System...
-
Page 16: Enclosure Failover When Two Emms Are Installed
Figure 1-7. Enclosure Mode Switch Settings unified mode switch setting NOTE: To change the enclosure mode, you must change the position of the enclosure mode switch before turning on power to the enclosure. Changing the position of the switch while the enclosure is on will not affect enclosure operation until the enclosure is rebooted. -
Page 17: Emm Thermal Shutdown
EMM Thermal Shutdown If critical internal temperatures are reached, the enclosure will be shut down automatically via either a thermal shutdown command issued by the EMM firmware or via a command from Server Administrator. Power Supply and Cooling Fan Features Your storage enclosure supports two integrated, hot-pluggable power supply/cooling fan modules. -
Page 18: Enclosure Alarms
Table 1-5. Power Supply/Cooling Fan Module LED Indicators LED type LED color DC power Green Power Amber supply/cooling fan fault AC power Green Enclosure Alarms An audible alarm is activated if any of the fault conditions listed in Table 1-6 occur. If a critical event occurs, the alarm sounds continuously. -
Page 19: Operating Your Storage Enclosure
Operating Your Storage Enclosure This section provides procedures for connecting your storage enclosure to a host system for either unified or split mode. Before You Begin Before connecting your storage enclosure, ensure that the following are available: • The components that came with your storage enclosure, including: –... -
Page 20: Connecting The Enclosure
• A split-mode configuration is one in which your storage enclosure is connected to either two host controllers, or two ports on a single host controller. In this configuration, the drives are split into two groups with eight drives controlled by one host controller and seven drives controlled by the other host controller. -
Page 21: Changing Your Enclosure's Operating Mode
Figure 2-1. EMM Cabling Diagram in Unified and Split Mode Unified Mode Host controller 4 Using the enclosure mode switch, select your mode of operation, either unified or split mode (see Figure 1-7 for switch positions). 5 Connect power to the power supplies. NOTICE: To safeguard your storage enclosure against power problems, connect the AC power cable to a protected power supply, such as a UPS, line conditioner, or surge protector. -
Page 22: Managing Your Storage Enclosure
9 Re-create any virtual disks within the enclosure, if necessary. Managing Your Storage Enclosure Disk storage within the enclosure can be configured using either the PERC 5/E Ctrl-R BIOS firmware or Server Administrator. For optimal management and serviceability of your enclosure, Dell recommends use of Server Administrator. NOTE: Online configuration, enclosure status, and active event notification is supported with Server Administrator version 4.5.1 or later only. -
Page 23: Downloading Firmware
Downloading Firmware You can download firmware updates for your storage enclosure using a Dell Update Package available at support.dell.com. NOTE: Firmware download may take several minutes per enclosure. During this time, the host may lose communication with the enclosure. After the download completes, a reboot of the host server is required. - Page 24 Operating Your Storage Enclosure...
-
Page 25: Installing Enclosure Components
Installing Enclosure Components This section explains how to install the following components: • Front bezel (optional) • Drives and drive carriers • EMMs • Power supplies • Control panel • Enclosure midplane Recommended Tools The procedures in this section require the use of one or more of the following tools: •... -
Page 26: Removing And Installing Drives
Figure 3-1. Installing and Removing the Front Bezel bezel lock 4 To replace the bezel, insert the interlocking notch into the U-shaped handle on the side of the front enclosure panel. 5 Snap the left side of the bezel into place in the U-shaped handle on the left side of the enclosure. 6 To lock the bezel, insert the key and turn to the right. -
Page 27: Removing Drives From The Enclosure
NOTICE: To avoid data loss when removing a drive, Dell recommends that you use Server Administrator to prepare the drive for removal. See your Server Administrator documentation for more information. -
Page 28: Installing Sas Drives In The Enclosure
Installing SAS Drives in the Enclosure NOTICE: To ensure proper airflow for enclosure cooling, each slot should contain either an active drive or a drive blank. NOTICE: Always wear a wrist grounding strap when handling equipment with static-sensitive components. Perform the following steps to install the new drive into the carrier: 1 If you are replacing a SAS drive in the carrier, remove the four screws that secure the drive to its carrier and remove the drive (see Figure 3-3). - Page 29 Figure 3-3. Installing the Drive in the Carrier screws (4) 5 With the drive carrier handle open, carefully align the channel on the drive carrier guide rail with the appropriate drive slot keying feature on the chassis face plate, and insert the drive (see Figure 3-2). 6 Push the drive carrier into the slot until the bottom of the open carrier handle makes contact with the chassis face plate.
-
Page 30: Installing Sata Drives In The Enclosure
Installing SATA Drives in the Enclosure NOTICE: To ensure proper airflow for enclosure cooling, each slot should contain either an active drive or a drive blank. NOTICE: Always wear a wrist grounding strap when handling equipment with static-sensitive components. Perform the following steps to install the new SATA drive into the carrier: 1 If you are replacing a drive in the carrier, remove the interposer, unclipping it from the carrier. - Page 31 Figure 3-4. Installing the Drive in the Carrier screws (4) physical disk carrier 5 With the drive carrier handle open, carefully align the channel on the drive carrier guide rail with the appropriate drive slot keying feature on the chassis face plate, and insert the drive (see Figure 3-2). 6 Push the drive carrier into the slot until the bottom of the open carrier handle makes contact with the chassis face plate.
-
Page 32: Removing And Installing An Emm
Removing and Installing an EMM An enclosure with redundant enclosure management contains two EMMs and can be configured in either a unified mode or split mode. An enclosure with nonredundant enclosure management consists of one EMM configured in unified mode. If only one EMM is installed in your enclosure, the empty slot must contain a blank cover. -
Page 33: Installing An Emm
3 Push the release lever in (toward the enclosure) until the module is retracted into the slot and secure. 4 If necessary, update the firmware for your EMM(s). See the Dell Support website at support.dell.com for the latest information on firmware updates. -
Page 34: Installing An Emm Module Cover In An Empty Bay
Installing an EMM Module Cover in an Empty Bay If your enclosure configuration calls for a single EMM, the empty EMM bay must contain a module cover to ensure proper airflow. Installing and Removing an EMM Module Cover 1 Align the edges of the module cover with the edges of the EMM bay (see Figure 3-6). 2 Push the module cover into the bay until it snaps into place. -
Page 35: Removing A Power Supply/Cooling Fan Module
Removing a Power Supply/Cooling Fan Module NOTICE: Power supply/cooling fan modules are hot-pluggable. Provided one power supply/cooling fan module is functioning normally, you can remove or replace the other while the enclosure is powered on. NOTE: If you remove a fully functioning power supply/cooling fan module, the fan speed in the remaining module will increase significantly to provide adequate cooling. -
Page 36: Installing A Power Supply/Cooling Fan Module
Installing a Power Supply/Cooling Fan Module 1 Carefully slide the new power supply/cooling fan module approximately two-thirds of the way into the empty bay. 2 Gently push the module all the way to the back of the bay until it is firmly seated in the backplane connector. -
Page 37: Installing The Control Panel
Figure 3-8. Removing and Replacing the Control Panel faceplate screws (16) 6 Using a Torx T10 driver, remove all 16 screws from the front faceplate of the enclosure as shown in Figure 3-8. 7 Remove the front faceplate from the enclosure and place it on a flat, secure surface. 8 Slide the control panel assembly straight out from its connector on the backplane (see Figure 3-8). -
Page 38: Removing And Installing The Midplane
Removing and Installing the Midplane CAUTION: Only trained service technicians are authorized to remove the enclosure cover and access any of the components inside the enclosure. Before performing any procedure, see your Product Information Guide for complete information about safety precautions, working inside the enclosure and protecting against electrostatic discharge. - Page 39 5 Slide the EMM/power supply cage out of the enclosure and place it aside. 6 Reaching into the enclosure chassis from the back, carefully disconnect the midplane from the control panel and lift it out of the enclosure. (See Figure 3-10.) 7 To re-install the midplane, reverse the previous steps.
- Page 40 Installing Enclosure Components...
-
Page 41: Troubleshooting Your Enclosure
Troubleshooting Your Enclosure Safety First—For You and Your Enclosure To perform certain procedures in this document, you must work inside the enclosure. While working inside the enclosure, do not attempt to perform service except as explained in this guide and elsewhere in your documentation. - Page 42 NOTE: In a split-mode configuration, these conditions apply to the server that is directly attached to the affected EMM. In a unified-mode configuration, these conditions apply when communication is lost to any enclosure in the daisy chain. Problem • The PERC 5/E Adapter Ctrl-R utility reports: –...
-
Page 43: Troubleshooting External Connections
Do not initialize the new virtual disks. 6 Exit the Ctrl-R utility and boot to the operating system. For more information on the Ctrl-R utility, see the Dell PERC5/E Adapter User’s Guide. Troubleshooting External Connections Loose or improperly connected cables and bent pins are the most likely source of problems. Ensure that all external cables are securely attached to the external connectors on your system and that none of the connectors are damaged. -
Page 44: Troubleshooting A Damaged Enclosure
4 Remove the power supply/cooling fan modules from the enclosure. See "Removing and Installing the Power Supply/Cooling Fan Module." 5 Remove the enclosure midplane. See "Removing and Installing the Midplane." 6 Let the enclosure dry thoroughly for at least 24 hours. 7 Reinstall all the components you removed in the previous steps. -
Page 45: Troubleshooting Enclosure Cooling Problems
Action CAUTION: Only trained service technicians are authorized to remove the enclosure cover and access any of the components inside the enclosure. Before performing any procedure, see your Product Information Guide for complete information about safety precautions, working inside the enclosure and protecting against electrostatic discharge. -
Page 46: Troubleshooting A Fan
Troubleshooting a Fan Problem • Enclosure-status indicator is amber. • Systems management software issues a fan-related error message. • Fan status indicator indicates a problem with the fan. Action CAUTION: Only trained service technicians are authorized to remove the enclosure cover and access any of the components inside the enclosure. -
Page 47: Troubleshooting Enclosure Connections
Problem • Drive status LED is flashing amber. Action 1 Review the Server Administrator alert logs for possible recovery actions. NOTE: If a drive rebuild is under way, allow the rebuild to complete before viewing the alert logs. 2 Remove the drive from the enclosure. See "Removing and Installing Drives." 3 Inspect the drive and midplane connectors for obvious damage. - Page 48 Troubleshooting Your Enclosure...
-
Page 49: Getting Help
When prompted by Dell's automated telephone system, enter your Express Service Code to route the call directly to the proper support personnel. If you do not have an Express Service Code, open the Dell Accessories folder, double-click the Express Service Code icon, and follow the directions. -
Page 50: Autotech Service
See the contact information for your region. Automated Order-Status Service To check on the status of any Dell™ products that you have ordered, you can go to support.dell.com, or you can call the automated order-status service. A recording prompts you for the information needed to locate and report on your order. -
Page 51: Dell Enterprise Training And Certification
If you need information about additional products available from Dell, or if you would like to place an order, visit the Dell website at www.dell.com. For the telephone number to call to speak to a sales specialist, see the contact information for your region. -
Page 52: Before You Call
If possible, turn on your enclosure before you call Dell for technical assistance and call from a telephone at or near the computer. You may be asked to type some commands at the keyboard, relay detailed information during operations, or try other troubleshooting steps possible only at the enclosure itself. - Page 53 Customer Care Technical Support Technical Support Services Sales Aruba General Support Australia (Sydney) E-mail (Australia): au_tech_support@dell.com International Access Code: 0011 E-mail Customer Care (Australia and New Zealand): apcustserv@dell.com Country Code: 61 Home and Small Business City Code: 2 Government and Business...
- Page 54 International Access Code: 00 E-mail for French-speaking Customers: support.euro.dell.com/be/fr/emaildell/ Country Code: 32 Technical Support for XPS portable computers only City Code: 2 Technical Support for all other Dell computers Technical Support Fax Customer Care Corporate Sales Switchboard Bermuda General Support...
- Page 55 Customer Technical Support (Penang, Malaysia) Country Code: 673 Customer Care (Penang, Malaysia) Transaction Sales (Penang, Malaysia) Canada (North York, Ontario) Online Order Status: www.dell.ca/ostatus International Access Code: 011 AutoTech (automated technical support) Customer Care (Home Sales/Small Business) Customer Care (med./large business, government) Technical Support (Home Sales/Small Business) Technical Support (med./large bus., government)
- Page 56 Country Code: 86 Technical Support E-mail: cn_support@dell.com City Code: 592 Customer Care E-mail: customer_cn@dell.com Technical Support Fax Technical Support (Dell™ Dimension™ and Inspiron) Technical Support (OptiPlex™, Latitude™, and Dell Precision™) Technical Support (servers and storage) Technical Support (projectors, PDAs, switches,...
- Page 57 Website: support.euro.dell.com International Access Code: 00 E-mail: support.euro.dell.com/dk/da/emaildell/ Country Code: 45 Technical Support for XPS portable computers only Technical Support for all other Dell computers Customer Care (Relational) Home/Small Business Customer Care Switchboard (Relational) Switchboard Fax (Relational) Switchboard (Home/Small Business)
- Page 58 E-mail: support.euro.dell.com/fr/fr/emaildell/ Country Code: 33 Home and Small Business City Codes: (1) (4) Technical Support for XPS portable computers only Technical Support for all other Dell computers Customer Care Switchboard Switchboard (calls from outside of France) Sales Fax (calls from outside of France)
- Page 59 Hong Kong Website: support.ap.dell.com International Access Code: 001 Technical Support E-mail: apsupport@dell.com Country Code: 852 Technical Support (Dimension and Inspiron) Technical Support (OptiPlex, Latitude, and Dell Precision) Technical Support (PowerApp™, PowerEdge™, PowerConnect™, and PowerVault™) Customer Care Large Corporate Accounts Global Customer Programs...
- Page 60 E-mail: dell_direct_support@dell.com Country Code: 353 Technical Support for XPS portable computers only City Code: 1 Technical Support for all other Dell computers U.K. Technical Support (dial within U.K. only) Home User Customer Care Small Business Customer Care U.K. Customer Care (dial within U.K. only) Corporate Customer Care Corporate Customer Care (dial within U.K.
- Page 61 Technical Support (Dimension and Inspiron) Technical Support outside of Japan (Dimension and Inspiron) Technical Support (Dell Precision, OptiPlex, and Latitude) Technical Support outside of Japan (Dell Precision, OptiPlex, and Latitude) Technical Support (PDAs, projectors, printers, routers) Technical Support outside of Japan (PDAs,...
- Page 62 Country Code: 853 Customer Service (Xiamen, China) Transaction Sales (Xiamen, China) Malaysia (Penang) Website: support.ap.dell.com International Access Code: 00 Technical Support (Dell Precision, OptiPlex, and Latitude) Country Code: 60 Technical Support (Dimension, Inspiron, and City Code: 4 Electronics and Accessories)
- Page 63 Netherlands (Amsterdam) Website: support.euro.dell.com International Access Code: 00 Technical Support for XPS portable computers only Country Code: 31 Technical Support for all other Dell computers City Code: 20 Technical Support Fax Home/Small Business Customer Care Relational Customer Care Home/Small Business Sales...
- Page 64 Norway (Lysaker) Website: support.euro.dell.com International Access Code: 00 E-mail: support.euro.dell.com/no/no/emaildell/ Country Code: 47 Technical Support for XPS portable computers only Technical Support for all other Dell products Relational Customer Care Home/Small Business Customer Care Switchboard Fax Switchboard Panama General Support...
- Page 65 St. Vincent and the Grenadines General Support Singapore (Singapore) Website: support.ap.dell.com International Access Code: 005 Technical Support (Dimension, Inspiron, and Electronics and Accessories) Country Code: 65 Technical Support (OptiPlex, Latitude, and Dell Precision) Technical Support (PowerApp, PowerEdge, PowerConnect, and PowerVault) Customer Care Transaction Sales Corporate Sales Slovakia (Prague) Website: support.euro.dell.com...
- Page 66 Country (City) International Access Code Country Code City Code South Africa (Johannesburg) Website: support.euro.dell.com International Access Code: E-mail: dell_za_support@dell.com 09/091 Gold Queue Country Code: 27 Technical Support City Code: 11 Customer Care Sales Switchboard Southeast Asian and Pacific Customer Technical Support, Customer Service,...
- Page 67 International Access Code: 00 E-mail: support.euro.dell.com/se/sv/emaildell/ Country Code: 46 Technical Support for XPS portable computers only City Code: 8 Technical Support for all other Dell products Relational Customer Care Home/Small Business Customer Care Employee Purchase Program (EPP) Support Technical Support Fax...
- Page 68 Country (City) International Access Code Country Code City Code Thailand Website: support.ap.dell.com International Access Code: 001 Technical Support (OptiPlex, Latitude, and Dell Precision) Country Code: 66 Technical Support (PowerApp, PowerEdge, PowerConnect, and PowerVault) Customer Care Corporate Sales Transaction Sales Trinidad/Tobago...
- Page 69 Employee Purchase Program (EPP) Customers Dell Sales Dell Outlet Store (Dell refurbished computers) Software and Peripherals Sales Spare Parts Sales Extended Service and Warranty Sales Dell Services for the Deaf, Hard-of-Hearing, or Speech-Impaired U.S. Virgin Islands General Support Venezuela General Support...
- Page 70 Getting Help...
-
Page 71: Glossary
Glossary This section defines or identifies technical terms, abbreviations, and acronyms used in your system documents. A — Ampere(s). AC — Alternating current. ACPI — Advanced Configuration and Power Interface. A standard interface for enabling the operating system to direct configuration and power management. ambient temperature —... - Page 72 DNS — Domain Name System. A method of translating Internet domain names, such as www.dell.com, into IP addresses, such as 143.166.83.200. DRAM — Dynamic random-access memory. A system’s RAM is usually made up entirely of DRAM chips.
- Page 73 expansion card — An add-in card, such as a NIC or SCSI adapter, that plugs into an expansion-card connector on the system board. An expansion card adds some specialized function to the system by providing an interface between the expansion bus and a peripheral. expansion-card connector —...
- Page 74 jumper — Small blocks on a circuit board with two or more pins emerging from them. Plastic plugs containing a wire fit down over the pins. The wire connects the pins and creates a circuit, providing a simple and reversible method of changing the circuitry in a board.
- Page 75 NMI — Nonmaskable interrupt. A device sends an NMI to signal the processor about hardware errors. ns — Nanosecond(s). NTFS — The NT File System option in the Windows 2000 operating system. NVRAM — Nonvolatile random-access memory. Memory that does not lose its contents when you turn off your system.
- Page 76 9-pin connector. service tag — A bar code label on the system used to identify it when you call Dell for technical support. simple disk volume — The volume of free space on a single dynamic, physical disk.
- Page 77 UNIX — Universal Internet Exchange. UNIX, the precursor to Linux, is an operating system written in the C programming language. uplink port — A port on a network hub or switch used to connect to other hubs or switches without requiring a crossover cable.
- Page 78 Glossary...
-
Page 79: Index
38 power supplies troubleshooting, 44 power supply features, 17 rack-mounted systems installing, 19 safety, 41 support contacting Dell, 52 system cooling troubleshooting, 45 thermal thresholds, 17 tools needed, 25 troubleshooting, 41 cooling fan, 46 damaged system, 44 external connections, 43... - Page 80 troubleshooting (continued) power supplies, 44 start-up routine, 41 system cooling, 45 wet system, 43 warranty, 7 Index...