Lenovo Yoga 7 User Manual
Hide thumbs
Also See for Yoga 7:
- Hardware maintenance manual (70 pages) ,
- User manual (46 pages) ,
- Hardware maintenance manual (70 pages)
Table of Contents
Advertisement
Advertisement
Table of Contents

Related Manuals for Lenovo Yoga 7


Summary of Contents for Lenovo Yoga 7
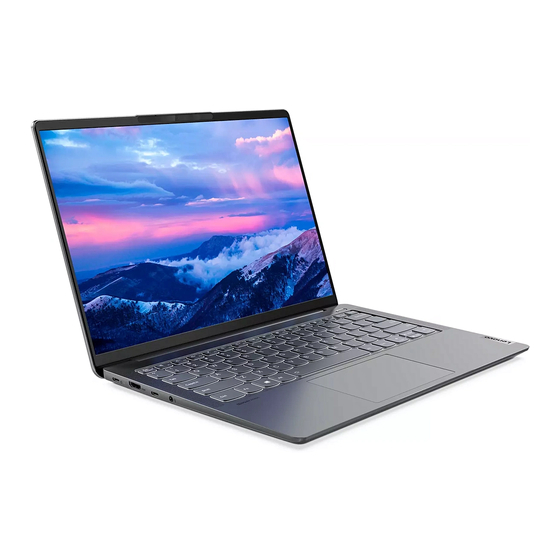
- Page 1 User Guide Yoga 7 (14″, 6)
- Page 2 • Setup Guide First Edition (July 2021) © Copyright Lenovo 2021. LIMITED AND RESTRICTED RIGHTS NOTICE: If data or software is delivered pursuant to a General Services Administration “GSA” contract, use, reproduction, or disclosure is subject to restrictions set forth in Contract No. GS-...
-
Page 3: Table Of Contents
Use Glance by Mirametrix ... Call Lenovo ....Open Glance by Mirametrix .. - Page 4 User Guide...
-
Page 5: About This Guide
About this guide • This guide applies to Lenovo product model(s) listed below. Illustrations in this guide may look slightly different from your product model. Model name Machine type (MT) Yoga 7 14ACN6 82N7 • For further compliance information, refer to the Generic Safety and Compliance Notices at https:// pcsupport.lenovo.com/docs/generic_notices... - Page 6 User Guide...
-
Page 7: Chapter 1. Meet Your Computer
Detect the surrounding light intensity and adjust the brightness of the built-in screen accordingly. Note: To turn off the automatic brightness adjustment, type display settings in the Windows search box and then press Enter. 6. Screen Display text, graphics, and videos. Support multi-touch function. © Copyright Lenovo 2021... -
Page 8: Base
Base 1. Wireless antennas Send and receive radio waves for the built-in wireless LAN (local area network) and Bluetooth module. Notes: • The antennas are not visible from the outside of the computer. • If the location of the antennas is close to the user’s body (< 20 cm), you can find the Specific Absorption Rate (SAR) values in the Setup Guide that comes with your computer. -
Page 9: Left
Left ® 1. USB-C connector/Power connector • Connect to an external display, storage, or data devices. Note: An appropriate adapter may be needed for connecting to external devices. • Connect to power with the included power cord and ac power adapter. -
Page 10: Right
The always- on function can be turned on or off in the UEFI/BIOS setup utility. Note: If Lenovo Vantage is pre-installed on your computer, you can also set always-on function within that software. -
Page 11: Bottom
Bottom 1. Novo button hole Press the Novo button to open the Novo Button menu. From the menu, you can choose to open the UEFI/BIOS setup utility, the Boot menu, or the Windows startup options screen. 2. Ventilation slots (inlet) Maintain the incoming airflow to dissipate internal heat. -
Page 12: Features And Specifications
Features and specifications Dimensions • Width: 320.4 mm (12.61 inches) • Depth: 214.6 mm (8.44 inches) • Thickness – Thinnest: 15.68 mm (0.61 inches) – Thickest: 17.7 mm (0.69 inches) ac power adapter • Input: 100 V ac–240 V ac, 50 Hz–60 Hz •... -
Page 13: Statement On Usb Transfer Rate
Security • Fingerprint reader • UEFI/BIOS passwords – Administrator password – User password – Master hard disk password – User hard disk password Network Bluetooth and Wi-Fi combo adapter Statement on USB transfer rate Depending on many factors such as the processing capability of the host and peripheral devices, file attributes, and other factors related to system configuration and operating environments, the actual transfer rate using the various USB connectors on this device will vary and will be slower than the data rate listed below for each corresponding device. - Page 14 User Guide...
-
Page 15: Chapter 2. Get Started With Your Computer
If night light mode is turned on, you can adjust the color temperature of the Night light temperature screen. Note: Selected Lenovo computers are low blue light certified. These computers are tested with night light turned on and color temperature set to the default value of 48. Windows... -
Page 16: Windows Help Information
To open it, type its name in the Windows Search box and select the matched result. If neither of the apps is pre-installed, you may install one on your own. Lenovo Vantage is available for download free of charge from the Microsoft Store. -
Page 17: Open The Novo Button Menu
Start your computer using a recovery drive Reset your computer Open advanced options screen Open the Novo Button menu For Lenovo computers with a Novo button, you can press the button to open the Novo Button menu. Step 1. Turn off the computer. Step 2. - Page 18 Mode Suitable for Notebook mode • Entering text • Drag and drop operations using the touchpad Stand mode • Giving a presentation • Viewing a slide show User Guide...
-
Page 19: Interact With Your Computer
Playing touch-enabled games Note: Product illustrations in this section are used to demonstrate features that are supported by a range of Lenovo products. It is normal that they may look different from your product model. Interact with your computer Keyboard hotkeys Some keys on the keyboard are printed with icons. -
Page 20: Multi-Touch Gestures For Touch-Enabled Screens
+ ESC. Multi-touch gestures for touch-enabled screens Selected Lenovo computers include a touch-enabled screen. For such a computer, you can use your fingers to interact with the operating system and apps that are gesture aware. Note: Not all gestures are supported by all apps. - Page 21 Gesture Function Selecting an item Double-clicking an item Tap twice quickly Right-clicking an item Tap and hold Zooming out Pinch Zooming in Spread Viewing all open apps Tap from the left edge Chapter 2 Get started with your computer...
-
Page 22: Lenovo Digital Pen
Displaying the Action Center of Windows Tap and hold Lenovo Digital Pen Selected models are equipped with Lenovo Digital Pen. The pen is not waterproof. Keep the pen away from water and excessive moisture. To purchase Lenovo Digital Pen, go to https://www.lenovo.com/accessories Install the AAAA battery Lenovo Digital Pen uses AAAA battery. -
Page 23: Smart Note
In Windows search box, type Lenovo Pen Settings. Step 2. Enter Lenovo Pen Settings window and change. Smart Note Smart Note enables you to write or draw on the touch screen by using your Lenovo Digital Pen. Chapter 2 Get started with your computer... - Page 24 Lock-Screen Notes Hold your Lenovo Digital Pen close to the lock screen, the Smart Note opens automatically. Refer to the following to turn on the Lock-Screen Notes switch. • Open the Smart Note, locate the setting and turn on the Lock-Screen Notes switch.
-
Page 25: Chapter 3. Explore Your Computer
Move the pointer over the calibration window. Step 3. Click the window when the snooze icon appears. To save battery power, you can turn on Snooze when unplugged or Snooze when no external monitors on the software settings page. © Copyright Lenovo 2021... -
Page 26: Calibrate Your Head Position
Calibrate your head position You can use the calibration window of Glance by Mirametrix to adjust your head position so that the ToF sensor can better detect your head movement. Step 1. Open the console by clicking the Glance by Mirametrix icon in the Windows notification area. The calibration window is displayed on top of the console. -
Page 27: Use Smart Display
Step 3. Change the setting for Flip to Boot. Note: You may also set Flip to Boot in Lenovo Vantage or Lenovo PC Manager. Manage power Use the information in this section to achieve the best balance between performance and power efficiency. -
Page 28: Set Power Button Behavior
To extend your battery’s lifespan, the battery may optimize its full charge capacity based on your usage. After prolonged periods of limited use, full battery capacity may not be available until you discharge to as low as 20% and recharge completely. For more information, refer to the power section of Lenovo Vantage. -
Page 29: Open The Uefi/Bios Setup Utility
Change the setting to Disabled or Enabled. Select Exit ➙ Exit Saving Changes. Step 4. Enable or disable always-on For some Lenovo computers with always-on connectors, the always-on function can be enabled or disabled in the UEFI/BIOS setup utility. Step 1. Open the UEFI/BIOS setup utility. -
Page 30: Set Administrator Password
Attention: If you forget the administrator password, a Lenovo authorized service personnel cannot reset your password. You must take your computer to a Lenovo authorized service personnel to have the system board replaced. Proof of purchase is required and a fee will be charged for parts and service. -
Page 31: Enable Power-On Password
Lenovo authorized service personnel cannot reset your password or recover data from the hard disk. You must take your computer to a Lenovo authorized service personnel to have the hard disk drive replaced. Proof of purchase is required and a fee will be charged for parts and service. - Page 32 Note: The user hard disk password cannot be removed separately. Step 4. Select Exit ➙ Exit Saving Changes. User Guide...
-
Page 33: Chapter 4. Help And Support
Where can I get the latest device • Lenovo Vantage or Lenovo PC Manager drivers and UEFI/BIOS? • Lenovo Support Web site at https://support.lenovo.com... -
Page 34: What Is A Cru
If you intend to install a CRU, Lenovo will ship the CRU to you. You might be required to return the defective part that is replaced by the CRU. When return is required: (1) return instructions, a prepaid shipping label, and a container will be included with the replacement CRU;... -
Page 35: Crus For Your Product Model
Call Lenovo If you have tried to correct the problem yourself and still need help, you can call Lenovo Customer Support Center. Before you contact Lenovo Record product information and problem details before you contact Lenovo. -
Page 36: Purchase Additional Services
• Lenovo hardware repair - If the problem is determined to be caused by Lenovo hardware under warranty, trained service personnel are available to provide the applicable level of service. -
Page 37: Appendix A. Notices And Trademarks
Lenovo representative for information on the products and services currently available in your area. Any reference to a Lenovo product, program, or service is not intended to state or imply that only that Lenovo product, program, or service may be used. Any functionally equivalent product, program, or service that does not infringe any Lenovo intellectual property right may be used instead. - Page 38 Actual results may vary. Users of this document should verify the applicable data for their specific environment. This document is copyrighted by Lenovo and is not covered by any open source license, including any Linux agreement(s) which may accompany software included with this product. Lenovo may update this document at any time without notice.