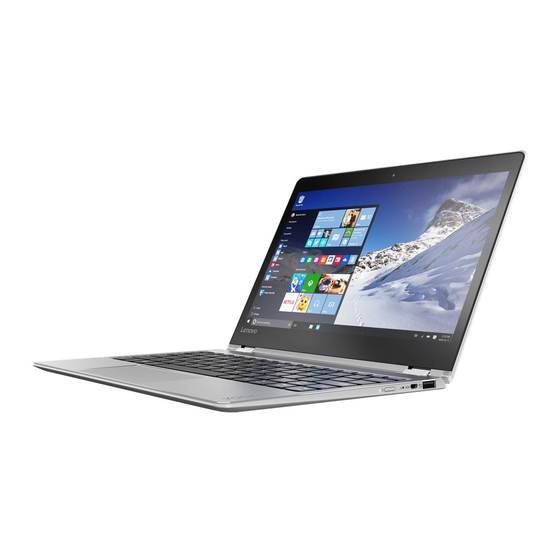
Lenovo Yoga 710 Series User Manual
Hide thumbs
Also See for Yoga 710 Series:
- Hardware maintenance manual (45 pages) ,
- User manual (38 pages) ,
- User manual (37 pages)

Related Manuals for Lenovo Yoga 710 Series


Summary of Contents for Lenovo Yoga 710 Series
- Page 1 Lenovo YOGA 710 YOGA 710-11ISK YOGA 710-11IKB User Guide Read the safety notices and important tips in the included manuals before using your computer.
- Page 2 Notes Before using the product, be sure to read Lenovo Safety and General Information Guide first. The latest electronic compliance and environmental information are available from the Lenovo compliance information Web sites. To view compliance information go to: http://www.lenovo.com/compliance To download environmental information go to: http://www.lenovo.com/ecodeclaration Some instructions in this guide may assume that you are using Windows ®...
-
Page 3: Table Of Contents
Task and desktop management ........................ 17 Connecting to a wireless network ......................18 Get Started app ............................18 Touch screen operation ..........................19 Chapter 3. Lenovo OneKey Recovery System................22 Chapter 4. Troubleshooting......................23 Frequently asked questions ........................23 Troubleshooting ............................25... -
Page 5: Chapter 1. Getting To Know Your Computer
Chapter 1. Getting to know your computer Top view - - - - - - - - - - - - - - - - - - - - - - - - - - - - - - - - - - - - - - - - - - - - - - - - - - - - - - - - - - - - - - - - - - - - - - - - - - - - - - - - - - - - - - - - - - - - - - - - - - - - - - - - - - - - - - - - - - - - - - - - - - Note: The dashed areas indicate parts that are not visible externally. - Page 6 Chapter 1. Getting to know your computer Integrated camera Use the camera for video communication or taking photos. Built-in microphone Captures sound which can be used for video conferencing, voice narration, or audio recording. Wireless LAN antennas Connect to a wireless LAN adapter to send and receive wireless radio signals.
- Page 7 Chapter 1. Getting to know your computer „ Using the keyboard Function key combinations Through the use of the function keys, you can change operational features instantly. To use this function, press and hold Fn ; then press one of the function keys The following describes the features of each function key.
- Page 8 Chapter 1. Getting to know your computer Hotkeys You can access certain system settings quickly by pressing the appropriate hotkeys. Enables/disables Airplane : Mutes/unmutes the sound. mode. Enables/disables the integrated : Decreases the volume level. camera. : Increases the volume level. : Locks the screen.
- Page 9 Chapter 1. Getting to know your computer „ Positioning the display panel The display panel can be opened to any angle up to 360 degrees. Notebook Mode Suitable for tasks that require a keyboard and mouse (such as creating documents, writing e- mails, and so on).
- Page 10 Chapter 1. Getting to know your computer Stand Mode (Theater Mode) Suitable for tasks that require little or no touch (such as viewing photos or playing videos). Tablet Mode Suitable for tasks that require touching the screen often (such as surfing the Web, playing games, and so on).
- Page 11 Chapter 1. Getting to know your computer Tent Mode (Presentation Mode) Suitable for tasks that require limited interaction with the touch screen (such as displaying graphs or PowerPoint presentations). ~ Attention: • Do not open the display with too much force, otherwise the panel or hinges may be damaged. Note: The keyboard and touchpad are automatically locked when the screen is opened beyond 190 degrees (approximately).
- Page 12 Chapter 1. Getting to know your computer „ Screen orientation You can rotate the display panel to your preferred orientation. The orientation of the display automatically changes (alternating between portrait and landscape modes) depending on how you hold it. Landscape Portrait...
-
Page 13: Left-Side View
Chapter 1. Getting to know your computer Left-side view - - - - - - - - - - - - - - - - - - - - - - - - - - - - - - - - - - - - - - - - - - - - - - - - - - - - - - - - - - - - - - - - - - - - - - - - - - - - - - - - - - - - - - - - - - - - - - - - - - - - - - - - - - - - - - AC power adapter jack Connects to the AC power adapter. -
Page 14: Right-Side View
Blinking The computer is in sleep mode. The computer is powered off. When the computer is off, press this button to start the Lenovo OneKey Novo button Recovery System or the BIOS setup utility, or to enter the boot menu. - Page 15 Chapter 1. Getting to know your computer „ Connecting USB device Your computer comes with one USB port compatible with USB devices. The first time you plug a USB device into a particular USB port on your computer, Windows automatically installs a driver for that device. After the driver has been installed, you can disconnect and reconnect the device without performing any additional steps.
-
Page 16: Bottom View
Chapter 1. Getting to know your computer Bottom view - - - - - - - - - - - - - - - - - - - - - - - - - - - - - - - - - - - - - - - - - - - - - - - - - - - - - - - - - - - - - - - - - - - - - - - - - - - - - - - - - - - - - - - - - - - - - - - - - - - - - - - - - - - - - - - - - - Speakers Provide audio output. -
Page 17: Chapter 2. Starting To Use Windows 10
Chapter 2. Starting to use Windows 10 Configuring the operating system for the first time - - - - - - - - - - - - - - - - - You may need to configure the operating system when it is first used. The configuration process may include the procedures below: •... - Page 18 Chapter 2. Starting to use Windows 10 „ Settings Settings lets you perform basic tasks. You can also search for more settings with the settings search box in the upper-right corner. To open the settings, do the following: • Open the start menu, and then select Settings „...
-
Page 19: Putting The Computer To Sleep Or Shutting It Down
Chapter 2. Starting to use Windows 10 Putting the computer to sleep or shutting it down - - - - - - - - - - - - - - - - - - - - When you have finished working with your computer, you can put it to sleep or shut it down. „... - Page 20 Chapter 2. Starting to use Windows 10 „ Shutting down the computer If you are not going to use your computer for a long time, shut it down. To shut down the computer, do one of the following: • Open the start menu, and then select Power Shut down.
-
Page 21: Task And Desktop Management
Chapter 2. Starting to use Windows 10 Task and desktop management - - - - - - - - - - - - - - - - - - - - - - - - - - - - - - - - - - - - - - - - - - - - - - - - - - - - - - - - - - - - - - - - - - - „... -
Page 22: Connecting To A Wireless Network
Chapter 2. Starting to use Windows 10 Connecting to a wireless network - - - - - - - - - - - - - - - - - - - - - - - - - - - - - - - - - - - - - - - - - - - - - - - - - - - - - - - - - - - - - Enabling wireless connection To enable wireless functions, do the following: Press F7 (... -
Page 23: Touch Screen Operation
Chapter 2. Starting to use Windows 10 Touch screen operation - - - - - - - - - - - - - - - - - - - - - - - - - - - - - - - - - - - - - - - - - - - - - - - - - - - - - - - - - - - - - - - - - - - - - - - - - - - - - - - - - - - - - The display panel can accept inputs like a tablet, using the multi-touch screen, or like a traditional notebook computer, using the keyboard and touchpad. - Page 24 Chapter 2. Starting to use Windows 10 (continued) Frequently used gestures Tasks performed Zoom Move two fingers together or apart while touching the screen. Zooms in and out on visual apps, such as pictures and maps. Can also jump to the beginning or end of a list.
- Page 25 Chapter 2. Starting to use Windows 10 (continued) Frequently used gestures Tasks performed Swipe Start from left/right edge of the screen, then swipe inwards toward the center. Swiping in from the left edge of the screen can open the task view. Swiping in from the right edge of the screen displays the action center.
-
Page 26: Chapter 3. Lenovo Onekey Recovery System
The above instructions should be followed when Windows can be started normally. • If Windows cannot be started, then follow the steps below to start the Lenovo OneKey Recovery System: Shut down the computer. Press the Novo button. From Novo Button Menu, select System Recovery and press Enter. -
Page 27: Chapter 4. Troubleshooting
Lenovo OneKey Recovery System Where are the recovery discs? Your computer did not come with any recovery discs. Use the Lenovo OneKey Recovery System if you need to restore the system to its original factory status. What can I do if the back-up process fails? If you can start the backup but it fails during the back-up process, try the following steps: Close all open programs, and then restart the back-up process. - Page 28 To start the BIOS setup utility: Shut down the computer. Press the Novo button and then select BIOS Setup. „ Getting help How can I contact the customer support center? See “Chapter 3. Getting help and service” in the Lenovo Safety and General Information Guide.
-
Page 29: Troubleshooting
- The operating temperature is within the acceptable range. (POST). See “Chapter 2. Use and care Information” in the Lenovo Safety and General Information Guide. Note: If the battery pack is charged and the temperature is within range, have the computer serviced. - Page 30 Chapter 4. Troubleshooting Display panel problems The screen is blank. • Do the following: - If you are using the AC power adapter or the battery pack, and the battery status indicator is on, press F12 ( ) to make the screen brighter. - If the power indicator is blinking, press the Power button to resume from sleep mode.
- Page 31 Chapter 4. Troubleshooting Other problems Your computer does not • To turn off your computer, press and hold the Power button respond. for eight seconds or more. If the computer still does not respond, remove the AC power adapter. • Your computer might lock when it enters sleep mode during a communication operation.
-
Page 32: Trademarks
Trademarks The following terms are trademarks or registered trademarks of Lenovo in the United States, other countries, or both. Lenovo OneKey Microsoft and Windows are trademarks of Microsoft Corporation in the United States, other countries, or both. Other company, products, or service names may be trademarks or service marks of others. - Page 33 en-US Rev. RP01...
- Page 34 „ „ What this Warranty Covers Lenovo warrants that each Lenovo hardware product that you purchase is free from defects in materials and workmanship under normal use during the warranty period. The warranty period for the product starts on the original date of purchase as shown on your sales receipt or invoice or as may be otherwise specified by Lenovo.
- Page 35 How to Obtain Warranty Service If the product does not function as warranted during the warranty period, you may obtain warranty service by contacting Lenovo or a Lenovo approved Service Provider. A list of approved Service Providers and their telephone numbers is available at: www.lenovo.com/support/phone.
- Page 36 Only unaltered Lenovo products and parts are eligible for replacement. The replacement product or part provided by Lenovo may not be new, but it will be in good working order and at least functionally equivalent to the original product or part. The replacement product or part shall be warranted for the balance of the period remaining on the original product.
- Page 37 „ Limitation of Liability Lenovo is responsible for loss or damage to your product only while it is in the Service Provider's possession or in transit, if the Service Provider is responsible for the transportation.
- Page 38 HAVE OTHER RIGHTS ACCORDING TO THE APPLICABLE LAWS OF YOUR STATE OR JURISDICTION. YOU MAY ALSO HAVE OTHER RIGHTS UNDER A WRITTEN AGREEMENT WITH LENOVO. NOTHING IN THIS WARRANTY AFFECTS STATUTORY RIGHTS, INCLUDING RIGHTS OF CONSUMERS UNDER LAWS OR REGULATIONS GOVERNING THE SALE OF CONSUMER GOODS THAT CANNOT BE WAIVED OR LIMITED BY CONTRACT.
- Page 39 Only unaltered Lenovo products and parts are eligible for replacement. The replacement product or part provided by Lenovo may not be new, but it will be in good working order and at least functionally equivalent to the original product or part. The replacement product or part shall be warranted for the balance of the period remaining on the original product.
- Page 40 The following replaces the same section in Part 1: „ Limitation of Liability: Lenovo is responsible for loss or damage to your product only while it is in the Service Provider's possession or in transit, if the Service Provider is responsible for the transportation.
- Page 41 „ Use of Personal Information: Lenovo will not be able to perform our service under this warranty if you refuse to provide your information or do not wish us to transfer your information to our agent or contractor. You have the right to access your personal information and request correction of any errors in it pursuant to the Privacy Act 1993 by contacting Lenovo (Australia &...
- Page 42 European Economic Area (EEA) The following is added to Part 1: Customers in the EEA may contact Lenovo at the following address: EMEA Service Organisation, Lenovo (International) B.V., Floor 2, Einsteinova 21, 851 01, Bratislava, Slovakia. Service under this warranty for Lenovo...
- Page 43 Lenovo limited warranty Part 3 - Warranty Service Information - - - - - - - - - - - - - - - - - - - - - - - - - - - - - - - - - - - - - -...
- Page 44 Lenovo limited warranty (Continued) Types of Product or Country or region of purchase Warranty period warranty machine type service Denmark, Estonia, Finland, Norway, Latvia, Lithuania, Portugal, Spain, Sweden, Belgium, Luxembourg, Netherlands, 1, 3 parts and labor - Hungary, Romania, Bulgaria, Czech...
- Page 45 Under CRU Service, the Service Provider will ship CRUs to you at its cost for installation by you. CRU information and replacement instructions are shipped with your product and are available from Lenovo at any time upon request. CRUs that are easily installed by you are called “Self-service CRUs”.
- Page 46 Lenovo. Transportation charges, both ways, shall be at Lenovo’s expense. If you fail to use the carton in which the replacement product was received, you may be responsible for any damage to the failed product occurring during shipment.
- Page 47 For more information about ENERGY STAR, visit http://www.energystar.gov. Lenovo encourages you to make efficient use of energy an integral part of your day-to-day operations. To help in this endeavor, Lenovo has preset the following power-management features to take effect when your computer has...
- Page 48 Product specific Notices Table 1. ENERGY STAR power-management features ® Windows Power plan: balanced (plugged in) • Turn off the display: After 10 minutes • Put the computer to sleep: After 30 minutes • Advanced power settings: - Turn off hard disks: After 20 minutes To awaken your computer from a Sleep mode, press any key on your keyboard.
- Page 49 Properly shielded and grounded cables and connectors must be used in order to meet FCC emission limits. Proper cables and connectors are available from Lenovo authorized dealers. Lenovo is not responsible for any radio or television interference caused by using other than recommended cables or connectors or by unauthorized changes or modifications to this equipment.
- Page 50 Um dieses sicherzustellen, sind die Geräte wie in den Handbüchern beschrieben zu installieren und zu betreiben. Des Weiteren dürfen auch nur von der Lenovo empfohlene Kabel angeschlossen werden. Lenovo übernimmt keine Verantwortung für die Einhaltung der Schutzanforderungen, wenn das Produkt ohne Zustimmung der Lenovo verändert bzw. wenn Erweiterungskomponenten von Fremdherstellern ohne Empfehlung der Lenovo gesteckt/eingebaut werden.
- Page 51 Dieses Gerät ist berechtigt, in Übereinstimmung mit dem Deutschen EMVG das EG-Konformitätszeichen - CE - zu führen. Verantwortlich für die Konformitätserklärung nach Paragraf 5 des EMVG ist die Lenovo (Deutschland) GmbH, Meitnerstr. 9, D-70563 Stuttgart. Informationen in Hinsicht EMVG Paragraf 4 Abs. (1) 4: Das Gerät erfüllt die Schutzanforderungen nach EN 55024 und EN 55022...
- Page 52 EU Contact Address: Lenovo, Einsteinova 21, 851 01 Bratislava, Slovakia Export Control Classification Notice (ECCN) - - - - - - - - - - - - - - - - - - - - - - - This product is subject to the United States Export Administration Regulations (EAR) and has an Export Classification Control Number (ECCN) of 5A992.c.
- Page 53 Lenovo YOGA 710-11ISK/Lenovo YOGA 710-11IKB Machine Type: 80TX/80V6 Note: The following specifications may contain technical inaccuracies or typographical errors. Lenovo reserves the right to improve and/or change specifications at any time without notice. Form Factor Dimensions Appr. 281 mm × 195 mm × 14.9 mm Weight Appr.
- Page 54 Specifications Battery pack Type Li-ion battery pack Cells/Capacity 4 cells, 40 Wh Note: The capacity given here is the typical or average capacity as measured in a specific test environment. Capacities measured in other environments may differ but are no lower than the rated capacity (see product label).
- Page 55 Trademarks Lenovo is a trademark or registered trademark of Lenovo in the United States, other countries, or both. Microsoft and Windows are trademarks of Microsoft Corporation in the United States, other countries, or both. Other company, products, or service names may be trademarks or service...
- Page 56 Lenovo YOGA 710-11ISK YOGA 710-11IKB Regulatory Notice...
- Page 57 Read first — regulatory information Please read this document before you use your Lenovo computer. Your Lenovo computer complies with the radio frequency and safety standards of any country or region in which it has been approved for wireless use. You must install and use your computer in strict accordance with the instructions as described hereafter.
- Page 58 FCC ID of wireless module: On the bottom side of your Lenovo computer, you will find an indicator label of the format “Contains Transmitter Module: FCC ID XXXX”, where XXXX represents the FCC ID that corresponds to your preinstalled Wireless LAN + Bluetooth Combo module.
- Page 59 Lenovo computer. Instead you will find an indicator label pointing to the location of the IC Certification number on the bottom side of your Lenovo computer. This label will be of the format “Contains Transmitter Module: Canada IC: XXXX”, where XXXX represents the IC ID that corresponds to your preinstalled WLAN module.
- Page 60 Le boîtier de votre ordinateur Lenovo ne comporte pas de numéro d’homologation IC (Industry Canada) pour la carte mini-PCI Express ; mais sous votre Lenovo, vous trouverez une étiquette indicatrice pointant vers l’emplacement du numéro d’homologation IC. L’étiquette se présente sous la forme “Contains Transmitter Module: Canada IC: XXXX”...
- Page 61 1009 Think Place - Building One Morrisville, NC 27560 Telephone: 1-919-294-5900 Trademarks Lenovo and the Lenovo logo are trademarks of Lenovo in the United States, other countries, or both. Other company, product, or service names may be trademarks or service marks of others.
- Page 62 Rev. AA00...