Panasonic NU-SC180B Owner's Manual
Hide thumbs
Also See for NU-SC180B:
- Owner's manual (55 pages) ,
- Operating instructions manual (51 pages)
Table of Contents
Advertisement
Owner's Manual
Manuel d'utilisation
使用說明書
Convection Steam Oven
Four à convection et à vapeur
純蒸氣烤焗爐
Household Use Only
Pour usage domestique seulement
僅家庭用
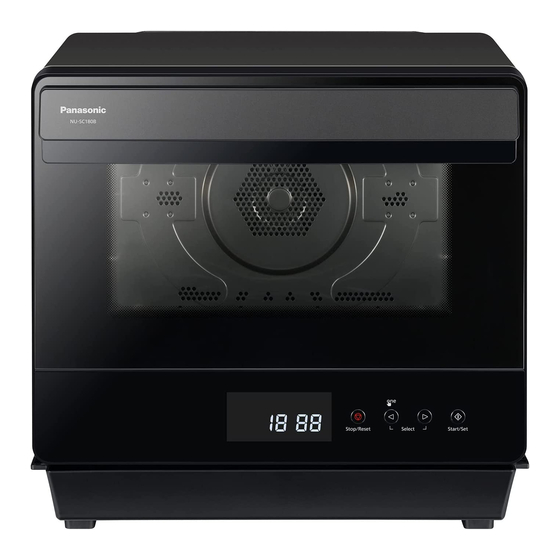
Model No.
Nº de modèle
NU-SC180B
型號:
Important safety instructions
Read carefully and keep for future reference
Importantes mesures de sécurité
Lire attentivement et conserver pour référence future
重要安全措施
仔細閱讀並妥善保存
F0003CF00CP_09_EN_20210218.indd cover1
2021/2/27 10:33:20
Advertisement
Table of Contents

Related Manuals for Panasonic NU-SC180B


Summary of Contents for Panasonic NU-SC180B
- Page 1 Four à convection et à vapeur 純蒸氣烤焗爐 Household Use Only Pour usage domestique seulement 僅家庭用 Model No. Nº de modèle NU-SC180B 型號: Important safety instructions Read carefully and keep for future reference Importantes mesures de sécurité Lire attentivement et conserver pour référence future 重要安全措施...
-
Page 2: Table Of Contents
Cleaning (Cavity) ........................43 Cleaning (System) ........................44 Cleaning (with Citric Acid) ......................45 Care of Your Oven ..........................46 Before Requesting Service ......................47-49 WARRANTY ............................50 Specifications .............................51 © Panasonic Appliances Microwave Oven (Shanghai) Co., Ltd. 2021 - Eng-1 - F0003CF00CP_09_EN_20210218.indd 1 2021/2/27 10:33:20... -
Page 3: Important Safety Instructions
Important Safety Instructions Read the manual carefully and keep it properly. Precautions for using this product for 12. The oven is used for household cooking only and may not be used for laboratory tests or other cooking Check whether the product is commercial purposes. -
Page 4: Precautions For Placement And Cooking
Important Safety Instructions (continued) 4. If you need to open the oven door to stir, turn cannot be directly placed in the oven cavity for over or rearrange food in the process of using cooking. steam, note to keep a distance; otherwise steam 3. - Page 5 Do not damage the safety lock of the oven door, including the door hinges. To repair the product, please contact an authorized Service Center by Panasonic. (b) Except for a qualified technician, repair work is very dangerous. Do not attempt to disassemble, repair or modify the oven yourself.
-
Page 6: Heating Principle
Heating Principle The diagrams shown below are examples of the accessories placements of various cooking modes. It may vary depending on the recipe/dish used. Cooking modes Principle and Types Uses Caution Placement Take food out Convection, immediately after Use the convection heater for Fermentation, heating;... -
Page 7: Cooking Techniques
Cooking Techniques Timing Browning A range in heating time is given in each recipe. The time To shorten the food convection or cooking time and range compensates for the uncontrollable differences get good color effect, be sure to apply dark soy sauce in food shapes, starting temperature and regional or spicy sauce to the food before baking. -
Page 8: Feature Diagram
Feature Diagram Air Outlet Menu/Warning Label Attach menu/warning label Warning symbol according to the required (Hot surface ) language. Convection Heater LED Light Upper Shelf Position Steam Outlet Air Outlet Lower Shelf Position Power Door Hinges Supply Cord When opening or closing the door, do not stretch your fingers inside the Power... - Page 9 Feature Diagram (continued) Figure 1 Drip Tray Control Panel Water Tank 1. Full water level is 800 ml. Add water to 800 ml mark. 2. Fill with pure water (do not use mineral water). 3. Fully fill the water tank, and cover with the rubber lid. Rubber Lid Water Tank Lid Integrated Water Tank...
-
Page 10: Cookware And Utensil Guide
Cookware and Utensil Guide Convection*, Convection*, Container Steam High, Steam-Med Container Steam High, Steam-Med Fermentation Fermentation Metal tray Lacquerware Aluminum and Wire rack other metal Note: Note: containers Meal containers Easy-rusting with resin metal container handles cannot is forbidden. be used. Heat-proof glass container Wood •... -
Page 11: Control Panel
Control Panel ➊ ➋ ➍ ➌ ➊ ➊ Display Window: ➋ Stop/Reset button ➌ Start/Set button A: Top shelf and Bottom Mode: shelf Two modes of steam cooking: ➍ Select button Steam-Med ....(See page 12) B: Normal Working Steam-High .....(See page 12) (The mark is rotate Stew ......(See page 13) during operation.) - Page 12 Control Panel (continued) One Push Setting/Cancel To set/cancel one push setting. (Press “ ” button 2 seconds) Function Setting To select a function which you desired. Time Setting* To set the cooking time. Menus Setting To choose desired menu among auto menus. Weight/Serving/Level Setting To set desired cooking weight/serving/level among auto menus.
-
Page 13: Steam Setting
Steam Setting Two modes for steam cooking, Steam-Med and Steam-High. Cooking with steam can keep foods soft and moist. For example: vegetables, seafood and so on. Additionally, it also can heat tin foods or vacuum packaged foods. Place wire rack with food on the ➊... -
Page 14: Stew Setting
Stew Setting This mode combines the steam and convection heater. It is suitable for stew soup and vegetables with long cooking times. You can set cooking time only. Place wire rack with food on the ➊ metal tray in the lower shelf position. Select Stew mode by pressing Select button. -
Page 15: Healthy Fry Setting
Healthy Fry Setting This mode can cook foods like fries with little or no oil. This is more healthy than traditional deep-frying and suitable for fried fish fillets, fried shrimp with bread crumbs, fried chicken etc. Select Healthy Fry mode by ➊... -
Page 16: Fermentation Setting
Fermentation Setting Fermentation has 30 °C and 40 °C modes. 30 °C can be used for fermentation of European bread and dough with rich oil. Like baguette or Danish bread. 40 °C can be used for fermentation of Chinese pastry and pizza dough. Place food in the container or ➊... -
Page 17: Convection Setting
Convection Setting Convection setting from 100 °C to 230 °C are suitable for baking meat, fish and Western desserts like cakes, pizzas, etc. Place the foods directly on the accessory, select suitable temperature and time, and start cooking. For evenly distributed color of cooked food, re-arrange food position or rotate the accessory during cooking. When cooking without Preheat: Place food on the accessory in the upper and lower shelf position. - Page 18 Convection Setting (continued) When cooking with Preheat: Select Convection mode by ➊ pressing Select button. (With Preheat) Press Set button to set Convection ➋ mode. (With Preheat) Set desired cooking temperature by ➌ Example: 190 °C pressing Select button. (Temperatures range from 100 °C to 230 °C.
-
Page 19: Steam Convection Setting
Steam Convection Setting This mode combines the steam and convection modes, adding steam while cooking in Convection mode which creates fluffier cakes and juicier meats. For more evenly distributed food color, re-arrange food or rotate the accessory during cooking. When cooking without Preheat: Place accessory with food in the ➊... - Page 20 Steam Convection Setting (continued) When cooking with Preheat: Press Select button to select Steam ➊ Conv. mode. (With Preheat) Note: Fill the tank with water before using. Press Set button to set Steam ➋ Conv. mode. (With Preheat) Set desired cooking temperature by Example: 230 °C ➌...
-
Page 21: Steam Shot Setting
Steam Shot Setting This function allows you to add steam during cooking in Convection and Fermentation mode (up to 3 minutes). Adding steam during cooking can enhance moisture distribution, thus promoting the softer dessert surfaces and juicier meats. At the beginning of fermentation using steam can increase cavity humidity, which is better for the dough to ferment. -
Page 22: One Push Setting
One Push Setting One push setting can simplify operation. You can set desired function as one push setting that can use easily in each time. To Save: “ ” will flash in the display window ➊ after finishing. It means you can save program as one push setting. -
Page 23: Child Safety Lock Setting
Child Safety Lock Setting This function allows you to prevent a young child operating the oven; however, the door can still be opened. You can set Child Safety Lock when “ ” shows in display window. To set: Press 3 times, “ ”... -
Page 24: Auto Cook Setting And Menus
Auto Cook Setting and Menus This function allows you to cook most of your favorite foods by setting the different weight. It can follow the prompts and cooking automatically without setting function, temperature and time. Press Select button and menu number will appear in the display window. Operation as follows: (except No.10-11, 13-18) Press Select button to select Auto ➊... - Page 25 Auto Cook Setting and Menus (continued) Operation as follows: No.10-11, 13-18 Press Select button to select Auto ➊ Menus. Press Set button to set a desired ➋ Auto Menus. Press Select button to select a Example: No.11 Fried ➌...
- Page 26 Auto Cook Setting and Menus (continued) Reference Menu Weight/Serving/Level Accessories Placement Page Steamed Fish* 200 g 300 g 400 g 500 g P. 27 Steamed Egg* 1-3 serves 4-6 serves P. 27 Steamed Chinese 1 level 2 levels P. 28 Buns* (9 pcs) (18 pcs)
- Page 27 Auto Cook Setting and Menus (continued) Reference Menu Weight/Serving/Level Accessories Placement Page Cleaning P. 42 (Deodorization) Cleaning (Cavity)* P. 43 Oven Cleaning Setting Cleaning P. 44 (System)* Cleaning P. 45 (with Citric Acid) Notes: 1. The recipes marked with “*” require steam. Be sure to fill the water tank before cooking. Add detergent before using citric acid cleaning.
- Page 28 Auto Cook Setting and Menus (continued) Steamed Fish Steamed Egg (1-3/4-6 serves) (200/300/400/500 g) (2 serves) Ingredients Ingredients fish ........1 (net weight 300 g) egg ........2 (about 50 g an egg sliced ginger ....5 g without shell) green onion ......
- Page 29 Auto Cook Setting and Menus (continued) Steamed Chinese Buns Steamed Frozen Foods (1 level / 2 levels) (1 level / 2 levels) Ingredients (1 level, 9 pcs) (1 level, 12 pcs) Fillings: Wrapper: Ingredient all purpose flour ..225 g minced meat ..
- Page 30 Auto Cook Setting and Menus (continued) Steamed Fresh Vegetables Steamed Sweet Potato Cubes (50-150 (200/300/400/500 g ) Ingredient Ingredient vegetables (green vegetables, Chinese Kale etc.) sweet potatoes ....50 -150 g Container Container Metal tray, wire rack Metal tray, wire rack (lower shelf), (lower shelf), integrated water tank...
- Page 31 Auto Cook Setting and Menus (continued) Steamed Scallop with Mashed Chinese White Sliced Garlic Chicken (1000 g ) (1 level / 2 levels) Ingredients Ingredient (1 level, 6 pcs) scallop ......6 pcs (about 120 g each) chicken ......about 1000 g vermicelli noodles .....
- Page 32 Auto Cook Setting and Menus (continued) Stewed Ribs Soup Fried Shrimp with Bread Crumbs (2-4 serves) (1 level / 2 levels) Ingredients Ingredients (4 serves) (1 level, 16 pcs) pork ribs ......350 g shelled shrimps ....400 g (about 16 pcs) carrot .......
- Page 33 Auto Cook Setting and Menus (continued) Fried Fish Fillets Home-made Yoghurt (1 level / 2 levels) (4-8 cups) Note: This auto menu will run for 5 hours. Ingredients (1 level, 350 g) belt fish ......350 g (about 12 pieces) Ingredients corn starch .......
- Page 34 Auto Cook Setting and Menus (continued) Barbecue Pork Teriyaki Chicken Wings (400/600/800 g ) (1 level / 2 levels) Ingredients pork shoulder (or pork belly) ..400 g Ingredient (1 level, 12 pcs) maltose (or honey) .....30 g water ..........30 ml chicken wings ....
- Page 35 Auto Cook Setting and Menus (continued) Egg Tarts Cookies (1 level / 2 levels) (1 level / 2 levels) Ingredient Ingredients (1 level, 9 pcs) (2 levels, 40 pcs) unsalted butter ....160 g egg tart skin ..... 9 pcs cake flour ......
- Page 36 Auto Cook Setting and Menus (continued) Cake batter: Cheese Cake (7 inch) 1. Cut cream cheese and unsalted butter into small pieces and let stand naturally until soft. Open vanilla bean and take vanilla seeds out for later use. 2. Stir together cream cheese, castor sugar, and vanilla seed in a mixer then beat until the texture is smooth.
- Page 37 Auto Cook Setting and Menus (continued) Method Home-made Pizza 1. Stir yeast and 1 g castor sugar mixture in warm (1 level / 2 levels) water and wait for 5 minutes. 2. To make the dough by hand, in a large bowl, add yeast water and stir together all the base ingredients, grease oil in the heat-proof container, spread out the dough in a container, cover loosely...
-
Page 38: Reheating Chart
Reheating Chart Note: In page 37 to 39, marking “➀” means that cooking by metal tray. Symbol “➁” means wire rack in metal tray. Sorts Foods Weight Accessories Program Time chilled : about 10 to 11 minutes Chilled Shumai* 207 g (9 pcs) Steam-Med ➁... -
Page 39: Cooking Chart
Cooking Chart Foods Weight Accessories Program Time Statement 3 pairs (6 pcs) Wash Dazha crabs, and place on Steamed Dazha ➁ / lower about 18 to about 100-150 g Steam-High wire rack, belly up, along with ginger Crabs* shelf 20 minutes each slices. - Page 40 Cooking Chart (continued) Foods Weight Accessories Program Time Statement 220 °C Cook directly without defrosting. Fried Frozen ➁ / lower about 18 to 260 g (4 pcs) Convection Different potatoes products need Hash Browns shelf 20 minutes (with preheat) different cooking time depends on the pre-fried extent and thickness ➀...
-
Page 41: Cleaning (Utensils)
Cleaning (Utensils) Cleaning (Utensils) This function is suitable for all kinds of dish cleaning. (need 30 minutes) Place wire rack with utensils on ➊ the metal tray in the lower shelf position. Then select Auto Menus by pressing Select button. ... -
Page 42: Cleaning (Feeding Bottles)
Cleaning (Feeding Bottles) Cleaning (Feeding Bottles) This function is used for all kinds of feeding bottles. Place wire rack with feeding bottle ➊ on the metal tray in the lower shelf position. Then select Auto Menus by pressing Select button. ... -
Page 43: Oven Cleaning Setting
Oven Cleaning Setting Cleaning (Deodorization) This function is suitable for ovens with odors (need 20 minutes). Before maintenance (cleaning the oven), please empty the oven and wipe inside dirt. Select Auto Menus by pressing ➊ Select button. Press Set button to set Auto Menus. ➋... -
Page 44: Cleaning (Cavity)
Oven Cleaning Setting (continued) Cleaning (Cavity) This function is suitable for cleaning a dirty oven caused by oil (need 30 minutes). Select Auto Menus by pressing ➊ Select button. Press Set button to set Auto Menus. ➋ Press Select button until “22” ➌... -
Page 45: Cleaning (System)
Oven Cleaning Setting (continued) Cleaning (System) After using steam function, this function can make the water pump through the pipe to the drip tray. Select Auto Menus by pressing ➊ Select button. Note: Fill water tank with 100 ml water before using and remove the water from the drip tray. -
Page 46: Cleaning (With Citric Acid)
Oven Cleaning Setting (continued) Cleaning (with Citric Acid) If “ ” appears in the display window after cooking, you should use citric acid to clean the water-piping. After using citric acid to clean, rinse with water again. Flush and clean water will drain into the drip tray. (need 30 minutes) Prepare detergent with approximately 20 g of citric acid dissolved completely in 250 ml of water, and pour the mixture into the integrated water tank of the oven directly. -
Page 47: Care Of Your Oven
Care of Your Oven Be sure to clean and maintain the oven after it is completely cold. Turn the oven off and remove the power supply plug from the wall socket before cleaning. A steam cleaner should not be used for cleaning. The outside oven surfaces should be Always clean the bottom plate, after cooling cleaned with a damp cloth. -
Page 48: Before Requesting Service
There is a problem with the outlet. check if the outlet is working. Please contact the service center specified There is a problem with the oven. by Panasonic. The door is not closed completely. Close the oven door securely. Start/Set button was not Press Start/Set button. - Page 49 After using steam function or cleaning, pour out the water from the drip tray and wipe with a sponge. If it seems there is a problem with the oven, contact an authorized Service Center by Panasonic. - Eng-48 - F0003CF00CP_09_EN_20210218.indd 48...
- Page 50 Before Requesting Service (continued) ALL THESE THINGS ARE NORMAL: Sounds will occur when This is caused by air mixed when the water tank is working. It is using the Steam function. normal. The sound of “Bar... Bar...” may be emitted at the back This is a cause of thermal expansion and contraction of the metal of the oven cavity during material used in the product.
-
Page 51: Warranty
2 Years This warranty is given only to the original purchaser, or the person for whom it was purchased as a gift, of a Panasonic brand product mentioned above sold by an authorized Panasonic dealer in Canada and purchased and used in Canada, which product was not sold “as is”, and which product was delivered to you in new condition in the original packaging. -
Page 52: Specifications
Specifications Model Number NU-SC180B Power Source 120 V, 60 Hz Steam 9.3 A 1130 W Power Consumption Convection 10.2 A 1230 W Steam Conv. 10.2 A 1230 W Steam 1100 W Output Power Convection 1200 W Steam Conv. 1200 W Outside Dimensions (H ×... - Page 53 Panasonic Canada Inc. 5770 Ambler Drive Mississauga, Ontario L4W 2T3 www.panasonic.com F0003CF00CP PA0321-0 Printed in China Imprimé en Chine 中國印刷 F0003CF00CP_09_EN_20210218.indd 52 2021/2/27 10:33:38...