
Related Manuals for Siemens WN44A100IN


Summary of Contents for Siemens WN44A100IN
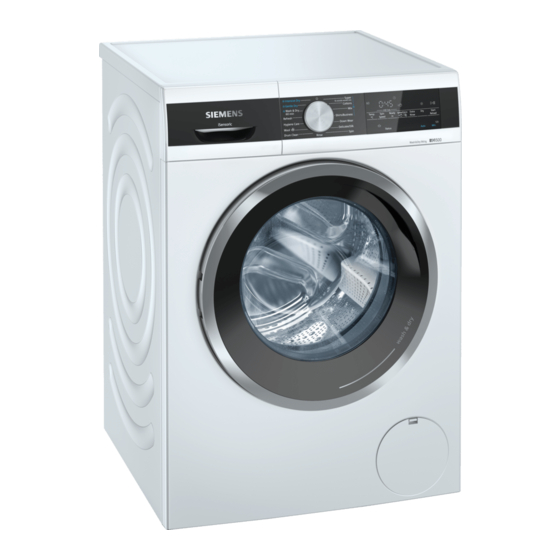
- Page 1 Washer dryer WN44A100IN siemens-home.bsh-group.com/welcome Register your product online...
- Page 2 Your new washer dryer Note/tip Information about the optimum use of You have chosen a Siemens washer the appliance/any other useful dryer. information. Please take a few minutes to read and 1. 2. 3. / a) b) c) become familiar with the advantages of your washer dryer.
-
Page 3: Table Of Contents
Contents e n I n s t r u c t i o n M a n u a l a n d I n s t a l l a t i o n I n s t r u c t i o n s Drying table . -
Page 4: Intended Use
Intended use Drain pump is blocked ..42 Intended use The drain hose at the siphon is blocked ......43 This appliance is intended for private Filter in the water supply is blocked 43 ■... -
Page 5: Safety Instructions
Safety instructions Do not allow children to Safety instructions ■ clean or maintain this appliance unsupervised. T he following safety information Keep children under 3 years S a f e t y i n s t r u c t i o n s and warnings are provided to ■... -
Page 6: Installation
Safety instructions Keep packaging, plastic film The mains voltage on your ■ and packing components away power socket must match from children. the rated voltage specified on the appliance Warning (identification plate). The Risk of poisoning! connected loads and the Detergents and care products required fuse protection are may result in poisoning if... - Page 7 Safety instructions If you take hold of any of the Warning ■ appliance's protruding parts Risk of electric shock/fire/ (e.g. the appliance door) in material damage/damage to order to lift or move it, these the appliance! parts may break off and If the appliance's mains cable is cause injury.
-
Page 8: Operation
Safety instructions The appliance is secured for Caution! ■ transportation by transport Material damage/damage to locking devices. If the the appliance transport locking devices are If the water pressure is too ■ not removed before the high or too low, the appliance is operated, this appliance may not be able to may result in damage to the... - Page 9 Safety instructions Do not use the appliance if During the last part of the ■ ■ industrial chemicals have drying cycle, the laundry in been used to clean the the drum is not heated laundry. (cooling cycle). This is to ensure that it remains at a Warning temperature at which it will...
- Page 10 Safety instructions If you reach into the drum Caution! ■ while it is still rotating, you Material damage/damage to risk injuring your hands. the appliance Wait until the drum has If the amount of laundry in ■ stopped rotating. the appliance exceeds its maximum load capacity, it Warning may not be able to operate...
-
Page 11: Cleaning/Maintenance
Safety instructions Cleaning/Maintenance Warning Risk of poisoning! Warning Poisonous fumes may be given Risk of death! off by cleaning agents that The appliance is powered by contain solvents, e.g. cleaning electricity. There is a risk of solvent. electric shock if you come into Do not use cleaning agents that contact with live components. -
Page 12: Environmental Protection
Do’s Energy saving mode is not be Please visit our website ■ activated when the programme is http://www.siemens-home.com/in/ running. Preserve.html to find out more If the laundry is then dried in the details regarding ewaste disposal ■... -
Page 13: Positioning And Connecting
Positioning and connecting Bag: Positioning and Installation and operating ■ connecting instructions Customer Service location ■ S tandard accessories directory* P o s i t i o n i n g a n d c o n n e c t i n g Warranty* ■... -
Page 14: Installation Surface
Positioning and connecting If the hose and mains cables are not On wooden joist floors, install the Note: ■ routed properly, there is a risk of appliance: tripping and injury. In a corner, if possible, ■ Lay hoses and cables in such a way On a water-resistant wooden board ■... -
Page 15: Removing The Support Struts
Positioning and connecting b) Remove the sleeves. Take the hoses out of the holders. Fit the covers. Unscrew and remove all four Lock the covers firmly in place by transport brace screws. applying pressure to the snap-in hooks. a) Remove the mains cable from the Removing the support struts holders. -
Page 16: Hose And Cable Lengths
Positioning and connecting Remove the transport struts. Connection on right side Hose and cable lengths Connection on left side ( ~ 85 cm 0 ~ 140 cm 8 ~ 140 cm @ 60 cm ~ 100 cm If the supply hose is too short for Note: your connection, you can order an extension from the after-sales service. -
Page 17: Water Outlet
Positioning and connecting Do not bend, squash, modify or cut – Model: Aqua-Stop ■ through the water supply hose (otherwise its strength is no longer guaranteed). Only tighten the screw connections ■ by hand. If the screw connections are tightened too much with a tool (pliers), the thread may be damaged. -
Page 18: Alignment
Positioning and connecting Caution! Drainage into a plastic pipe with ■ rubber bushing or into a drainage Damage to the appliance/fabrics If the end of the drain hose is immersed in the drained water, water may be sucked back into the appliance and may damage the appliance/fabrics. -
Page 19: Electrical Connection
Positioning and connecting Check the alignment of the Notes appliance with a spirit level, and The mains voltage and voltage ■ adjust it if necessary. Change the indicated on the washing machine height by turning the appliance feet. (rating plate) are the same. All four appliance feet must stand The connected load and fuse firmly on the ground. -
Page 20: Before Washing For The First Time
Positioning and connecting To prevent frothing, use only Notes Note: half the recommended amount Do not modify the plug provided with ■ of detergent. Do not use any the appliance. If the plug will not fit woollens or mild detergents. into outlet have a properly grounded Close the detergent drawer. - Page 21 Positioning and connecting b) Insert and tighten the screws. Installing the transport locks: Remove the covers and keep them in a safe place. Use a screwdriver if Note: necessary. c) Clip the hoses securely in the holders. Before switching on the appliance again: Insert all four sleeves.
-
Page 22: Getting To Know The Appliance
Getting to know the appliance Getting to know the appliance A ppliance G e t t i n g t o k n o w t h e a p p l i a n c e Detergent drawer Control panel Loading door Service flap... -
Page 23: Control Panel
Getting to know the appliance Control panel Programme default settings can be changed. Overview of all programme default settings ~ Page 33 Additional programme settings can be selected. Overview of all additional programme settings ~ Page 34 I Start/Reload button for starting, interrupting, (e.g. -
Page 24: Display Panel
Getting to know the appliance Display panel Displays for the programme ( Temperature for washing Ž (cold) – 90 °C Temperature in °C programme Programme duration after programme 0 Programme information 1:50* selection in h:min (hours:minutes) 1 – 24 h Finish in time in h (h=hour) Max. - Page 25 Getting to know the appliance 8 Programme progress sym- Washing bols Rinsing ¬ Draining/Spinning Drying Ô Wrinkle guard Ó w lights up On if childproof lock has been activated @ Programme information and additional function symbols ~ Page 38 w flashes The childproof lock is actived, and if the pro- gramme selector has been adjusted or the buttons have been pressed...
-
Page 26: Laundry
Laundry Sorting laundry Laundry Sort your laundry according to the care P reparing laundry for washing instructions and manufacturer's L a u n d r y information on the care labels, depending on: Protecting your laundry and appliance Type of fabric/fibre ■... -
Page 27: Preparing Laundry For Drying
Laundry Preparing laundry for drying Starching To ensure an even drying result, Laundry should not be treated Note: Note: sort the laundry according to the: with fabric softener. Type of fabric ■ Switch on the appliance. Care symbols which are indicated on ■... -
Page 28: Overview Of Programmes
Overview of programmes Overview of programmes S electable programme O v e r v i e w o f p r o g r a m m e s Programme/Type of laundry Options/Information Name of the programme Max. load for washing/ Max. - Page 29 Overview of programmes Programme/Type of laundry Options/Information Shirts/Business 2,0 kg/2,0 kg Suitable for Shirts/Blouses made of cotton, linen, synthetics Ž - 60 °C fibres or blended fabrics. – – – –, 0 - 800 rpm speed ÿ, eco ¦ , Extra Rinse »...
- Page 30 Overview of programmes Programme/Type of laundry Options/Information Drum Clean 0,0 kg/- Special programme for drum hygiene or fluff removal. Do not Ž, 40°C, 90 °C load any laundry.. 1200 rpm 90°C = antibacterial programme. 40°C = antibacterial programme, special drum cleaning deter- gent can be used.
- Page 31 Overview of programmes Programme/Type of laundry Options/Information ‰ Wash & Dry 60 min 2,0 kg/1,0 kg For small amount lightly soiled single layer garments made of Ž - 40 °C cotton, linen, synthetic or blended fabrics. – – – –, 0 - 1200 rpm The default programme is ‰...
-
Page 32: Drying Table
Overview of programmes Drying table Recommended Estimated drying time (min) drying programme Load type Automatic Dry Drying load » (Cupboard · (Cupboard (kg) dry) dry plus) Cottons (textiles made of ‰ Intensive Dry 0,5-2,0 40-90 60-100 cotton or linen such as under- 2,0-3,0 90-120 100-130... -
Page 33: Changing Programme Default
Changing programme default settings Ready In Changing programme 8:Define the Finish in time (end default settings of programme). Y ou can change the default settings for The respective programme Note: C h a n g i n g p r o g r a m m e d e f a u l t s e t t i n g s selected programmes. -
Page 34: Selecting Additional Functions
Selecting additional functions Notes Selecting additional Programme selection in ‰ Intensive ■ functions Dry or ‰ Gentle Dryposition to select an individual drying programme. Overview of Y ou can select your desired additional programmes ~ Page 28 S e l e c t i n g a d d i t i o n a l f u n c t i o n s functions by touching the respective The standard drying mode is »... -
Page 35: Operating The Appliance
Operating the appliance Select programme/switch on Operating the the appliance appliance If you have activated the Note: P reparing the appliance childproof lock, you must first deactivate O p e r a t i n g t h e a p p l i a n c e it before you can set a programme. -
Page 36: Placing Laundry Into The Drum
Operating the appliance If an individual drying programme or Notes washing and drying without interruption The selectable additional functions ■ is selected, you can change the default depends on the selected washing/ settings for the drying programme by drying programme. touching Dry as required. -
Page 37: Dosing And Adding Detergent And Care Products
Operating the appliance Observe the maximum specified Pour in detergent and/or cleaning ■ load. Overfilling adversely affects the product. washing/drying result and promotes creasing. Make sure that no items of laundry are trapped between the door and the rubber seal, and close the door. -
Page 38: Childproof Lock
Operating the appliance If the following appears on the display Note: Foam detection If the symbol o also lights up in the panel: display panel, the appliance has The symbol Õ disappears, ■ detected too much foam during the reloading is possible. wash cycle and automatically activated The symbol Õ... -
Page 39: End Of The Programme
Operating the appliance Select Spin. Wrinkle guard process starts after ■ Touch I Start/Reload button. drying process is finished to prevent laundry getting wrinkle if you do not For drying programmes: take laundry out in time. The process lasts about 30 minutes. 0:00 will be Select ‰... -
Page 40: Appliance Settings
Appliance settings Exiting setting mode Appliance settings You can now end the process and set the programme selector to the Û (Off) Y ou can change the following settings: position. The settings are saved. A p p l i a n c e s e t t i n g s The volume of the end signal. -
Page 41: Cleaning And Maintenance
Cleaning and maintenance for the appliance may damage the drum Cleaning and and cause injury. Regularly run a programme for cleaning maintenance the drum or wash at temperatures of at least 60ºC. Warning Leave the appliance to dry after every C l e a n i n g a n d m a i n t e n a n c e Risk of death! operation with the door open, and leave... -
Page 42: Drain Pump Is Blocked
Cleaning and maintenance To remove the insert: Push the insert Leave the detergent drawer open Note: upwards from below with your finger. so that any residual water can evaporate. Drain pump is blocked Turn the water tap off to prevent Note: more water from flowing in and to ensure that it is drained via the pump. -
Page 43: The Drain Hose At The Siphon Is Blocked
Cleaning and maintenance Carefully unscrew the pump cover; The drain hose at the siphon residual water may leak out. is blocked Clean the interior, pump cover thread and pump housing. The Turn the programme selector to Û impeller in the drain pump must be (Off). -
Page 44: Faults And What To Do About Them
Faults and what to do about them Clean the filters: Faults and what to do Disconnect the hose from the rear of about them the appliance. E mergency release F a u l t s a n d w h a t t o d o a b o u t t h e m E.g. -
Page 45: Information On The Display Panel
Faults and what to do about them Drain the water. ~ Page 42 Pull the emergency release downwards with a tool and release. The door can then be opened. Information on the display panel Display Cause/Remedy Flashes fast + signal: The door was opened and the water level is too high. Õ... -
Page 46: Faults And What To Do About Them
Faults and what to do about them Display Cause/Remedy E:32 Unbalance problem, spinning phase is aborted. alternating with when programme is finished Other displays Turn the programme selector to Û (Off), wait for five seconds and then switch it on again. - Page 47 Faults and what to do about them Faults Cause/Remedy Water is not visible in the Not a fault – the water is below the visible area. drum. The wrong detergent/fab- Empty the dispenser(s), clean it/them and pour in the correct product. ric softener has been ~ "Emptying the detergent draw, cleaning the detergent drawer and its hous- poured into the dis-...
- Page 48 Faults and what to do about them Faults Cause/Remedy Odours, stain formation in Run the Drum Clean 90°C programme without laundry. the appliance. Add washing powder or a detergent containing bleach. Note: To prevent foaming, only use half the amount of detergent recommend- ed by the detergent manufacturer.
-
Page 49: After-Sales Service
After-sales service Faults Cause/Remedy The drying result is not After the end of the programme, warm laundry feels damper than it actu- ■ satisfactory (laundry is ally is. Spread the laundry out and allow the heat to disperse. not dry enough). Excessively high ambient temperature (above 30 °C) or inadequate ventila- ■... -
Page 50: Consumption Values
Consumption values Consumption values E nergy and water consumption, programme duration and residual moisture for C o n s u m p t i o n v a l u e s the main washing programmes (approximate values) Programme Rated ca- Energy consump- Water consump- Program dura-... -
Page 51: Technical Data
Technical data Technical data Aqua-Stop warranty D imensions: O nly for appliances with Aqua-Stop T e c h n i c a l d a t a A q u a - S t o p w a r r a n t y 84,8 cm x 59,8 cm x 59,0 cm In addition to warranty claims against (height x width x depth) - Page 52 01450 2655 (0.03 € per minute at peak. Off peak 0.0088 € per minute.) You can find the contact information for all countries in the attached after-sales service directory. BSH Hausgeräte GmbH Carl-Wery-Straße 34 81739 München GERMANY siemens-home.bsh-group.com *9001588008* 9001588008 (0008)