LG KG225 User Manual
T-mobile
Hide thumbs
Also See for KG225:
- User manual (229 pages) ,
- Service manual (126 pages) ,
- Brochure (8 pages)

Related Manuals for LG KG225


Summary of Contents for LG KG225
-
Page 1: User Guide
ENGLISH K G 2 2 5 USER GUIDE K G 2 2 5 USER GUIDE Please read this manual carefully before operating your mobile phone. Retain it for future reference. P/N : MMBB0204002 (1.0) - Page 2 KG225 Please read this manual carefully before operating your mobile phone. Retain it for future reference. Disposal of your old appliance 1. When this crossed-out wheeled bin symbol is attached to a product it means the product is covered by the European Directive 2002/96/EC.
-
Page 3: Table Of Contents
Table of Contents Introduction Guidelines for safe and efficient use KG225 Features Parts of the phone Open view Rear view Key description Display information On-Screen icons Getting started Installing the SIM card and the battery Remove the battery Install the SIM card... - Page 4 Multimedia Photos Pictures Sounds Applications Camera Games Alarm clock Calculator World time Unit converter Voice recorder SIM application Messages New message Inbox Outbox Draft Listen to voice mail Info message Templates Settings t-zones Home Bookmarks Go to URL Settings Calendar Schedule Memo Profiles...
- Page 5 Table of Contents Settings Copy all Delete all Information Settings Date & Time Phone settings Call settings Security settings Network settings GPRS setting Memory status Reset settings On browsing menu Accessories Technical data...
-
Page 6: Introduction
Congratulations on your purchase of the advanced and compact KG225 mobile phone, designed to operate with the latest digital mobile communication technology. Introduction This user’s guide contains important information on the use and operation of this phone. Please read all... -
Page 7: Guidelines For Safe And Efficient Use
Radio wave exposure and Specific Absorption Rate (SAR) information This mobile phone model KG225 has been designed to comply with applicable safety requirements for exposure to radio waves. This requirement is based on scientific guidelines that include safety margins designed to assure the safety of all persons, regardless of age and health. -
Page 8: Efficient Phone Operation
radios or personal computers The unit should be kept away from heat sources such as radiators or cookers. Never place your phone in a microwave oven as it will cause the battery to explode. Do not drop. Do not subject this unit to mechanical vibration or shock. -
Page 9: Avoid Damage To Your Hearing
Guidelines for safe and efficient use phones. Minor interference may affect TVs, radios, PCs, etc. Road safety Check the laws and regulations on the use of mobile phones in the areas when you drive. Do not use a hand-held phone while driving. Give full attention to driving. -
Page 10: Battery Information And Care
Unlike other battery systems, there is no memory effect that could compromise the battery's performance. Use only LG batteries and chargers. LG chargers are designed to maximize the battery life. Do not disassemble or short-circuit the battery pack. -
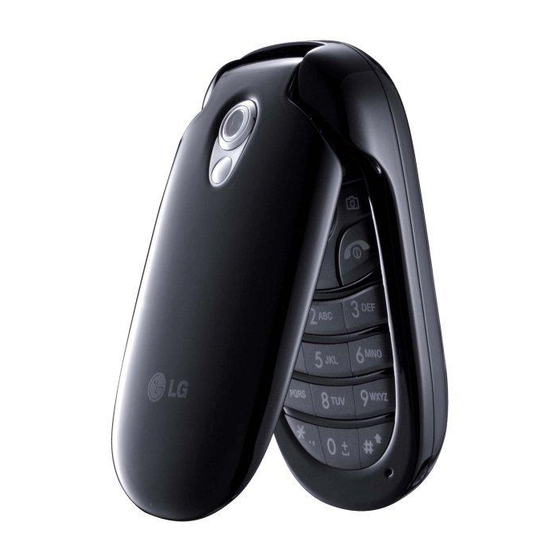
Page 11: Kg225 Features
KG225 Features Parts of the phone Open view Display screen Multimedia key Left soft key Message key Phone book list key Earpiece t-zones key Send key Star key Calendar key Right soft key Camera key Confirm key End/Power key Clear/Cancel key... -
Page 12: Rear View
Rear view Battery Handstrap hole Battery latch Headset jack SIM card socket Battery terminals Cable connector/ Battery charging connector/ Hands-free car kit connector... -
Page 13: Key Description
KG225 Features Key description The following shows key components of the phone. Keypad description Description Left soft key / Right soft key Each of these keys performs the function indicated by the text on the display immediately above it. Navigation keys Use to scroll through menus and move the cursor. -
Page 14: Side Keys
Description Clear key Deletes a character by each press. Hold the key down to clear all input. Also use this key to go back to the previous screen. Side keys Description Up/Down side keys When you open the flip, you can control the volume of key tone in the standby mode and the volume during a call. -
Page 15: Display Information
KG225 Features Display information The table below describes various display indicators or icons that appear on the phone’s display screen. On-Screen icons Icon/Indicator Description Tells you the strength of the network signal. Call is connected. You can use GPRS service. -
Page 16: Getting Started
Installing the SIM card and the battery Make sure the power is off before you remove the battery. 1. Remove the battery. Press the button to release the battery, then slide the battery down till it stops. Now lift the battery from its compartment. -
Page 17: Install The Battery
Getting started 3. Install the battery. Charging the Battery To connect the mains adapter to the phone, you must have installed the battery. 1. With the arrow facing you as shown in the diagram push the plug on the battery adapter into the socket on the bottom of the phone until it clicks into place. -
Page 18: Disconnecting The Adapter
Disconnecting the adapter Disconnect the travel adapter from the phone by pressing its side buttons as shown in the diagram. 1. When charging is finished, the moving bars of the battery icon stop and ‘Full’ is displayed on the screen. 2. -
Page 19: Turning Your Phone On And Off
Getting started Turning your phone on and off Turning your phone ON 1. Install a battery to the handset and connect the phone to an external power source such as the travel adapter, cigarette lighter adapter or handsfree car kit. Or install a charged battery pack to the handset. -
Page 20: Barring Password
PUK code (4 to 8 digits) The PUK (PIN Unblocking Key) code is required to unlock a PIN blocked phone. The PUK code may be supplied with the SIM card. If not, contact your network operator for the code. If you lose the code, also contact your network operator. -
Page 21: General Functions
General functions Making and answering calls Making a call 1. Make sure your phone is switched on. 2. Enter a phone number, including the area code. To delete numbers press the hold the clear key to erase the entire number. 3. -
Page 22: Signal Strength
Adjusting the volume If you want to adjust the earpiece volume during a call, use the side keys ( ). Press the up side key to increase and down side key to decrease the volume. Note In standby mode with the phone open, pressing the side keys adjusts the key tone volume. -
Page 23: Changing The Text Input Mode
General functions T9 Mode This mode lets you enter words with only one keystroke per letter. Each key on the keypad has more than one letter. The T9 mode automatically compares your keystrokes with an internal dictionary to determine the correct word, thus requiring far fewer keystrokes than the traditional ABC mode. - Page 24 1. When you are in the T9 predictive text input mode, start entering a word by pressing keys . Press one key per letter. The word changes as letters are typed. Ignore what’s on the screen until the word is typed completely.
-
Page 25: Phonebook
General functions Characters in the order display Upper Case . , / ? ! - : ' " 1 A B C 2 D E F 3 G H I 4 J K L 5 M N O 6 P Q R S 7 T U V 8 W X Y Z 9 Space 0... -
Page 26: Making A Second Call
Making a second call You can make a second call while currently on a call. Enter the second number and press the send key. When the second call is connected, the first call is automatically placed on hold. You can get a number you wish to dial from the phonebook to make a second call. -
Page 27: Multiparty Or Conference Calls
General functions Switching DTMF tones on during a call To turn DTMF tones on during a call, press the left soft key, and then select DTMF on . DTMF tones can be turned off the same way. DTMF tones allow your phone to make use of an automated switchboard. -
Page 28: Adding Calls To The Conference Call
Adding calls to the conference call To add a call to an existing conference call, press the left soft key, then select the Conference/Join all. Displaying callers in a conference call To scroll through the numbers of the callers who make up a conference call on the handset screen, use the up/down navigation keys. -
Page 29: Selecting Functions And Options
Selecting functions and options Your phone offers a set of functions that allow you to customise the phone. These functions are arranged in menus and sub-menus, accessed via the two soft keys marked . Each menu and sub-menu lets you view and alter the settings of a particular function. -
Page 30: Menu Tree
1. Call register 1.1 Missed calls 1.2 Received calls 1.3 Dialled calls 1.4 All calls 1.5 Delete recent calls 1.6 Call charges 1.7 GPRS information 2. Multimedia 2.1 Photos 2.2 Pictures 2.3 Sounds 3. Applications 3.1 Camera 3.2 Games 3.3 Alarm clock 3.4 Calculator 3.5 World time 3.6 Unit converter... - Page 31 Menu tree 7. Profiles 7.1 General 7.2 Loud 7.3 Headset 7.4 Car 7.5 Vibrate only 7.6 Silent 8. Contacts 8.1 Search 8.2 Add new 8.3 Caller groups 8.4 Speed dials 8.5 Settings 8.6 Copy all 8.7 Delete all 8.8 Information 9.
-
Page 32: Call Register
You can check the record of missed, received, and dialled calls only if the network supports the Calling Line Identification (CLI) within the service area. The number and name (if available) are displayed together with the date and time at which the call was made. -
Page 33: All Calls
Call register Send a message to this number. Delete the call from the list. All calls You can view all lists of outgoing or incoming calls. Delete recent calls Use this to delete the missed call list, received call list, or dialled call list. You can also delete all call lists at one time selecting All calls . -
Page 34: Gprs Information
Settings (SIM Dependant) Set tariff: You can set the currency type and the unit price. Contact your service providers to obtain charging unit prices. To select the currency or unit in this menu, you need the PIN2 code. Set credit: This network service allows you to limit the cost of your calls by selected charging units. -
Page 35: Multimedia
Press the navigation keys for accessing the contents or your photos. Photos The photos taken with the KG225 are stored in here. (For more details, refer to page 35.) Pictures Picture: Select a picture from the list by pressing the left soft key [View]. -
Page 36: Applications
Your multimedia phone comes with an easy-to-use built-in camera, which allows you to instantly take, view and share pictures with your friends and family. Note If the battery is too low, you may not be able to use the Camera feature. Camera Take a picture Press the Menu key and select Camera >... - Page 37 Applications Note For the picture to be used in the phonebook, select 48x48 (for phonebook). 7. Image quality ( ): Fine/ Normal/ Basic. 1. Centre the desired option menu using the left/right navigation keys. 2. Select the desired value with the up/down navigation keys.
-
Page 38: Take Continuously
Take continuously You can take the maximum of 9 pictures subsequently at the same time. After taking a picture, you can view it using the up/down navigation keys. You can also save them by pressing the OK key. Note If you set 320x240 in resolution, you can take only 6 pictures. -
Page 39: Games
Applications Note If Auto save (Menu 3.1.3) is set to Yes, the captured image is automatically saved without displaying this menu bar. (Refer to page 38.) 4. To save the image, centre the ( press If you don’t want to save the image, centre the ) and press You can also send the image via multimedia message by selecting (... -
Page 40: Alarm Clock
Alarm clock You can set up to 5 alarm clocks to go off at a specified time. 1. Select On and enter the alarm time you want. 2. Select the repeat period : Once, Mon ~ Fri, Mon ~ Sat, Everyday . 3. -
Page 41: Unit Converter
Applications Unit converter This converts any measurement into a unit you want. There are 4 types that can be converted into units: Length, Area, Weight, and Volume. 1. Select one of four unit types by pressing the left soft key [Unit]. 2. -
Page 42: Messages
This menu includes functions related to SMS (Short Message Service), MMS (Multimedia Message Service), voice mail, as well as the network’s service messages. Sending of SMS and MMS leads to costs. For details please contact your network operator. New message You can write and edit text messages up to 10 pages. -
Page 43: Inbox
Messages Save: Stores messages in the Drafts folder. Font: You can select the Size and Style of font. Colour: You can also set the Colour of the text (foreground) and the background. Alignment: You can select the alignment of text. [Left/Centre/Right] Add T9 dictionary: You can add your own words. -
Page 44: Outbox
Note S S I I M M m m e e s s s s a a g g e e : : SIM message means the message is exceptionally stored in the SIM card. When you are notified that you have received a multimedia message, you have to wait for the message to be downloaded before you can view it. -
Page 45: Draft
Messages The messages of which transmission was completed has the following options. View: You can view the selected message. Forward: You can forward the selected message to other recipients. Delete: Deletes the selected message from outbox. Information: You can view the information of selected message: subject (only for multimedia message), the date and time when you sent it, message type and size, the priority (only for... -
Page 46: Listen To Voice Mail
Delete: Deletes the selected message from the drafts folder. Information: You can view the information of selected message: subject (only for multimedia message), the date and time when saved, message type and size, the priority (only for multimedia message). Delete all: Deletes all the messages from drafts folder. -
Page 47: Templates
Messages Topics Add new: You can add Info service message numbers in the Phone memory with its nickname. View list: You can see Info service message numbers which you have added. If you press [Options], you can edit and delete info message categories which you have added. - Page 48 Delete all: Deletes all templates. Multimedia templates You can create a multimedia template after pressing the left soft key [Add new]. And the multimedia templates you saved as a template while creating a multimedia message in the Write multimedia message (See page 48). View: You can view the multimedia template.
-
Page 49: Settings
Messages Settings Text message Message types: Text, Voice, Fax, Natl. paging, X.400, Email, ERMES Usually, the type of message is set to Text. You can convert your text into alternative formats. Contact your service provider for the availability of this function. - Page 50 Profiles: In order to download MMS from the server, you need to set up the URL for the multimedia message server. Permitted message types - Personal: Personal message. - Advertisements: Commercial message. - Information: Necessary information. Voice mail centre You can receive voicemail if this feature is supported by your network service provider.
-
Page 51: T-Zones
t-zones How to access t-zones. You can use your phone for so much more than just texting and talking. t-zones provides information such as news, weather forecast, information on sports or traffic whenever you need it. In addition, t-zones provides superior multimedia services such as the latest music or ring tones, wallpapers or games for your entertainment and device personalisation. -
Page 52: Go To Url
Delete all: Deletes all the bookmarks. Go to URL You can connect directly to the site you want. After entering a specific URL, press the OK key. Settings Profiles A profile is the network information used to connect to the Internet. Note In case the SIM card support SAT(i.e. - Page 53 t-zones - GPRS settings: The service settings are only available when GPRS is chosen as a bearer service. APN: Input the APN of the GPRS. User ID: The users identify for your APN server. Password: The password required by your APN server.
-
Page 54: Calendar
Schedule When you enter this menu, a calendar appears. A square cursor is located on the current date. You can move the cursor to another date using the navigation keys. On the calendar, you can use the following keys. skips back a year. skips forward a year. -
Page 55: Profiles
Profiles In Profiles, you can adjust and customise the phone tones for different events, environments, or caller groups. There are six preset profiles: General, Loud, Headset, Car, Vibrate only and Silent. Each profile can be personalised(Except Vibrate only, Silent menu). Press the left soft key [Menu] and select Profiles using left/right navigation keys. -
Page 56: Customising Profiles - Rename
Effect sound volume: Set the volume of effect sound. Power on/off volume: Set the volume of the ring tone when switching the phone on/off. Customising profiles – Rename You can rename a profile and give it any name you want. Note Vibrate only, Headset and Car (and Silent) profiles cannot be renamed. -
Page 57: Contacts
Contacts You can save phone numbers and their corresponding names in the memory of your SIM card. In addition, you can save up to 500 numbers and names in the phone memory. Press the left soft key [Menu] in standby mode, then select Contacts. -
Page 58: Caller Groups
Adding new entries into SIM memory: You can enter a name and number, and select the required group. (Depends on the SIM) Adding new entries into the phone memory: You can enter a name, and number, and select the required group. And select which number will be the main number. -
Page 59: Settings
Contacts Settings Default memory You can select the memory for the Contacts feature between the SIM and the phone. If you select Variable , when adding entry, the phone will ask where to save the number. Search by You can set the phone to search by name or number, when you search Contacts. -
Page 60: Information
Information Service dial number (SIM dependent): Use this to view the list of Service Dialling Numbers (SDN) assigned by your network operator (if supported by the SIM card). Such numbers include the emergency, directory enquiries and voice mail numbers. 1. Select the Service dial number option. 2. -
Page 61: Settings
Settings You can set the following menus for your convenience and preferences. Date & Time You can set functions relating to the date and time. Set date You can enter the current date. Date format You can set the Date format such as DD/MM/YYYY, MM/DD/YYYY, YYYY/MM/DD. -
Page 62: Call Settings
Language You can select the display language. When the language option is set to Automatic, the language is automatically selected according to the language of the SIM card used. English will be set if the language on the SIM card is not supported by the phone. Call settings You can set the menu relevant to a call by pressing [OK] in the Setting menu. - Page 63 Settings Answer mode Flip open If you select this menu, you can receive an incoming call when only opening the flip. Any key If you select this menu, you can receive a call by pressing any key except Send key only If you select this menu, you can receive a call by only pressing [Send] key.
-
Page 64: Security Settings
Security settings PIN code request In this menu, you can set the phone to ask for the PIN code of your SIM card when the phone is switched on. If this function is activated, you’ll be requested to enter the PIN code. 1. - Page 65 Settings All incoming The barring service for all incoming calls. Incoming when abroad The barring service for all incoming calls when roaming. Cancel all You can cancel all barring services. Change password You can change the password for Call Barring Service.
-
Page 66: Network Settings
Change codes PIN is an abbreviation of Personal Identification Number to prevent use by an unauthorised person. You can change the access codes: Security code, PIN code, PIN2 code. 1. If you want to change the Security code/PIN2 code input your original code, and then press [OK]. -
Page 67: Gprs Setting
Settings Band selection EGSM/DCS According to depending on Network situation, you can select EGSM/DCS. PCS only According to depending on Network situation, you can select PCS only. GPRS setting You can set the GPRS service depending on various situations. Switch on (Menu 9.5.2) If you select Power on and you are in a network that (Menu 9.5.2.1) -
Page 68: Memory Status
Memory status You can check the status of memory in use. Reset settings You can initialise all factory defaults. You will need the Security code to activate this function. Menu 9.7 Menu 9.8... -
Page 69: On Browsing Menu
On browsing menu Home Refer to (Menu 5.1). Reload Reloads the current page. Bookmarks See (Menu 5.2). Save as bookmark You can save a site as bookmark. Go to URL You can move to the site you want. In this menu, you can also edit the site address. -
Page 70: Accessories
Accessories Note Always use genuine LG accessories. Failure to do this may invalidate your warranty. Accessories may be different in different regions; please check with our regional service company or agent for further inquires. -
Page 71: Technical Data
Technical data General Product name : KG225 System : GSM 900 / DCS 1800 / PCS 1900 Ambient temperatures Max : +55°C Min : -10°C... - Page 73 MEMO...