Table of Contents
Advertisement
Quick Links
Advertisement
Table of Contents

Related Manuals for Toshiba MMU-AP0072WH1


Summary of Contents for Toshiba MMU-AP0072WH1
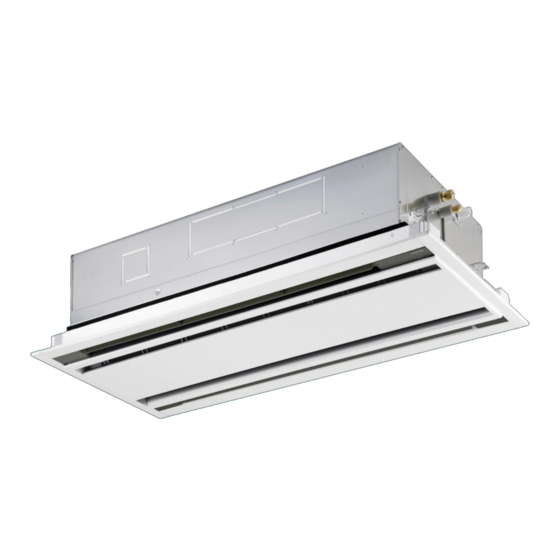
- Page 1 AIR CONDITIONER (MULTI TYPE) Installation manual Indoor Unit For commercial use Model name: 2-way Air Discharge Cassette Type MMU-AP0072WH1 MMU-AP0092WH1 MMU-AP0122WH1 MMU-AP0152WH1 MMU-AP0182WH1 MMU-AP0242WH1 MMU-AP0272WH1 MMU-AP0302WH1 MMU-AP0362WH1 MMU-AP0482WH1 MMU-AP0562WH1 English...
-
Page 2: Table Of Contents
APPLICABLE CONTROLS........25 conditioners made by Toshiba Carrier Corporation. He or she has been trained to install, TEST RUN . - Page 3 Transportation of Shoes with additional protective toe cap work on the air conditioners made by Toshiba Carrier Corporation or, alternatively, he or she heavy objects has been instructed in such matters by an individual or individuals who have been trained and...
-
Page 4: Precautions For Safety
SMMS 2-way Air Discharge Cassette Type Installation Manual PRECAUTIONS FOR SAFETY Warning Indications on the Air Conditioner Unit Warning indication Description The manufacturer shall not assume any liability for the damage caused by not observing the description of this manual. WARNING WARNING ELECTRICAL SHOCK HAZARD... - Page 5 SMMS 2-way Air Discharge Cassette Type Installation Manual • Before carrying out the installation, maintenance, repair or removal • When cleaning the filter or other parts, set the circuit breaker to work, be sure to set the circuit breaker to the OFF position. OFF without fail, and place a “Work in progress”...
- Page 6 SMMS 2-way Air Discharge Cassette Type Installation Manual • When transporting the air conditioner, wear shoes with additional • Carry out the specified installation work to guard against the protective toe caps. possibility of high winds and earthquake. • When transporting the air conditioner, do not take hold of the bands If the air conditioner is not installed appropriately, a unit may topple around the packing carton.
- Page 7 SMMS 2-way Air Discharge Cassette Type Installation Manual • The charge hose must be connected in such a way that it is not • Install a circuit breaker that meets the specifications in the slack. Installation Manual and the stipulations in the local regulations and •...
- Page 8 SMMS 2-way Air Discharge Cassette Type Installation Manual • After the work has finished, be sure to use an insulation tester set Relocation (500V Megger) to check the resistance is 1 MΩ or more between • Only a qualified installer (*1) or qualified service person (*1) is the charge section and the non-charge metal section (Earth allowed to relocate the air conditioner.
-
Page 9: Accessory Parts
SMMS 2-way Air Discharge Cassette Type Installation Manual ACCESSORY PARTS CAUTION New Refrigerant Air Conditioner Installation Accessory parts • THIS AIR CONDITIONER ADOPTS THE NEW HFC REFRIGERANT (R410A) WHICH DOES NOT DESTROY OZONE Part name Quantity Shape Usage LAYER. Installation Manual This manual Be sure to hand over to customers. -
Page 10: Selection Of Installation Place
SMMS 2-way Air Discharge Cassette Type Installation Manual SELECTION OF INSTALLATION PLACE CAUTION When the air conditioner is installed in the following kinds of locations where the ceiling temperature may be 30°C and Select a location for the indoor unit where the cool or warm air will circulate evenly. the relative humidity may be over 80%, condensation may occur on the outer surfaces of the indoor unit and drip. -
Page 11: Installation Of Indoor Unit
SMMS 2-way Air Discharge Cassette Type Installation Manual INSTALLATION OF INDOOR UNIT Ceiling height It is hard for the warm air to reach the floor level if the ceiling height exceeds the standard dimension (set at the time of shipment) in the table below. Therefore, the high-ceiling setting must be selected. For details on how to select this setting, refer to the section “Installing indoor unit on high ceiling”... - Page 12 SMMS 2-way Air Discharge Cassette Type Installation Manual External view AP007 to AP015 (Unit: mm) Refrigerant pipe connecting port Model: MMU- Gas side: A AP007 to AP012 Ø9.5 AP015 Ø12.7 B view 137.5 147.5 Ø6.4 ØΑ Α 257.5 1000 1050 95.5 A view Panel external dimension...
- Page 13 SMMS 2-way Air Discharge Cassette Type Installation Manual AP018 to AP030 (Unit: mm) Refrigerant pipe connecting port Model: MMU- Liquid side: A Gas side: B AP018 Ø6.4 Ø12.7 AP024 to AP030 Ø9.5 Ø15.9 B view 137.5 147.5 ØΑ ØΒ Α 1245 1365 1415...
- Page 14 SMMS 2-way Air Discharge Cassette Type Installation Manual AP036 to AP056 (Unit: mm) B view 1665 1785 1835 137.5 147.5 Ø9.5 95 190 Ø15.9 1600 Α A view Panel external dimension Ceiling bottom surface Ceiling opening dimension Ceiling panel (Sold separately) Hanging bolt pitch Refrigerant pipe connecting port (Liquid) Electric parts box...
- Page 15 SMMS 2-way Air Discharge Cassette Type Installation Manual Opening a ceiling and installation of hanging bolts Treatment of ceiling The ceiling differs according to structure of building. For details, consult your constructor or interior finish contractor. • Decide on the installation position and orientation of the indoor unit while factoring in “SELECTION OF In the process after the ceiling board has been removed, it is important to reinforce ceiling foundation (frame) and to INSTALLATION PLACE”...
- Page 16 SMMS 2-way Air Discharge Cassette Type Installation Manual Installation of indoor unit • Attach a nut (M10 or W3/8: procured locally) and the Ø34 washer (supplied) to each hanging bolt. • Insert a washer on both sides of the T groove of the hanging bracket of the indoor unit, and hang the indoor unit. Procure hanging bolts and nuts locally.
-
Page 17: Drain Piping Work
SMMS 2-way Air Discharge Cassette Type Installation Manual DRAIN PIPING WORK Installation of ceiling panel (sold separately) Install the ceiling panel according to the Installation Manual attached with it after piping/wiring work has completed. To install the ceiling panel, follow the instructions provided with the panel. Check that installation of indoor unit and ceiling opening part is correct, and then install it. - Page 18 SMMS 2-way Air Discharge Cassette Type Installation Manual Connecting flexible hose Drain pipe Hose band VP25 vinyl chloride pipe • Insert the soft end socket of the flexible hose provided into the drain pipe connecting port of the indoor unit as far as connecting port (accessory) (Procured locally)
- Page 19 SMMS 2-way Air Discharge Cassette Type Installation Manual Connecting drain pipe Check the draining • Connect a hard socket (procured locally) to the hard socket of the attached supplied flexible hose. In the test run, check that water drain is properly performed and water does not leak from the connecting part of the •...
- Page 20 SMMS 2-way Air Discharge Cassette Type Installation Manual Perform heat insulating CAUTION • As shown in the figure, cover the flexible hose and hose band with the attached heat insulator up to the bottom of the indoor unit tightly. When pouring the water, pour it slowly. If it is poured with too much force, it will spread around the inside of the indoor •...
-
Page 21: Refrigerant Piping
SMMS 2-way Air Discharge Cassette Type Installation Manual REFRIGERANT PIPING Flaring dia. meter size: A (Unit: mm) • Use the tightening torque levels as listed in the table below. Outer diam. of copper –0.4 Outer dia. of connecting pipe Tightening torque (N•m) pipe (mm) Connecting refrigerant piping CAUTION... -
Page 22: Electrical Work
SMMS 2-way Air Discharge Cassette Type Installation Manual ELECTRICAL WORK Open the valve fully Open the valve of the outdoor unit fully. Thermal insulation process WARNING REQUIREMENT Apply thermal insulation for the pipes separately at liquid side and gas side. Using the specified wires, ensure to connect the •... - Page 23 SMMS 2-way Air Discharge Cassette Type Installation Manual Power supply Communication line 220 V – 240 V ~, 50 Hz Control wiring between indoor units, (Up to 1000 m) 1.25 mm² Power supply Wire size 220 V ~, 60 Hz and outdoor unit (2-core shield wire) (Up to 2000 m) 2.0 mm²...
- Page 24 SMMS 2-way Air Discharge Cassette Type Installation Manual Wire connection REQUIREMENT • Be sure to pass the wires through the bushing of wiring connection port of the indoor unit. • Keep a margin (Approx. 100 mm) on a wire to hang down the electric parts box at servicing, etc. •...
- Page 25 SMMS 2-way Air Discharge Cassette Type Installation Manual Thermal insulation to wiring connecting port Wiring between indoor and outdoor units NOTE An outdoor unit connected with control wiring between indoor and outdoor units wire becomes automatically the header unit. Wiring example Adhered surface Outdoor Power supply Outdoor Power supply...
-
Page 26: Applicable Controls
SMMS 2-way Air Discharge Cassette Type Installation Manual APPLICABLE CONTROLS Push and hold button and “TEMP.” button When settings have been completed, push simultaneously for at least 4 seconds. After a while, button to determine the settings. the display flashes as shown in the figure. Confirm When button is pushed, flashes and then... - Page 27 SMMS 2-way Air Discharge Cassette Type Installation Manual With a remote controller-less system (group control) Change of lighting time of filter Group control sign Besides the switching method using the wired remote controller as a way to establish the high-ceiling and filter In a group control, a remote controller can control up to settings, switching is also possible by changing over the short plug settings on the indoor printed circuit board as maximum 8 units.
-
Page 28: Test Run
SMMS 2-way Air Discharge Cassette Type Installation Manual TEST RUN After the test run, push button to stop a test run. (Display part is same as procedure 1.) Push check button to cancel the test run mode. Before test run ([TEST] disappears on the display and the status CAUTION returns to a normal.) -
Page 29: Maintenance
SMMS 2-way Air Discharge Cassette Type Installation Manual MAINTENANCE 2-3. Once you have checked that the hooking side Mount the air filter at both ends has dropped down by one step, • Insert the air filter until it touches the back slowly rotate the panel downward (3), and open surface. -
Page 30: Trouble Shooting
SMMS 2-way Air Discharge Cassette Type Installation Manual TROUBLE SHOOTING Return the center panel holders to their original positions, and tighten the two screws at the left and two screws at the right (total: 4 screws) using the screwdriver. Make sure that the center panel is securely fixed Confirmation and check Every pushing of “TEMP.”... - Page 31 SMMS 2-way Air Discharge Cassette Type Installation Manual Check method On the wired remote controller, central control remote controller and the interface P.C. board of the outdoor unit (I/F), a check display LCD (Remote controller) or 7-segment display (on the outdoor interface P.C. board) to display the operation is provided.
- Page 32 SMMS 2-way Air Discharge Cassette Type Installation Manual Check code Wireless remote controller Outdoor unit 7-segment display Sensor block display of receiving unit Check code name Judging device Wired remote controller display Auxiliary code Operation Timer Ready Flash Outdoor unit of other line connected Other line connected during automatic address Indoor unit of other line connected No header unit...
- Page 33 SMMS 2-way Air Discharge Cassette Type Installation Manual Check code Wireless remote controller Outdoor unit 7-segment display Sensor block display of receiving unit Check code name Judging device Wired remote controller display Auxiliary code Operation Timer Ready Flash Comp. 1 side Comp.
- Page 34 SMMS 2-way Air Discharge Cassette Type Installation Manual Check code Wireless remote controller Outdoor unit 7-segment display Sensor block display of receiving unit Check code name Judging device Wired remote controller display Auxiliary code Operation Timer Ready Flash — — Duplicated central control addresses Indoor unit Number of heat storage units connected...
- Page 35 Batch alarm of general-purpose equipment control interface equipment, I/F Differs according to error contents of unit with occurrence of alarm Group control follower unit error TCC-LINK — — (L20 is displayed.) Duplicated central control addresses TCC-LINK : TOSHIBA Carrier Communication Link. EN-67 EN-68...
-
Page 36: Specifications
Hereby declares that the machinery described below: MMU-AP0122WH1 19 (10) MMU-AP0152WH1 19 (10) Generic Denomination: Air Conditioner MMU-AP0182WH1 26 (14) Model/type: MMU-AP0072WH1, MMU-AP0092WH1, MMU-AP0122WH1, MMU-AP0152WH1, MMU-AP0182WH1, MMU-AP0242WH1, MMU-AP0272WH1, MMU-AP0302WH1, MMU-AP0242WH1 26 (14) MMU-AP0362WH1, MMU-AP0482WH1, MMU-AP0562WH1 MMU-AP0272WH1 26 (14) Commercial name: Super Modular Multi System Air Conditioner... - Page 37 SMMS 2-way Air Discharge Cassette Type Installation Manual WARNINGS ON REFRIGERANT LEAKAGE Important Check of Concentration Limit NOTE 2 The standards for minimum room volume are as follows. The room in which the air conditioner is to be installed requires a design that in the event of (1) No partition (shaded portion) refrigerant gas leaking out, its concentration will not exceed a set limit.
- Page 39 DH91303402...