Table of Contents
Advertisement
Quick Links
INSTRUCTION MANUAL
MONITOR WITH DVD RECEIVER
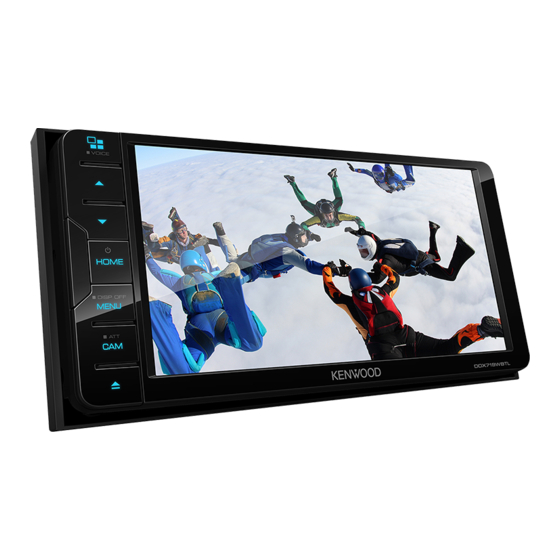
DDX719WBTL
DDX6019BT
(Region 4 - DVD Region Code 4 Area)
This instruction manual is used to describe the models listed above. Model availability and features (functions)
may differ depending on the country and sales area.
© 2019 JVCKENWOOD Corporation
(Region 4 - DVD Region Code 4 Area)
MONITOR WITH RECEIVER
DMX719WBTL
DMX6019BT
DMX5019BT
ENGLISH
B5A-2610-10 (RN)
Advertisement
Table of Contents

Related Manuals for Kenwood DDX719WBTL


Summary of Contents for Kenwood DDX719WBTL
- Page 1 ENGLISH INSTRUCTION MANUAL MONITOR WITH DVD RECEIVER MONITOR WITH RECEIVER DDX719WBTL DMX719WBTL (Region 4 - DVD Region Code 4 Area) DDX6019BT DMX6019BT (Region 4 - DVD Region Code 4 Area) DMX5019BT This instruction manual is used to describe the models listed above. Model availability and features (functions) may differ depending on the country and sales area.
- Page 2 Important Notice Important Notice To ensure proper use, please read through this For DDX719WBTL/DDX6019BT : CAUTIONS manual before using this product. It is especially To care for the unit important that you read and observe WARNINGS • If you have parked the car for a long time in hot or and CAUTIONS in this manual.
- Page 3 Important Notice Important Notice ENGLISH...
-
Page 4: Table Of Contents
Connection..................26 Turning off the power/turning off the AV source ..5 Bluetooth mobile phone ............29 Putting the unit in standby ............5 Illustrations of DDX719WBTL are mainly used for Bluetooth audio player ............. 31 Turning off the screen ..............5 explanation. -
Page 5: Component Names And Operations
• Displays the <Angle Adjust> screen. (Page 6) DMX719WBTL: ATT button • (Press): Attenuates the sound. 7 Monitor panel 8 Screen (touch panel) 9 DDX719WBTL: USB1 input terminal from the rear panel DMX719WBTL: USB input terminals (USB1 and (USB1) 5 V 1.5 A... - Page 6 Component Names and Operations Component Names and Operations 4 DDX6019BT: CAM/ATT button DMX5019BT 6 Monitor panel 7 Screen (touch panel) • CAM (Press): Displays the picture from the connected rear view camera. 8 USB1 input terminal from the rear panel •...
-
Page 7: Basic Operations
The ATT indicator lights up. (Hold) (Hold) (Hold) To cancel attenuation: Adjusting the volume • DDX719WBTL/DDX6019BT/DMX5019BT: Press and hold the same button again. Putting the unit in standby DDX719WBTL DDX6019BT DMX5019BT • DMX719WBTL/DMX6019BT: Press the same button... -
Page 8: Monitor Panel Operations
• To return to the previous screen, touch [ ] on the setting screen. [Language]*1 Select the text language used for on-screen information. Touch [Language Select], then select the language. • American English(en) (Initial)/British English(en)/ E.g. Angle adjust screen for DDX719WBTL Nederlands(nl)/Français(fr)/Deutsch(de)/ Italiano(it)/Español(es)/(ar) /Ελληνικά(el)/ Português(pt)/Čeština(cs)/Polski(pl)/Magyar(hu)/ Руccĸий(ru)/ (th)/Türkçe(tr)/ (zh)/... -
Page 9: Setting The Security Code
• OFF: Deactivates the display demonstration. DMX719WBTL DMX6019BT Then, on the <SETUP> screen, touch as follows: *1 Only for DDX719WBTL/DDX6019BT: [Security] [Security Code Set] “Please Power Off” appears when the setting is changed. To Enter a four-digit number (... -
Page 10: Various Screens And Operations
Various Screens and Operations Various Screens and Operations Getting Started Getting Started You can display or change to other screens at any time Set the date and clock. Home screen to show information, change the AV source, change the settings, etc. Press HOME on the monitor panel to display the Home screen from other screens. - Page 11 Plays files on a USB device. E.g. Source/option selection screen for [AV-IN] Switches to an external component DDX719WBTL connected to the AV-IN input terminal. [Audio] Displays the sound adjustment screen. [STANDBY] Puts the unit in standby. Displays the <SETUP> screen. * Only for DDX719WBTL/DDX6019BT. ENGLISH...
-
Page 12: Source Control Screen
(gray): Off 1 Playback source or media type screen”. 2 Picture data/artwork (shown if the file contains *2 Only for DDX719WBTL/DDX6019BT. artwork except for disc playback) Displays other available operation keys 3 For video: Hides the operation keys on the screen besides those shown on q. -
Page 13: List/Setting Screen
3 Goes to the previous chapter/track.* (Page 15) Starts/pauses playback. 4 Goes to the next chapter/track.* 2 DDX719WBTL/DDX6019BT/DMX5019BT: * Available playback mode differs depending on the source, disc/file Camera: Displays the picture from the * Not available for video from an external component (AV-IN). -
Page 14: Disc
Top]: Returns to the root folder. • [ Up]: Returns to the upper layer. 6 Changes the page to display more items. • [ ]: Scrolls the page. • [ ]: Jumps to the top or bottom page. E.g. Inserting a disc for DDX719WBTL ENGLISH... - Page 15 Disc Disc (Only for DDX719WBTL/DDX6019BT) [Menu Language] Playback operations Settings for DVD playback Select the initial disc menu language. Audio playback information and key (Initial: English) Display the <DVD SETUP> screen. operation On the source control screen, touch as follows:...
-
Page 16: Video
• Touch the screen to restore the operation keys. 3 Repeat/random playback mode keys 4 Current playback item information/audio format E.g. Video menu control screen for DDX719WBTL 5 Playback status/playing time 6 Indicators • IN: Lights up when a disc is inserted.* •... -
Page 17: Usb
• For playable file types and other information, see <Contrast> Adjusts the contrast. (−4 to 4) page 53 and page 55. DDX719WBTL DDX6019BT DMX5019BT <Brightness> Adjusts the brightness. (−4 to 4) • You cannot connect a PC or portable HDD to the DMX719WBTL DMX6019BT USB input terminal. - Page 18 DMX719WBTL: Switching the USB devices Selecting a folder/track on the list The unit is equipped with two USB input terminals. (Only for DMX719WBTL) Display the folder/track list. You can connect two USB devices. You can switch between the USB devices connected On the source control screen, touch as follows: USB device to the USB input terminals from the rear panel.
-
Page 19: Ipod/Iphone
iPod/iPhone iPod/iPhone From <Link Search>: DMX719WBTL: Although this unit is equipped with Connecting an iPod/iPhone 1 Select the file type ([ ]: audio/[ ]: video). two USB input terminals, but only one iPod/iPhone 2 Select the tag type to display a list of contents can be used at a time. -
Page 20: Mirroring
Installing the application (commercially available) Select the tag type to display a list of contents that Install the latest version of the Mirroring for KENWOOD contain the same tag as the track/file currently USB Audio cable for iPod/iPhone: application and activate the application on your being played, then select the item. - Page 21 • Mirroring for KENWOOD application is discontinued For Android devices: by the following operations if you use the application When you use Mirroring for KENWOOD application for with an iPhone: the first time, the terms of service are displayed. It is –...
- Page 22 While displaying your smartphone screen on this not work correctly. Make the settings. unit using Mirroring for KENWOOD application, you can also select one of the following as the current playback source to listen to (without going to the Home screen).
-
Page 23: Radio
Radio Radio 4 Text information Touching the operation keys performs the following Listening to the radio actions: • Touching [<] scrolls the text if not all of the text is shown. The unit switches to FM alarm scene automatically • Touching [ ] switches the information (e.g. - Page 24 Radio Radio Manual presetting [PTY]* (For FM Radio Broadcast Data System Selecting a preset station features) Select the band, then tune in to a station Enters PTY search mode. Select the band, then display the preset you want to store. 1 Touch a PTY code.
-
Page 25: Spotify
Spotify Spotify With Spotify, your music is everywhere. Working out, Install the latest version of the Spotify application on Playback operations partying or relaxing, the right music is always at your your smartphone. fingertips. There are millions of songs on Spotify—from •... -
Page 26: Other External Components
On the source control screen, touch as follows: supplied with the view camera. • For DDX719WBTL/DMX719WBTL: You can use both Touching the operation keys performs the following rear view camera and front view camera. actions: •... -
Page 27: Av-In
• Make sure <Front Camera> is set to [OFF]. terminal and TV tuner remote control output (REMO (Page 42) OUT) terminal. (Page 49) On the monitor panel: Displaying the TV screen DDX719WBTL DDX6019BT DMX5019BT • Set <TV Tuner Control> to [ON] on the <AV> DMX719WBTL DMX6019BT AV-IN screen beforehand. -
Page 28: Bluetooth
Bluetooth® Bluetooth® Other External Components Other External Components Playback information and key operation Information Preparation Bluetooth is a short-range wireless radio • Connect and install the microphone beforehand. For communication technology for mobile devices such as details, see pages 50 – 52. mobile phones, portable PCs and other devices. •... - Page 29 Bluetooth® Bluetooth® Auto pairing For a Bluetooth device compatible with When your Bluetooth device is compatible When <Auto Pairing> is set to [ON] on the <TEL Bluetooth 2.0: with A2DP or SPP: Determine usage as SETUP> screen, iOS (such as iPhone) devices are Select the unit (“DDX7W”/ “DMX7W”/ “DDX6”/ an audio player or a device with Apps automatically paired when connected via USB input...
- Page 30 Bluetooth® Bluetooth® Select to connect and deselect to disconnect the Select the device you want to connect/ Enter the PIN code ( ), then confirm the device. disconnect. entry ( [TEL 1]/[TEL 2] Select to use as the hands free device.
-
Page 31: Bluetooth Mobile Phone
Bluetooth® Bluetooth® 2 Select a method to make a call. • To clear the last entry, touch [BS]. During a call... • To move the entry position, touch [ Bluetooth mobile phone When a call comes in... 1 From the call history* (missed calls/received Touching the operation keys performs the following calls/dialed calls) actions:... - Page 32 Bluetooth® Bluetooth® To use alphabet search in the phonebook C When item 5 is selected in step 2: Presetting phone numbers 1 Touch [ A-Z ]. You can preset up to eight phone numbers. Say the name of the person you want to 2 Touch the first letter you want to search for on call.
-
Page 33: Bluetooth Audio Player
Bluetooth® Bluetooth® Editing phonebook Select a method to add a phone number Bluetooth audio player to preset list and register the number to To transfer the phonebook If the connected Bluetooth mobile phone is the preset list ( ), then touch [Close] ( compatible with Phone Book Access Profile (PBAP), Bluetooth you can transfer the phonebook of the mobile phone... - Page 34 When “Bluetooth” is selected as the source, you can connected as [ ]. used as device for KENWOOD Music Mix. connect up to five Bluetooth audio devices at the – Touch to go to <Select Device> screen.
-
Page 35: Bluetooth Mobile Phone Settings
Settings Settings Bluetooth® Bluetooth® <Bluetooth HF/Audio>* Bluetooth mobile phone settings Audio settings Select the speakers used for Bluetooth mobile You can change various settings for using Bluetooth phones. Display the <Audio> screen. mobile phones on the <TEL SETUP> screen. • Front: Front speakers only. On the Home screen, touch as follows: •... - Page 36 HPF FREQ 100 Hz speaker. at the same time: Slope -6 dB/Oct A selection window appears for each setting. Select DDX719WBTL Gain an item, then touch [Close] to close the window. 0 dB DMX719WBTL TW Gain Speaker Select -1 dB Car Type E.g.
- Page 37 Settings Settings Adjust the sound as follows: Selecting a preset sound mode <HPF FREQ> Adjusts the crossover frequency for the front or rear <Bass EXT> Display the preset sound modes. speakers (high pass filter). Activates/deactivates bass. • ON/OFF (Initial) <LPF FREQ> Adjusts the crossover frequency for the speaker <SW Level>...
- Page 38 Settings Settings <Position/DTA> Localizing the sound image—Front Focus Touch [Delay] ( ), then adjust the Digital Time Alignment (DTA) value ( ) for each You can adjust the sound effects according to your • Speaker types shown on the screen differ depending listening position.
- Page 39 Settings Settings <Fader/Balance> <Sound Effect> [Sound Image LR(Front)] Adjusts the sound image to be localized set on the Touch [ ] or drag the mark to adjust. Adjust the sound effect. front position. <Fader>* <Bass Boost> [Sound Image LR(Rear)] Adjusts the front and rear speaker output balance. Selects the bass boost level.
-
Page 40: Av Settings
Settings Settings <Realizer> Determining the value for <Position/DTA> AV settings Virtually makes the sound more realistic using the adjustment Digital Signal Processor (DSP) system. Select the sound Display the <AV> screen. If you specify the distance from the center of the level. - Page 41 Settings Settings <Background> <OSD Clock> Storing your favorite image for the background You can change the background design or color. • ON (Initial): Displays the clock while a video source is playing or when the display is turned off. You can use your favorite image stored on the To change the background design: •...
-
Page 42: User Interface Settings
Settings Settings Rotate the image ( ) if necessary, then Select a function to assign to the selected User interface settings confirm the selection ( button. Display the <User Interface> screen. On the Home screen, touch as follows: Then, on the <SETUP> screen, touch [User Interface]. <Steering Remote Controller>... -
Page 43: Camera Settings
Settings Settings To initialize the setting: <Touch Panel Adjust> Camera settings Touch [Learning initialization]. Adjust the touch positions of the keys on the screen. • A confirmation message appears. Touch [Yes]. Display the <Camera> screen. Touch and hold the center of the marks at the lower –... -
Page 44: Special System Settings
(1), then adjust the <DEMO>* position of the selected mark (2). (Only for DDX719WBTL/DMX719WBTL) • ON (Initial): Activates the display demonstration. • OFF: Deactivates the display demonstration. Set the duraton (in seconds) to display the picture from the front view camera when you shift the gear * Some features are not selectable when [ON] is selected. -
Page 45: Bluetooth Settings
Settings Settings <Audio SETUP Recall>* <TEL SETUP> Bluetooth settings Recall the settings memorized by <Audio SETUP Configure the setting for using a Bluetooth mobile Display the <Bluetooth Setup> screen. Memory>. phone. (Page 33) On the Home screen, touch as follows: A confirmation message appears. Touch [Yes]. * Selectable only when <SETUP Memory>... -
Page 46: Remote Controller
Insert the batteries with the + and – poles aligned controller falls down and gets wedged under the DDX719WBTL/DMX719WBTL properly, following the illustration inside the case. pedals while driving. • Do not leave the battery near fire or under direct sunlight. -
Page 47: Basic Operation For Rc-Dv340
• Switches to the current source – Fast forward/backward speed control screen. changes each time you press • Displays the Mirroring for the key. KENWOOD application screen • 4/5: Slow forwards/backwards. from the connected smartphone. – Slow forward/backward speed ENTER Enters options. - Page 48 Deletes a character while in direct • For station frequency: Press Starts/pauses playback. search mode. • For others: Press ENTER. * Only for DDX719WBTL/DDX6019BT. To exit the search mode: Press DIRECT. USB (AUD mode) Music Disc/Audio file/Video file (AUD mode) AM− / FM+ Selects a folder.
-
Page 49: Kenwood Remote App
KENWOOD Remote APP Before installation • DO NOT connect the ignition wire (red) and the KENWOOD Remote is an application that connects Precautions on installation and connection battery wire (yellow) to the car chassis (ground), you and controls compatible KENWOOD car receivers via •... - Page 50 Connect the wiring harness to the unit. DMX6019BT/DMX5019BT. fuse with one with the same rating. • Item \ is supplied only for DDX719WBTL/ Install the unit in your car. • Insulate unconnected wires with vinyl tape or other DMX719WBTL.
-
Page 51: Installing The Unit
• Connect to the car’s steering remote harness using the steering wheel remote input cable ( [ ). Installing the unit using the mounting Contact your KENWOOD dealer for details. bracket removed from the car 6 Audio video input (AV IN 1) “... -
Page 52: Wiring Connection
Installation and Connection Wiring connection For DDX6019BT/DMX6019BT/DMX5019BT Gray/Red ST REMOTE Connect to your vehicle’s Bright green/Red steering remote harness. Contact your KENWOOD STEERING Input 1 REMOTE Purple/Red dealer for details. π Input 2 Connect the antenna cord to the antenna terminal. - Page 53 Installation and Connection Installation and Connection For DDX719WBTL *1 When using Antenna Control, connect the ANT CONT lead Connector D: To the car’s steering remote harness (blue) to A5 (blue) on the wiring harness. • Depending on the type of vehicle, it cannot be *2 For 3-way speaker system connection, see also page 49.
- Page 54 Installation and Connection Installation and Connection For DMX719WBTL *1 When using Antenna Control, connect the ANT CONT lead Connector D: To the car’s steering remote harness (blue) to A5 (blue) on the wiring harness. • Depending on the type of vehicle, it cannot be *2 For 3-way speaker system connection, see also page 49.
-
Page 55: References
References References • This unit can play back files that meet the conditions • This unit cannot play back the following files: Maintenance below: – MP3 files encoded with MP3i and MP3 PRO format. – Bit Rate: – MP3 files encoded with Layer 1/2. Cleaning the unit For disc: –... - Page 56 References References Unplayable disc types and formats Language codes (for DVD language selection) About disc playback • DVD-Audio/DVD-ROM discs Afar Scots Gaelic Playable disc types • SVCD (Super Video CD), CD Text, CD-ROM, CD-I (CD-I Abkhazian Galician • CD-DA: Audio CD Ready), DTS-CD Afrikaans Guarani...
- Page 57 References References • Electrostatic shock at connecting a USB device may About USB playback Latvian, Lettish Samoan cause abnormal playback of the device. In this case, MG Malagasy Shona Important try one of the following: Maori Somali Make sure all important data has been backed up to –...
-
Page 58: Troubleshooting
In No picture is displayed on the screen. Tracks on the Recordable/Rewritable discs cannot this case, visit the following KENWOOD web site: Turn on the screen. (Page 5) be skipped. - Page 59 If the above does not solve the problem, turn the Store stations manually. (Page 22) No sound while using Mirroring for KENWOOD power off and on before replacing with another application. USB device. Static noise while listening to the radio.
- Page 60 Troubleshooting Troubleshooting No sound comes out of the speakers. “Connection Error” appears. AV-IN If you use “Mirroring” source before, verify that the The device is registered but the connection has No picture appears on the screen. iPhone’s screen recording function is stopped.
-
Page 61: Specifications
Maximum Power DC 5 V 1.5 A Communication (32.8 ft) Supply Current DVD player section Range D/A Converter 24 bit (Only for DDX719WBTL/DDX6019BT) Audio Codec SBC/AAC Audio Decoder MP3/WMA/AAC (.m4a)/WAV/ D/A Converter 24 bit Profile HFP (Hands Free Profile) 1.7 FLAC... - Page 62 Rear Camera Frequency 30 Hz to 15 kHz Front/Rear (HPF): Frequency (Hz): (RCA jack) Response (±3.0 dB) Through/30/40/50/60/70/ Video Input Level DDX719WBTL/DMX719WBTL: Signal to Noise Ratio 68 dB (MONO) 80/90/100/120/150/180/ for Front Camera 1 Vp-p/75 Ω Selectivity > 80 dB 220/250 (RCA jack) (±400 kHz)
- Page 63 Specifications Specifications 3 Way X'Over Position 2 Way (Front/Rear/Subwoofer Weight (Main Unit) DDX719WBTL: Delay): 2.4 kg (5.3 lbs) Tweeter (HPF): Frequency (Hz): 0 ft to 20.01 ft (0.03 ft or 1k/1.6k/2.5k/4k/5k/6.3k/8k/ DMX719WBTL: 0.04 ft Step) 10k/12.5k 2.0 kg (4.5 lbs) 3 Way (Tweeter/Mid Range/ Slope (dB/Oct.): −6/−12...
-
Page 64: Trademarks And Licenses
Specifications Specifications of their respective owners. THIS SOFTWARE IS PROVIDED BY THE COPYRIGHT Trademarks and licenses • THIS PRODUCT IS LICENSED UNDER THE AVC PATENT HOLDERS AND CONTRIBUTORS “AS IS” AND ANY PORTFOLIO LICENSE FOR THE PERSONAL USE OF A EXPRESS OR IMPLIED WARRANTIES, INCLUDING, •... - Page 68 For updated information (the latest Instruction Manual, system updates, new functions, etc.), please visit the following website: <www.kenwood.com/cs/ce/>...